Several of our blocks for the 2021 Quilting BOM Facebook group have the Flying Geese blocks. There are different methods depending on the number of Flying Geese that you need.
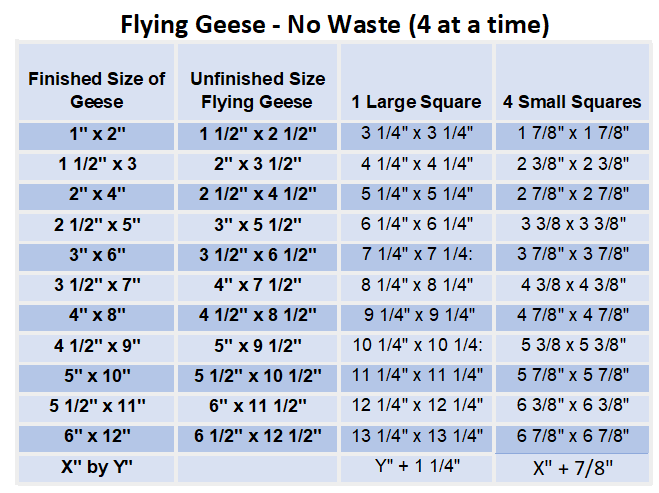
- No waste (4 at a time)
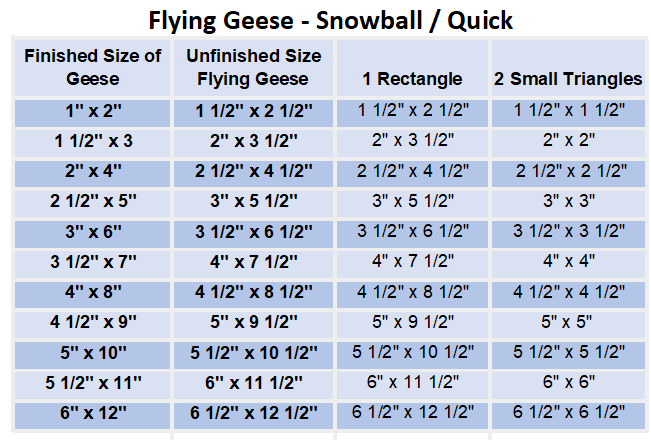
- Quick pieced or Snowballing (1 at a time)
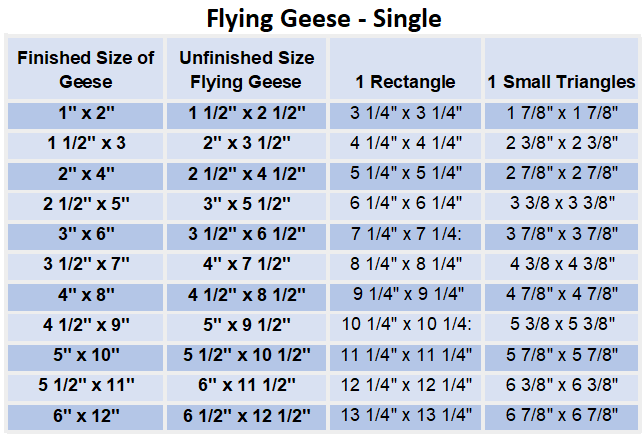
- Single Flying Geese
- Flying Geese Rulers (1 at a time)
Try the different techniques and find the one that works best for you. Remember, when squaring up your Flying Geese, to always trim at the widest part of the center color, along the bottom, so that you do not lose the 1/4″ seam allowance above the point.
There is one option for No-waste (4 at a time) that you can do use to create two-color Mirror Flying Geese.
These are just a few of the different ways that Flying Geese can be made, and it just depends on the number that you need for your project. The no-waste method saves on fabric when compared to the Snowball/Quick method, but if you only need two, this is probably your best option.
For charts of the size of fabric pieces you need.
I hope these different options help you when working on the blocks if you want to change the quantity or color combinations for the blocks.
No Waste Flying Geese
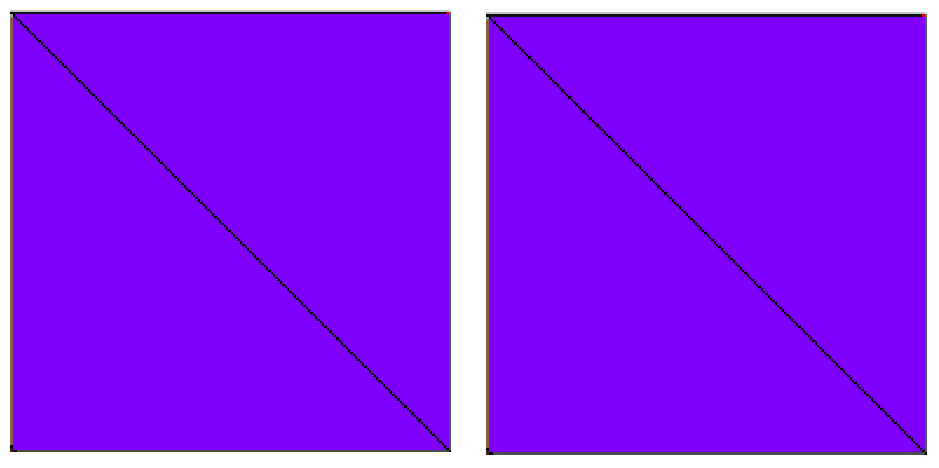
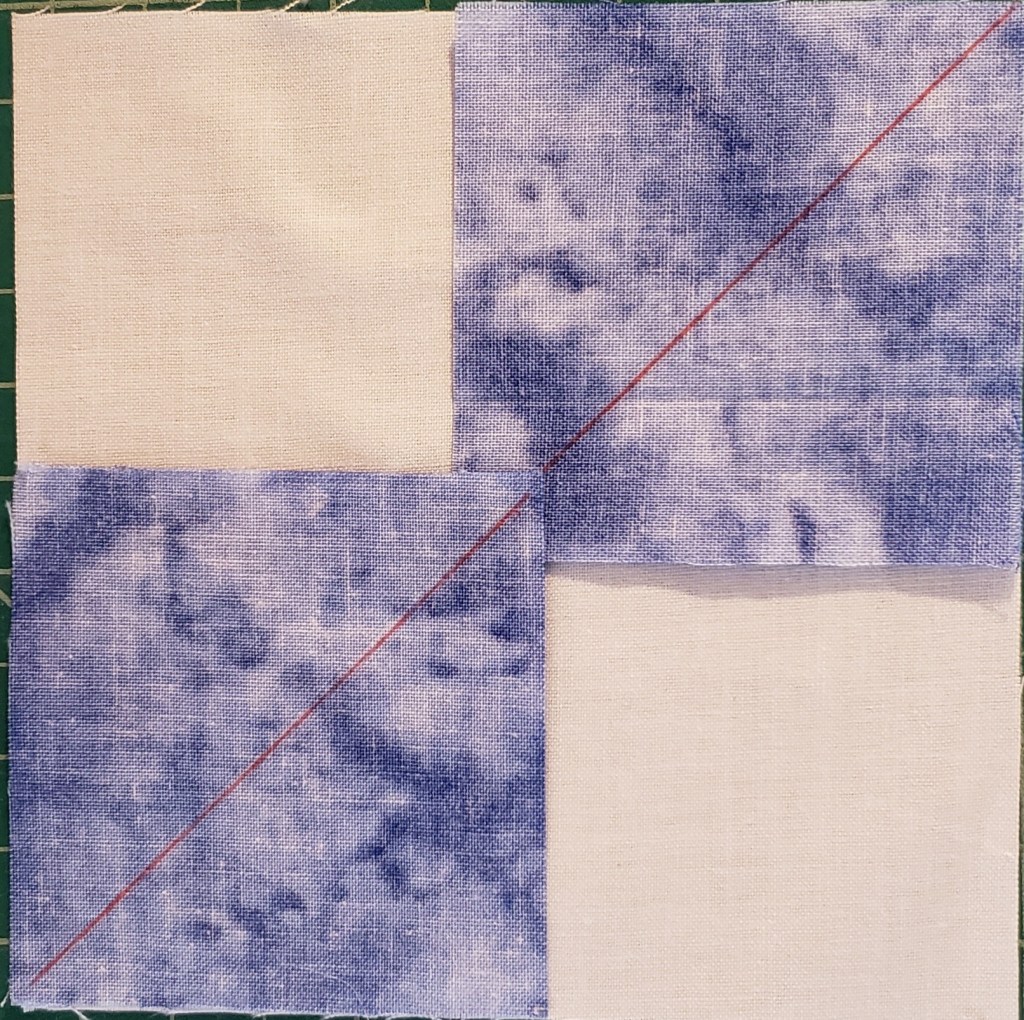
Draw a diagonal line across the back of the smaller squares (Color B)

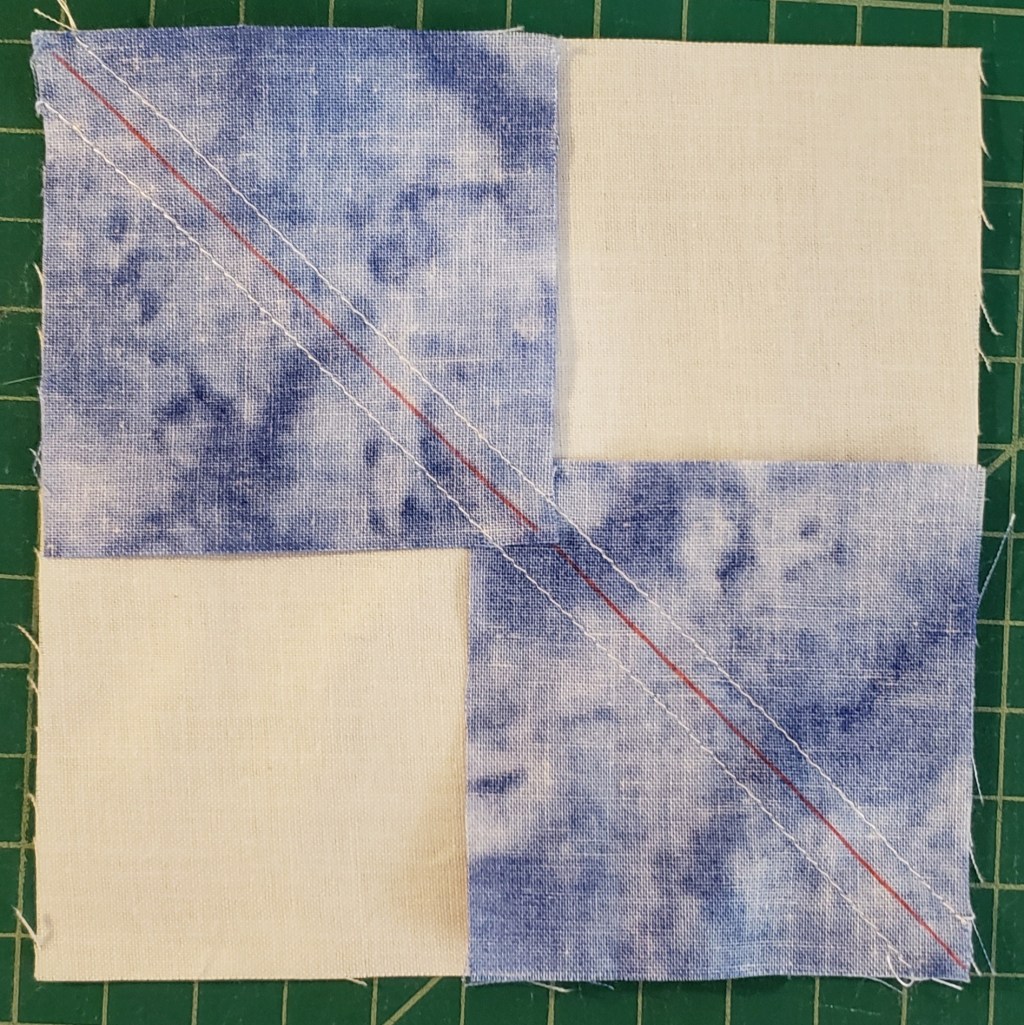
Place two Color B on opposite corners of Color A, right sides together, with the lines flowing together.

Stitch 1/4″ along both sides of the drawn lines

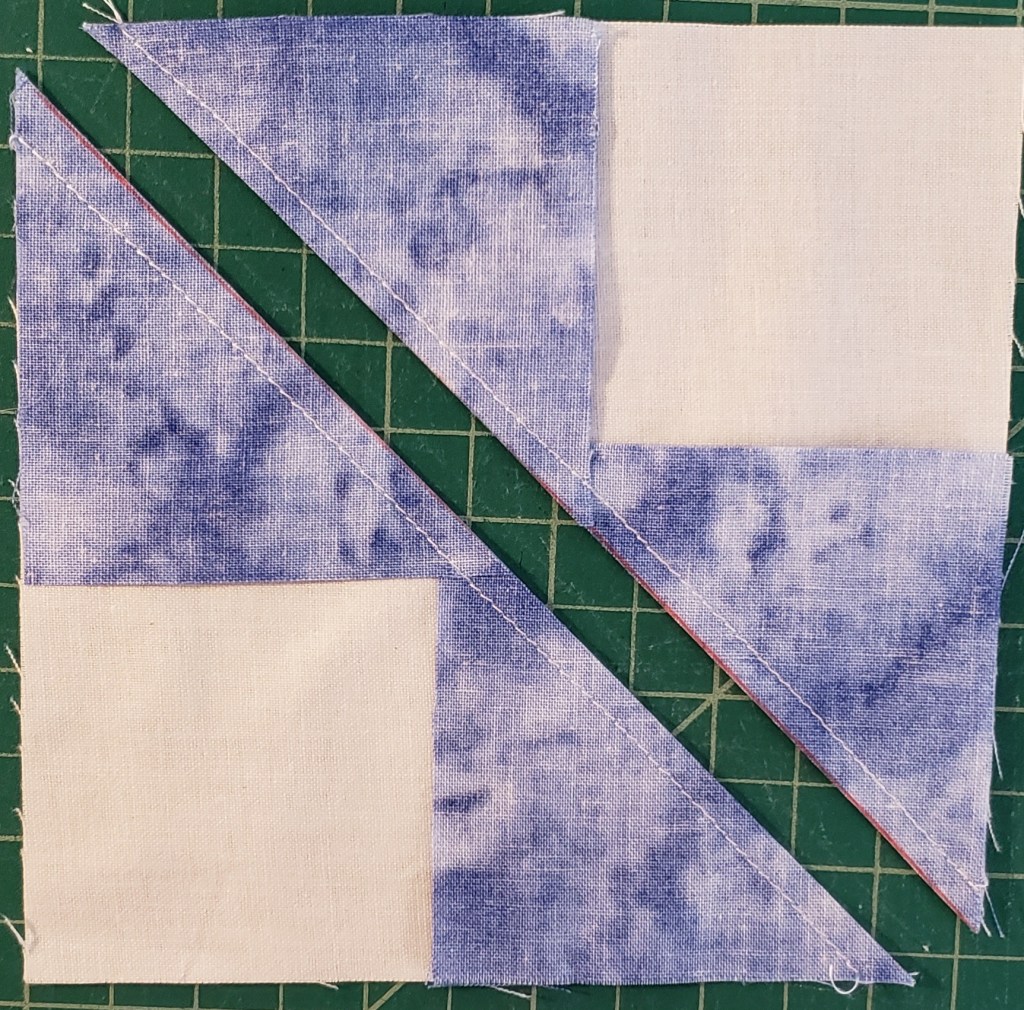
Cut along the drawn lines, down the middle between the stitch lines.

Press seams open.

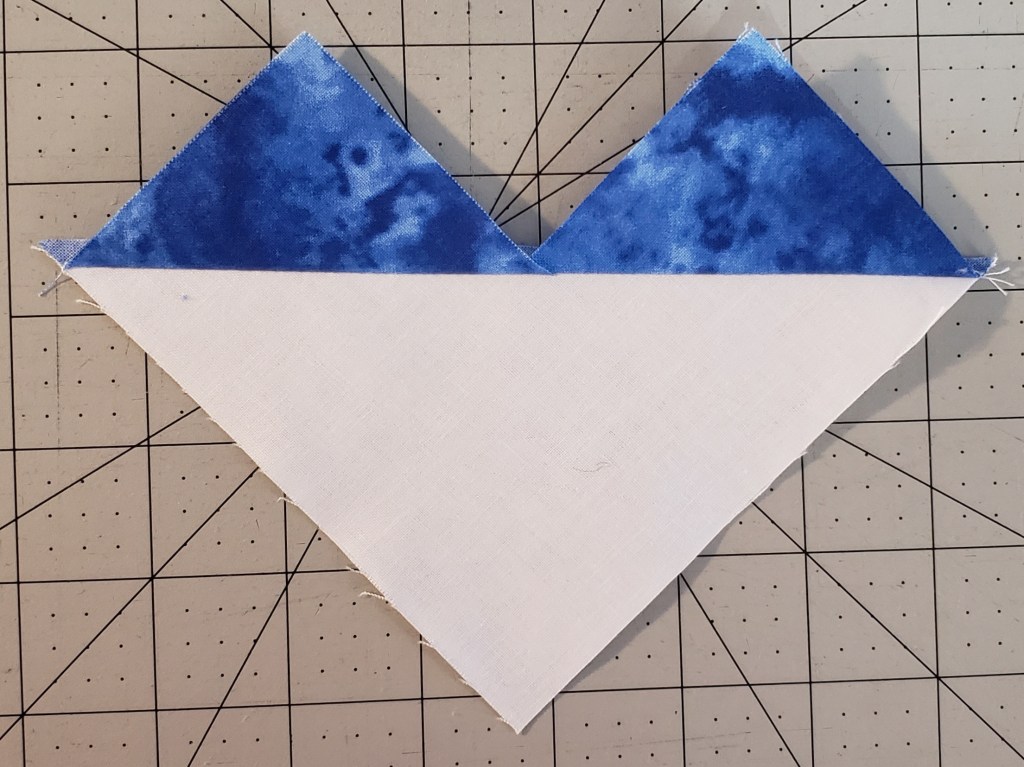
Using one piece, place one Color B on the corner, with the diagonal lines flowing into the middle of the triangles.

Stitch 1/4″ on each side of the line

Cut along the drawn line


Press both pieces open.
Repeat last three steps to create the other two Flying Geese.
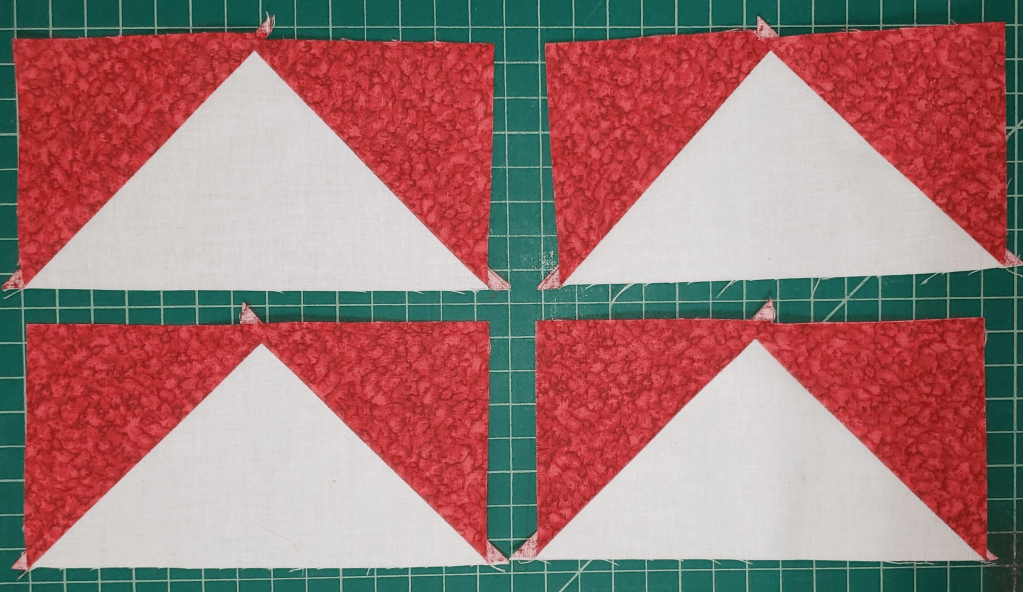
Square up your flying geese to the correct size, making sure to square from all sides, making sure that you leave 1/4″ seam allowance above the center point.
You will have completed 4 Flying geese with no fabric waste.

Quick-pieced or Snowballing (one at a time)
Fabric Cutting
This block does create more waste, but if you need a quantity other than in 4’s, this is a good way to get them made.
You will need two pieces (Piece A – center, Piece B – Sides). Draw a diagonal line across the back of both Color B pieces.
Laying one Color B on the right side of Color A, (make sure to following the angle of line).
Sew along the line (on the line).

Trim to 1/4″ seam allowance

Press seams towards Piece B (purple).

Lay another Color B on the left side of Color A (matching angle of line to picture)

Sew along the drawn line
Trim 1/4″ along the left side of the sew line, and press seam open towards piece B (purple).

This will give you one flying geese with two pieces of fabric. You do have a little bit of waste. (or scraps)
NOTE: an option is to sew a second line to the outside of the sew lines, before cutting, 1/2″ and then cut between the two sewn lines, to create some “bonus” HST.
Single – Flying Geese
These block pieces will depend on the size of your finished Flying Geese. This process can be used to create different color flying geese.
Step 1 – Cut Piece A diagonally in half, creating 2 triangles of the middle color.

Step 2 – Cut the Piece B background piece diagonally both directions, this will create 4 triangles. (you will have three extra pieces, that could be used to make other Flying Geese.

Using two pieces of the background pieces Piece B) and one middle color piece (Piece A)
Layout in the following layout.

Sew the left side triangle to the center.

Press seams towards the background (white).

Sew the right triangle to the center, and press seams towards the background (white).

Square up the Flying geese, make sure that you square-up the square evenly, from both sides of the sides to keep the point centered. Make sure to not trim more than 1/4″ above the point, so you still have your seam allowance, and trim any extra from the bottom (long side of the color piece).
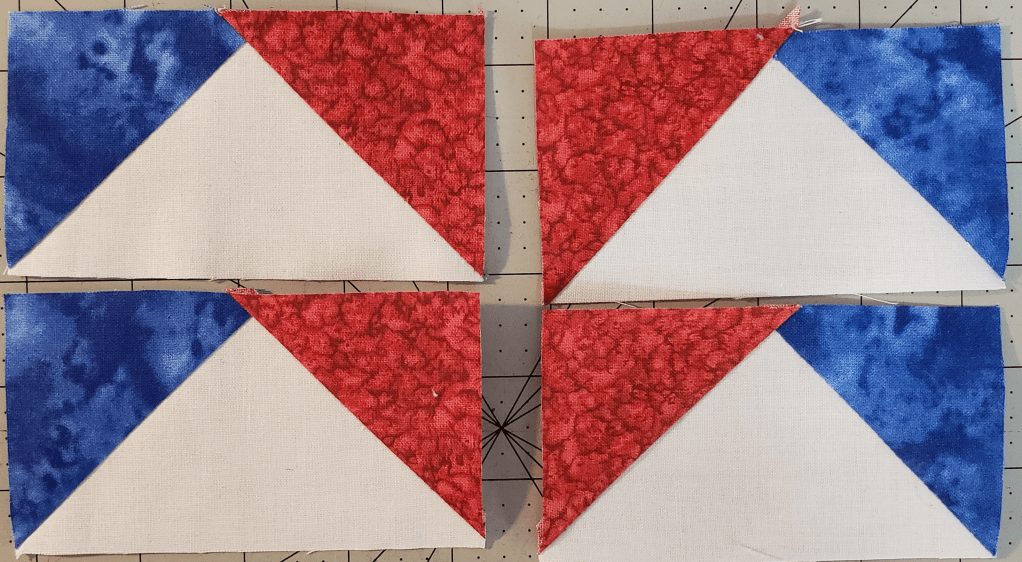
No Waste- two color Mirror Flying Geese
The process is the same as normal for no waste Flying Geese, it is just different in which way you use piece B squares. You will need to have two of color B and two of Color C instead of four of one color.
Draw a diagonal line across the back of Piece B. 2 of each color
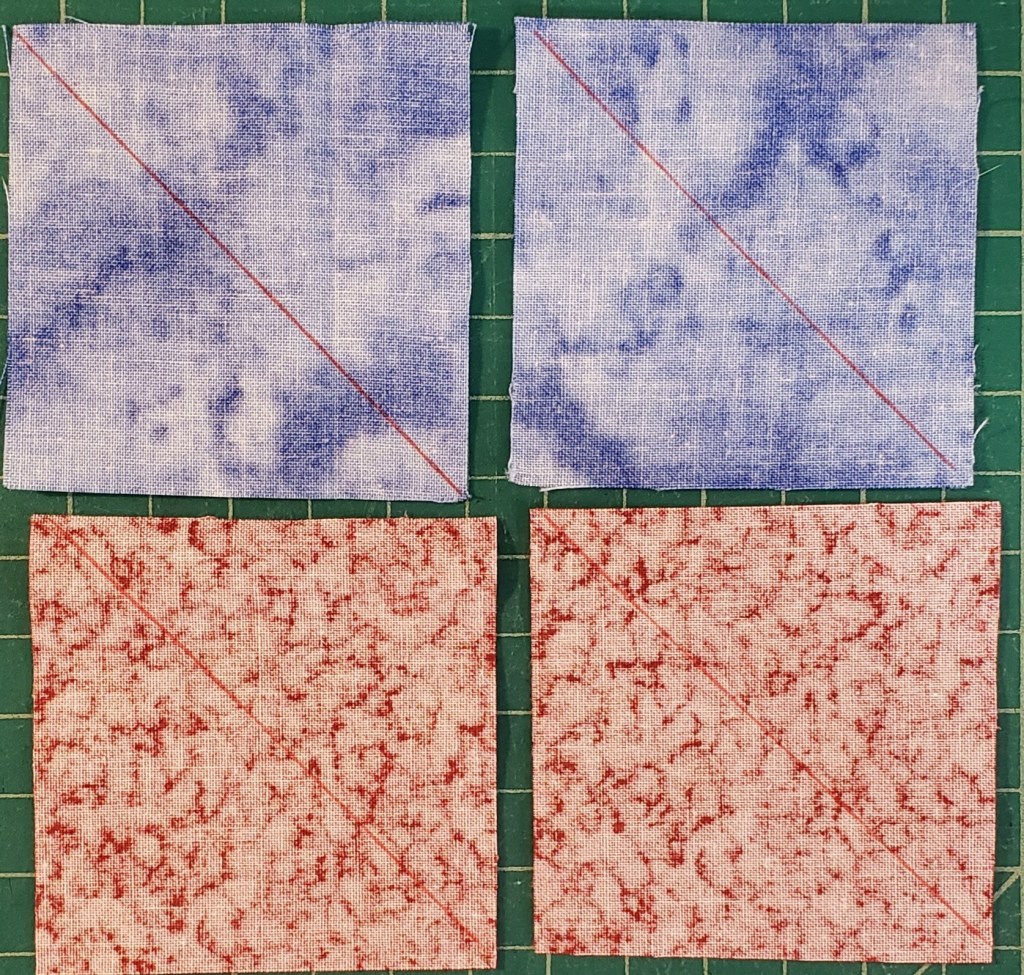
Place two Color B on opposite corners of Color A, right sides together, with the lines flowing together.
Stitch 1/4″ along both sides of the drawn lines
Cut along the drawn lines.
Press Open
NOTE: make sure that you use Color C (Second color)
Using one piece, place one Color C on the corner, with the diagonal lines flowing into the middle of the triangles.
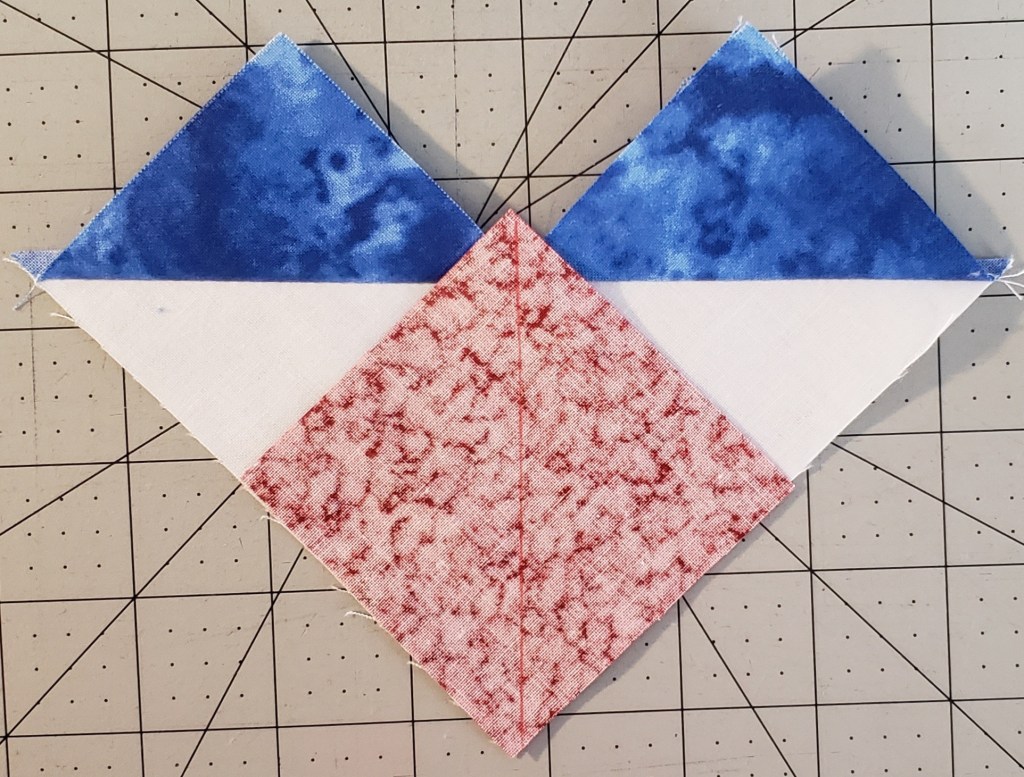
Stitch 1/4″ on each side of the line
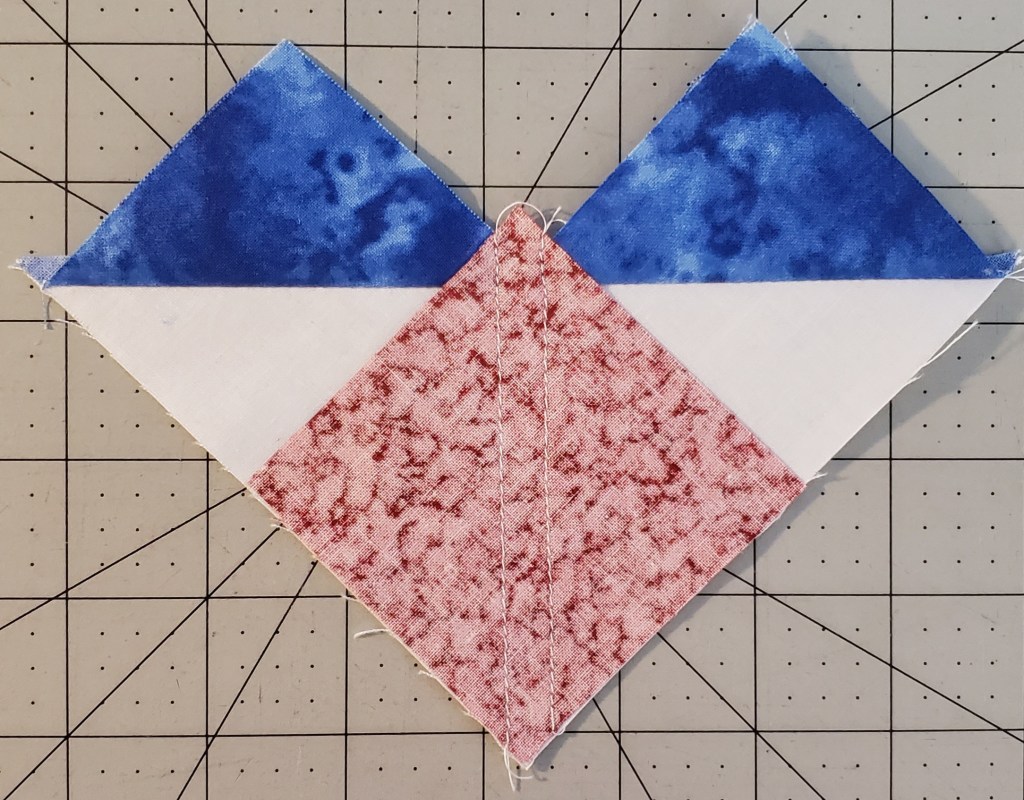
Cut along the drawn line
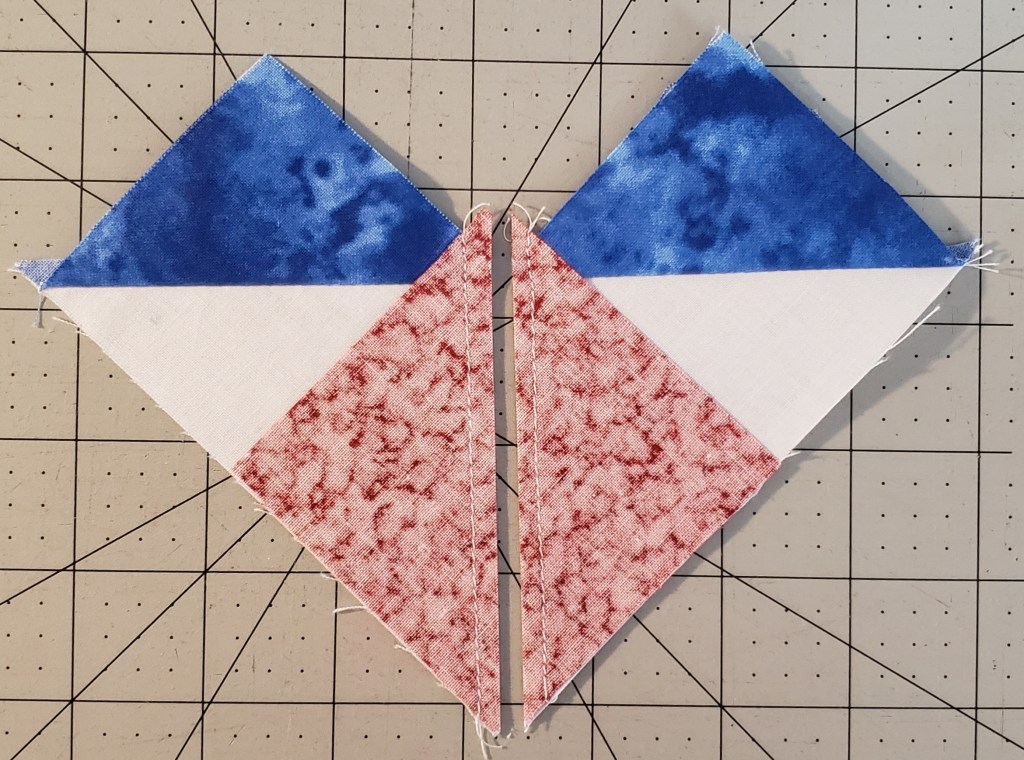
Press both pieces open, as you see you will have mirror images. This is correct.
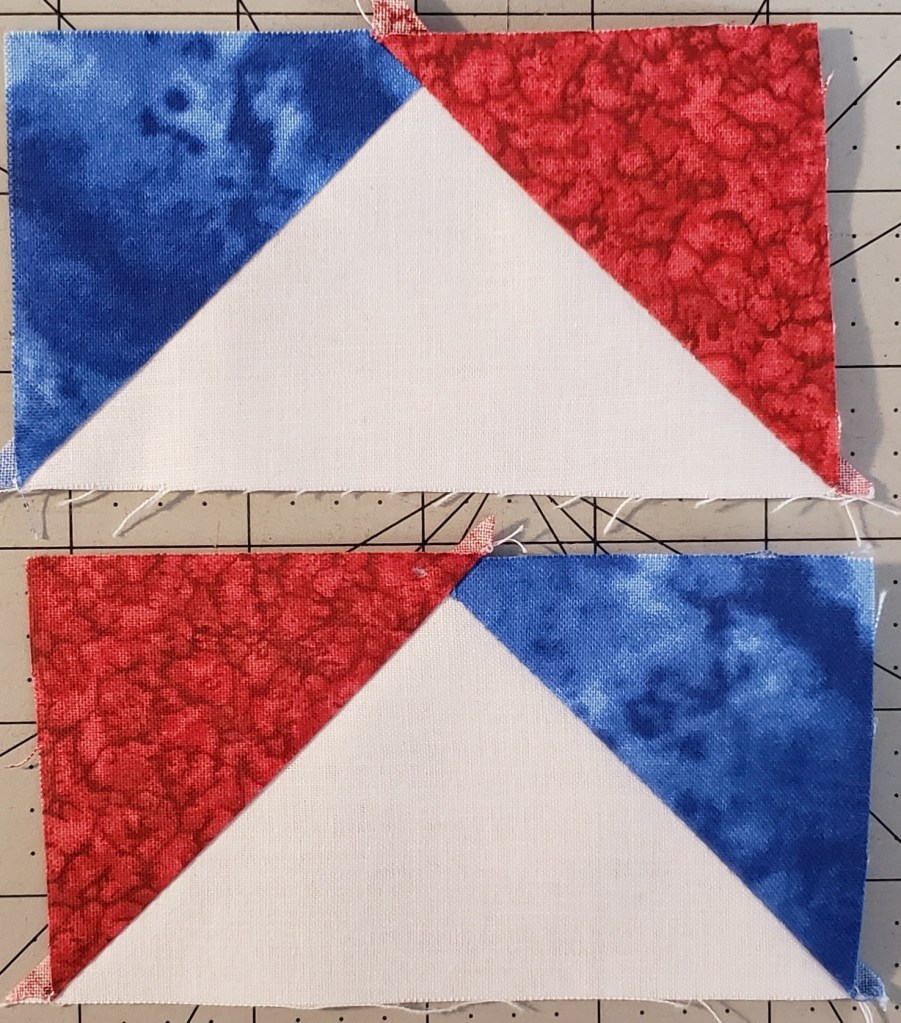
Repeat the last three steps to complete the other two Flying Geese.

Flying Geese Rulers
There are a lot of different “Flying Geese Rulers” and some are one size, while others are for multiple sizes. There are so many rulers, that I could simply not show you have to make Flying Geese with them all.
Charts
Flying Geese are normally twice as long as they are tall. Here are some charts for No Waste, Snowballing and Singles.
Large Squares are Piece A and the smaller squares are piece B.

1 Comment