This is a fast and easy block, that looks like you worked with lots of small pieces. This is one of my favorite blocks to work with. When I make quilts for co-workers, this is the pattern I use. I have used it for several quilts that I gave to the Nursing homes.
I used this block for a quilt for one of our Physician’s babies, and she came in and told me that it is her (now toddler) son’s favorite “blanket” and that if she forgets it when they travel, it is going to be a long trip.
I have a co-worker that keeps talking about wanting to make a quilt, but has had trouble getting started, so I offered to help her make a simple block, and we would turn it into a “Mug Rug”
What is a mug rug? It is basically a large coaster, that you can add not only a drink but some snacks on it as well. I use these on my desk. Depending on the size of your squares, will depend on the finished size of the block, and your mug rug.
Fabric (to complete the mug rug)
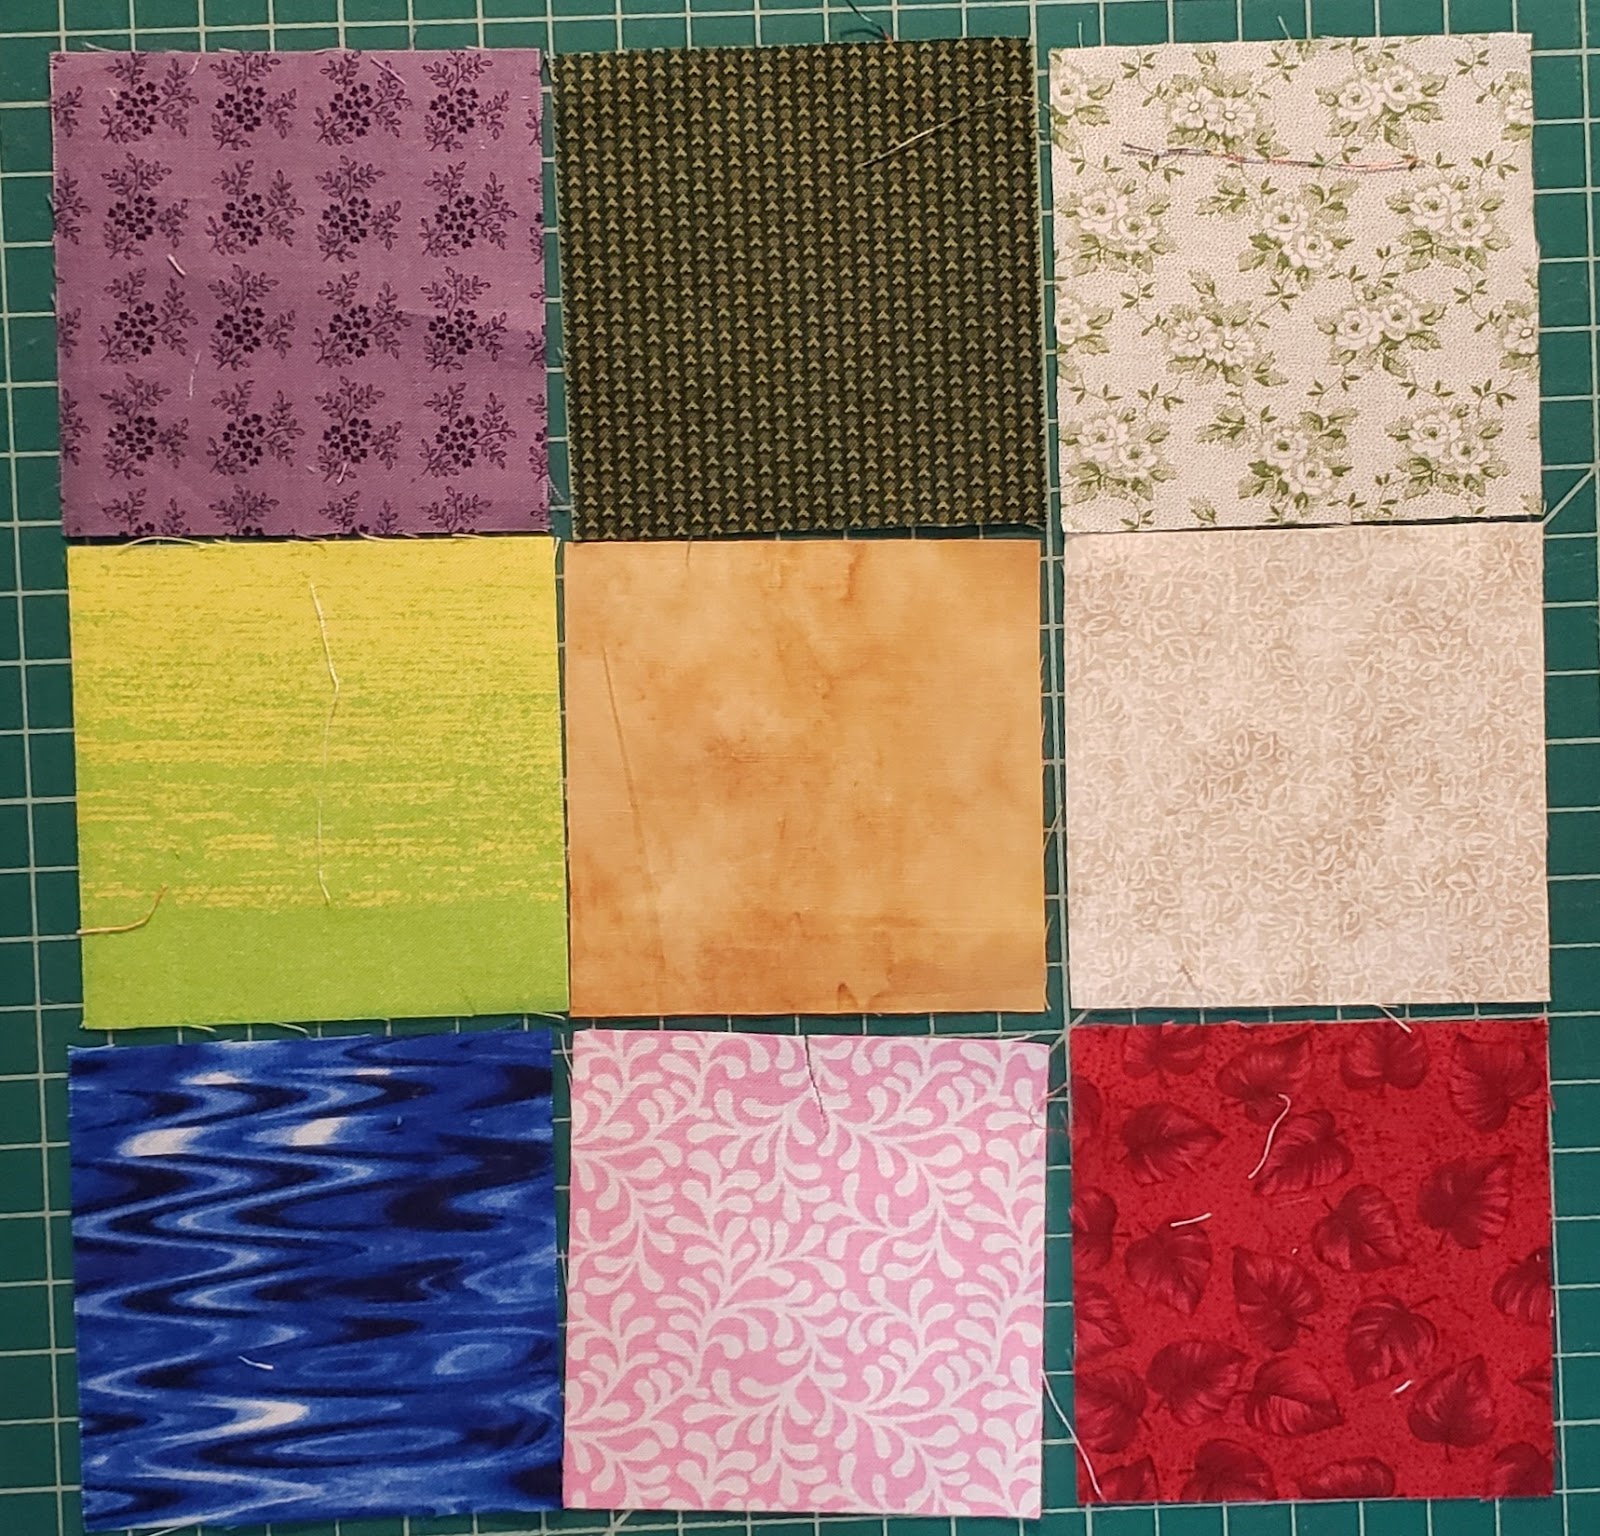
- 9 different squares (all same size)
- Suggestions – larger print(s) for 4 corner squares
- Medium print for 4 side squares
- Small print or solid for center square
- Batting piece – 1″-2″ larger than finished block
- (add size of squares)
- Back fabric – 3″-4″ larger than finished block
- (add size of squares and add an additional 1 1/2″)
Assembly
Step 1 – 9 patch block
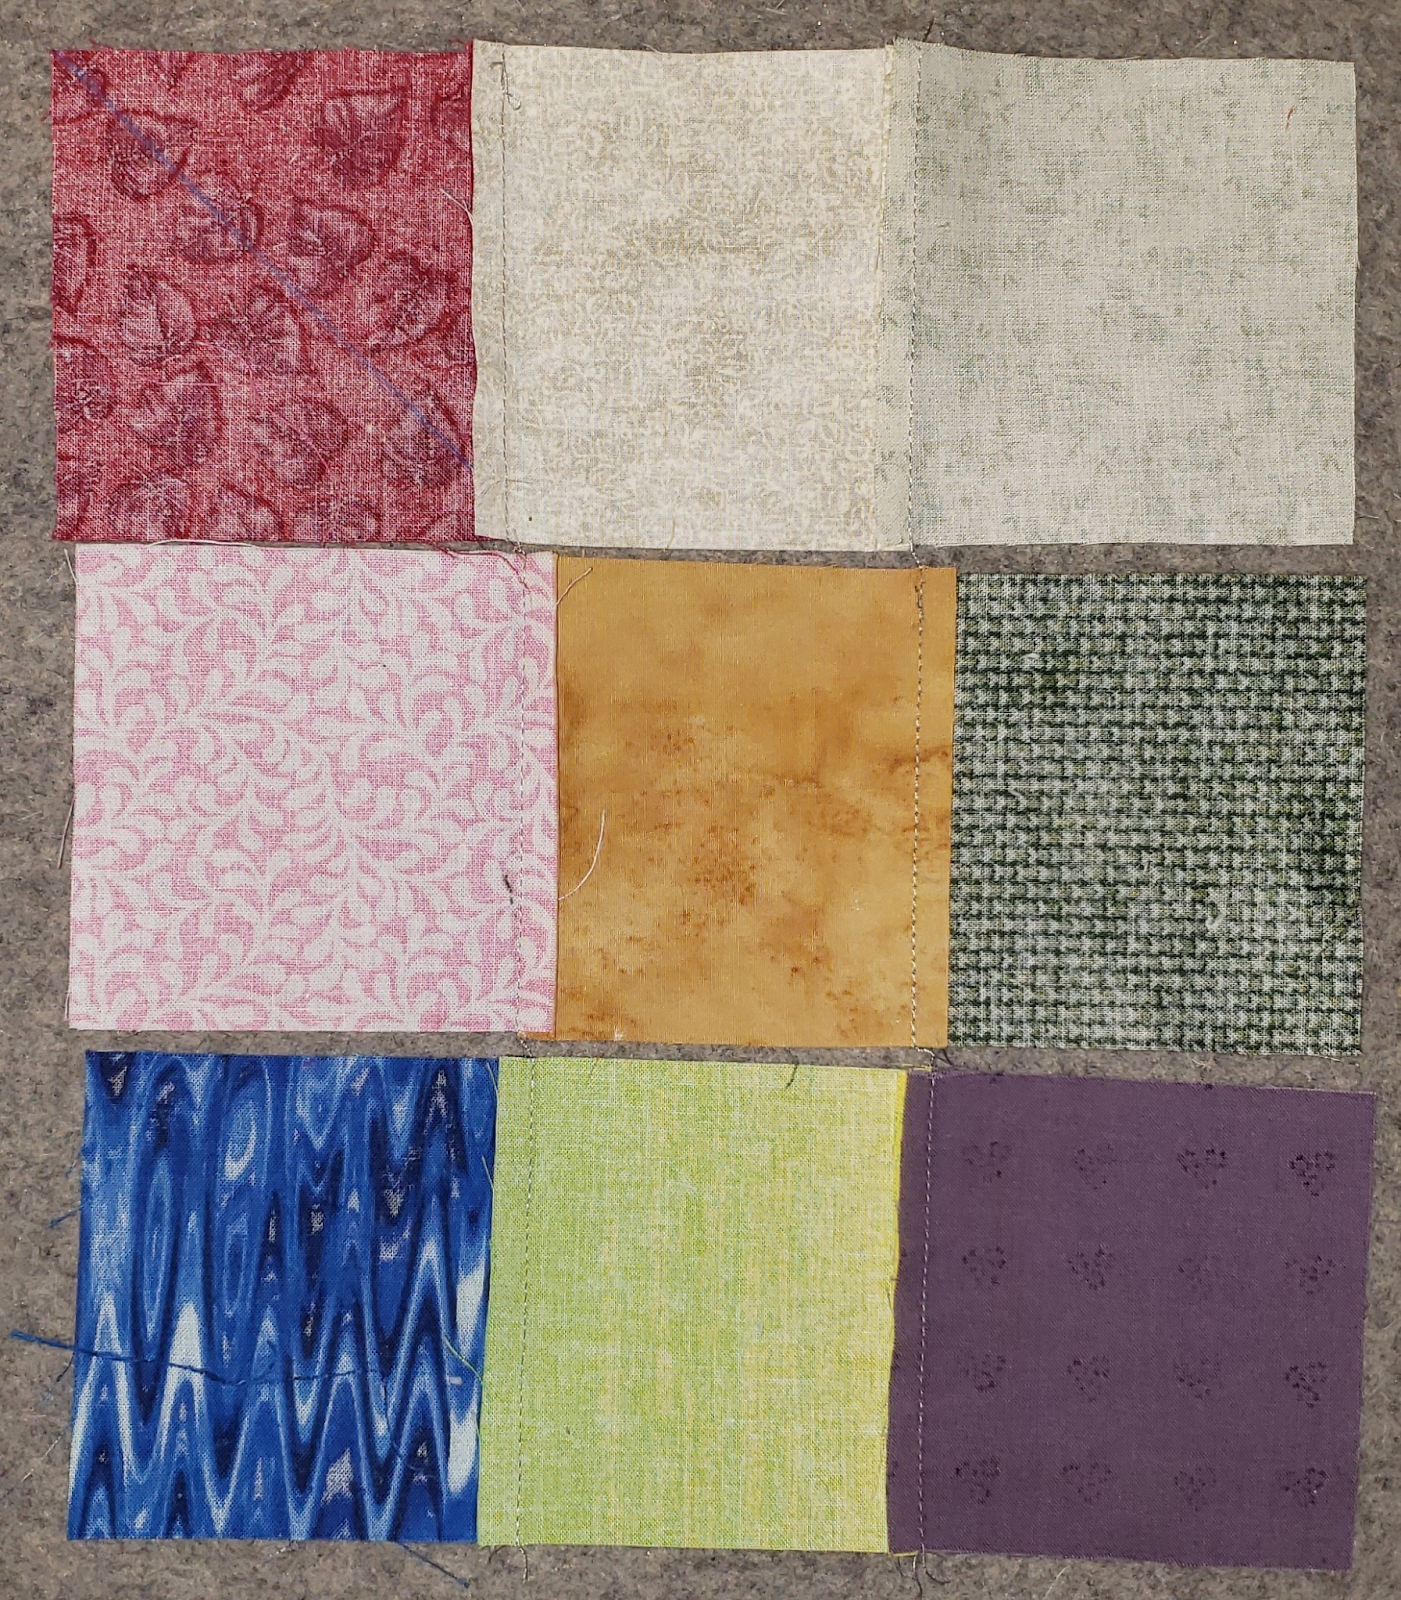
- Layout your 9 different squares in a layout that you like.
- We will be cutting some of the blocks, so make sure you center block is a smaller print
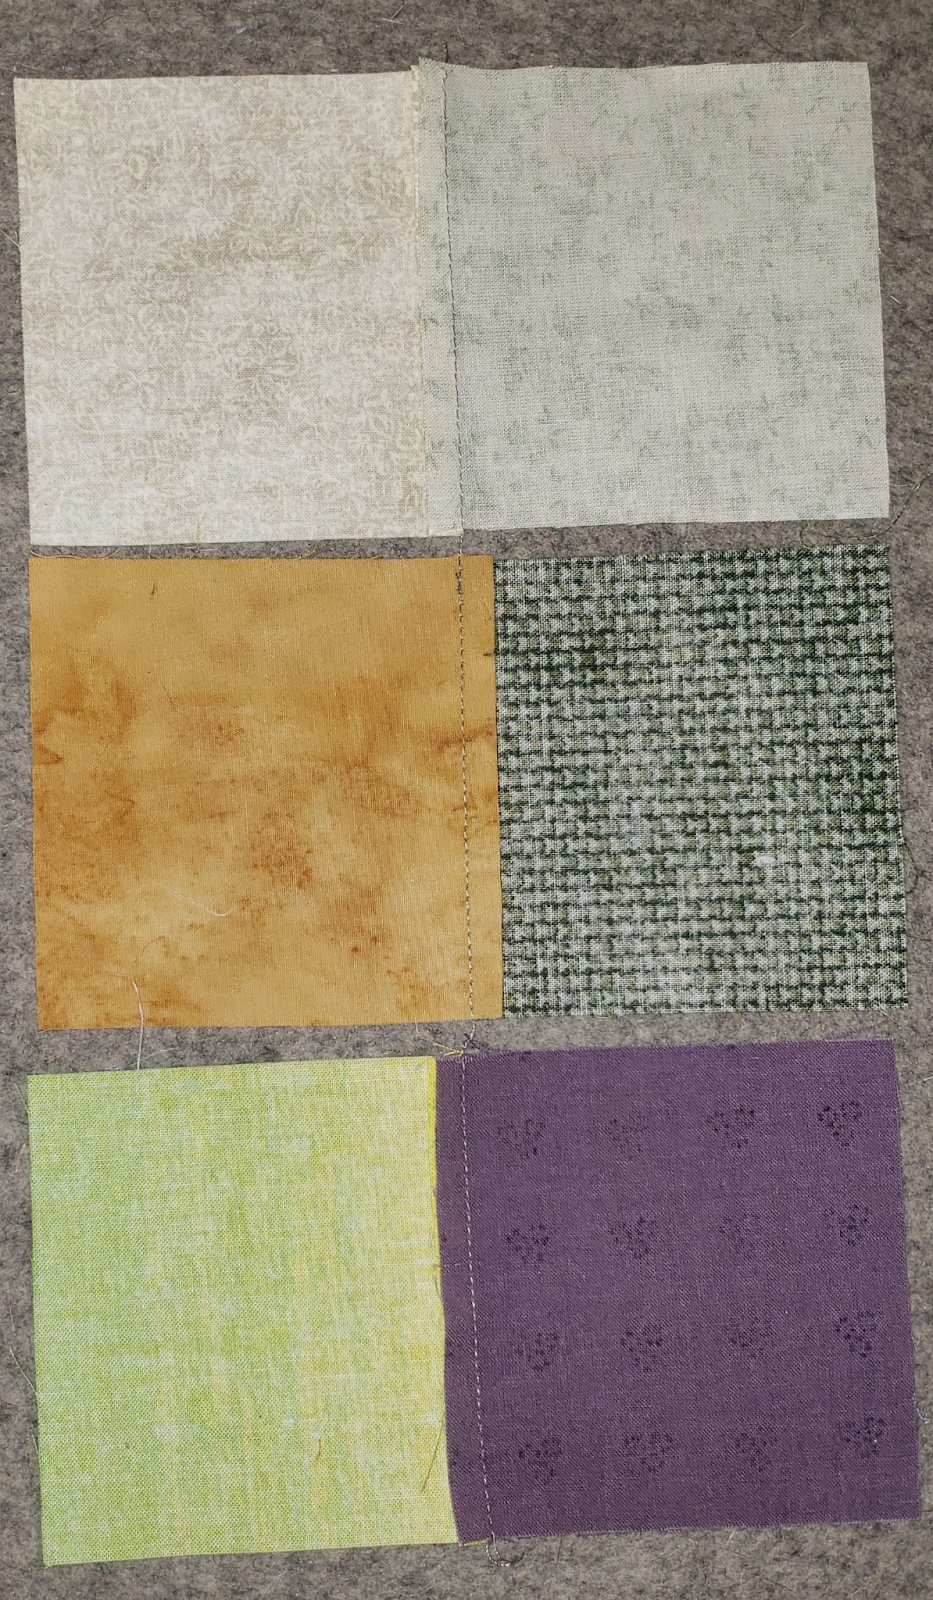
- Fold over the center squares onto the left squares, right-sides together
- Sew a 1/4″ seam down the right side of the squares
- If you stop at the end of the first square, and lay the second squares down on the machine, and continue to sew, this is chain piecing, an will help keep your block in the correct layout as you sew
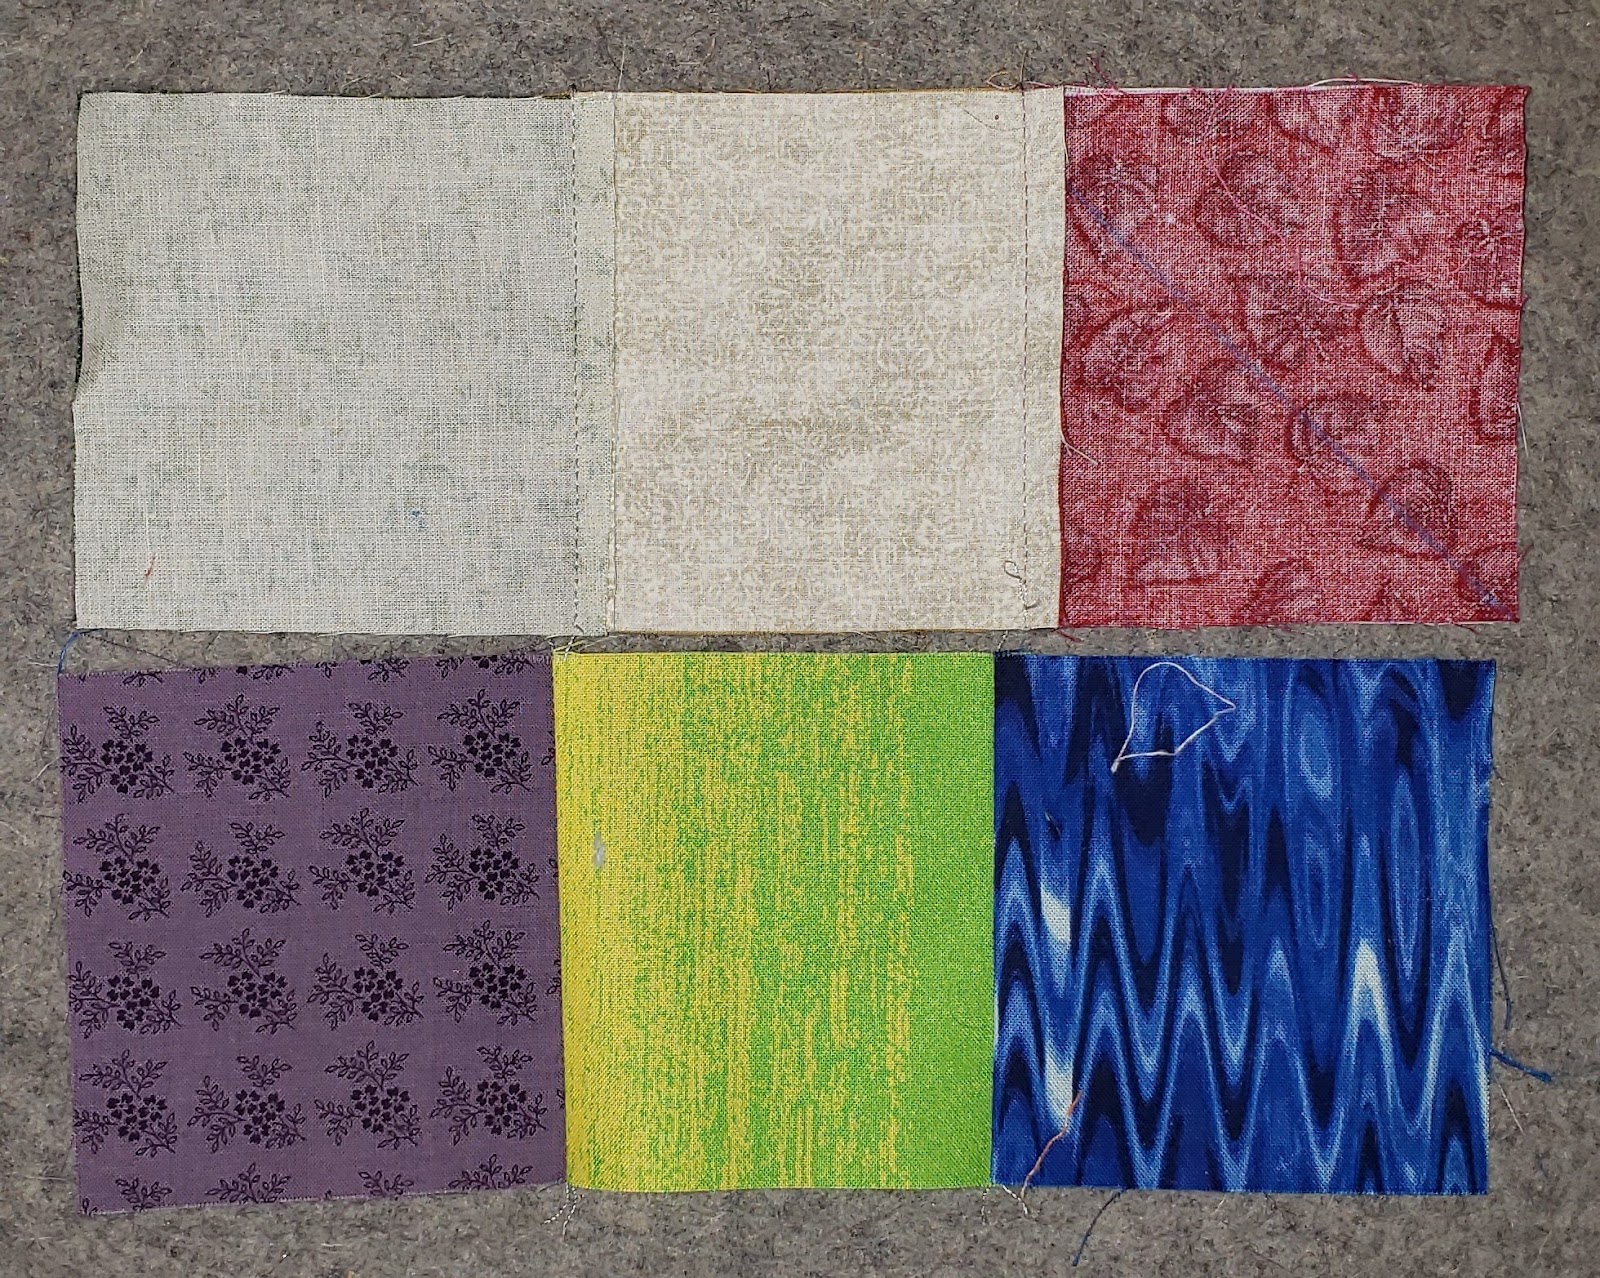
- Press the seams, top and bottom squares one direction, and the middle the opposite.
- Do not “iron”, but press down, and gently slide, so you are not stretching the fabric.
- Lay your 6 sewn squares back with the other 3 to make sure everything is still in the order that you want.

- Fold over the right squares onto the center squares, right-sides together.
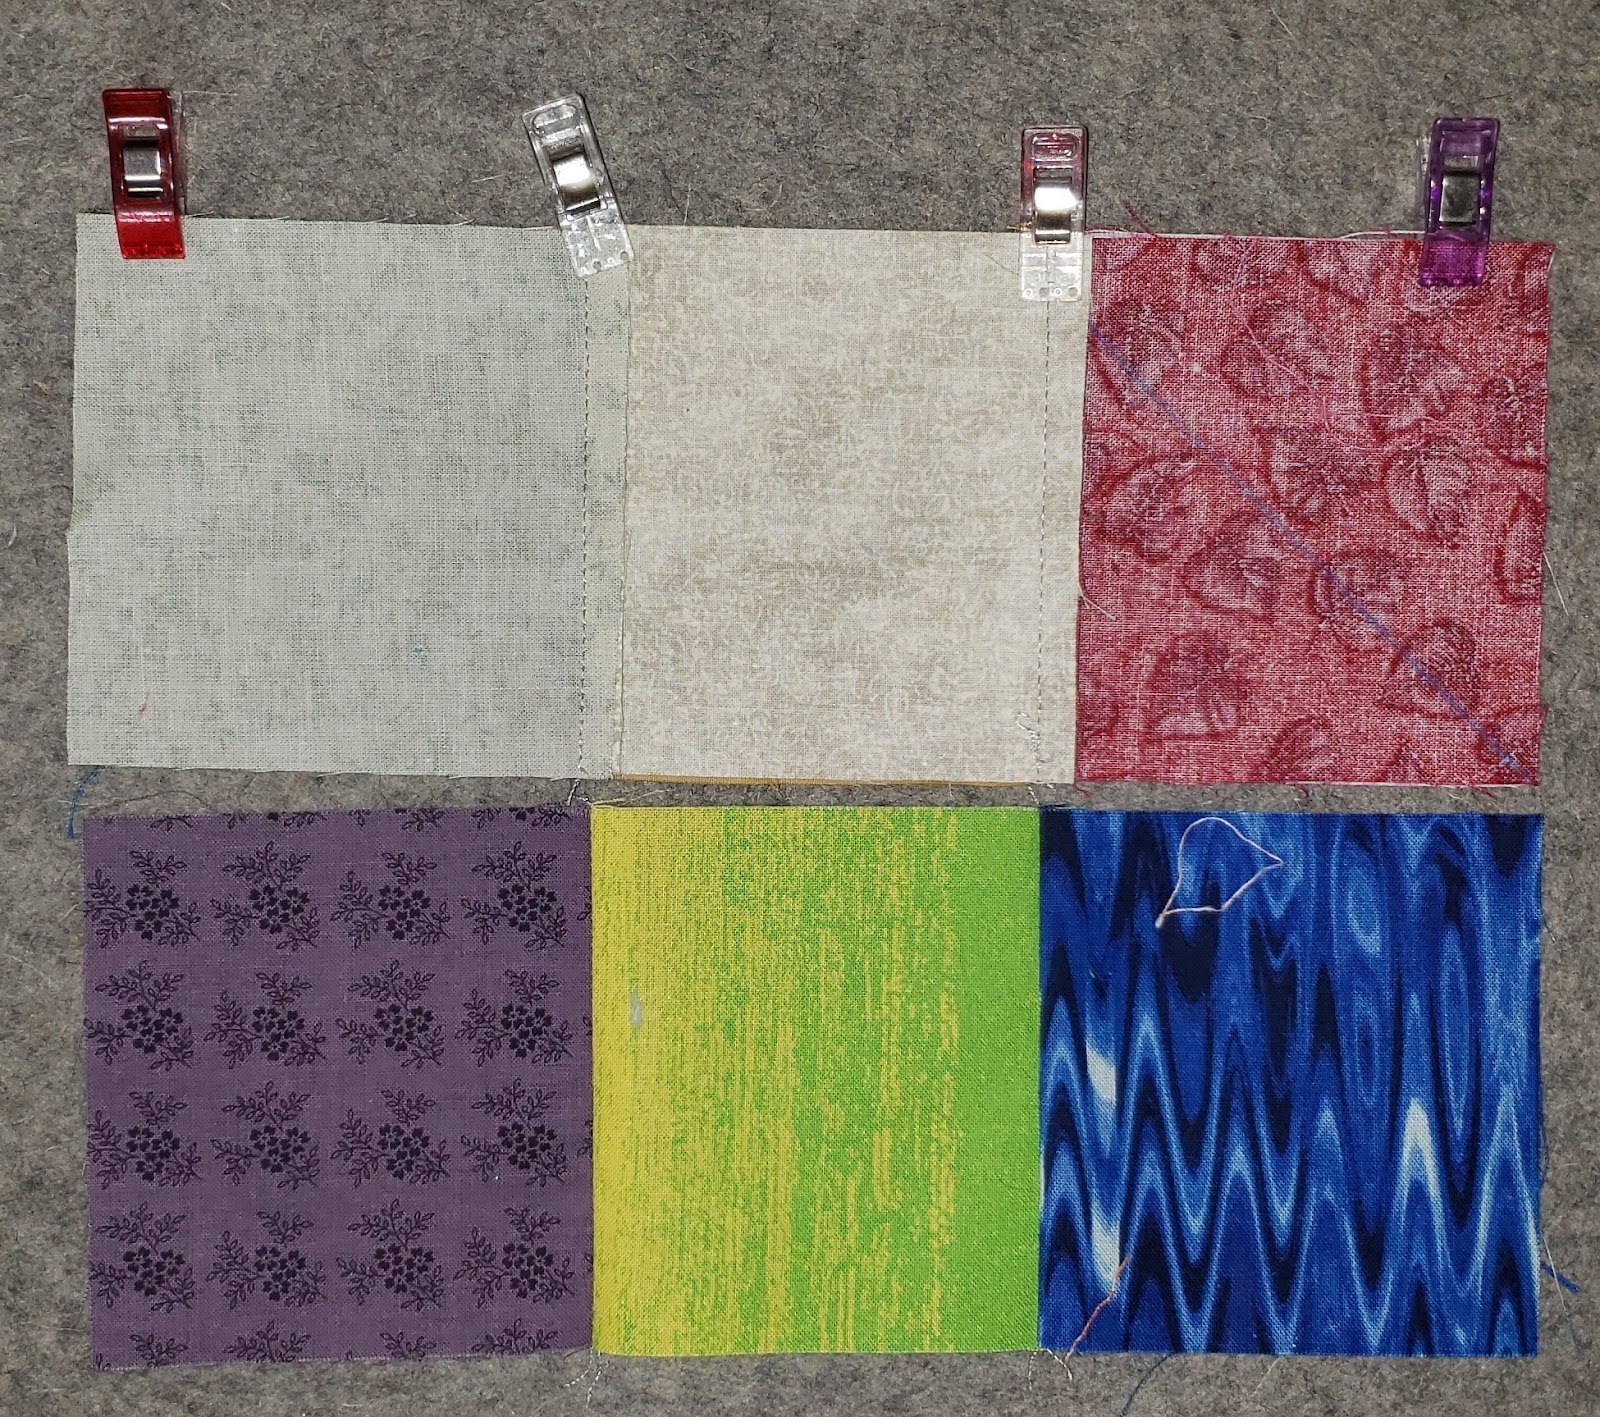
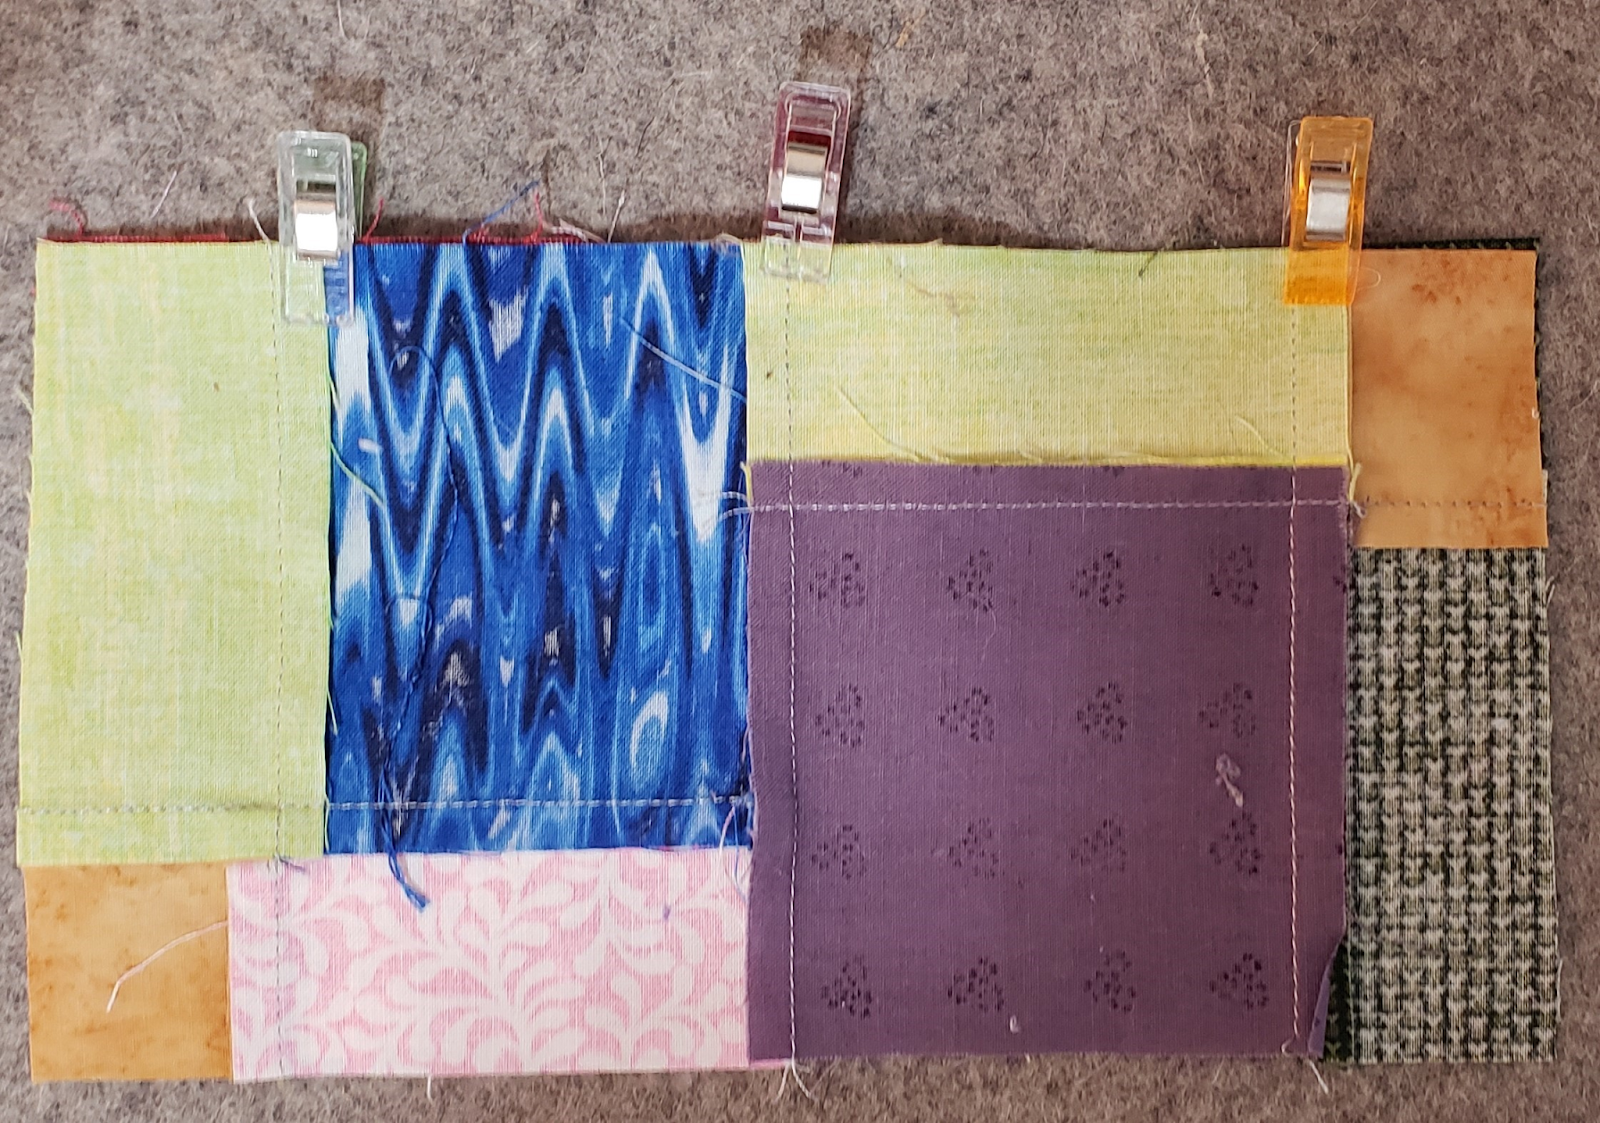
- I recommend using clips or pins to hold them together

- Sew a 1/4″ seam down the right sides of the squares
- Again, try to chain piece, to hold the squares together as you go.

- Press the seams, making sure to press them the same order that you did for the left side of the block.
- Fold the top row down to the middle, right-sides together
- Match the seams together, making sure they nest together

- Clip or pin the seams
- Add a clip or two as needed
Sew a 1/4″ seam
Open the two rows, and fold up the bottom row towards the center, right-sides together
Match the seams together, making sure they nest together
Clip or pin the seams

Sew a 1/4″ seam
Press the seams, you can press them all down or all up.

Press the block to make sure it lays flat.
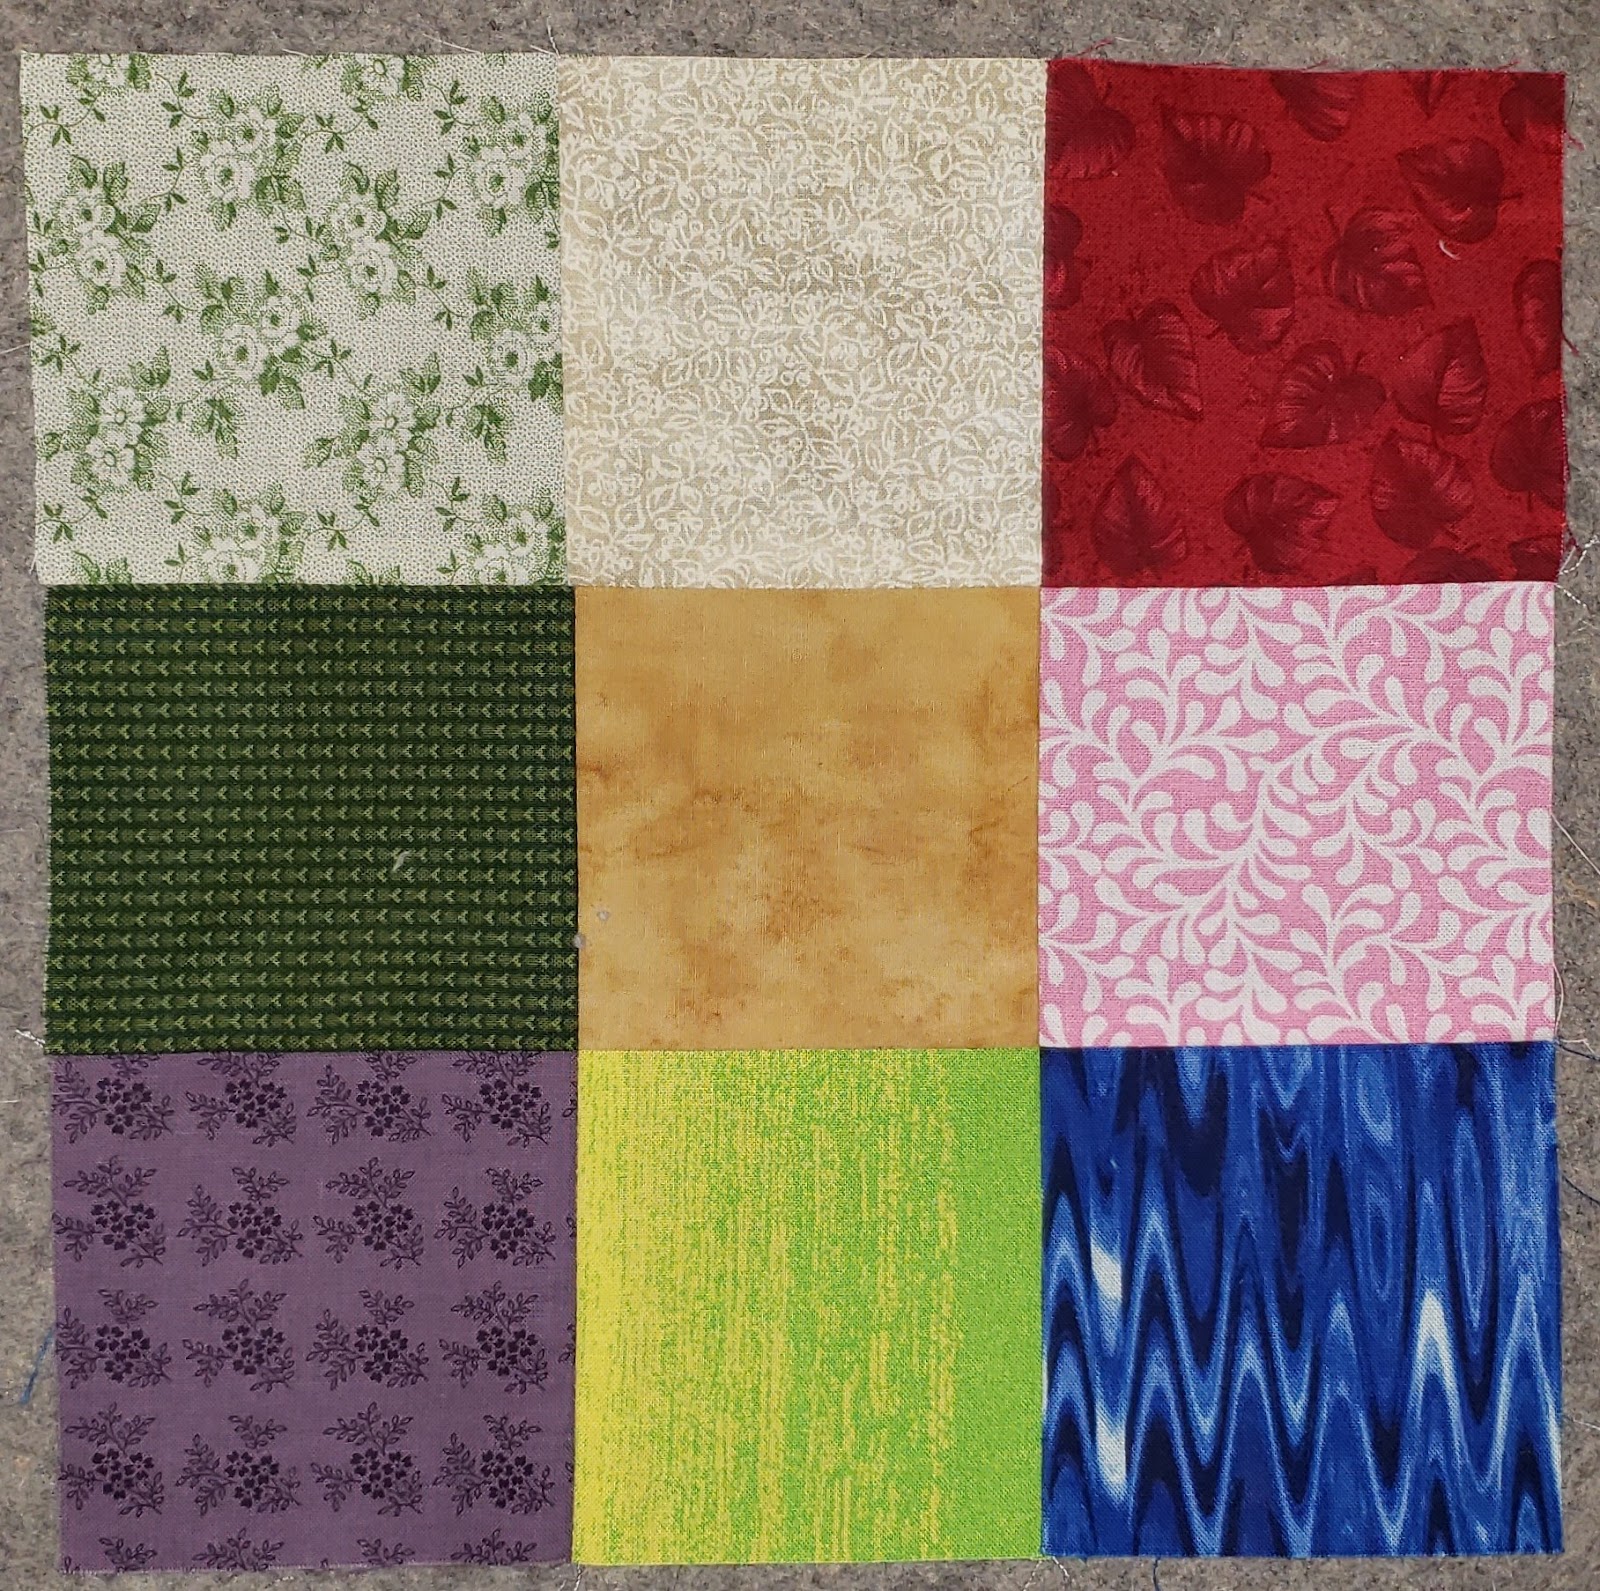
You have finished a 9 patch block.
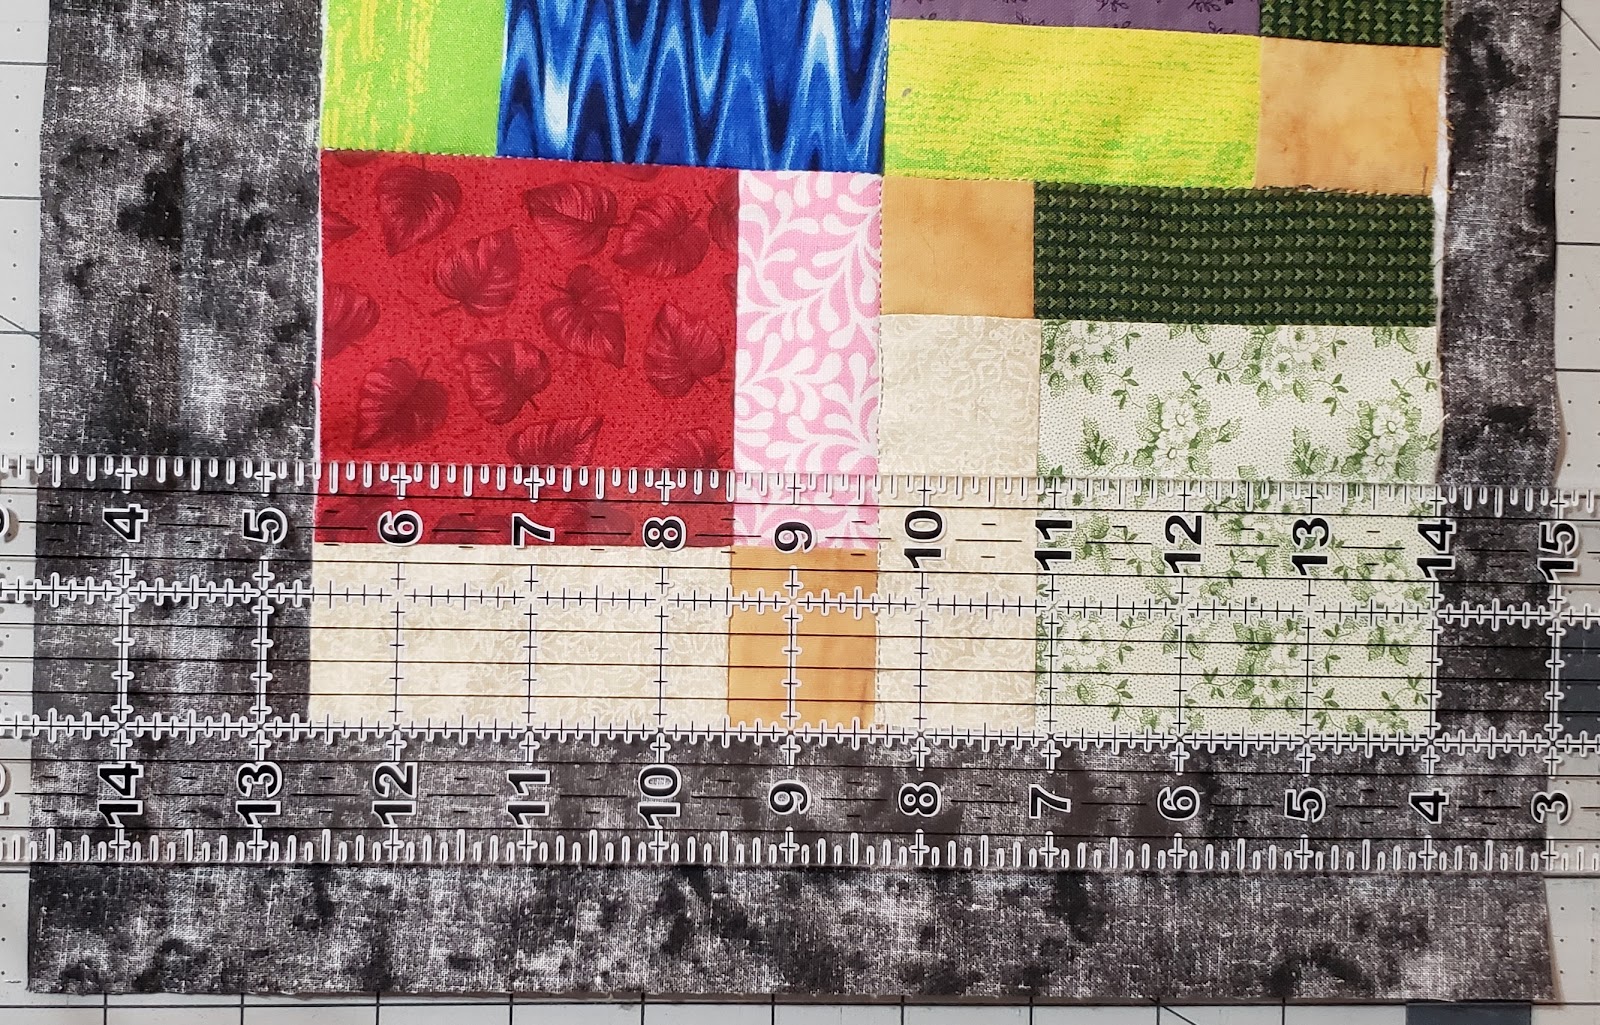
Step 2 – Cutting 9 patch block
- Figure the size of your middle blocks, and divide in half
- If you start with a 5″ square, the center will be 4 1/2″, so half would be 2 1/4″
- If you start with a 3 1/2″ square, the center will be 3, so half would be 1 1/2″
- Lay a ruler down, measuring the size figured
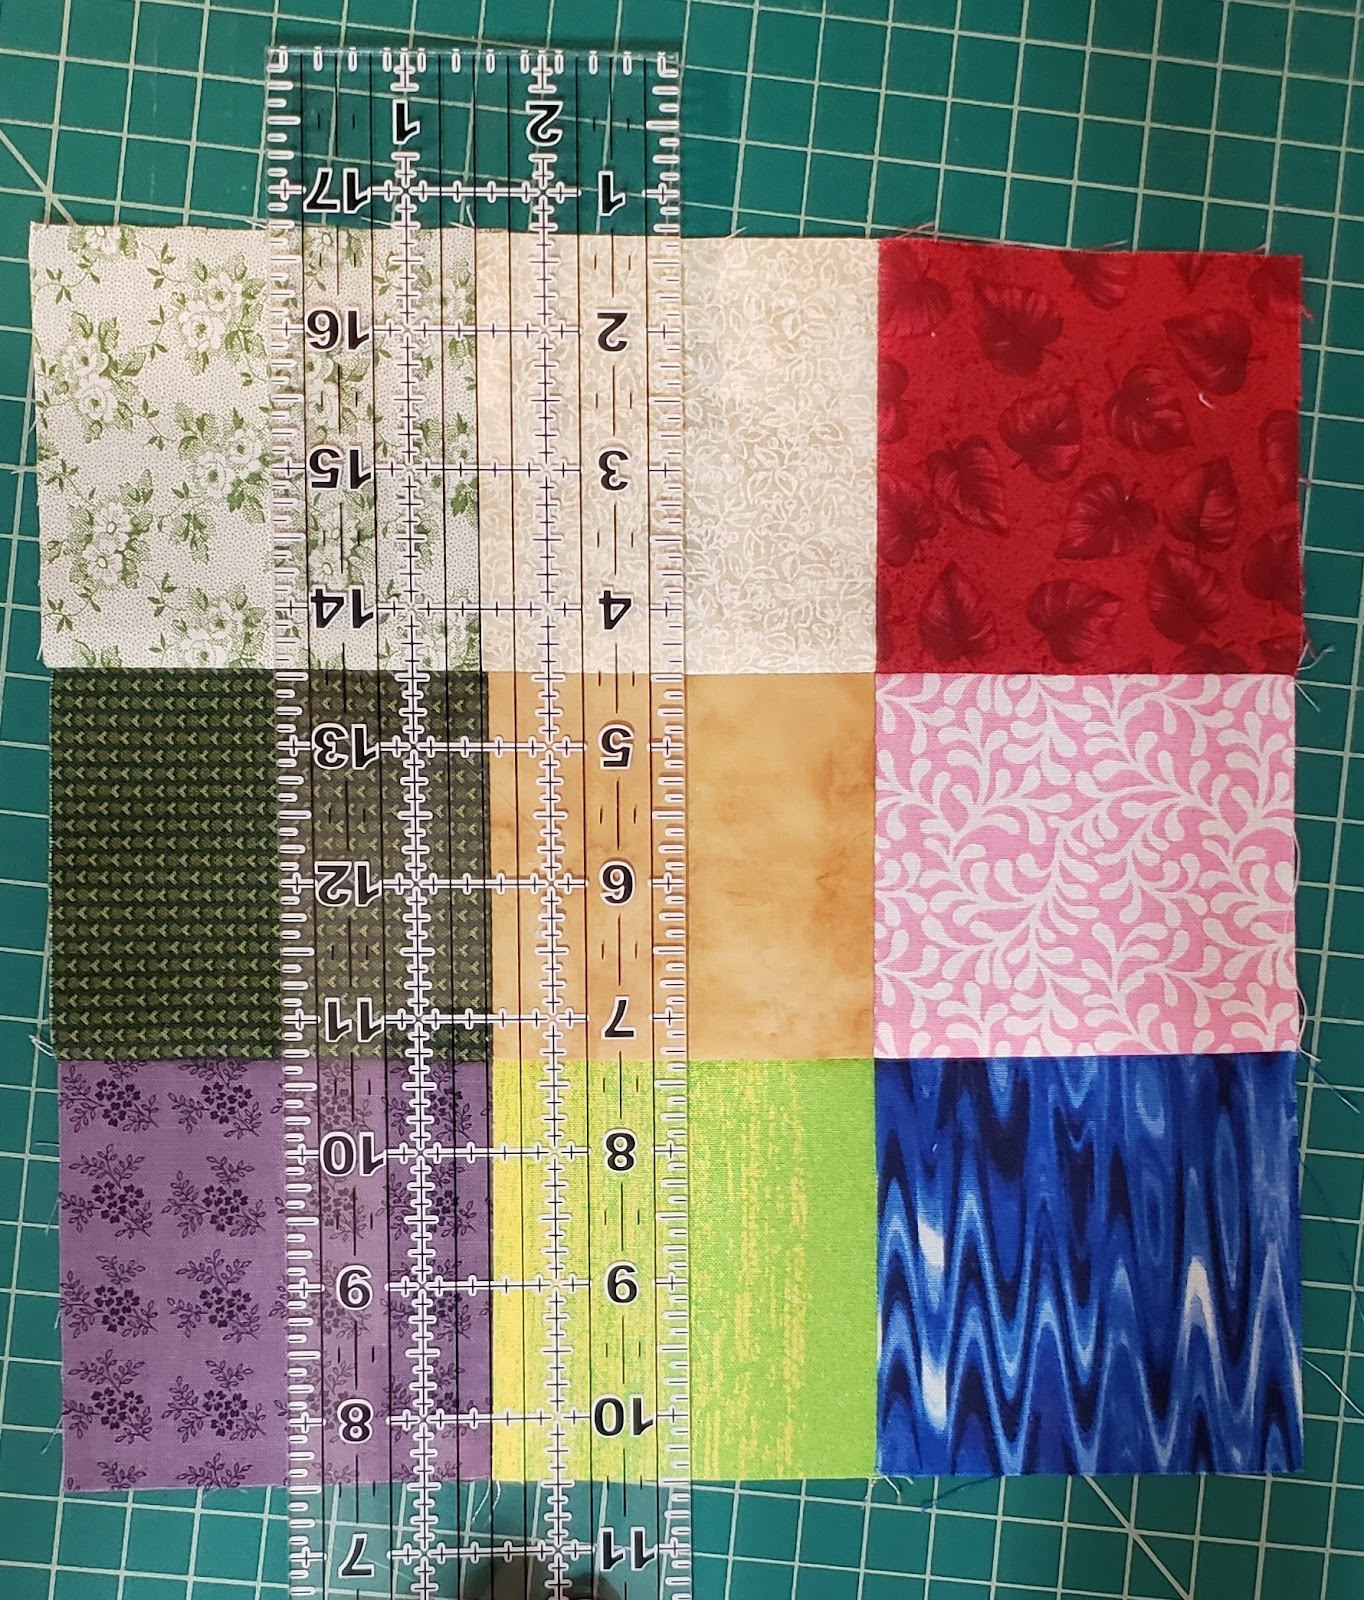
- Using two rulers, can help you figure the center of the block to make sure you are correct
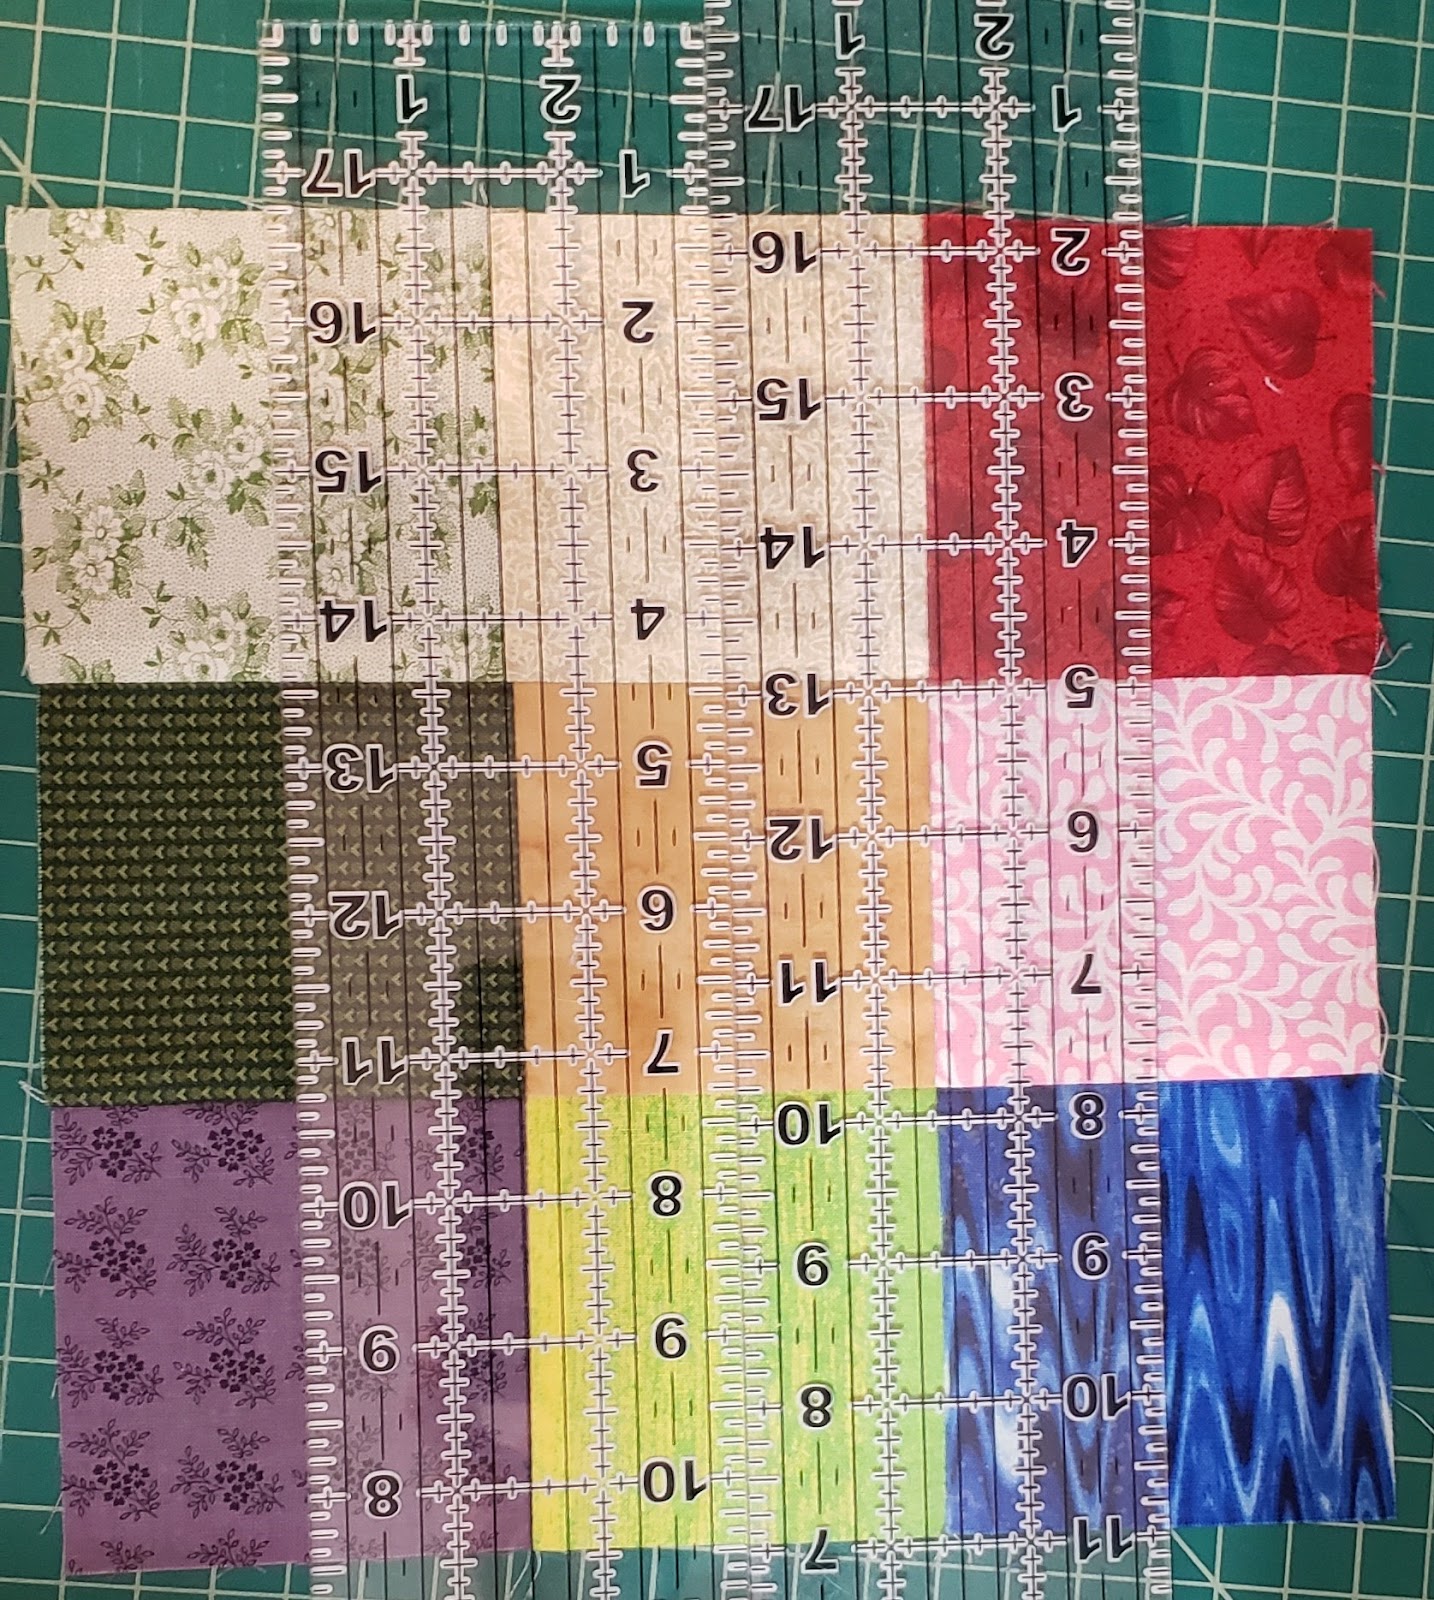
- While giving a little pressure on the Ruler, carefully cut down the middle of the squares
- Without separating your two pieces, carefully rotate the square
- A smaller cutting mat or a rotating mat is good to move the block without separating the pieces
- Lay the ruler down the opposite direction of the block, again in the center, and using the same measurement, find the center of the block

- While giving a little pressure on the ruler, carefully cut down the middle of the squares
- You have now cut the block into 4 squares

- You can move pieces apart, but do not move the blocks
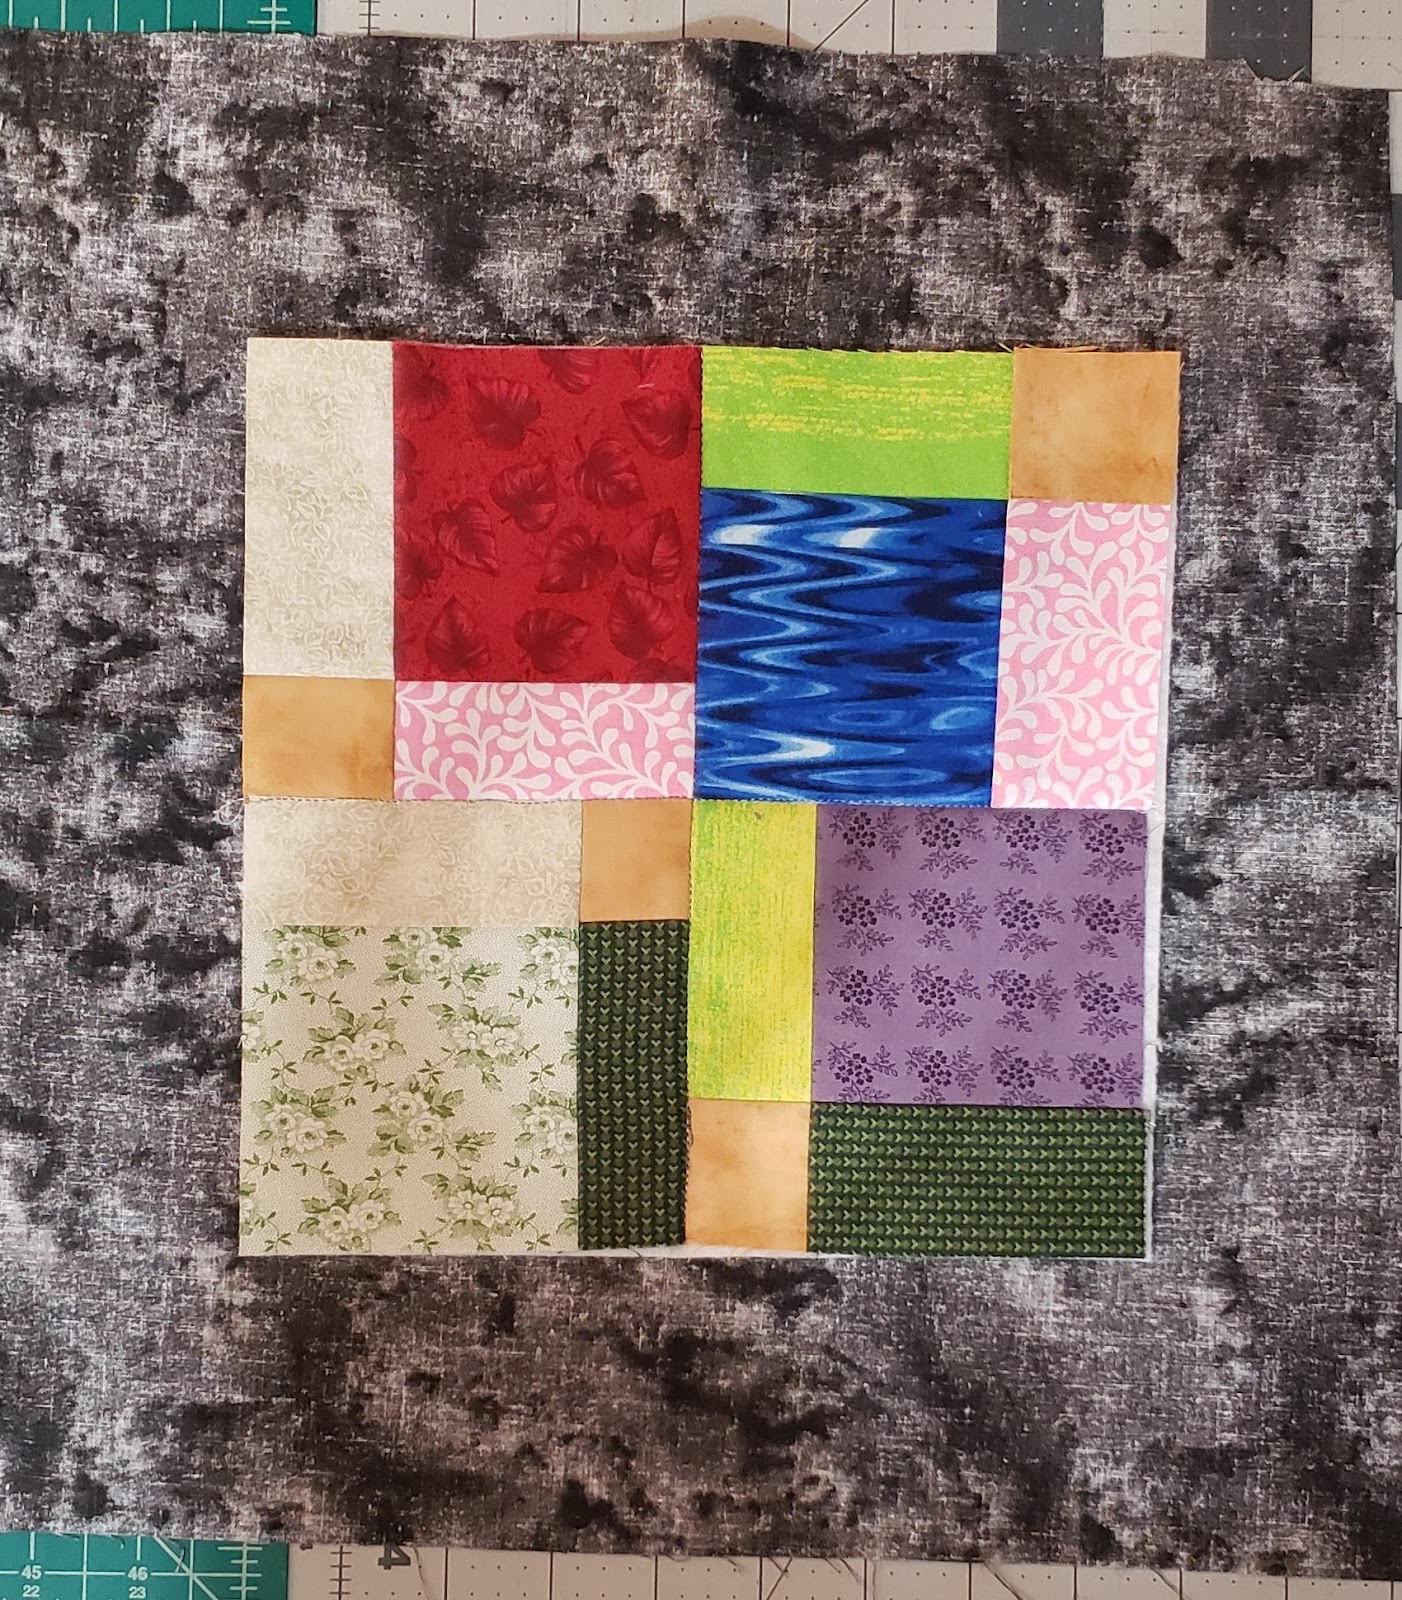
Step 3 – Final assembly of block
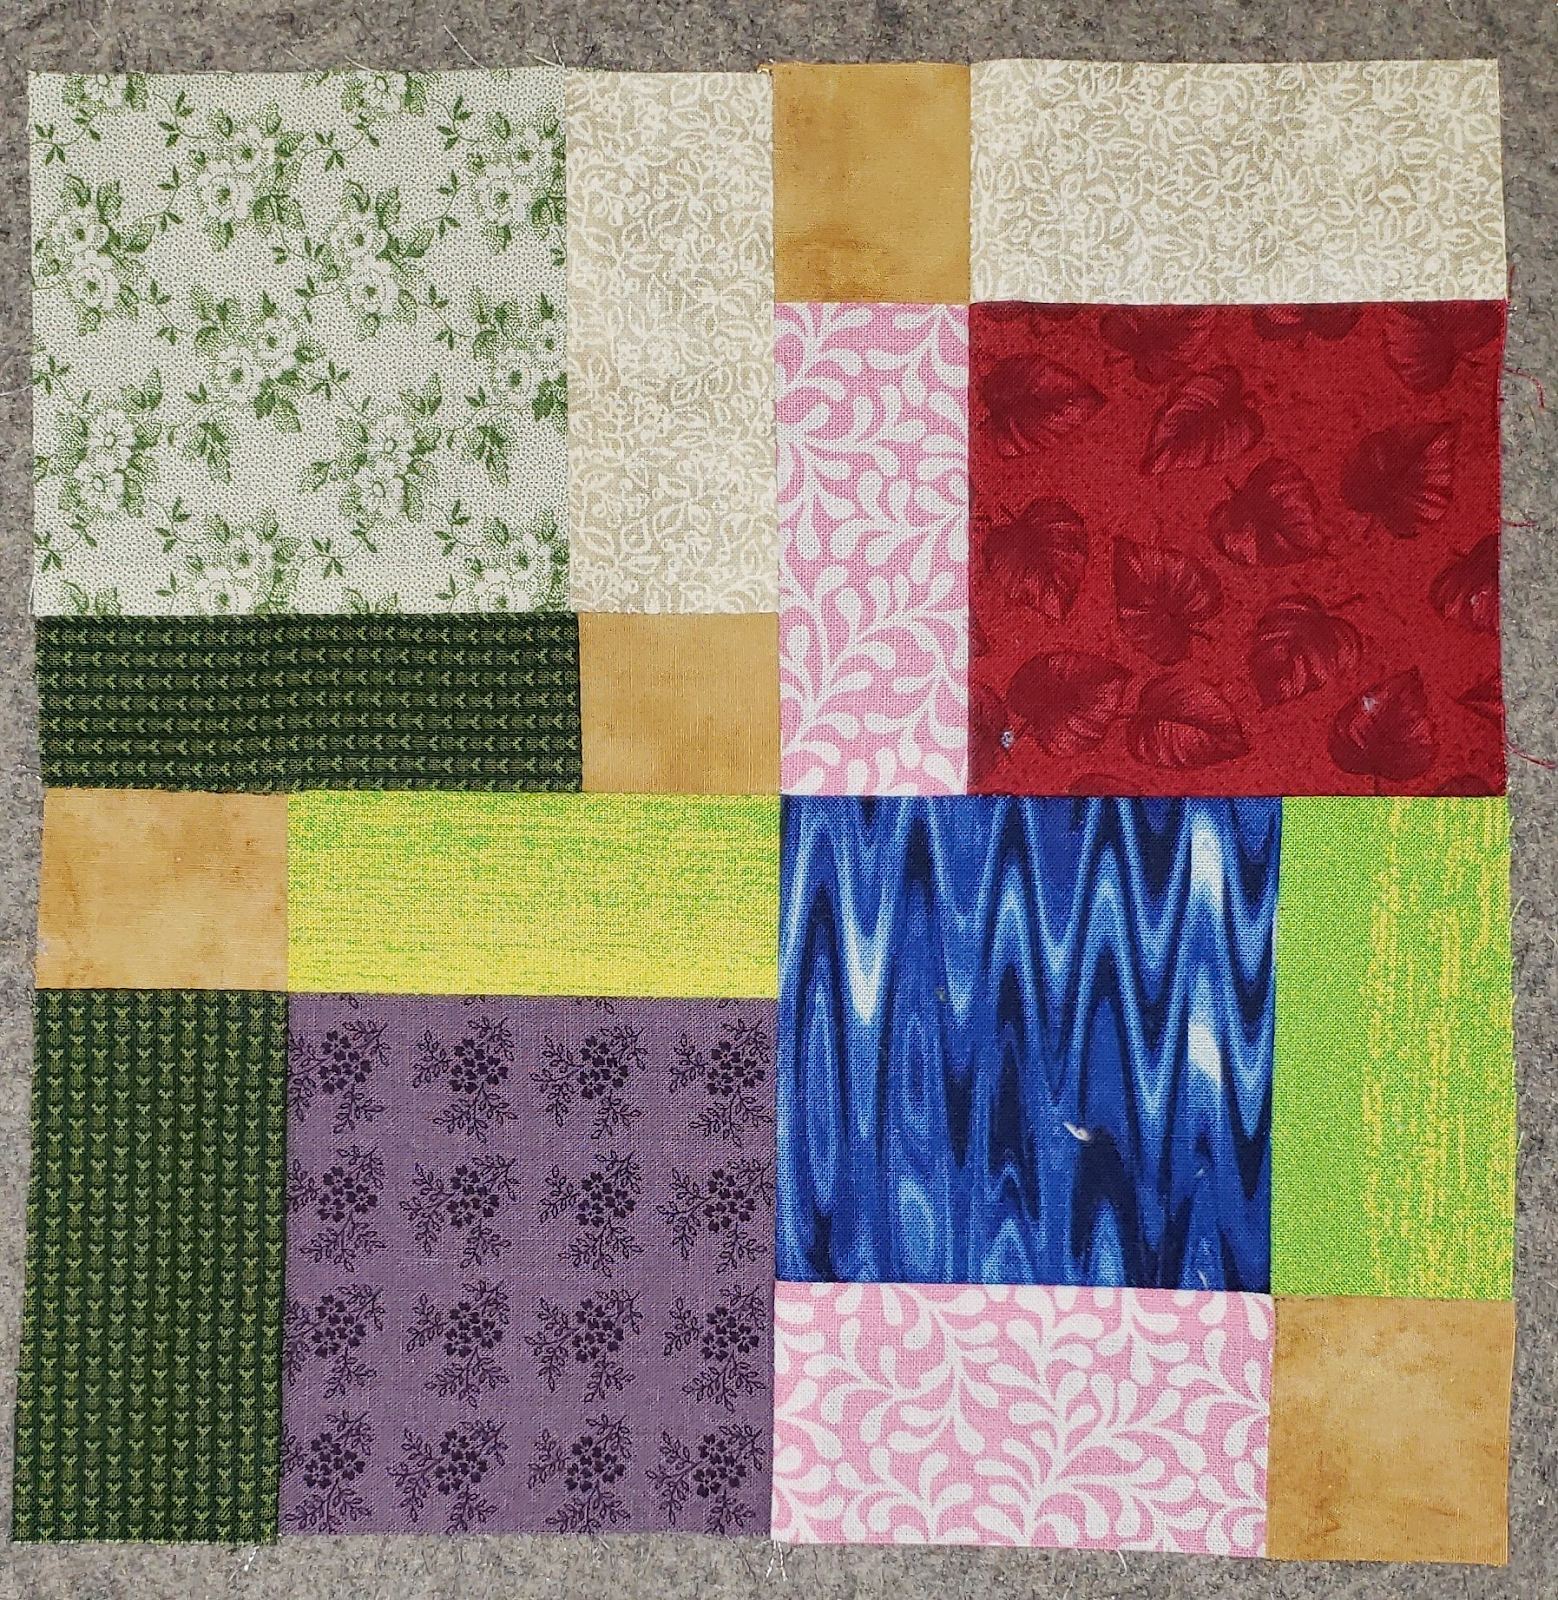
- Starting with the right-top square, rotate one turn towards right
- Then the right-bottom square, rotate two turns towards the right
- Then the left-Bottom square, rotate three turns towards the right
- The left-top square does not move

- If you look at your block, you should not see any matching seams between the blocks, except for the center points

- You will sew the pieces together, similar to the 9-patch, except it will be a four patch. Fold over the right pieces onto the left pieces, right-sides together

- Sew 1/4″ seam on right side
- Do no cut thread, after first blocks, continue with second
- Open the squares, to make sure you have them in the order that you want
- Press the seams, making sure to press one seam to right and one to left

- Lay the block open, and fold two pieces towards the other two pieces
- Sew 1/4″ seam on the right side of the blocks (the side where the two pieces are connected by thread)
- Press the block open, press the seams, either one direction or open, depending on if you are making multiple blocks and attaching them together.
- Press the block to make sure flat

A good practice is to square-up your block if you are going to be attaching to other blocks, making sure the same sizes
Note: 5″ squares will create a 13 1/2″ x 13 1/2″ block (will be 13″ x 13″ if sewn to other blocks)
3 1/2″ squares will create a 9″ block (will be 8 1/2″ x 8 1/2″ if sewn to other blocks)
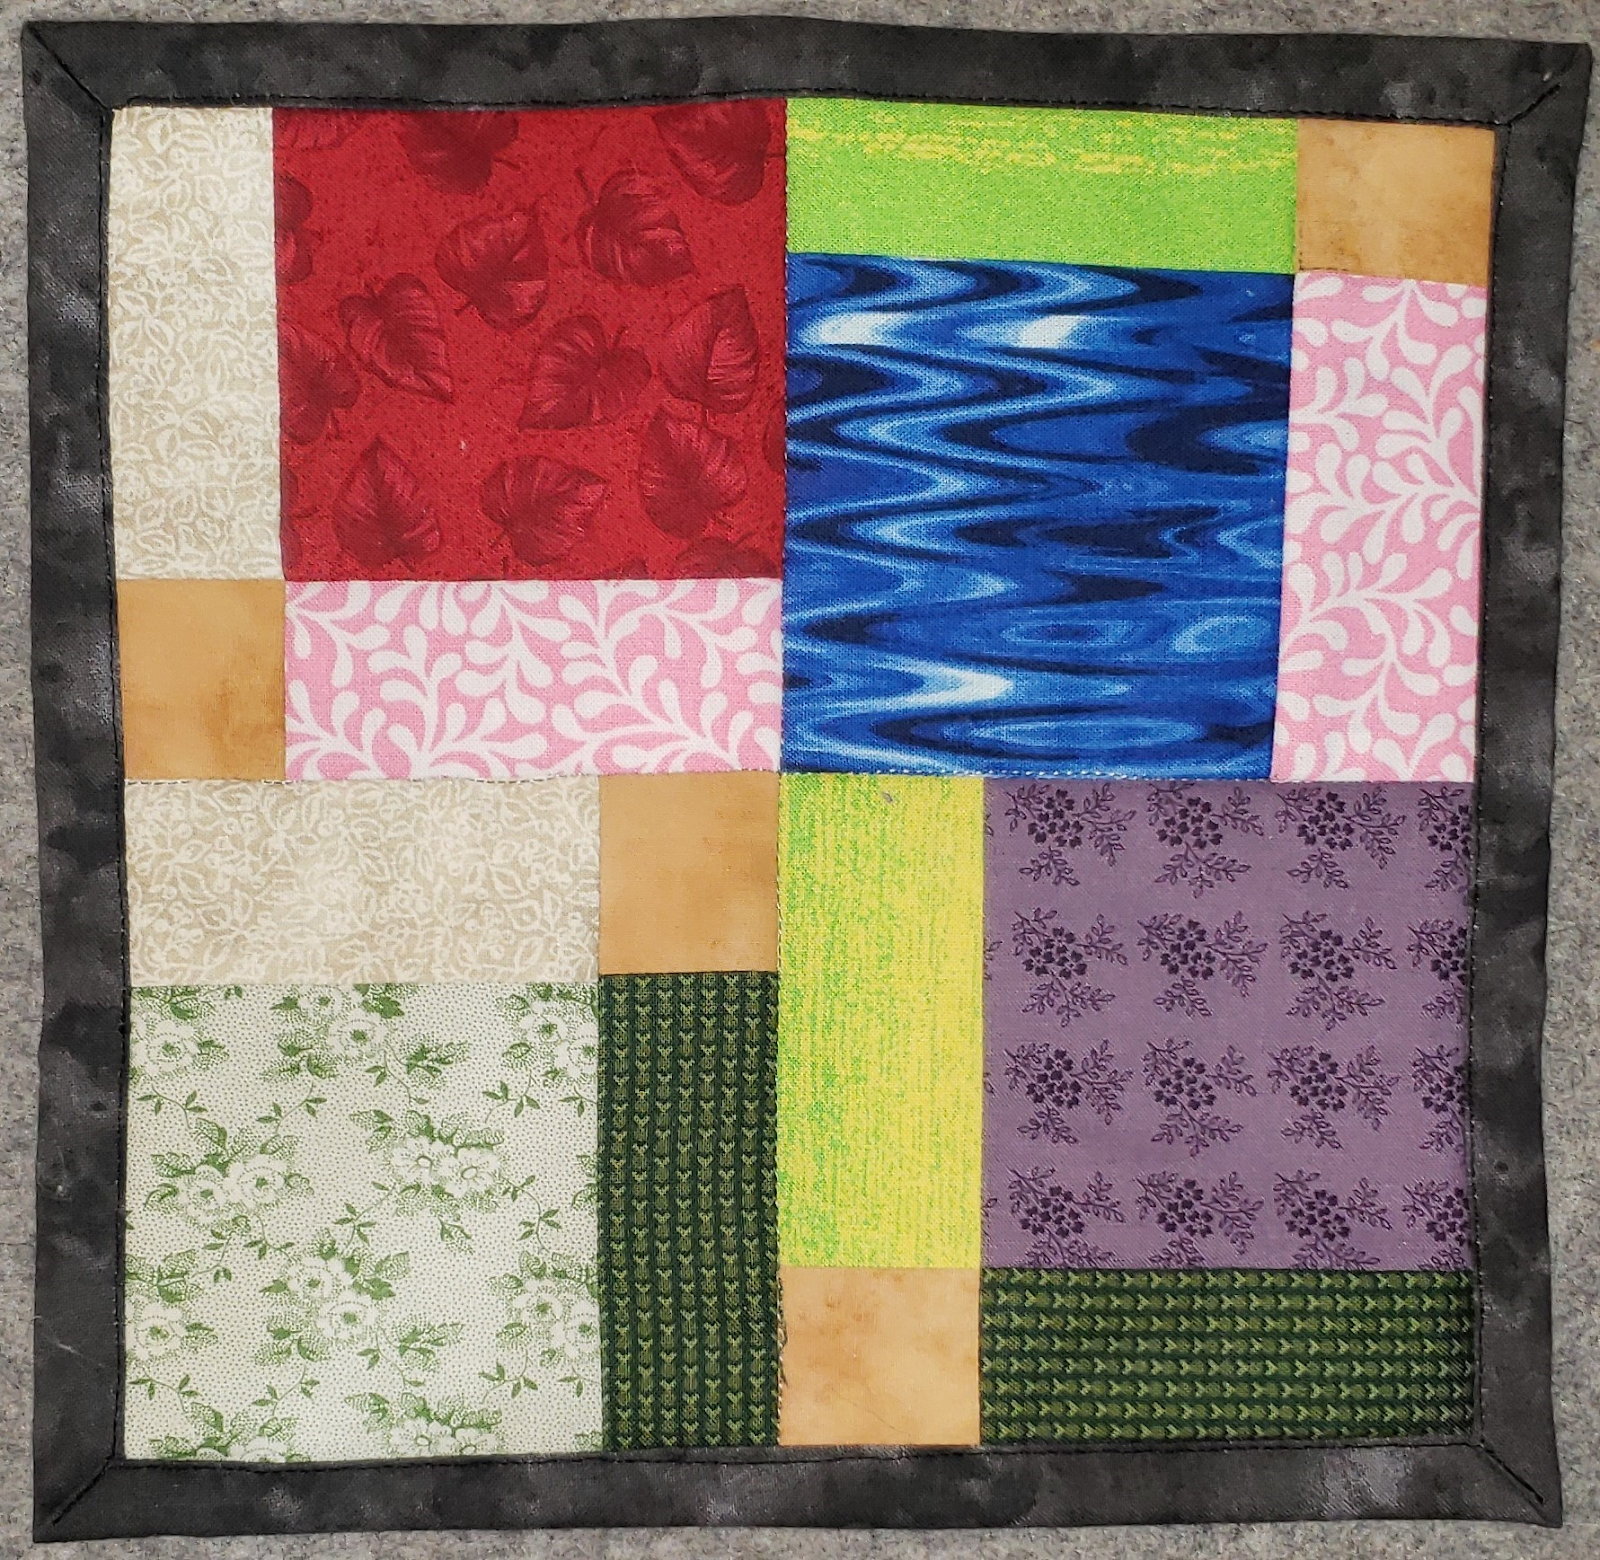
You have now completed the “Disappearing 9-patch Block“.
Step 4 – Making a quilt sandwich
- Lay the back fabric wrong side up
- This piece should be at least 3″-4″ larger than your quilt square.

- Center a piece of batting on top of the background fabric
- This piece should be a little larger than you block (1″-2″)
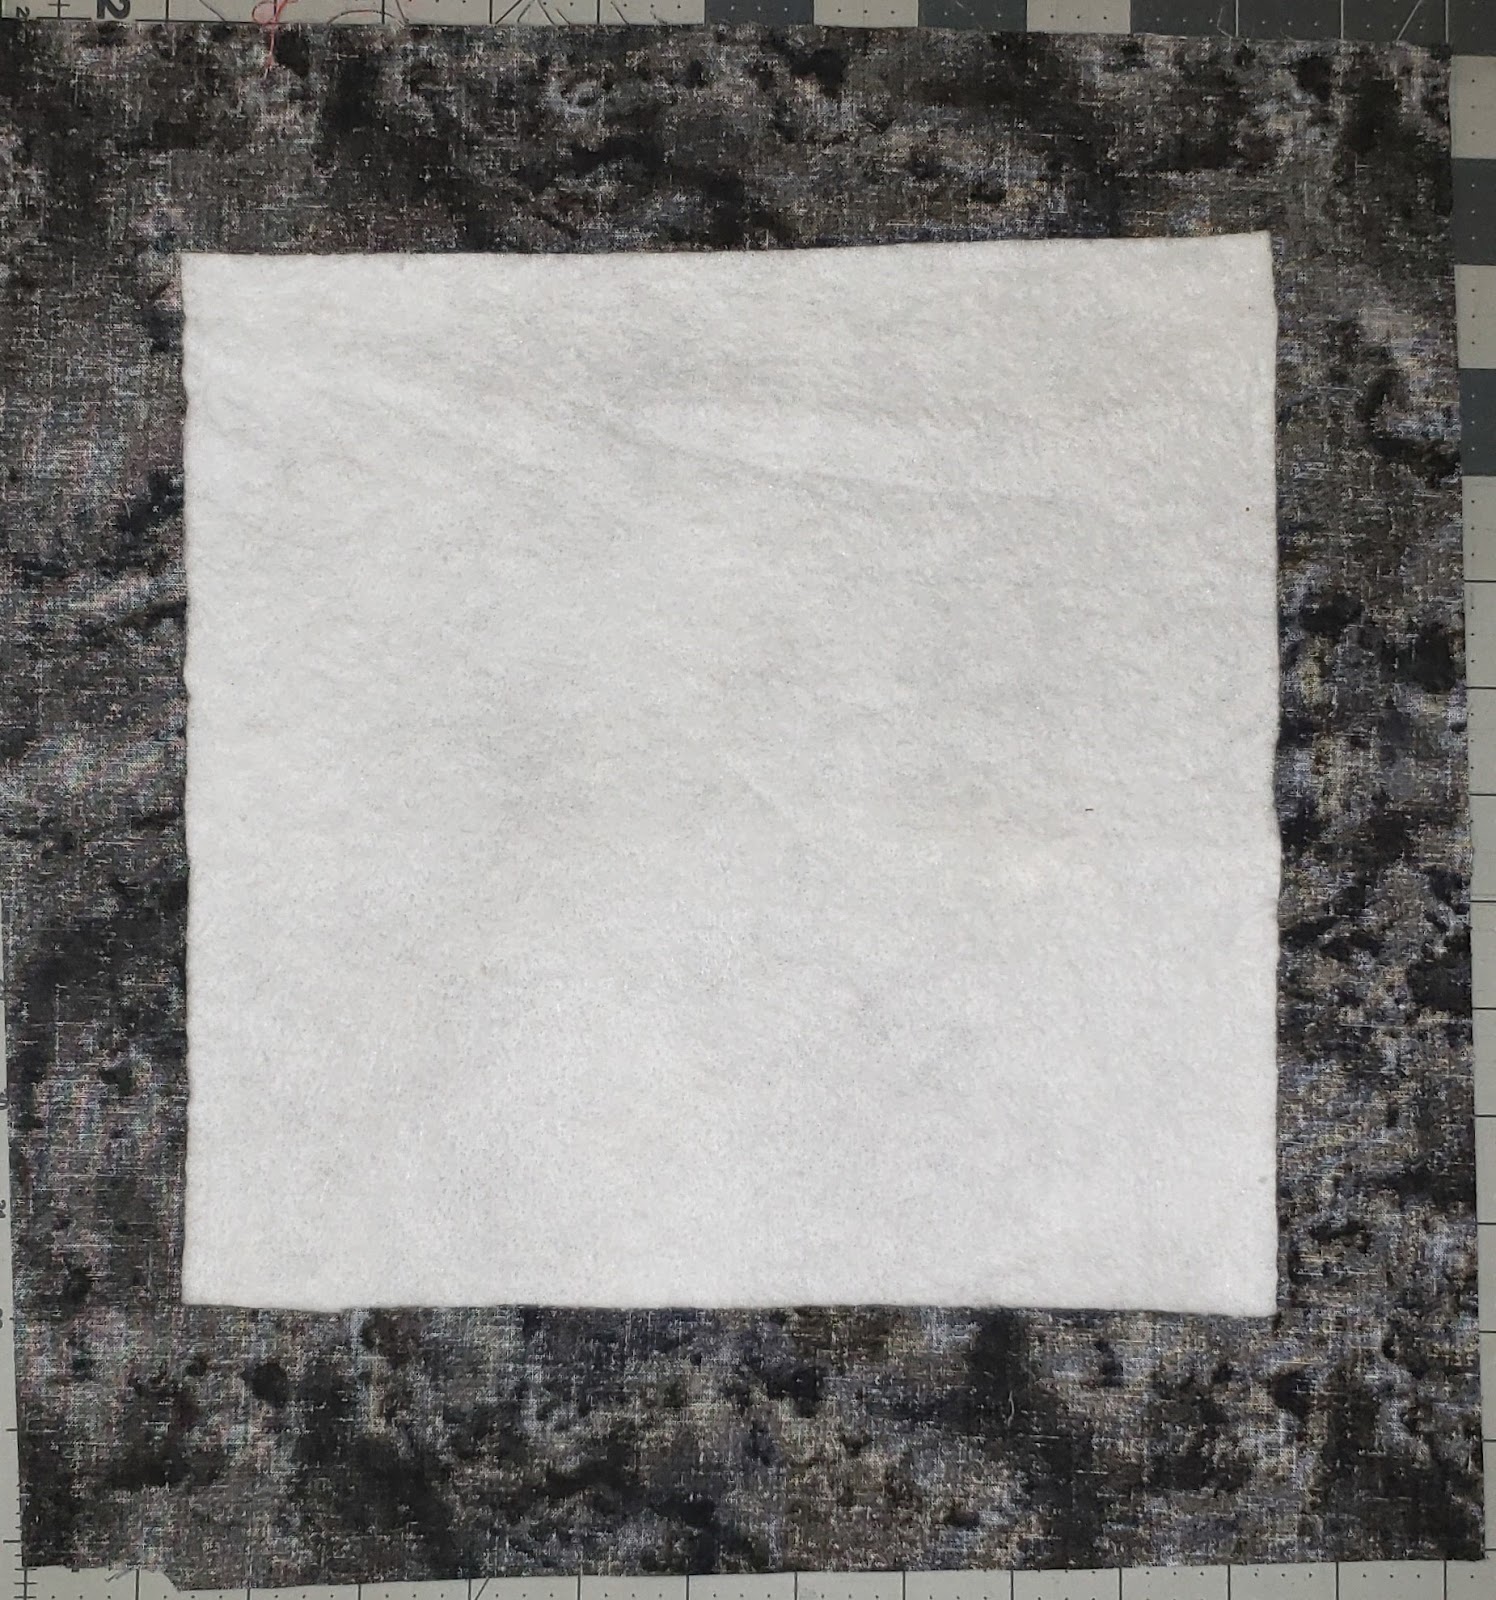
- Center your completed block onto with the right-side facing up

- You can pin or use a spray baste to hold together.
- If you pick up the quilt sandwich, you should see the right-side of the fabric on both sides
Step 5 – Quilt
- There are lots of ways to quilt a block.
- Stitch in the ditch is the easiest way to quilt
- Stitch down the center of the block, along the seam line from top to bottom
- Turn block and stitch down the center the opposite directions, along the seam line, creating a +
- You can do more directions, just following the seams.
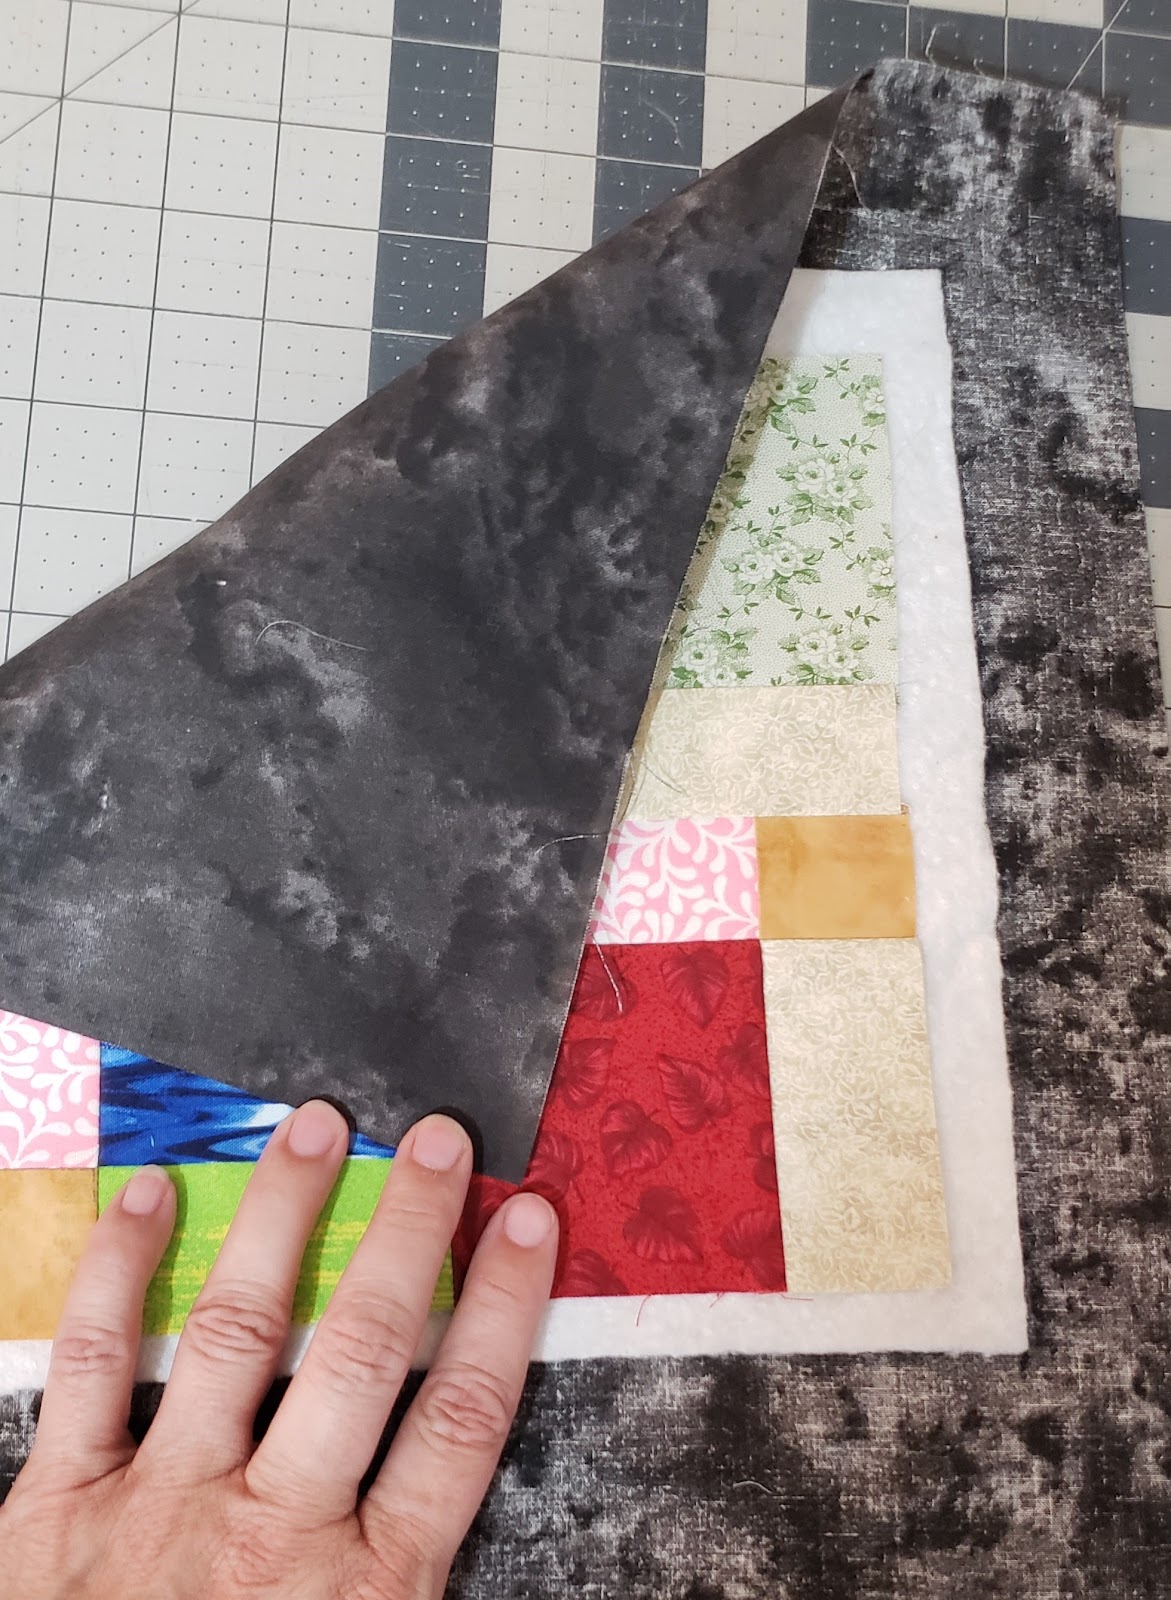
Step 6 – Binding
- This block is going to be self bound
- Without cutting the back fabric, trim the batting to the same size as the front block
- You can use scissors or carefully with a rotary mat
- Trim you back fabric to be 1″ on all four sides of the square
- This is where a little larger is good, so if you move a little, you are not short fabric
- Fold the back fabric 1″ in half and press
- Line the edge to the quilt top piece and press
- Wrong-sides together

- Continue to press around on all four sides

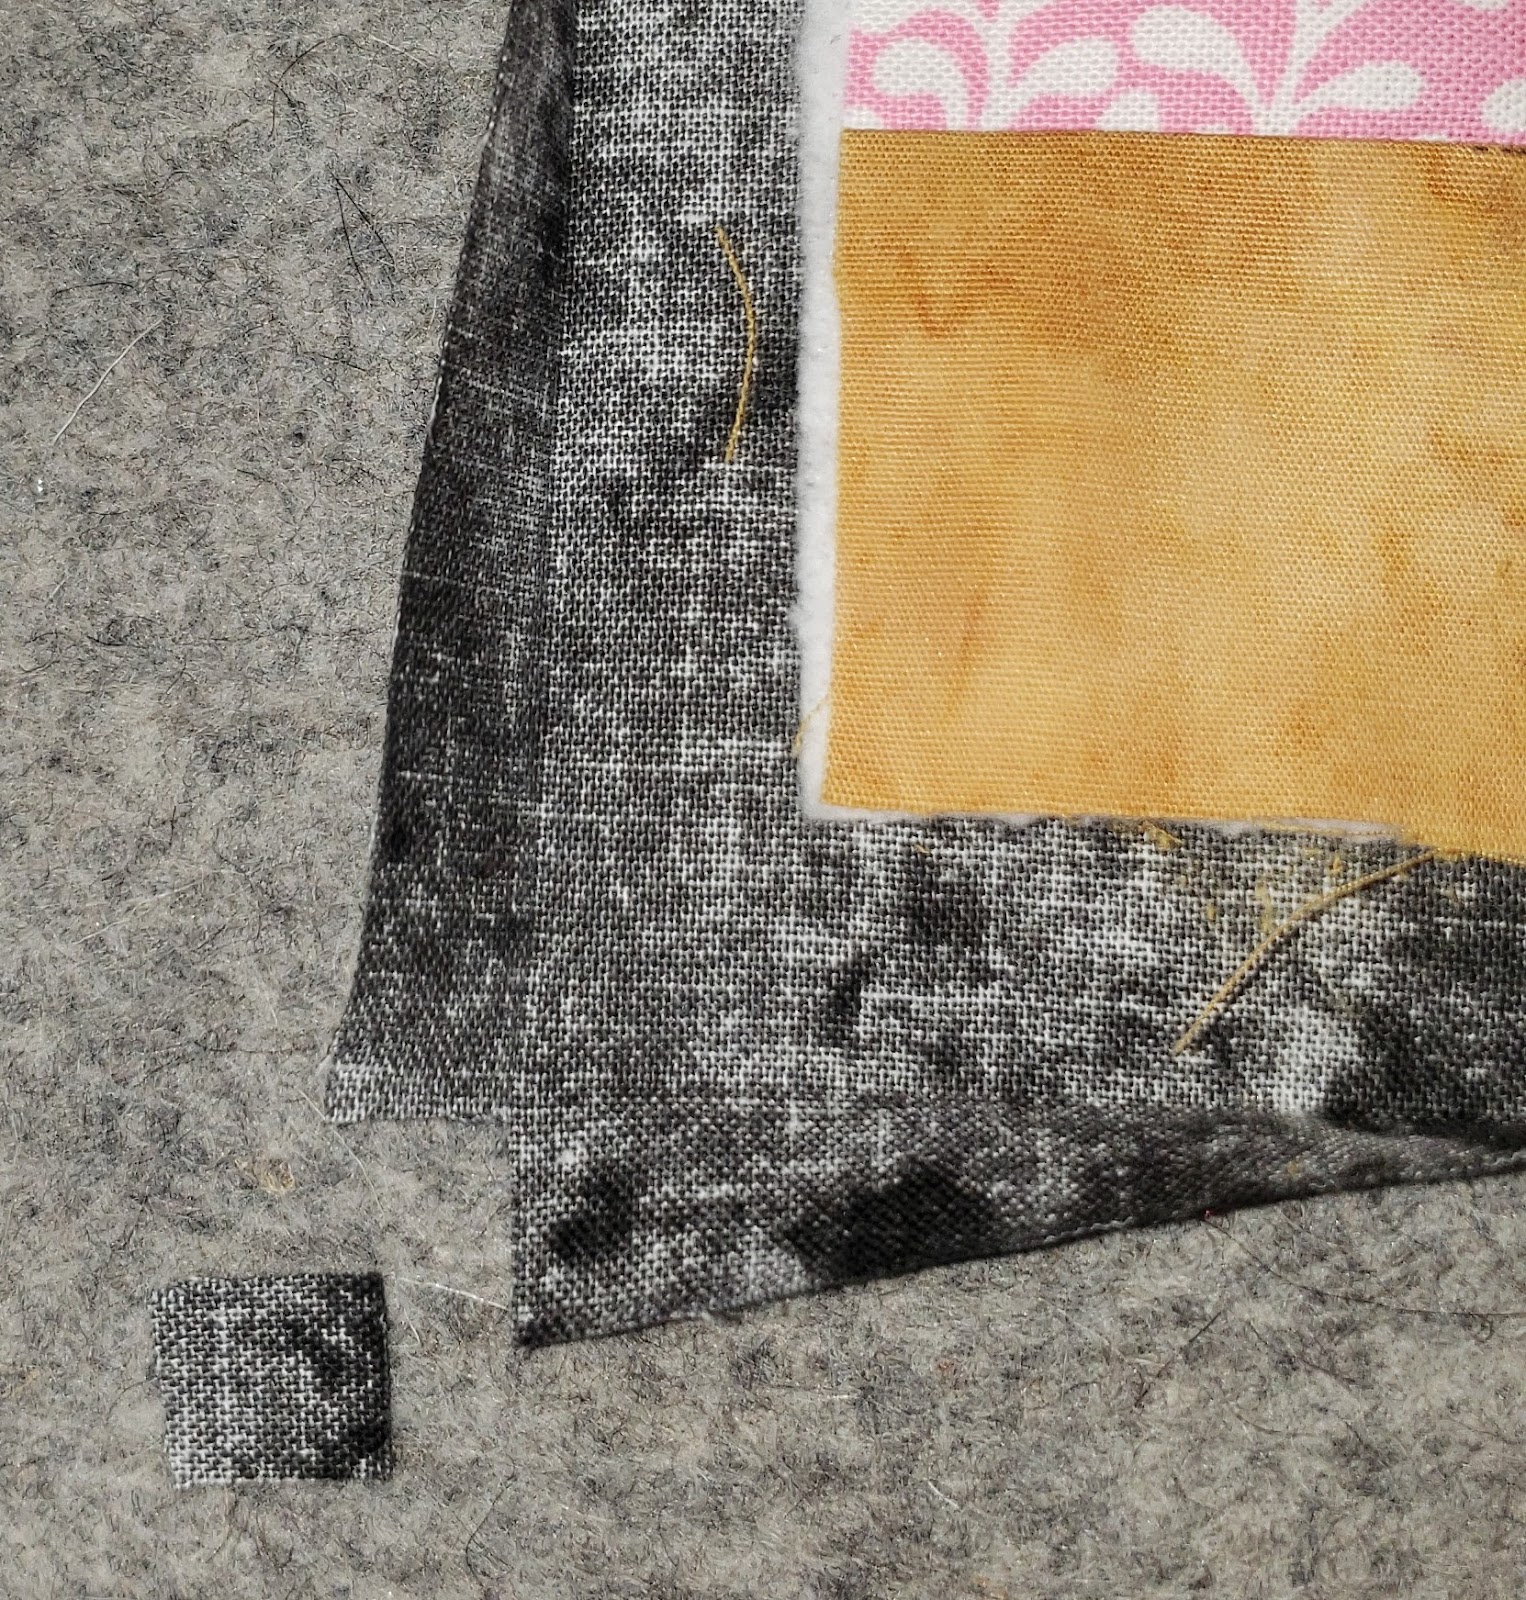
- In the corners of the back fabric you’ll see where the lines cross, trim the little corner out to reduce bulk.
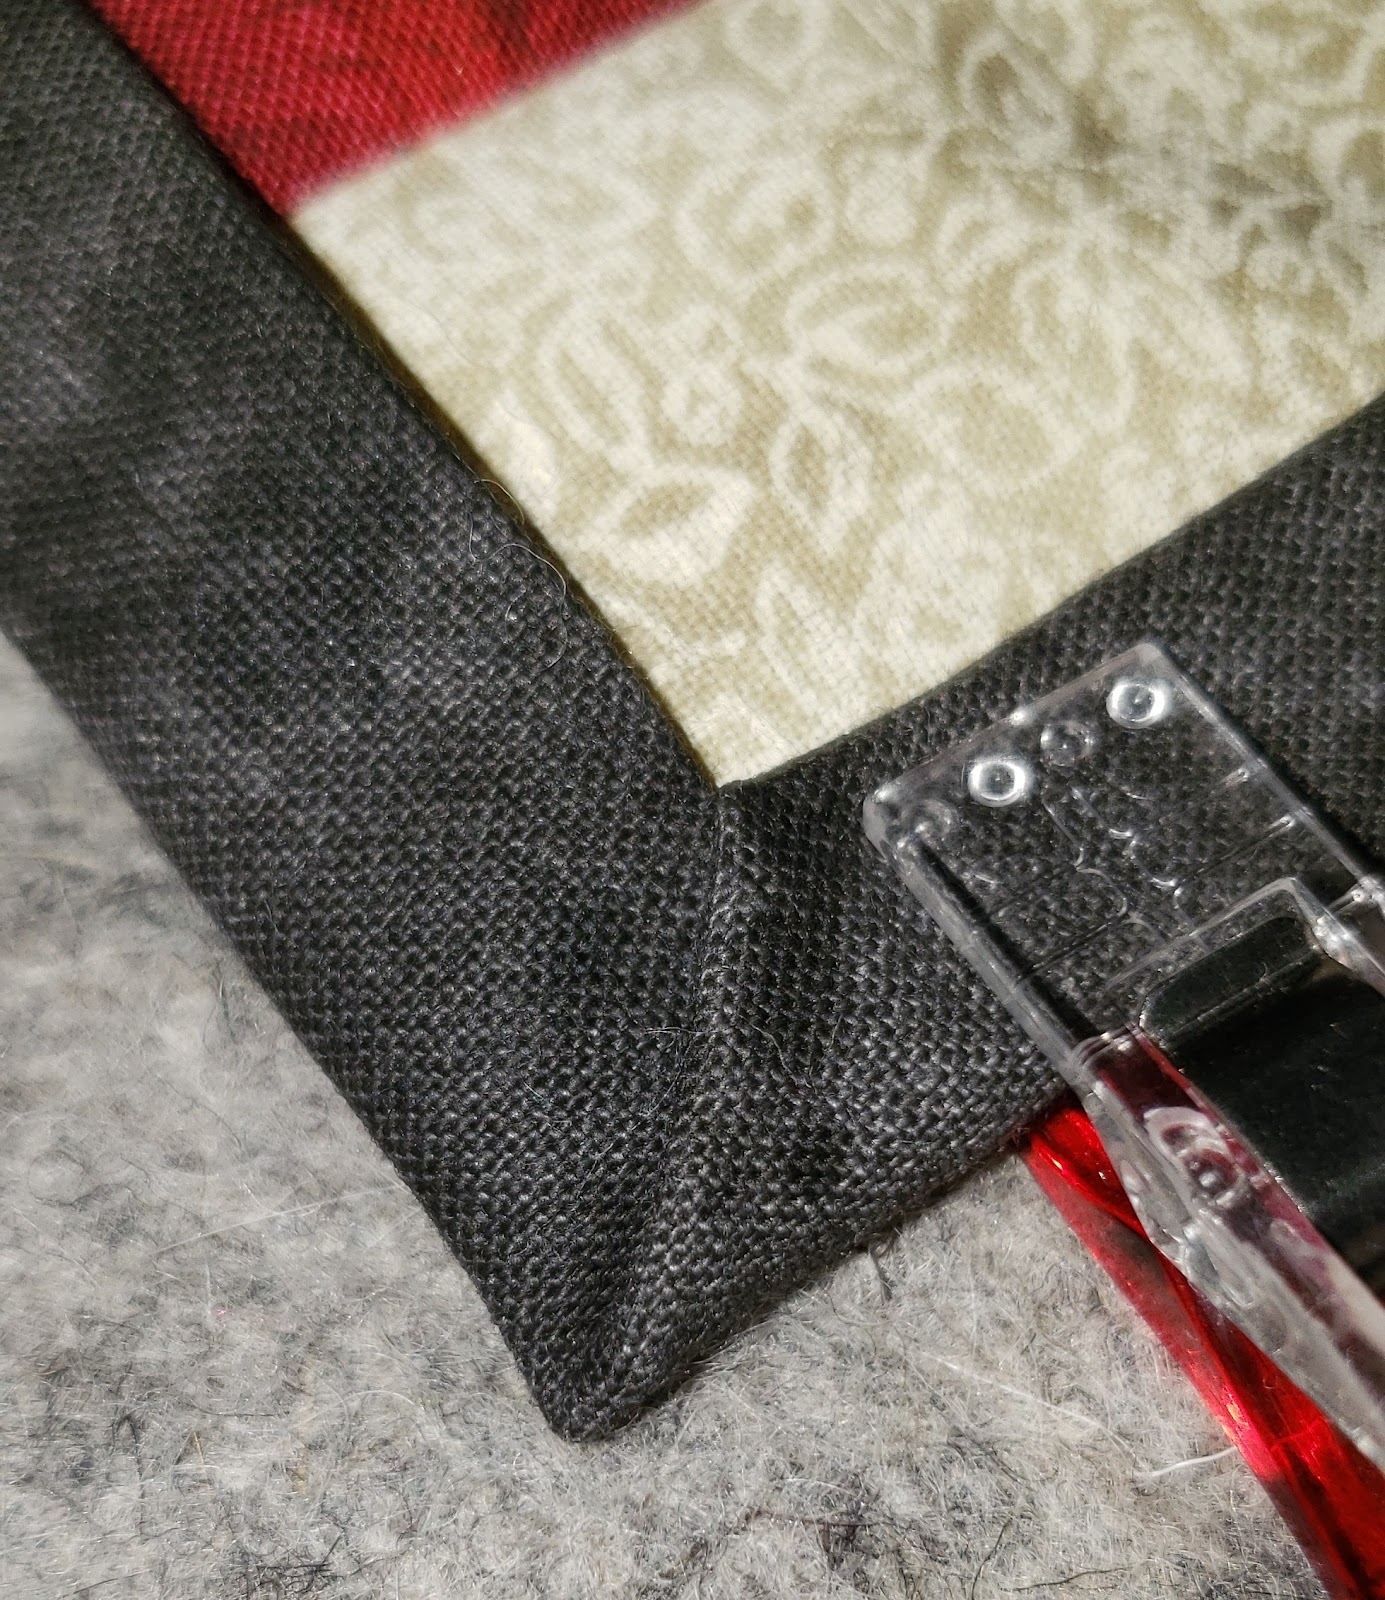
- Next Fold in half again towards top of quilt block, and pin or clip into place
- At corners, fold down to create a triangle at corner

- Continue working to next side, fold down the first 1/2 fold press

- Then fold over the top, and clip
- When you have three sides folded over and clipped, fold over the third corner, and then go to the last corner, and fold it over. Before clipping the last side, this makes the fold easier

- When all sides are clipped (or pinned) sew along the edge of the back fabric.
- Double stitch at the start/stop to lock stitches

You have now completed a simple one block Mug Rug.

Take the time to post your block or mug rug on the Facebook I look forward to seeing all your wonderful blocks! Make sure to post on the Facebook group!
