The Row-by-Row quilt will be divided into 6 different sets of instructions. Then the 7th instructions will be the assembly of the quilt top, and an alternate back option. (updated actually 6 weeks of rows, and then assembly).

To make my Row-by-Row quilt, I used the Island Batik Wonderous collection by Jerry Khiev, there are 20 different prints, and each was 1/2 yard. You could finish the quilt top with 20 different fat quarters or a variety of fabrics. I will be referencing the Item number of the Wonderous set.
The products featured in this post were given to me by Island Batik, Schmetz, Hobbs, & Aurifil,
You can also use fabric in your stash to create the blocks. If you are using fat quarters, your cutting lengths may be different, so you will need to cut more strips of fabric.
Fabric requirements
3 sets of two colors.
Need 7 1/2″ x WOF (one color of each set)
Need 5 1/2″ x WOF (other color of each set)
Note: If you choice to use Fat Quarters, you will need 15″ x 22″ (first color) and 11″ x 22 (second color)
Fabric Cutting
| Color | N | G | M | I | O | T |
| Item # | 3365 | 1802 | 1396 | 5001 | 5360 | 3005 |
| Row 1 | 2 – 2 1/2 strips WOF 1 – 2 1/2″ x 5″ | 2 – 2 1/2 strips WOF | ||||
| Row 5 | 2 – 2 1/2 strips WOF 1 – 2 1/2″” x 5″ | 2 – 2 1/2 strips WOF | ||||
| Row 10 | 2 – 2 1/2 strips WOF 1 – 2 1/2″” x 5″ | 2 – 2 1/2 strips WOF |
Piece N/M/O – cut the two strips WOF to measure 30″ x 2 1/2″ (leaving each about a 10″ piece)
Piece G/I/T – Cut one WOF strip to measure 30″ x 2 1/2″ (leaving about a 10″ piece)
Piece G/I/T – cut three WOF strip to measure 10″ x 2 1/2″, and then cut two 5″ x 2 1/2″ strips
NOTE: Your 10″ pieces left from cutting the 30″ strip may be longer than 10″, so when you cut the extra 3 pieces o 10″ x 2 1/2″ they may be shorter than the left over pieces, you can cut these pieces to be 10″ as well, or just sew them together, leaving the extra to trim off (This is what I did).
Assembly
I did assemble the rows in different order than what was on the quilt top at the end.
Row 10 – Pieces G & N
When you choice your fabrics, make sure to decide which color pattern you want for your first row, as you will need a total off 11 pieces of that set, and only 10 pieces of the other set. I used the dark/light/dark combination for the first left column, so that set is Layout A.
Step 1 – Layout A
- Layout the two Piece N and Piece G that are 30″ long in the following layout
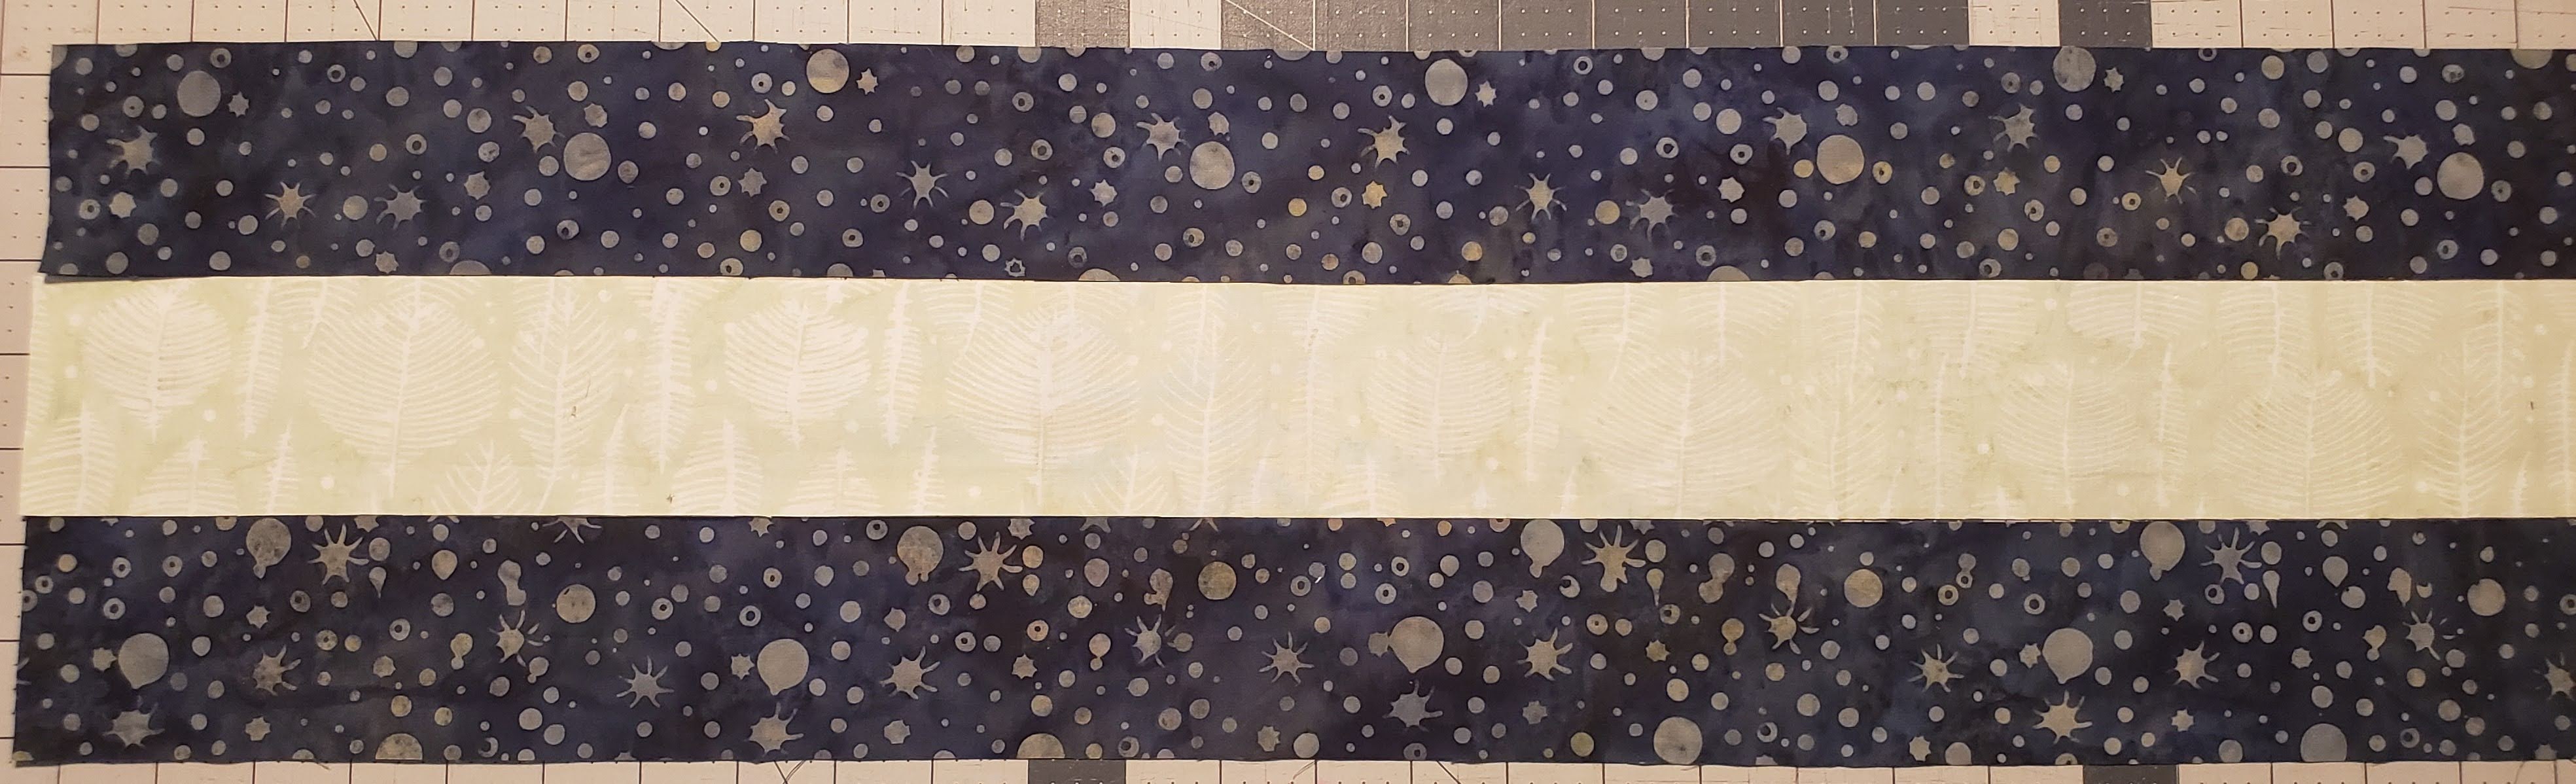
Sew the pieces together, make sure to sew opposite directions when sewing strips of fabric together, this helps keep the pieces straight.

Press the seams towards the darker fabric. This is important so that when you sew the strips together, they will nest together, to make matching easier and more accurate.
Step 2 – Cut strips
- Lay the strips and trim one side to make sure it is straight
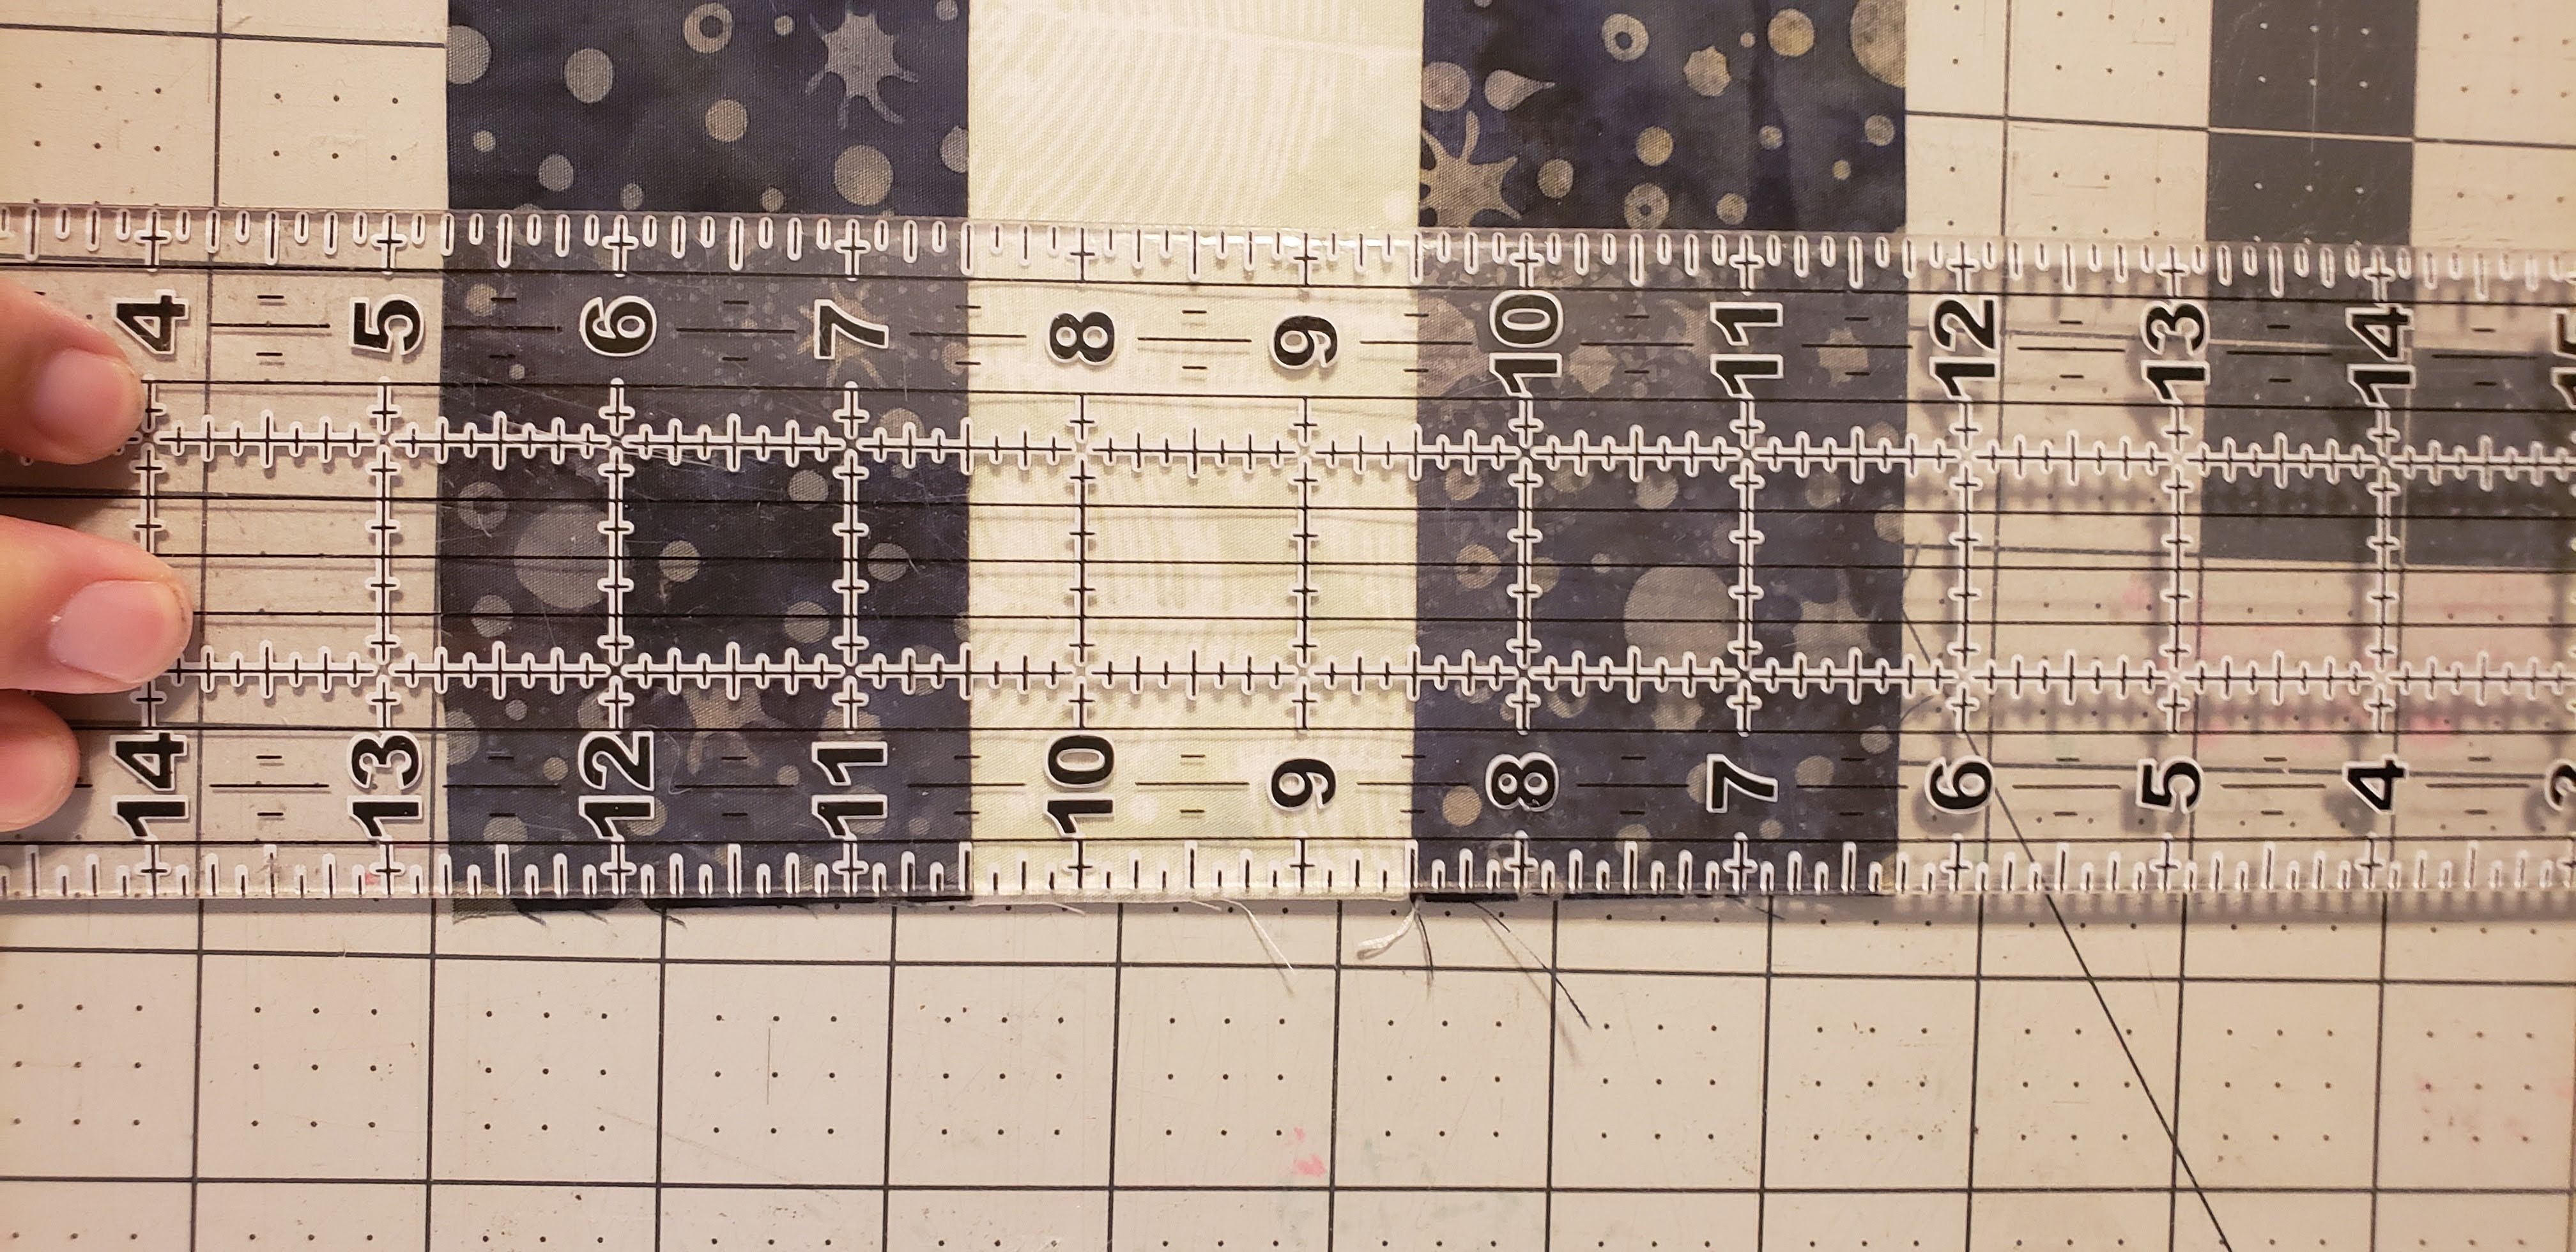
Cut strips of 2 1/2″ x 6 1/2″ (three color pieces strips)

- You will create a total of 11 strips (you may have a little extra fabric at the end)
Step 3 – Layout B
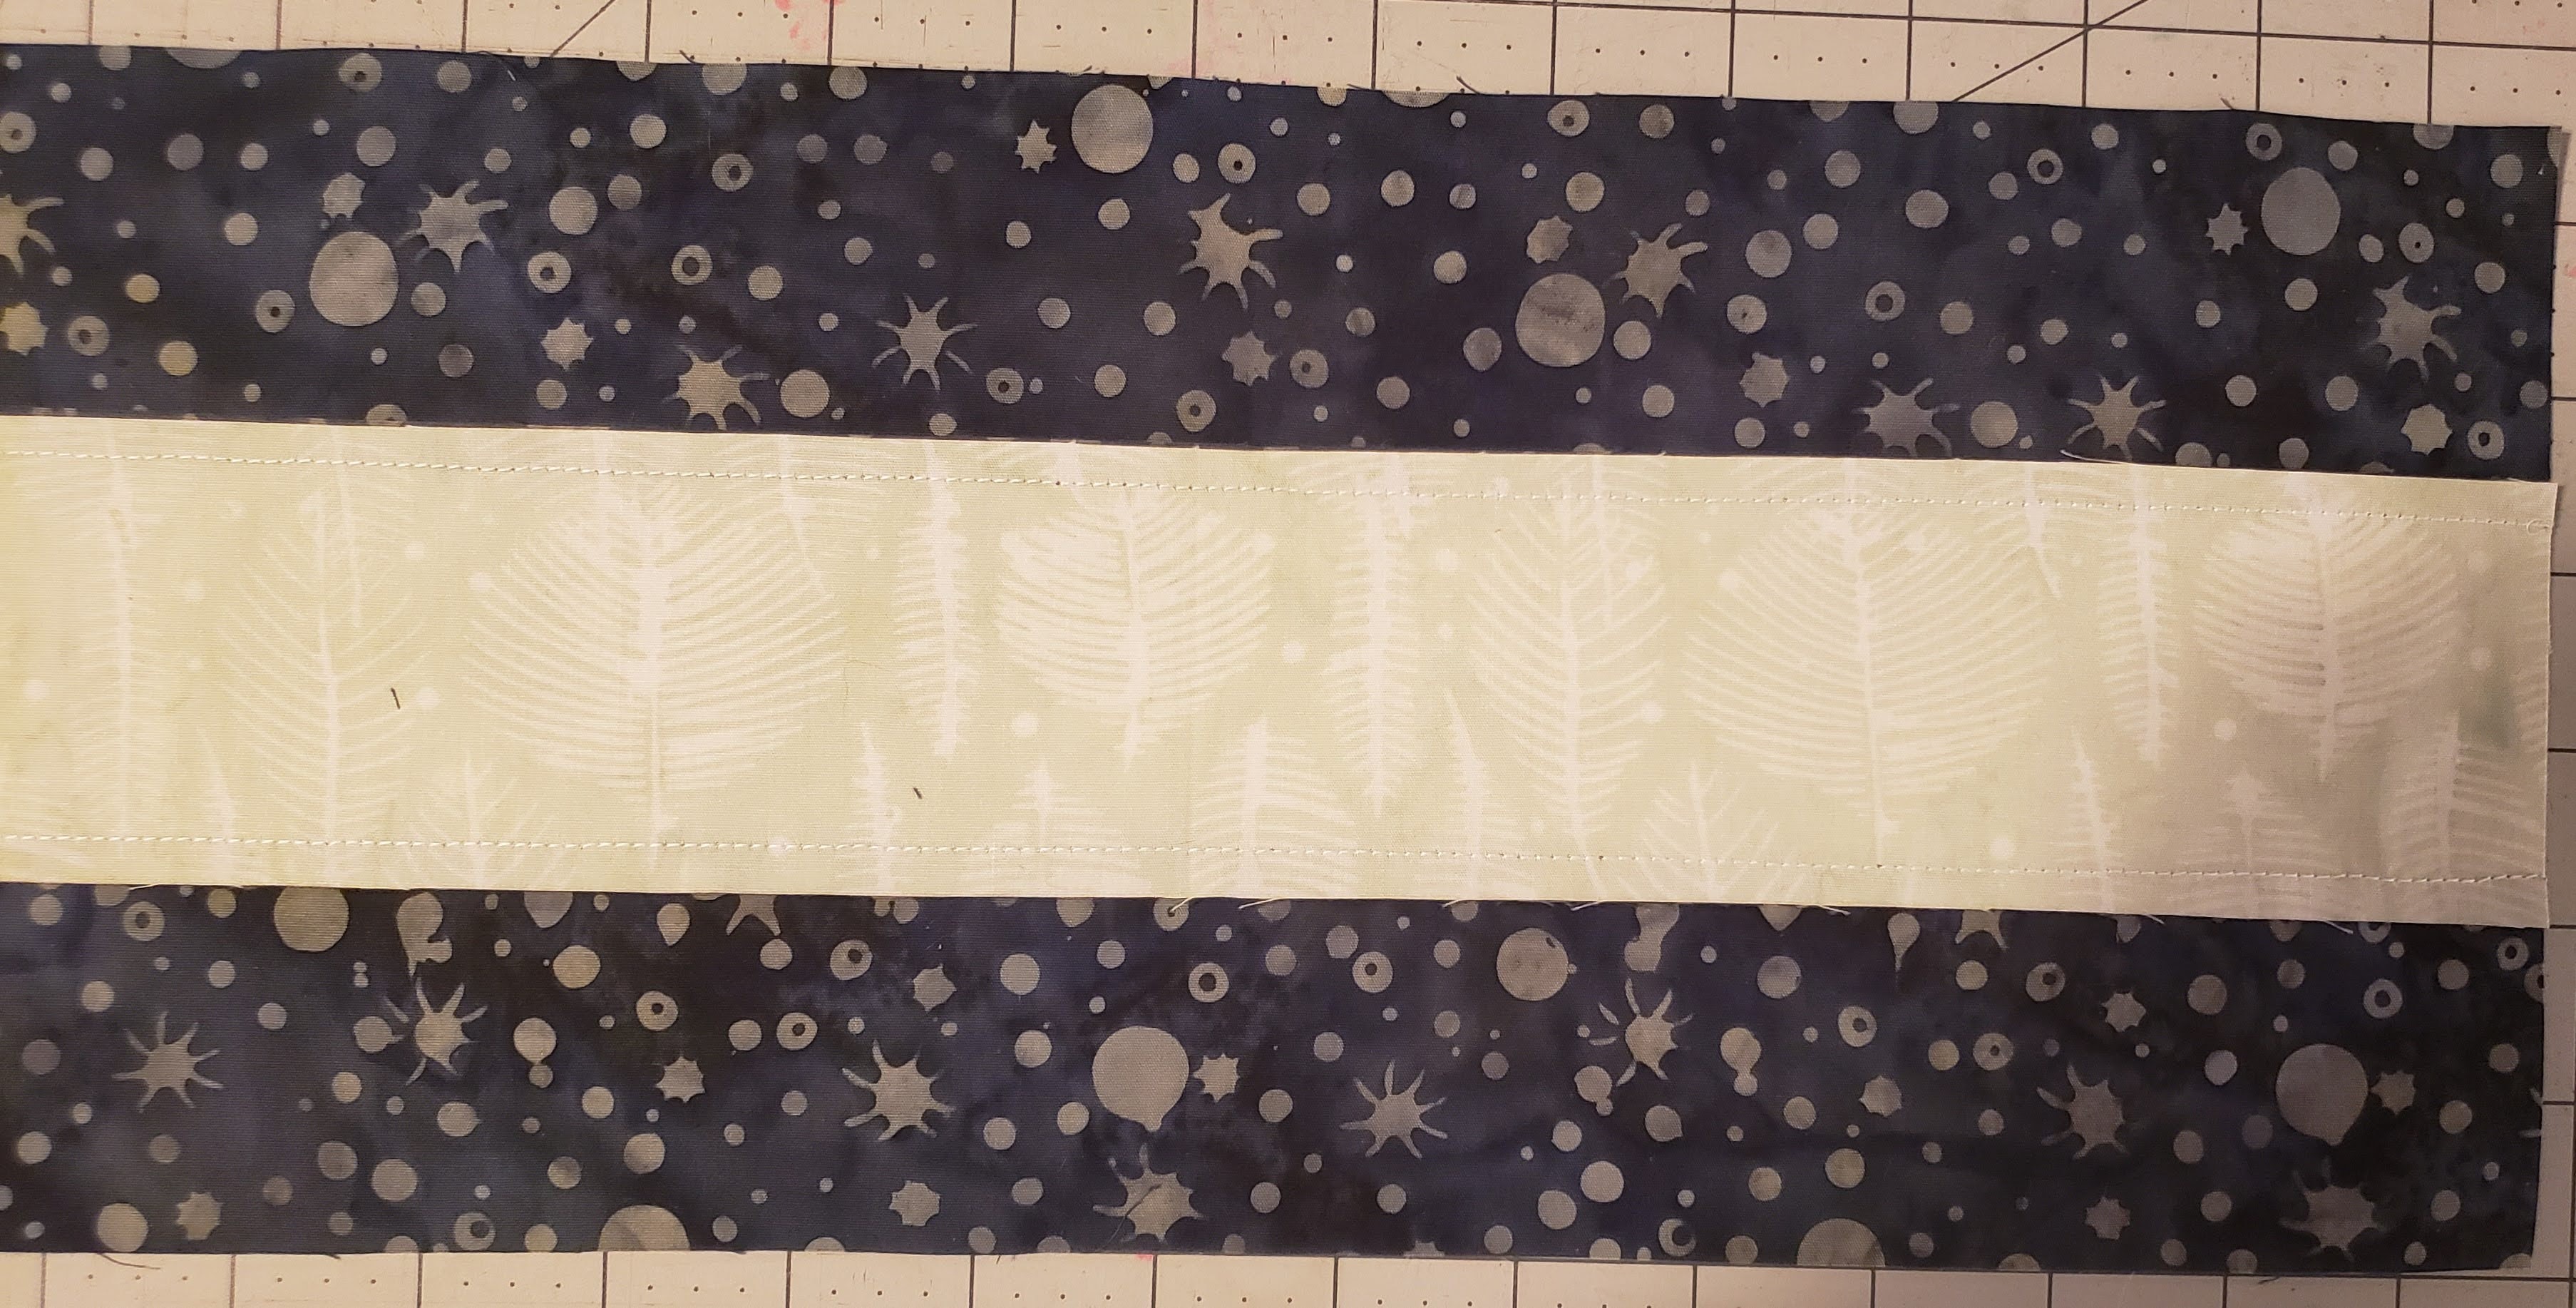
- Using two 10″ pieces of Piece G and one 10″ Piece N, sew together in the following layout

- Sew the pieces together
- Press the Seams towards the dark fabric (This should be the opposite of the first set of strips
- Repeat the process using the other two 10″ pieces of Piece G and one 10″ piece N, sew together and press the seams towards the dark fabric

Repeat the process using the 5″ pieces of Piece G and one 5″ piece N, sew together and press the seams towards the dark fabric

Step 4 – Cut Strips
- Lay the strips and trim one side to make sure it is straight
- Cut strips of 2 1/2″ x 6 1/2″ (the three pieces strips) from each of the three sets of strips (as you will have different lengths, you will have extra at the end. Set those aside

You will create a total of 10 strips (you may have a little extra)

Step 5 – Layout
There are tow options for sewing the pieces together
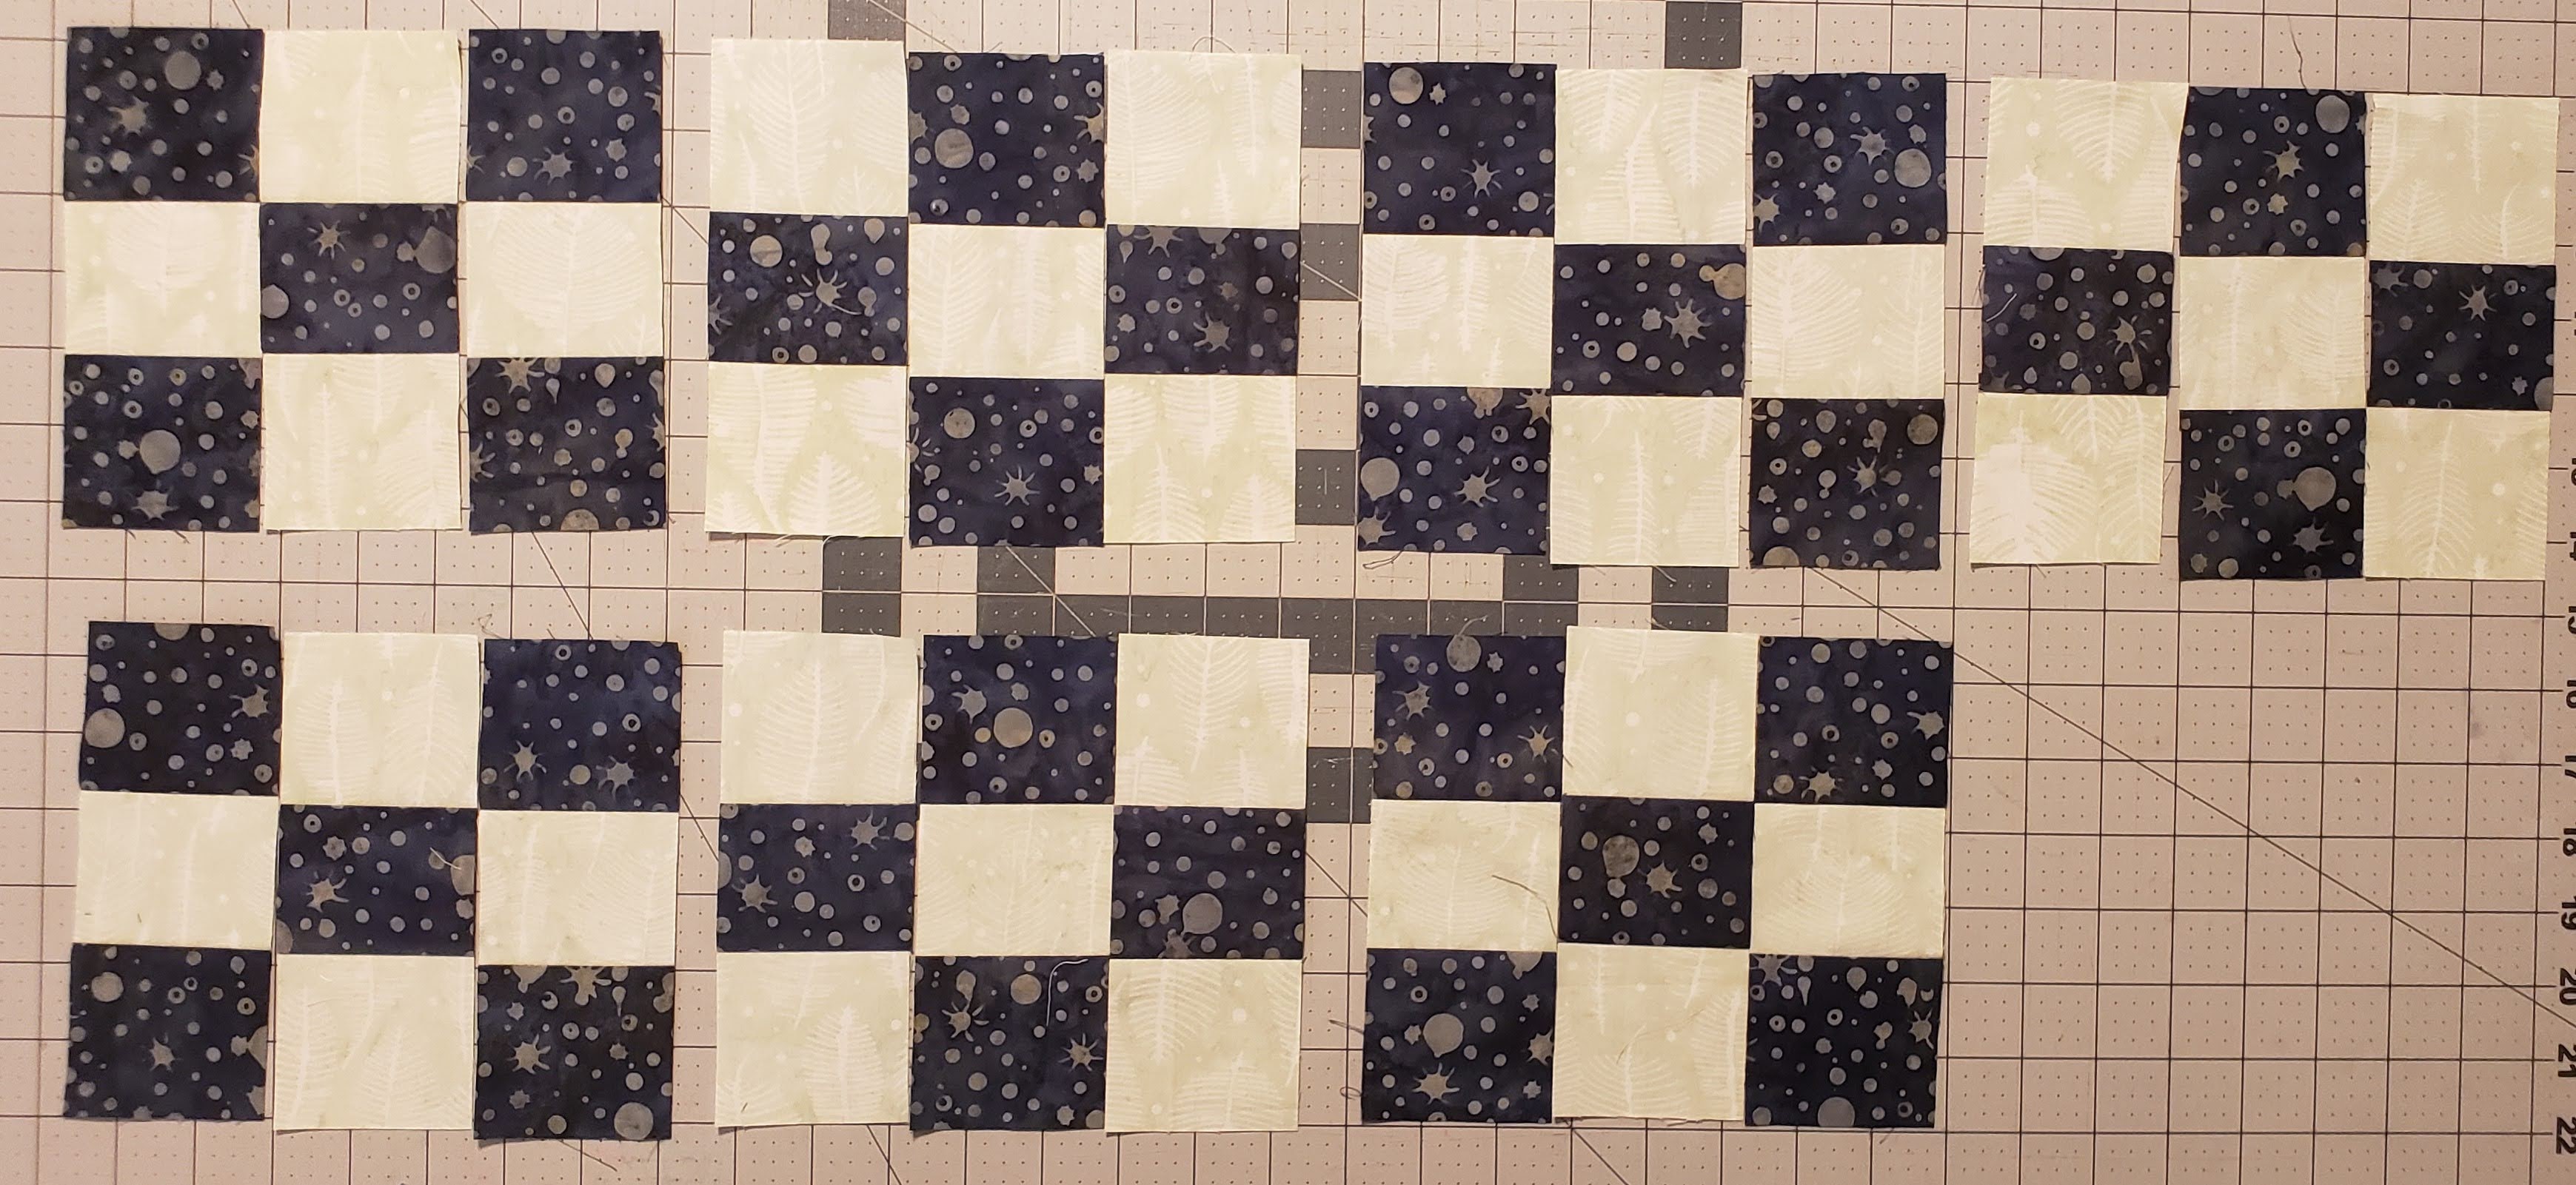
- Option 1
- Create two different sets of 9 patch – Alternating between the two sets of strips, layout the pieces. Sew them in groups of three to create a nine-patch block, and then sew the alternating 9-patch block together. You will have 4 of one 9-patch and 3 of the alternating 9-patch. Sew the row together. Each set will measure 6 1/2″ x 6 1/2″

Option 2
- You can lay the row out and sew all together, just make sure that you alternate between going from the top to the bottom, then bottom to the top as you go across the row. This will help keep the strip straight and not curve.
Press your seams.
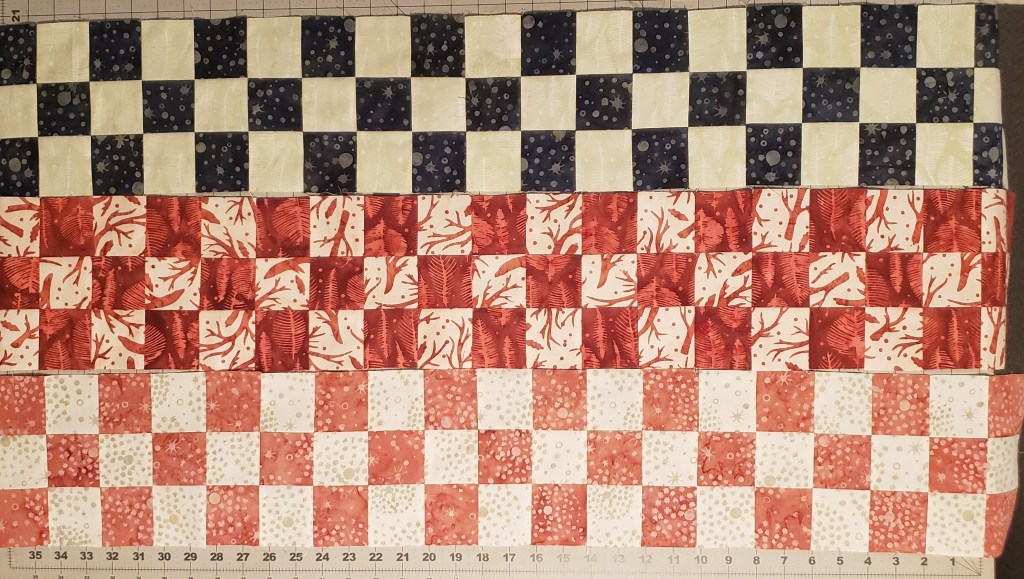
You have now completed Row 1 – 9-Patch blocks.

Row 5 – 9 Patch
- Using pieces M & I
- Repeat Steps 1 to 5 for Row 1 to create the second row of 9-patch blocks.

Row 1 – 9 Patch
- Using Pieces O & T
- Repeat Steps 1 to 5 for Row 1, to create the third row of 9-patch blocks.

You have now completed the first three of the rows for the Row-by-Row quilt top.
Come back next week for the another row of blocks.
I look forward to seeing all your wonderful 9-patch rows! Make sure to post on the Facebook group!
Thank you to Island Batik, Hobbs Batting Aurifil Thread and Schmetz for providing me with the materials to make this quilt.


You are pretty awesome to be providing instructions on how to make your quilt! Way to go!
LikeLiked by 1 person