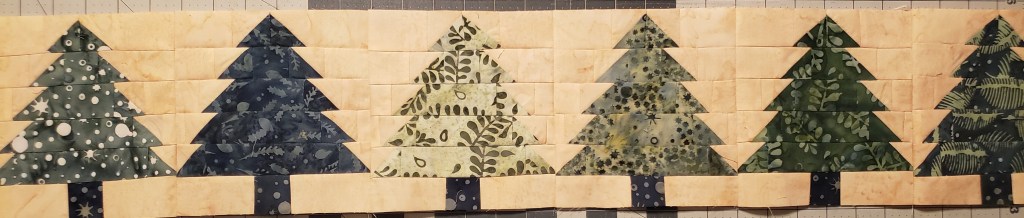
The Row-by-Row quilt will be divided into 6 different sets of instructions, this is the Fifth week, the Row of Trees.
To make my Row-by-Row quilt, I used the Island Batik Wonderous collection by Jerry Khiev, there are 20 different prints, and each was 1/2 yard. You could finish the quilt top with 20 different fat quarters or a variety of fabrics. I will be referencing the Item number of the Wonderous set.
The products featured in this post were given to me by Island Batik, Schmetz, Hobbs, & Aurifil,
You can also use fabric in your stash to create the blocks. If you are using fat quarters, your cutting lengths may be different, so you will need to cut more strips of fabric.
Fabric requirements for this row
Tree – seven colors 10″ x 10″ for each tree
Tree stump – 1 1/2″ x 12″ or 3″ x 6″
Background – 20″ x WOF
Here are the Island Batik fabric colors I used in my quilt
Color A – 1560
Color B – 2636
Color C – 5531
Color D – 4531
Color E – 2656
Color F – 3609
Color K – 6562
Color J – 4560 (tree stumps)
Background- peach
Fabric Cutting
Cut the Tree base fabric into seven 1 1/2″ x 1 1/2″ squares, one will be used in each of the seven trees.
There are seven trees in the row, and you will need to cut the “Tree fabric” for each of the seven fabrics for seven sets.
| Fabric | Cut Size | Pieces | |
| Tree | 2″ x 2″ | 1 | HST |
| 2 1/2″ x 2 1/2″ | 2 | HST | |
| 1 1/2″ x 1 1/2″ | 2 | Row 2 | |
| 1 1/2 ” x 2 1/2″ | 2 | Row 3 | |
| 1 1/2″ x 3 1/2″ | 2 | Row 4 | |
| 1 1/2″ x 4 1/2″ | 2 | Row 5 |
You will need to cut a total of seven sets of the following pieces, one for each tree.
| Cut for | Total pieces | |||
| Fabric | Cut Size | Each tree | needed | |
| Background | 2″ x 2″ | 1 | HST | 7 |
| 2 1/2″ x 2 1/2″ | 2 | HST | 14 | |
| 1 1/2″ x 3″ | 2 | Row 6 | 14 | |
| 1 1/2″ x 2 1/2″ | 2 | Row 1 | 14 | |
| 1 1/2″ x 2″ | 2 | Row 2 | 14 | |
| 1 1/2″ x 1 1/2″ | 2 | Row 3 | 14 | |
| 1 1/2″ x 1″ | 2 | Row4 | 14 |
Place one of the tree bases, and one set of the background fabric, and a set of each color of trees, to create seven sets of fabric needed for each tree.
Assembly
You will create seven identical trees (just different fabrics) for the row. Here are the steps for one tree.
Step 1 – creating 1 1/2″ x 1 1/2″ Half Square Triangles (HST)
Using one 2 1/2″ x 2 1/2″ pieces of tree fabric and one of the Background, matching right sides together.
You will then stitch 1/4″ seam allowance around the squares
You will then cut diagonally in half both directions.
Best practice is to square up your HST to 1 1/2″ x 1 1/2″ each.
This will create 4 HST, you will need to use the other two pieces of 2 1/2″ x 2 1/2″ to create 4 more HST.
For examples, check out my 4-at-a-time HST blog
Step 2 – creating 2 more 1 1/2″ x 1 1/2″ HST
Using the 2″ x 2″ pieces of the tree fabric and the background fabric, matching right sides together.
Draw a diagonal line on the back side of the lighter fabric.
Stitch 1/4″ along both sides of the drawn line.
Cut down the drawn line, to create 2 more HST.
For examples, check out my 2-at-a-time HST blog.
Square up to 1 1/2″ x 1 1/2″ HST.
You now have 10 HST.
Step 3 – Layout
Layout your pieces in the following layout:
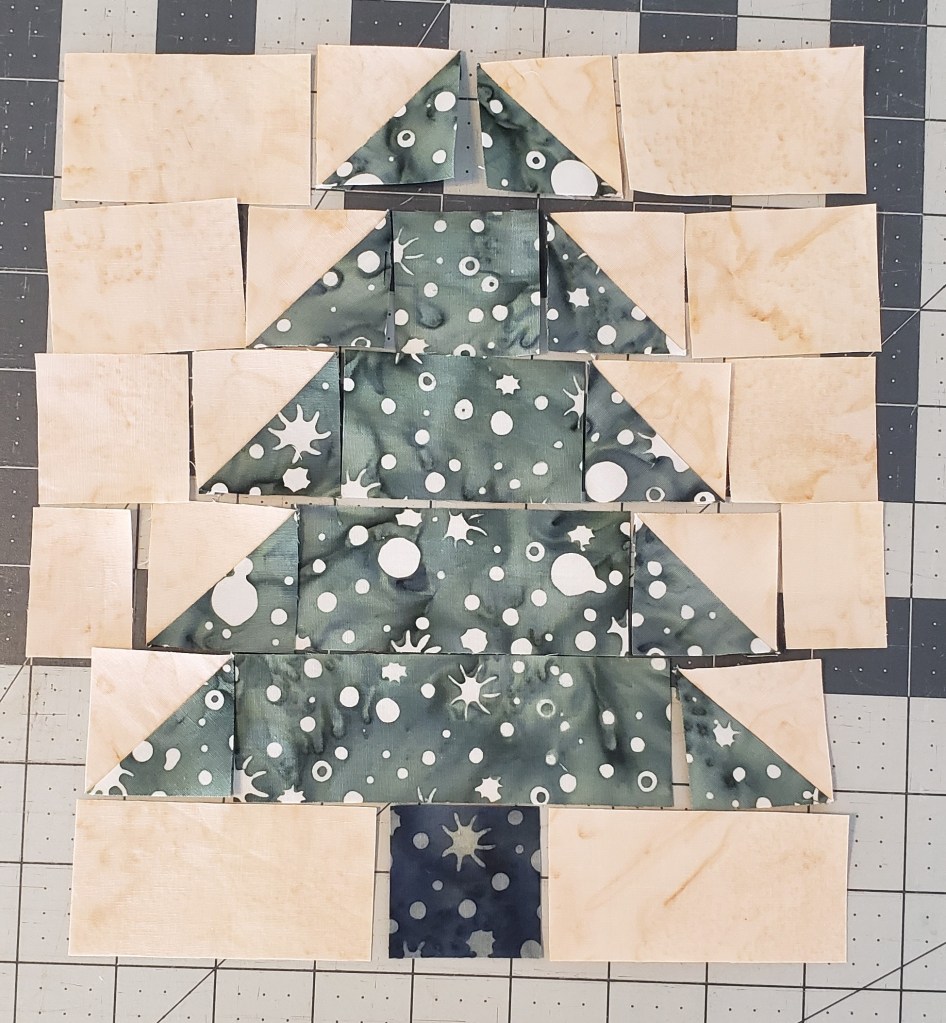
Piece layout by size and description
| All 1 1/2″ pieces | |||||
| A | B | C | D | E | |
| Row 1 | 2 1/2″ B | HST | HST | 2 1/2″ B | |
| Row 2 | 2″ B | HST | 1 1/2″ T | HST | 2″ B |
| Row 3 | 1 1/2″ B | HST | 2 1/2″ T | HST | 1 1/2″ B |
| Row 4 | 1″ B | HST | 3 1/2″ T | HST | 1″ B |
| Row 5 | HST | 4 1/2″ T | HST | ||
| Row 6 | 3″ B | 1 1/2″ S | 3″ B | ||
| Fabric Legend . | |||||
| Background = B | |||||
| Tree = T | |||||
| Stump = S | |||||
| HST – Half Square Triangle pieces |
You will need to sew the pieces together by the row. Each row has different size pieces, so you will not be nesting any pieces together.
Best Practice: when sewing rows together, best practice is to sew one from the left to right, then right to left, going back and forth. This will help keep the block from twisting and being more curved.
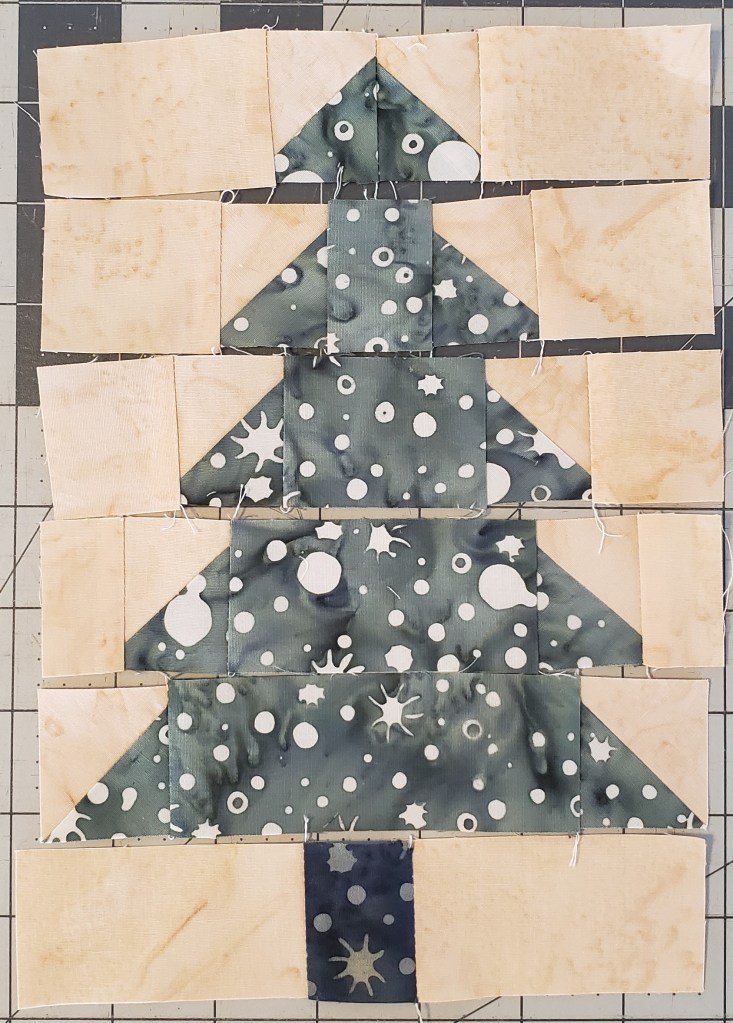
Make sure to press you seams for each row. I pressed towards the darker fabric.
Then sew the rows together.

Press your seams.
Best Practice, to look at how your rows will nest together. First block press down, second block press up, and continue as you go across. This will help with nesting the seams together as you sew the row together.
Here is the back of one Tree, and how I pressed the seams.

Step 4 – square up
Each tree block will measure 6 1/2″ x 6 1/2″ before attaching together. Square-up each tree.
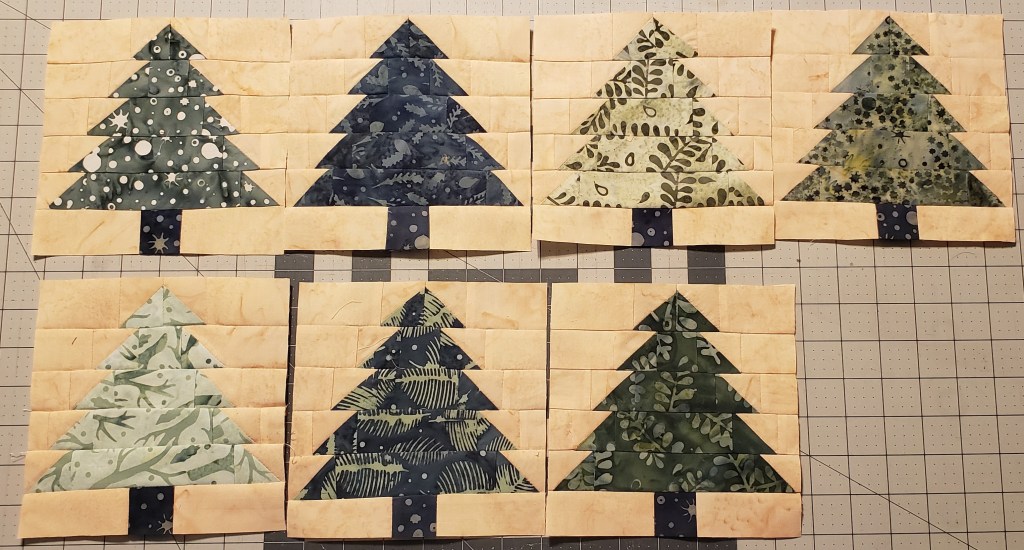
Step 5 – Repeat
Repeat steps 1 to 4 to create each Tree. You can do the same steps for all seven at one time, or create one at a time.
I created the first Tree, and then did all the HST for the next 6 trees at the same time. Then it was just laying out the trees and sewing the pieces together.
Here are all 7 of my Trees.
Step 6 – Assembling row
Layout your Tree blocks in the order you would like them to go. Sew the rows together.

This is where pressing your seams up or down will help with the assembly.
You have now completed Row 11, Trees for the Row-By-Row Challenge.
Come back next week for the another row of blocks.
I look forward to seeing all your wonderful Tree rows! Make sure to post on the Facebook group!
Thank you to Island Batik, Hobbs Batting Aurifil Thread and Schmetz for providing me with the materials to make this quilt.


#islandbatikambassador #islandbatik #iloveislandbatik #hobbsbatting #aurifil #aurifilthread #juki #Schmetz
