A few years ago (2014) I made a quilt for my husband, and he loved it. It was one of the first quilts that I had made. Quilted with straight lines from top to bottom of quilt. (Didn’t really take pictures back then).
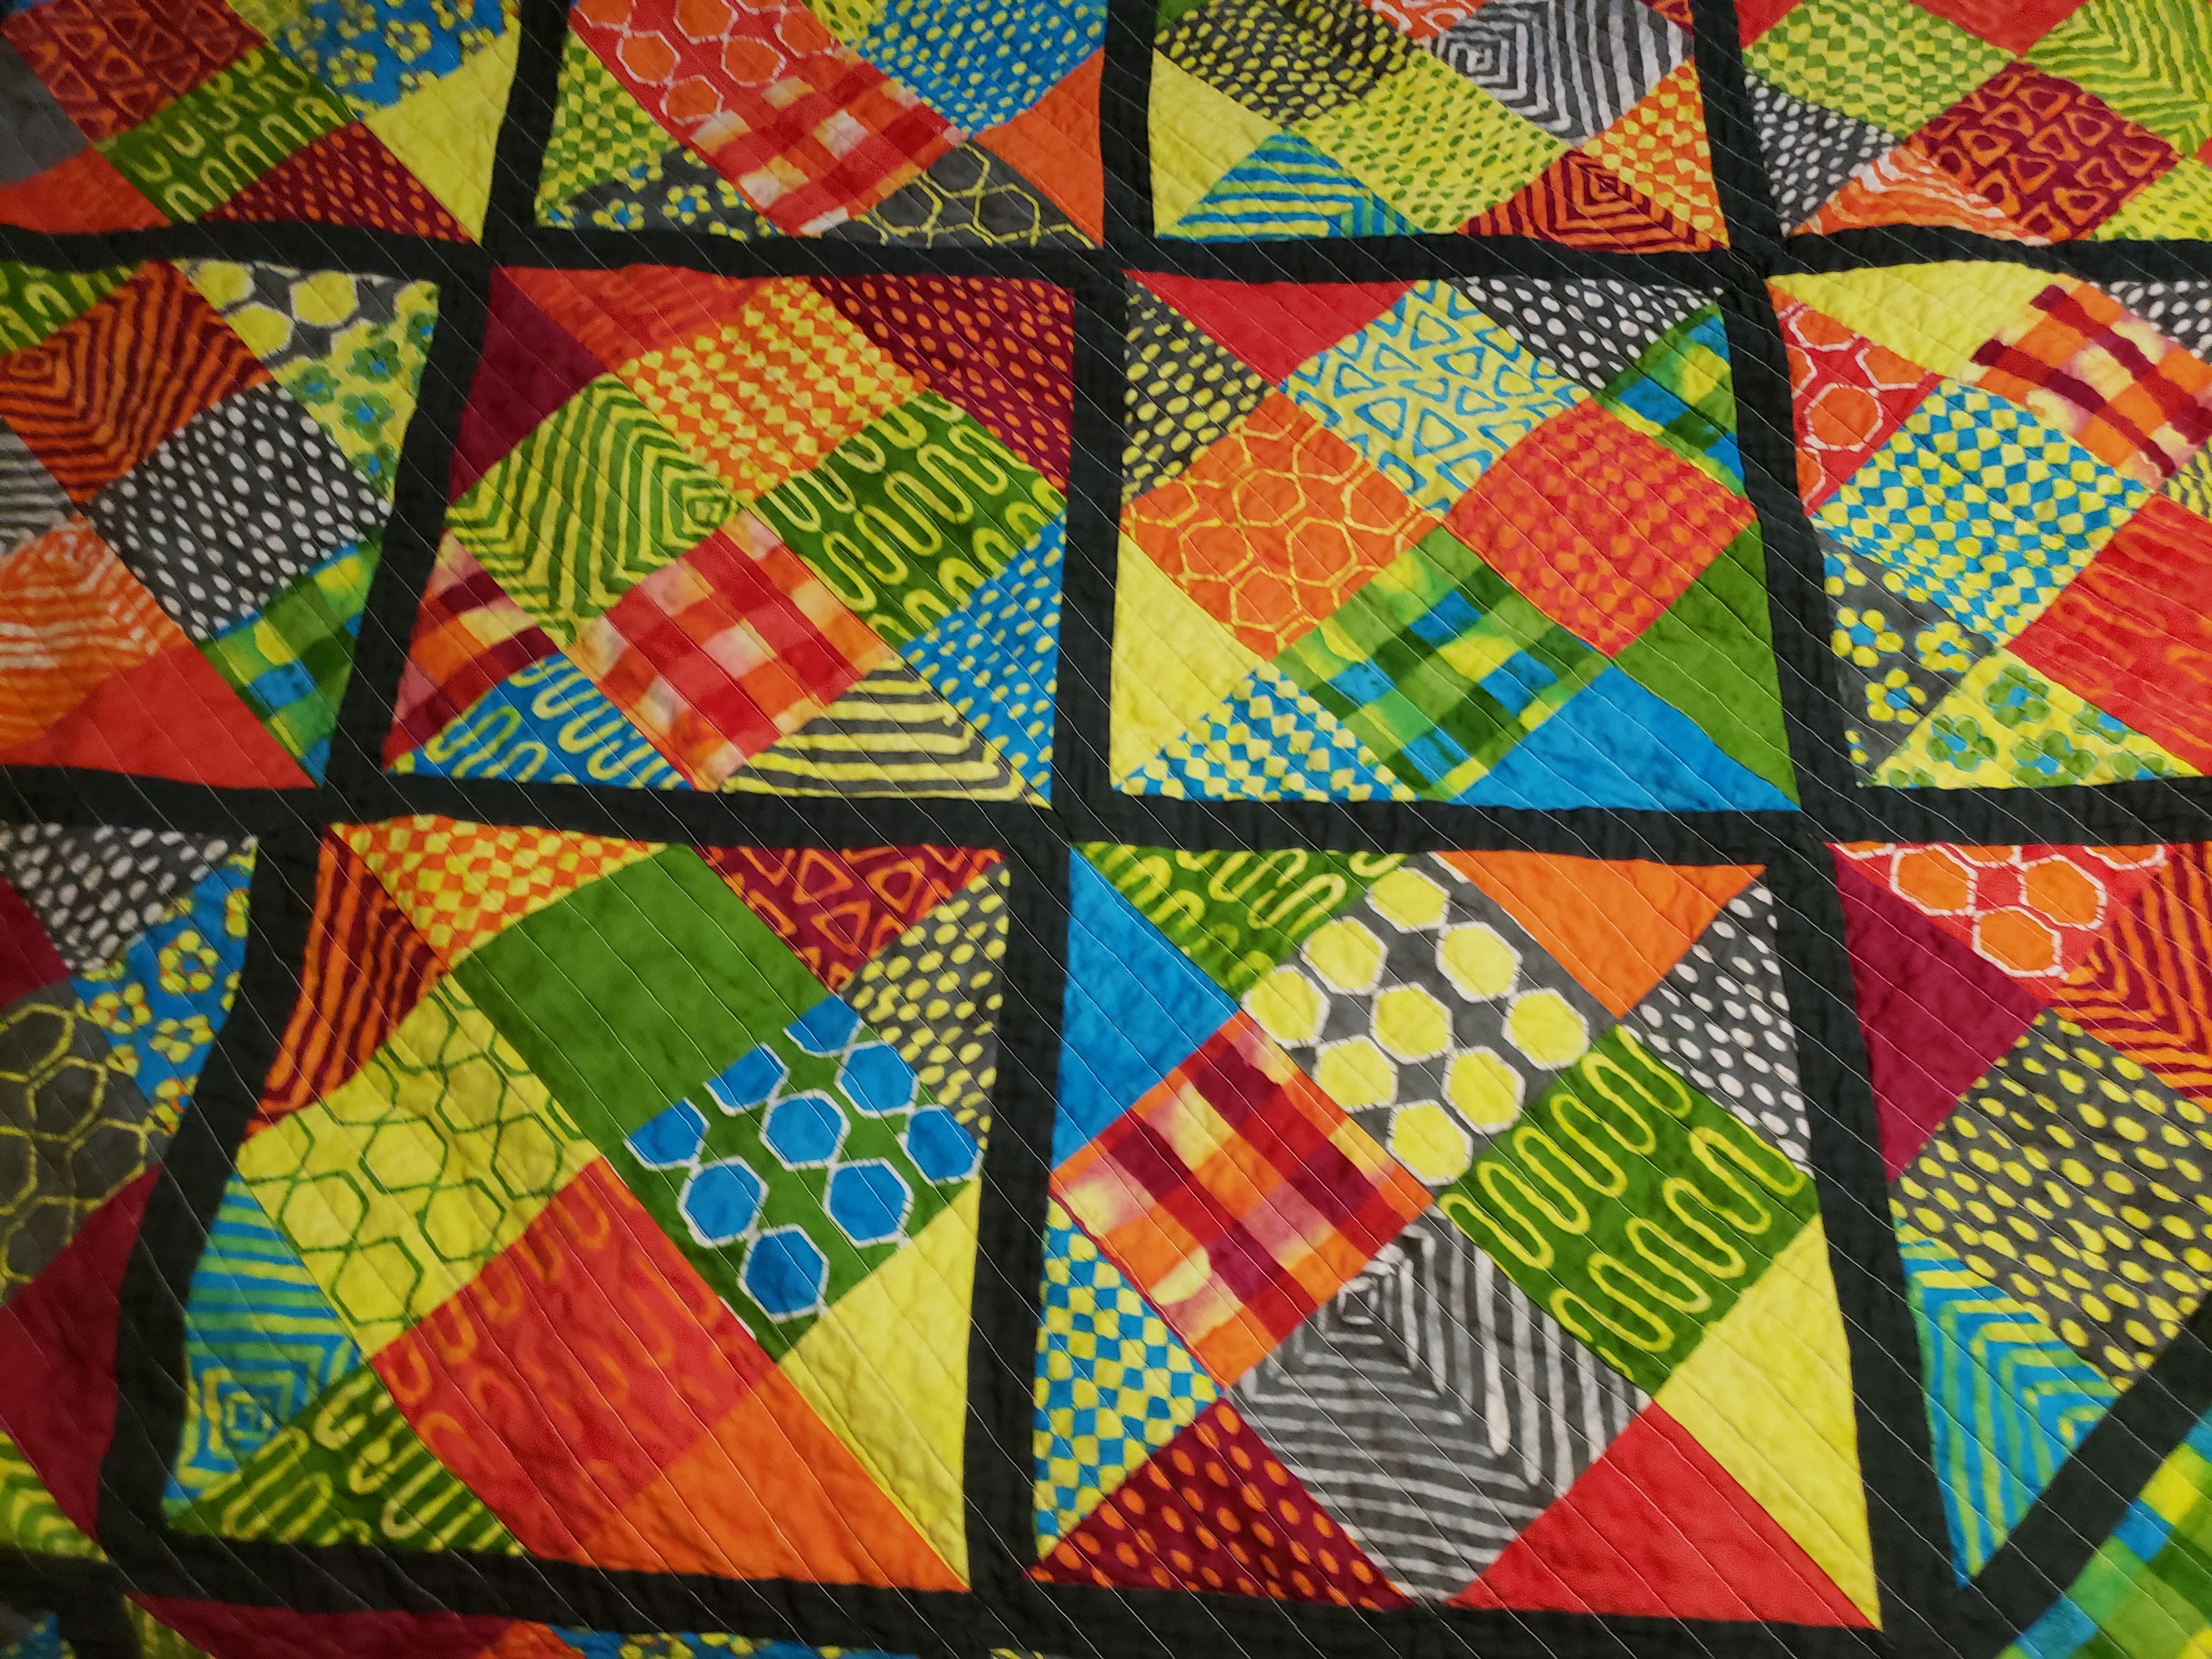
Over a year ago, he got a puppy, Hollie, a Rottweiler/Pit Bull mix. She was about 10 weeks old when we adopted her from the local shelter. When my husband would go to work, she would get stressed. She would eat big holes into that quilt (and other blankets). By the time my husband realized it, it was too late to fix. He just used it until, there were more holes than quilt left.

Since, he is no longer can work. He is home all the time. She has stopped stressing out. We feel that a new quilt should be safe. At least we hope it will be safe. I offered him some of the quilts that I made. But he wants something that is longer than it is wide.
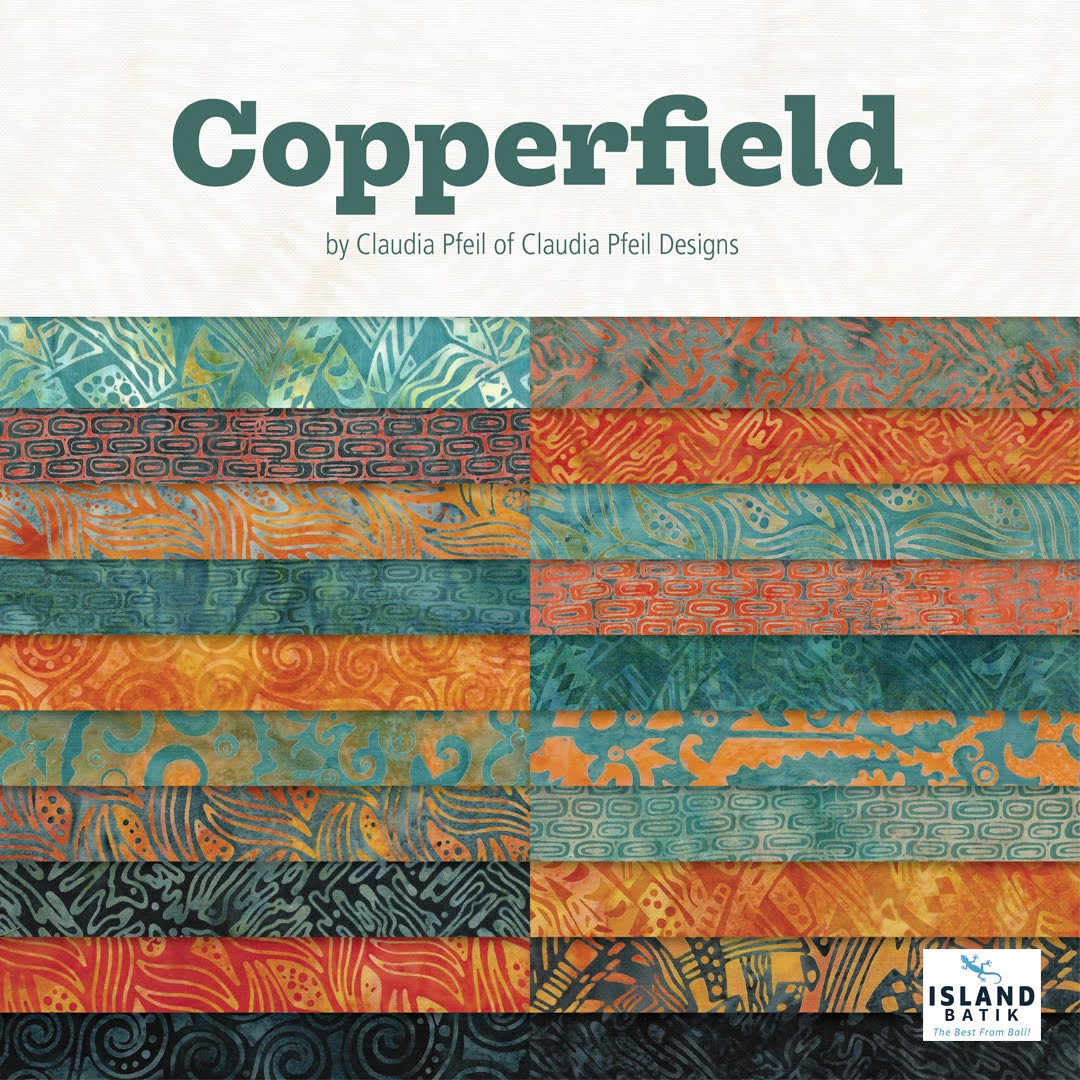
A couple years ago, I received from Island Batik a package of 2 1/2″ strips of Copperfield, by Claudia Pfeil Designs. I received a package of 2 1/2″ strips. I also got 2 yards of a dark and light corresponding fabric. This fabric was given to me free as my role as an Island Batik Ambassador. My husband said it reminds him of the fall, with the colors.
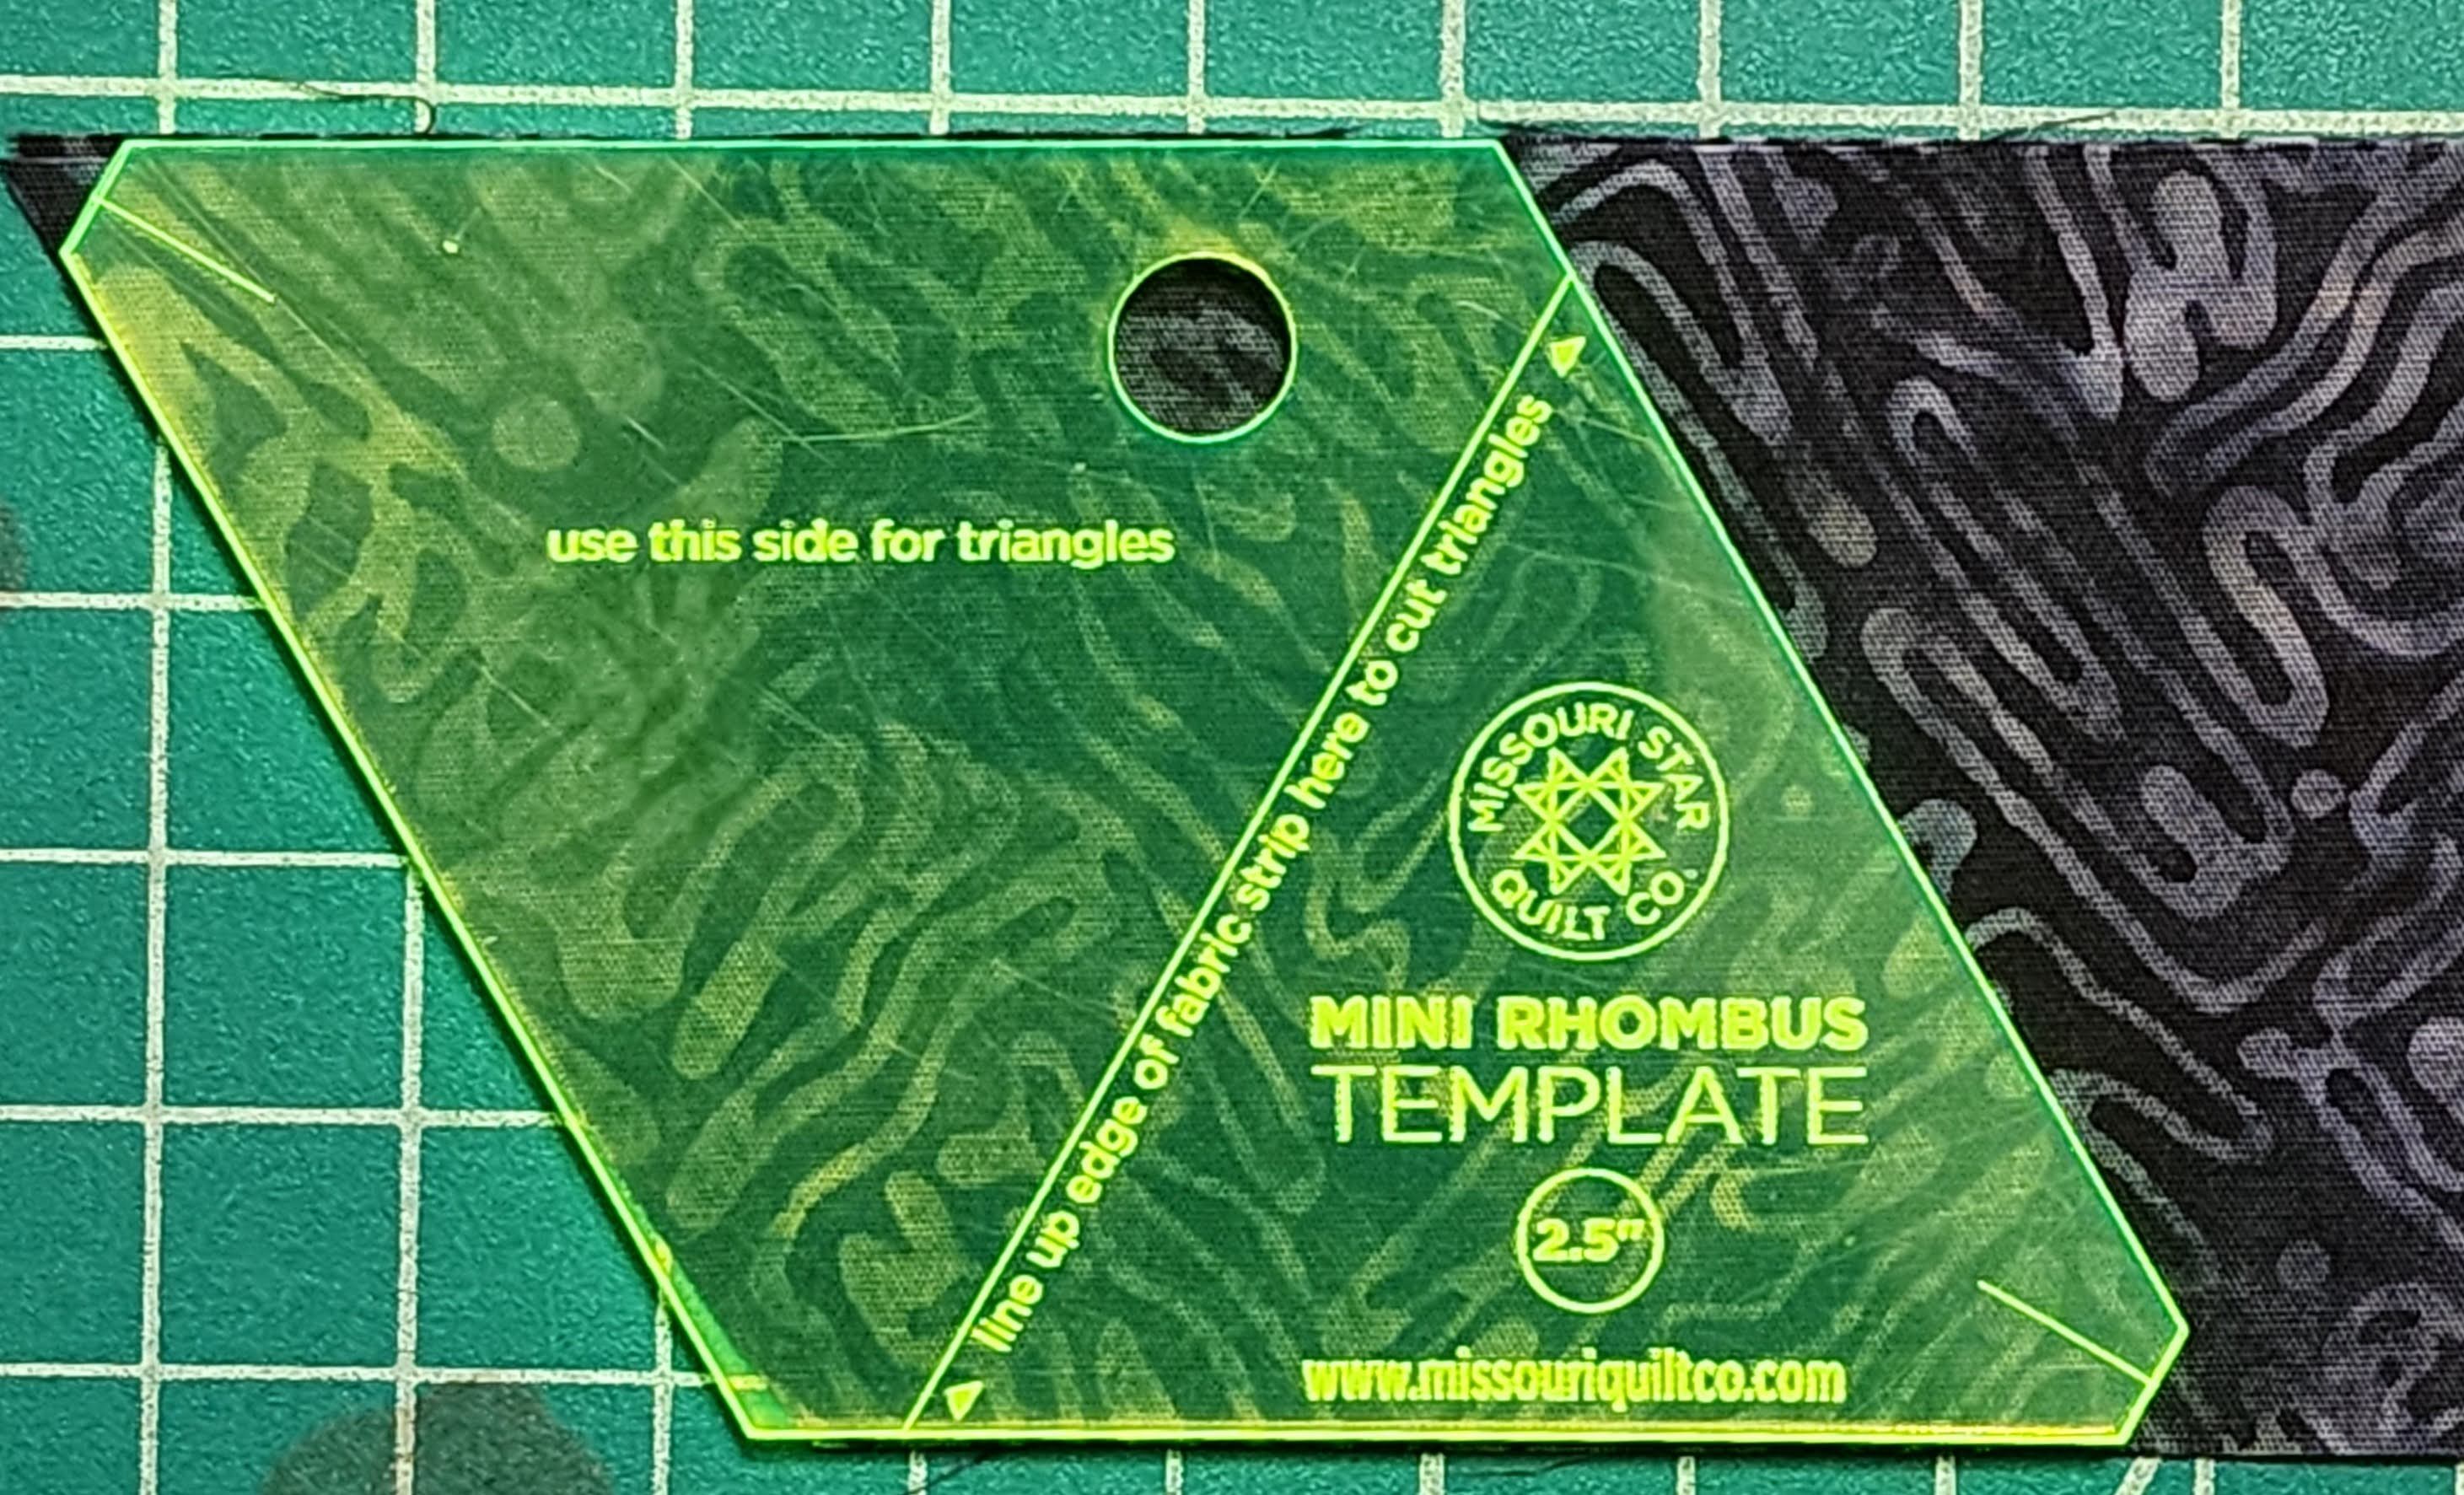
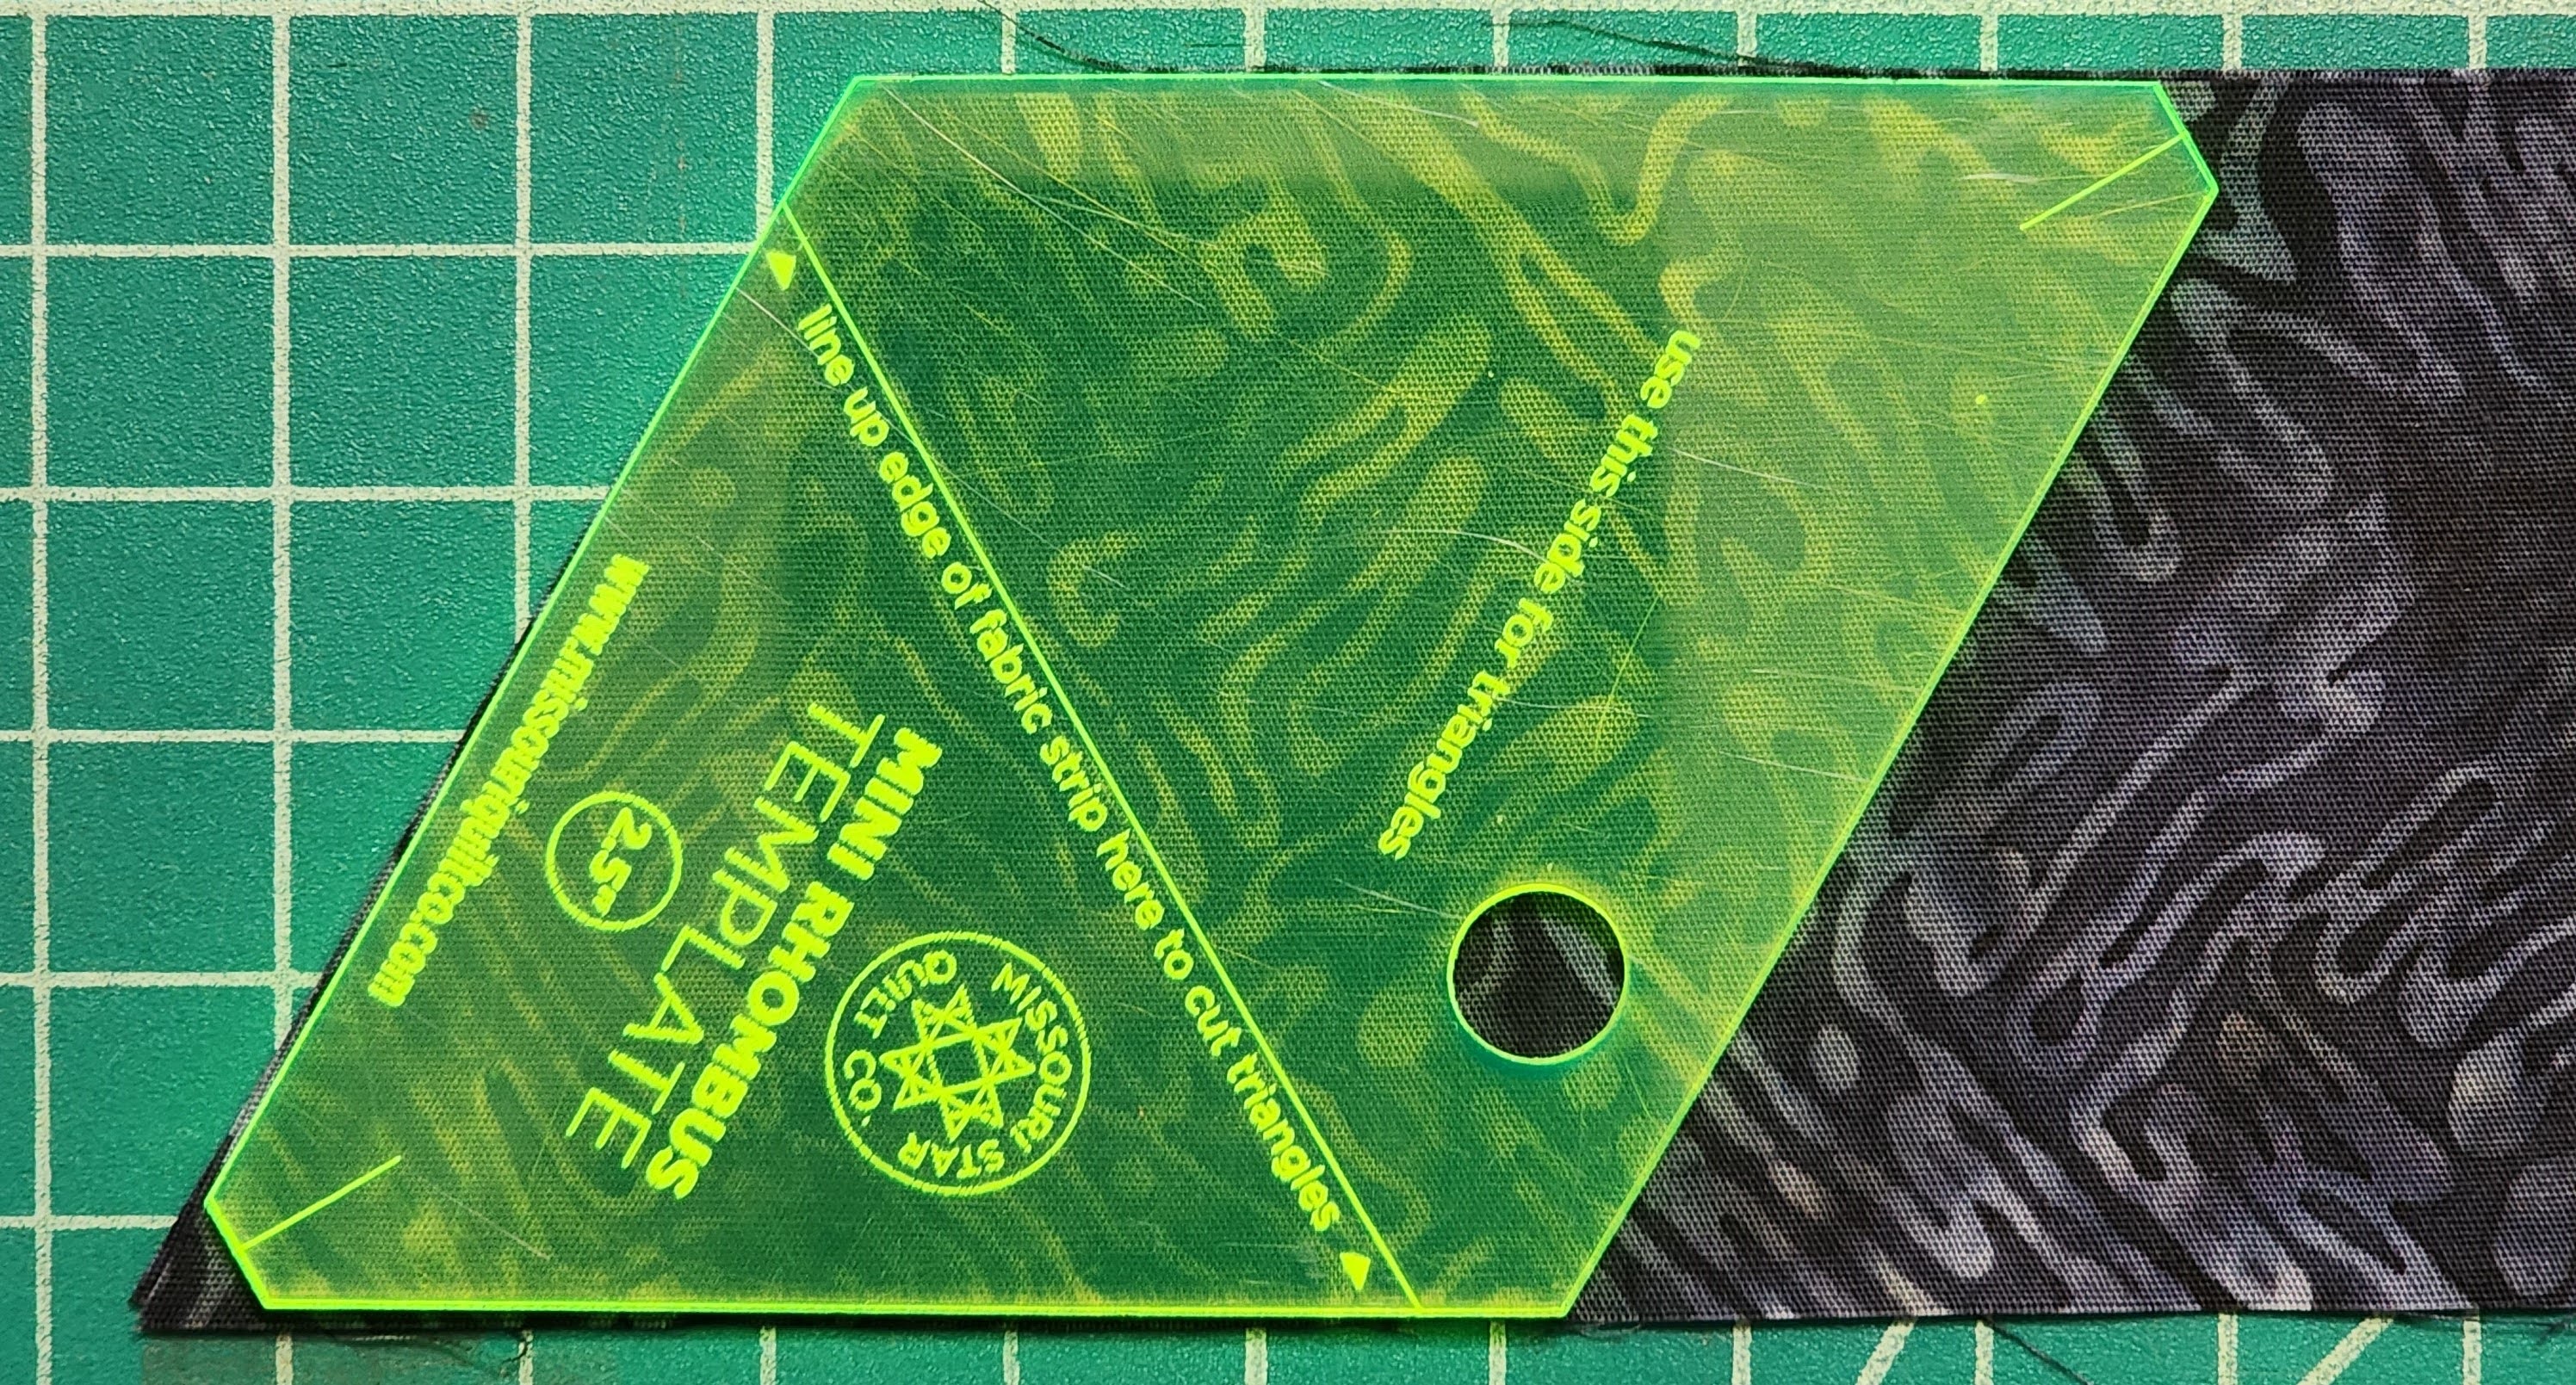
A couple years ago, I had purchased a small Rhombus and a mini-Rhombus templates from Missouri Star Quilt company. I decided to use the Mini-Rhombus template on the 2 1/2″ strips.
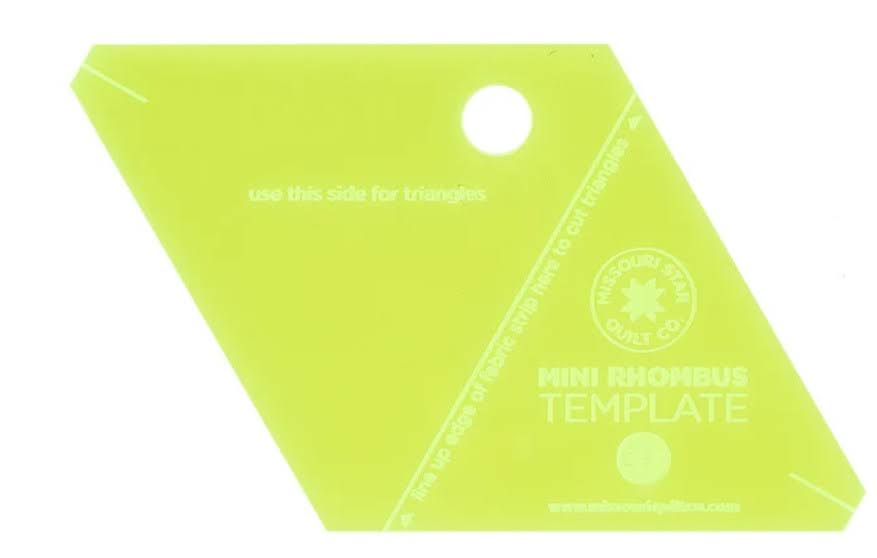
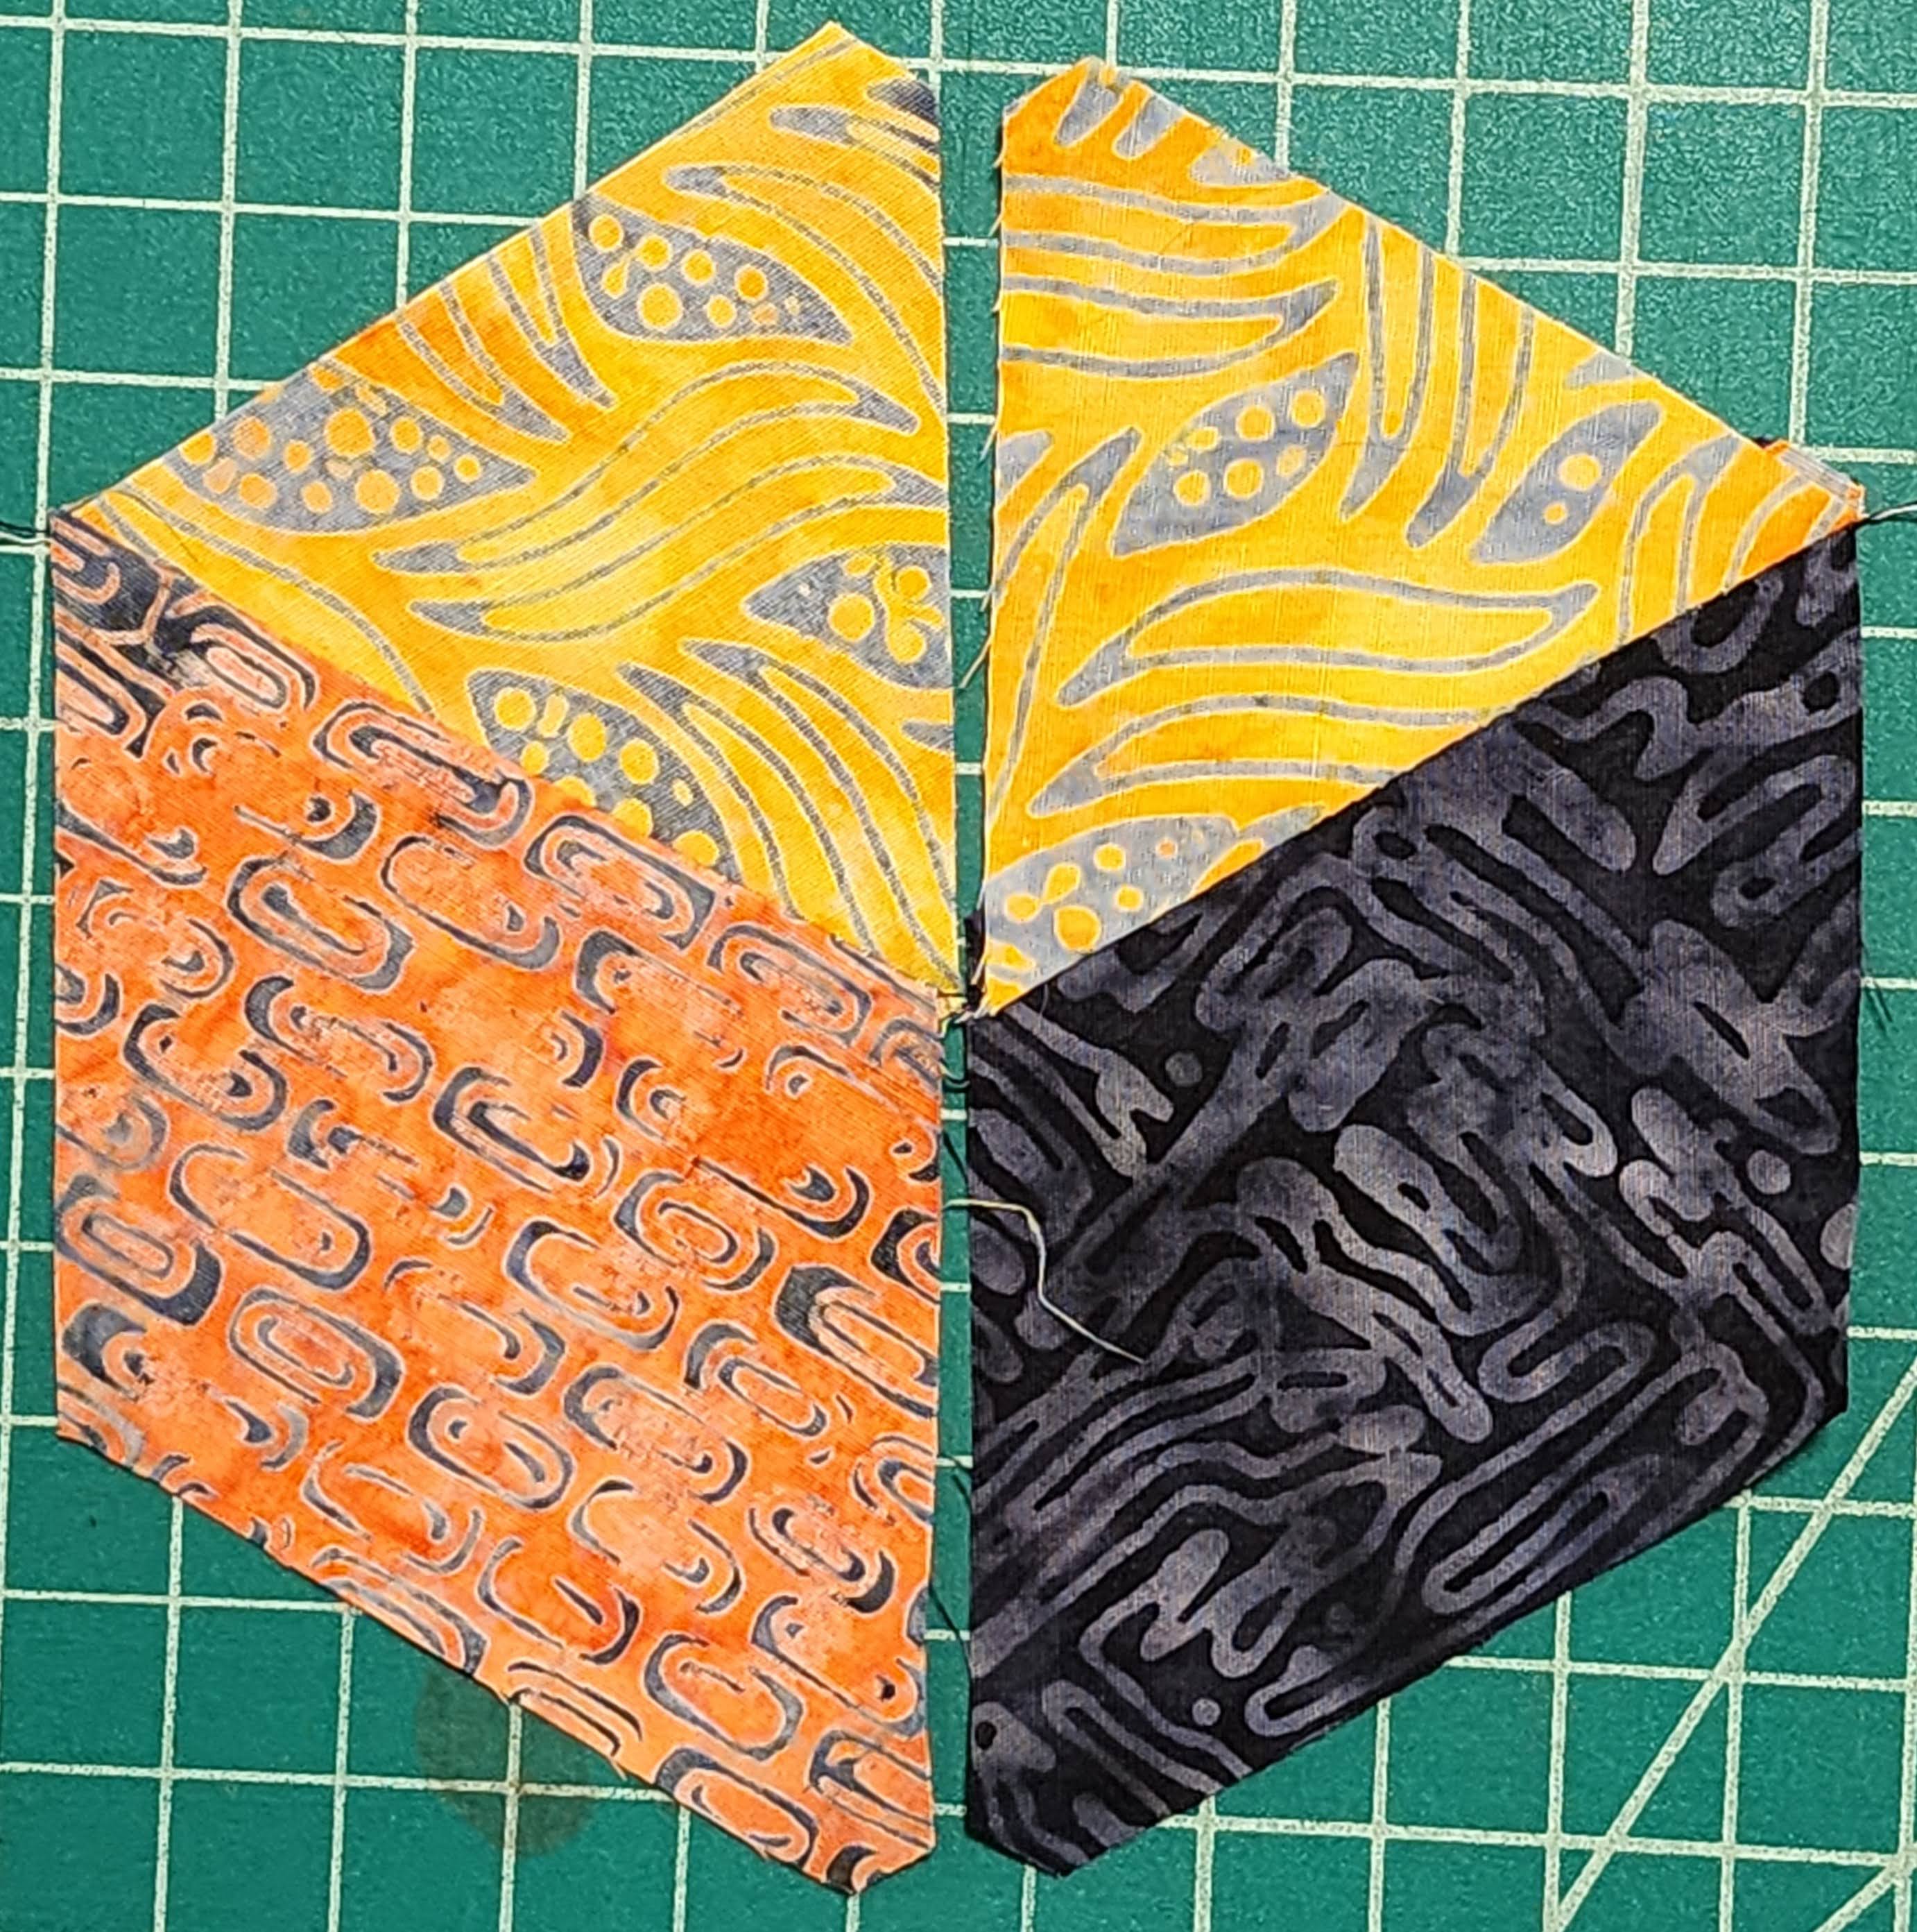
The Rhombus ruler makes creating a 3-D Tumbling Blocks block, without any “Y” seams. This template was easy to use. Jenny at Missouri Star has a great tutorial on how to use the ruler with a charm pack. But it can also be used easily on 2 1/2″ strips.
First thing I did was separate the fabric into sets of 3, one dark, one light and one medium fabric. The Copperfield fabric has 20 different colors, with 40 pieces I the pack. I created 6 sets of 3, creating two sets of each.
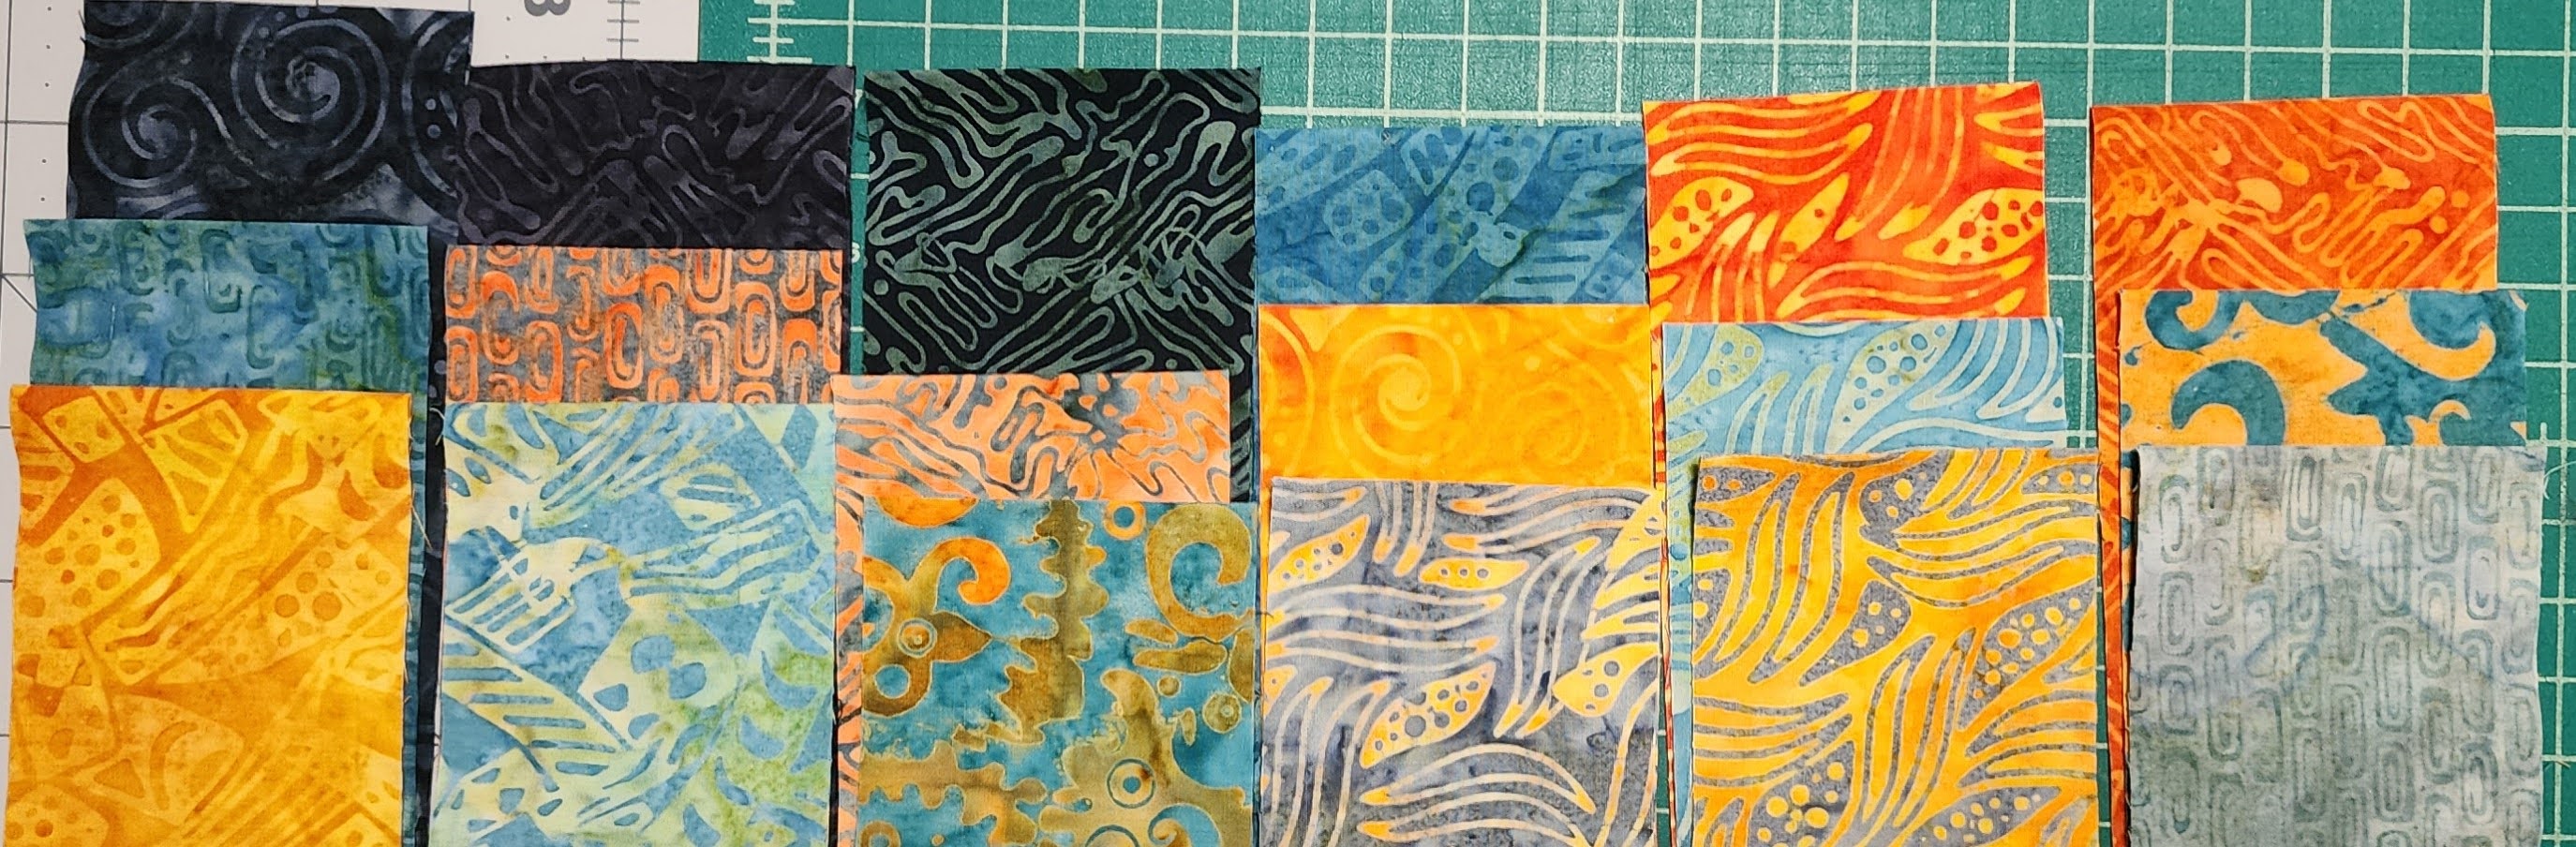
For the smaller triangle pieces, I used the light fabric. All sets need to be done the same way, so they will work together.
Light Fabric – Line up the line in the middle of the template. Position it along the edge of the fabric. Then, cut the fabric.
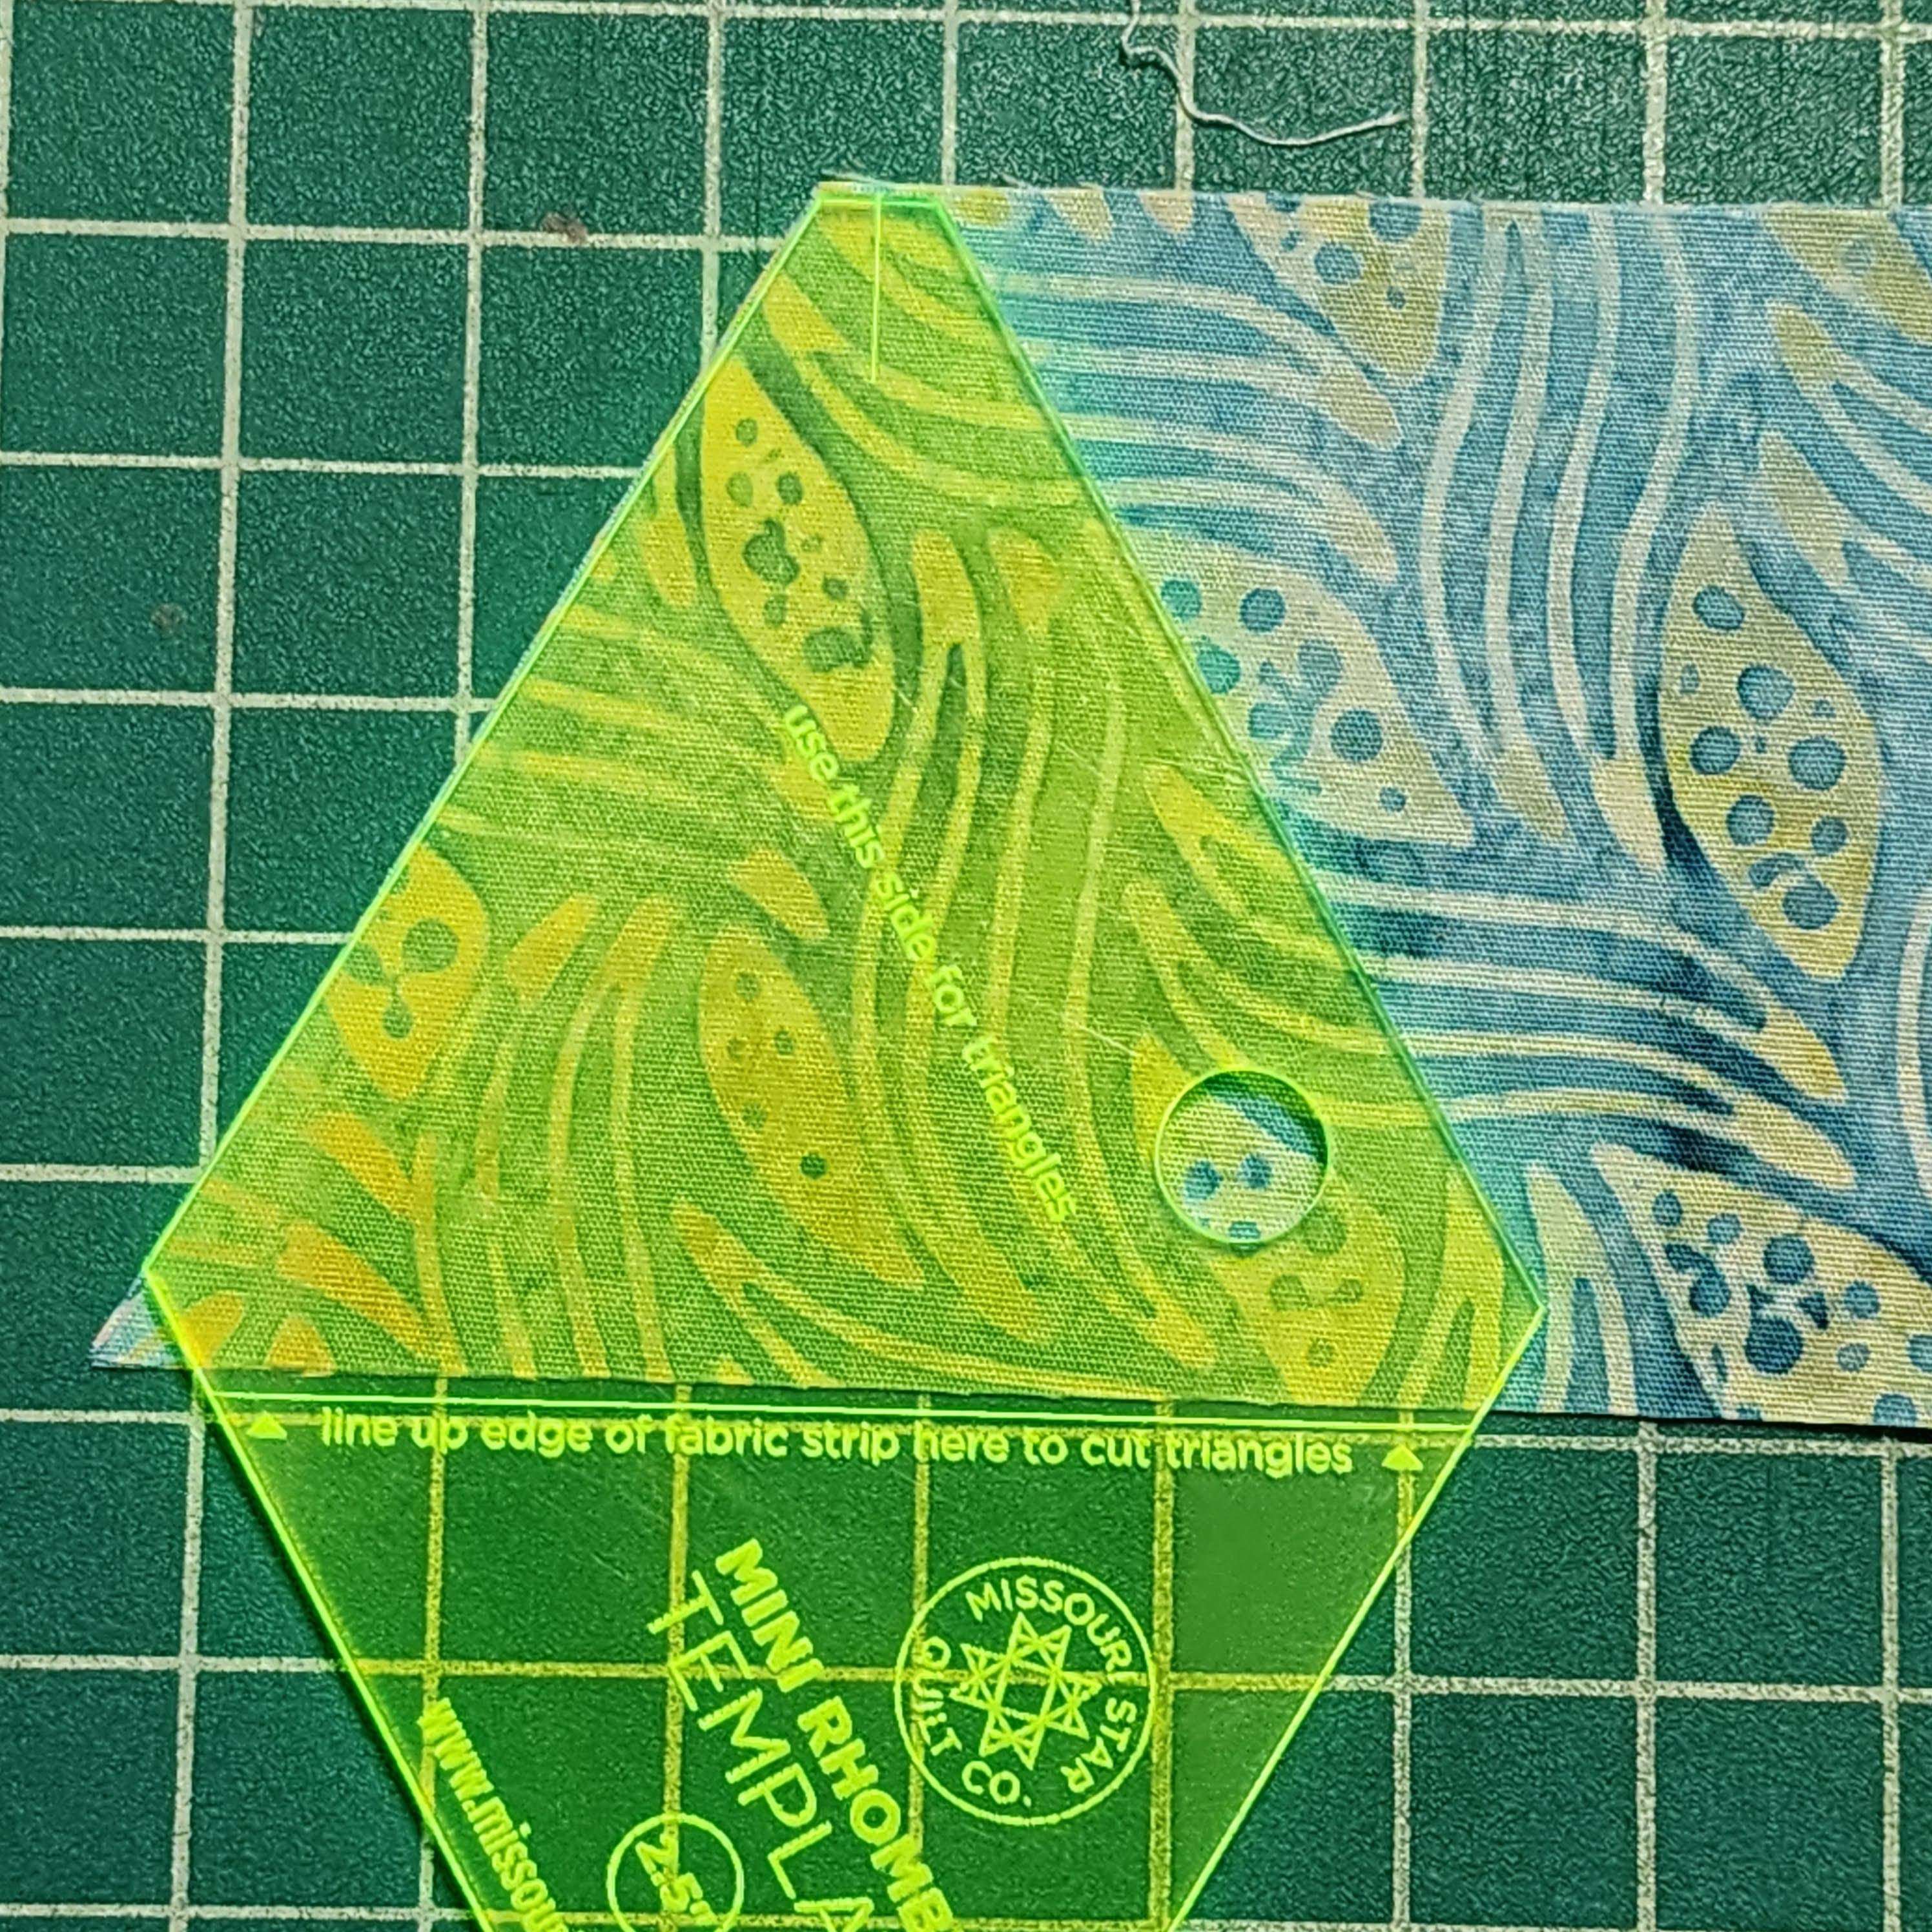
Rotate the ruler around (180 degrees). Cut another triangle. Make sure to keep the line matched up to the edge of the fabric.
Repeat this all the way across the fabric strip.
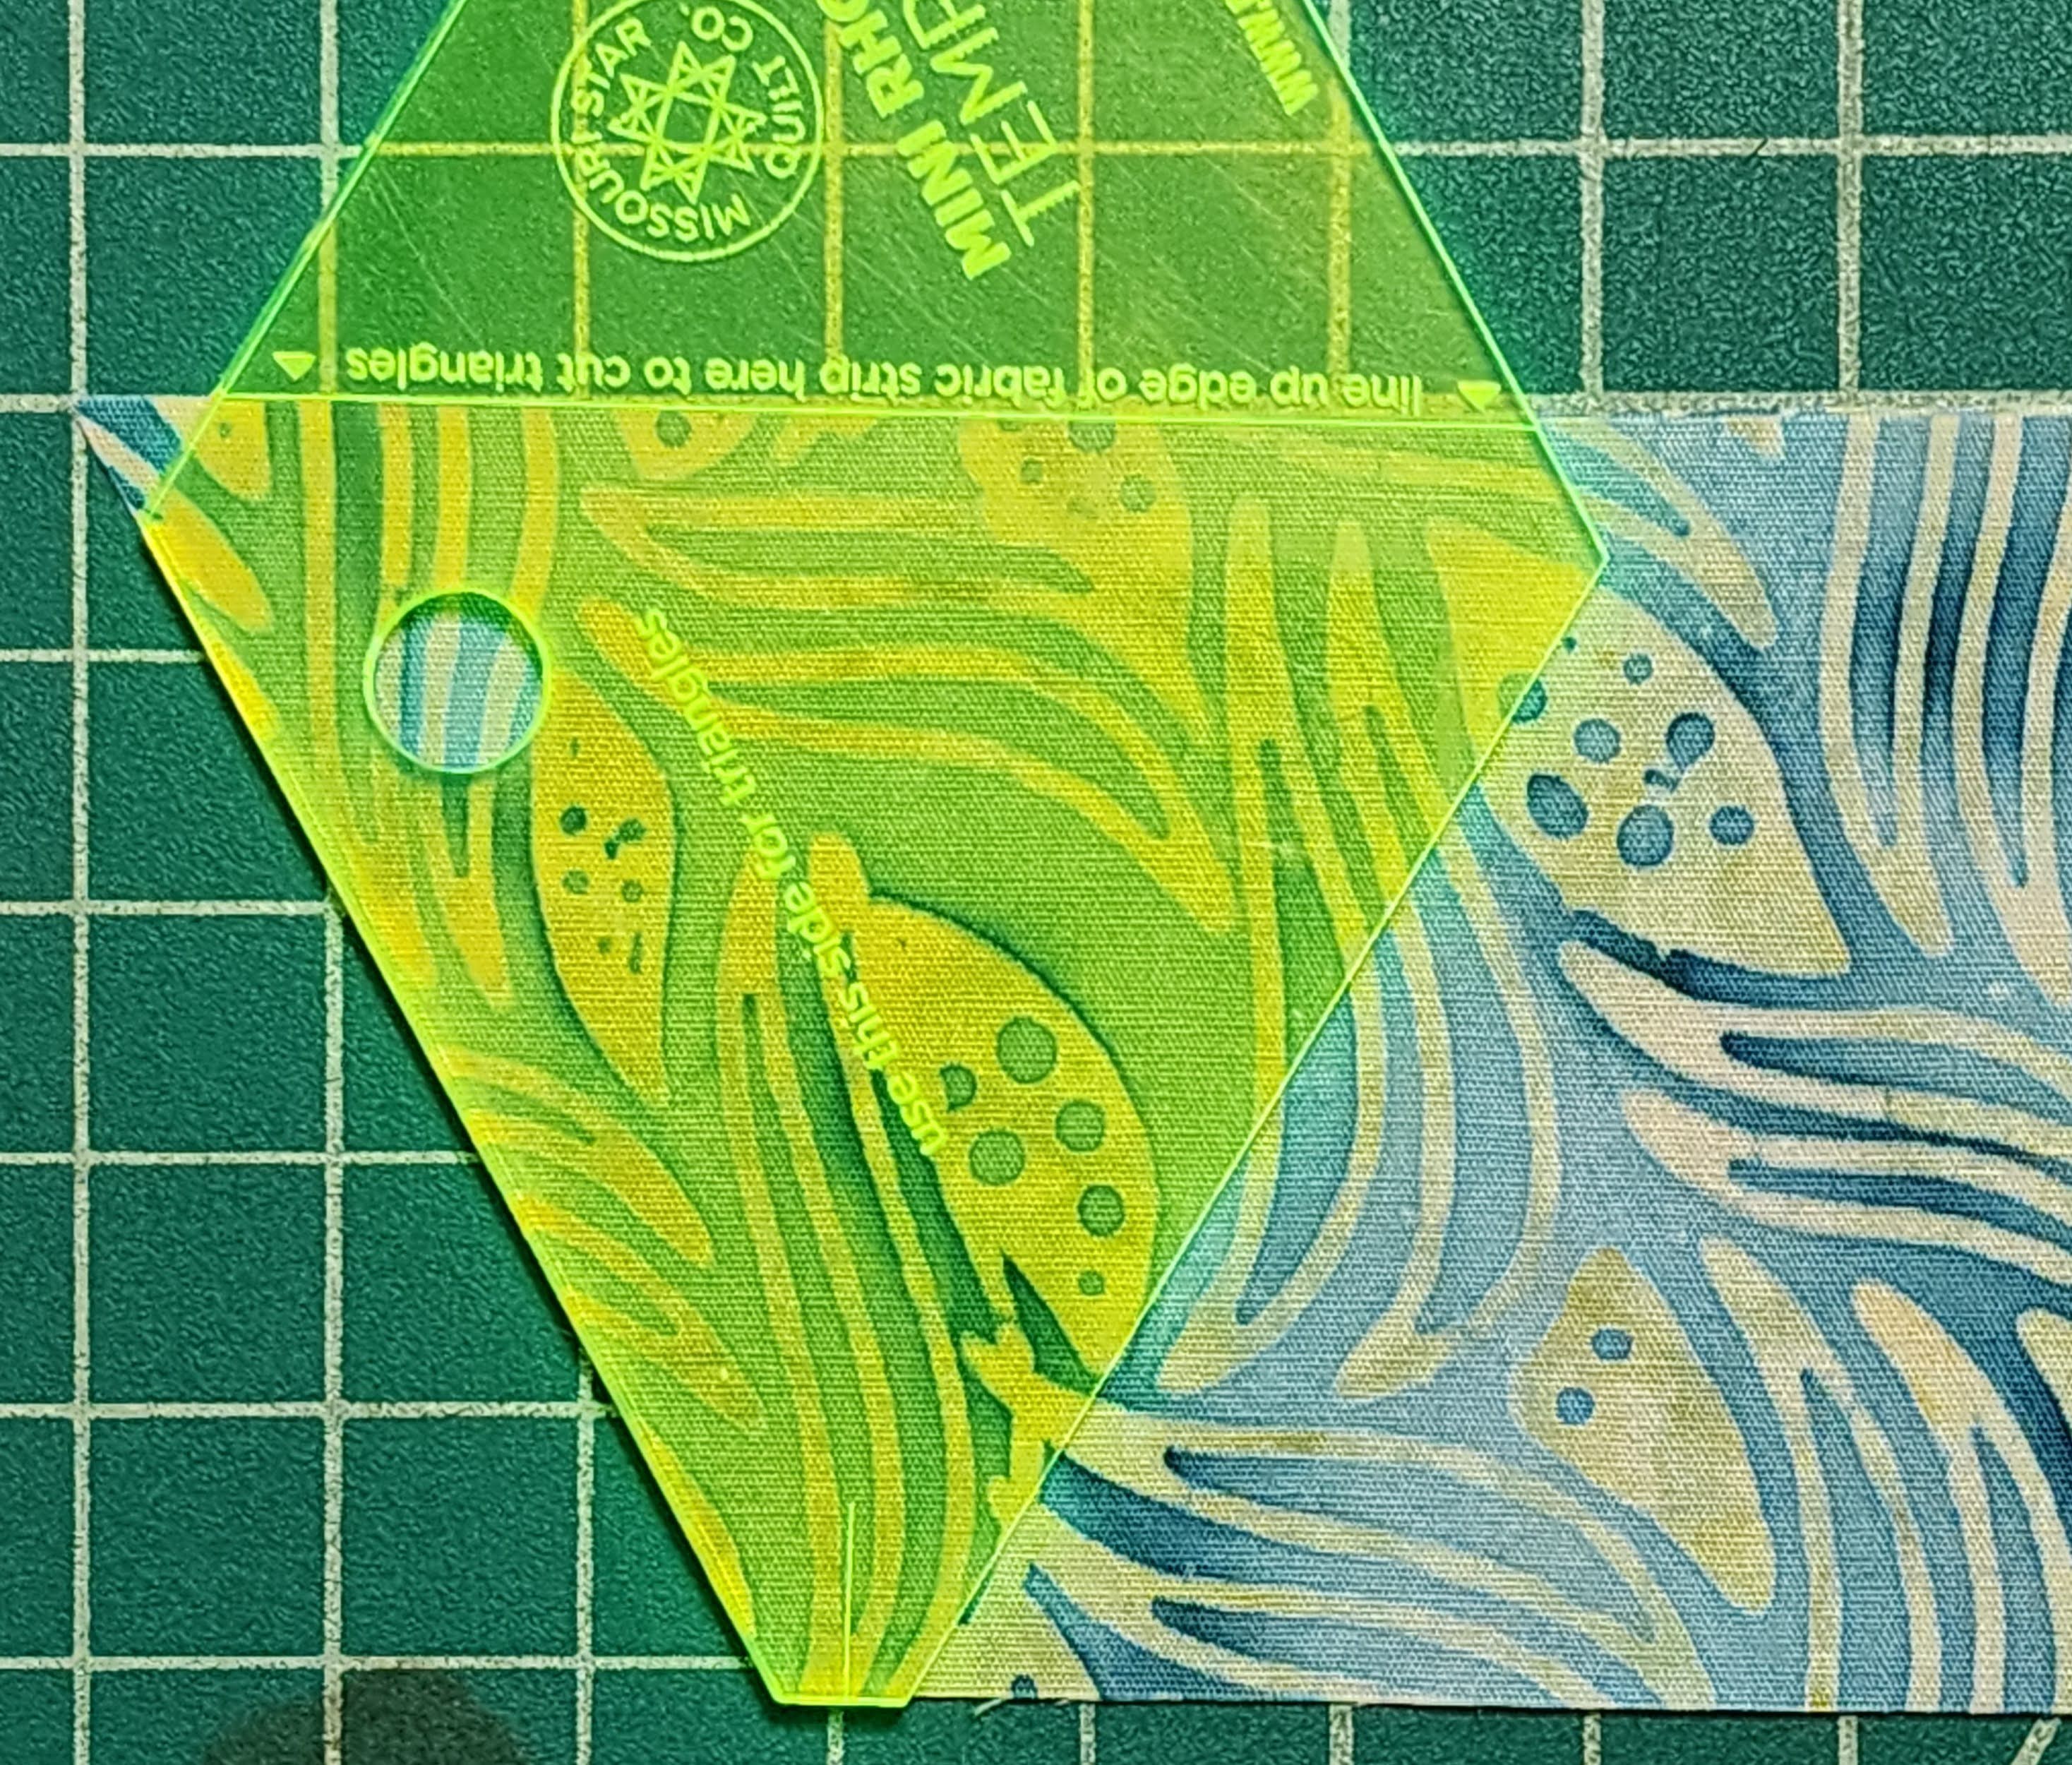
Next, you will use both the medium and dark fabric. Line the full ruler on the fabric. Then, cut the fabric. (You can cut them together).
Rotate the ruler around (180 degrees), match up the three sides of the ruler, and cut the fourth side. Continue this all the way down the fabric strip.
You will do this for all the sets of colors.
Make sure that you pay attention as you cut the fabric. I would space off what strip I was cutting. I would cut the wrong piece off of the fabric. This created a shortage. It usually happened when I was cutting the triangles. I would start cutting the full piece. Then I would realize as soon as I cut it.
I grouped the pieces together into stacks. I then started laying them out on my worktable the way I wanted them to go together.

Note: One thing I realized about 1/2 way through. I decided to go ahead and sew the light to the dark and medium fabrics. When I laid them out, I was sure that they were correct on the table. They will be sewn together in rows, so you have to strips.
Next, after laying out the sections, you will start sewing into columns.
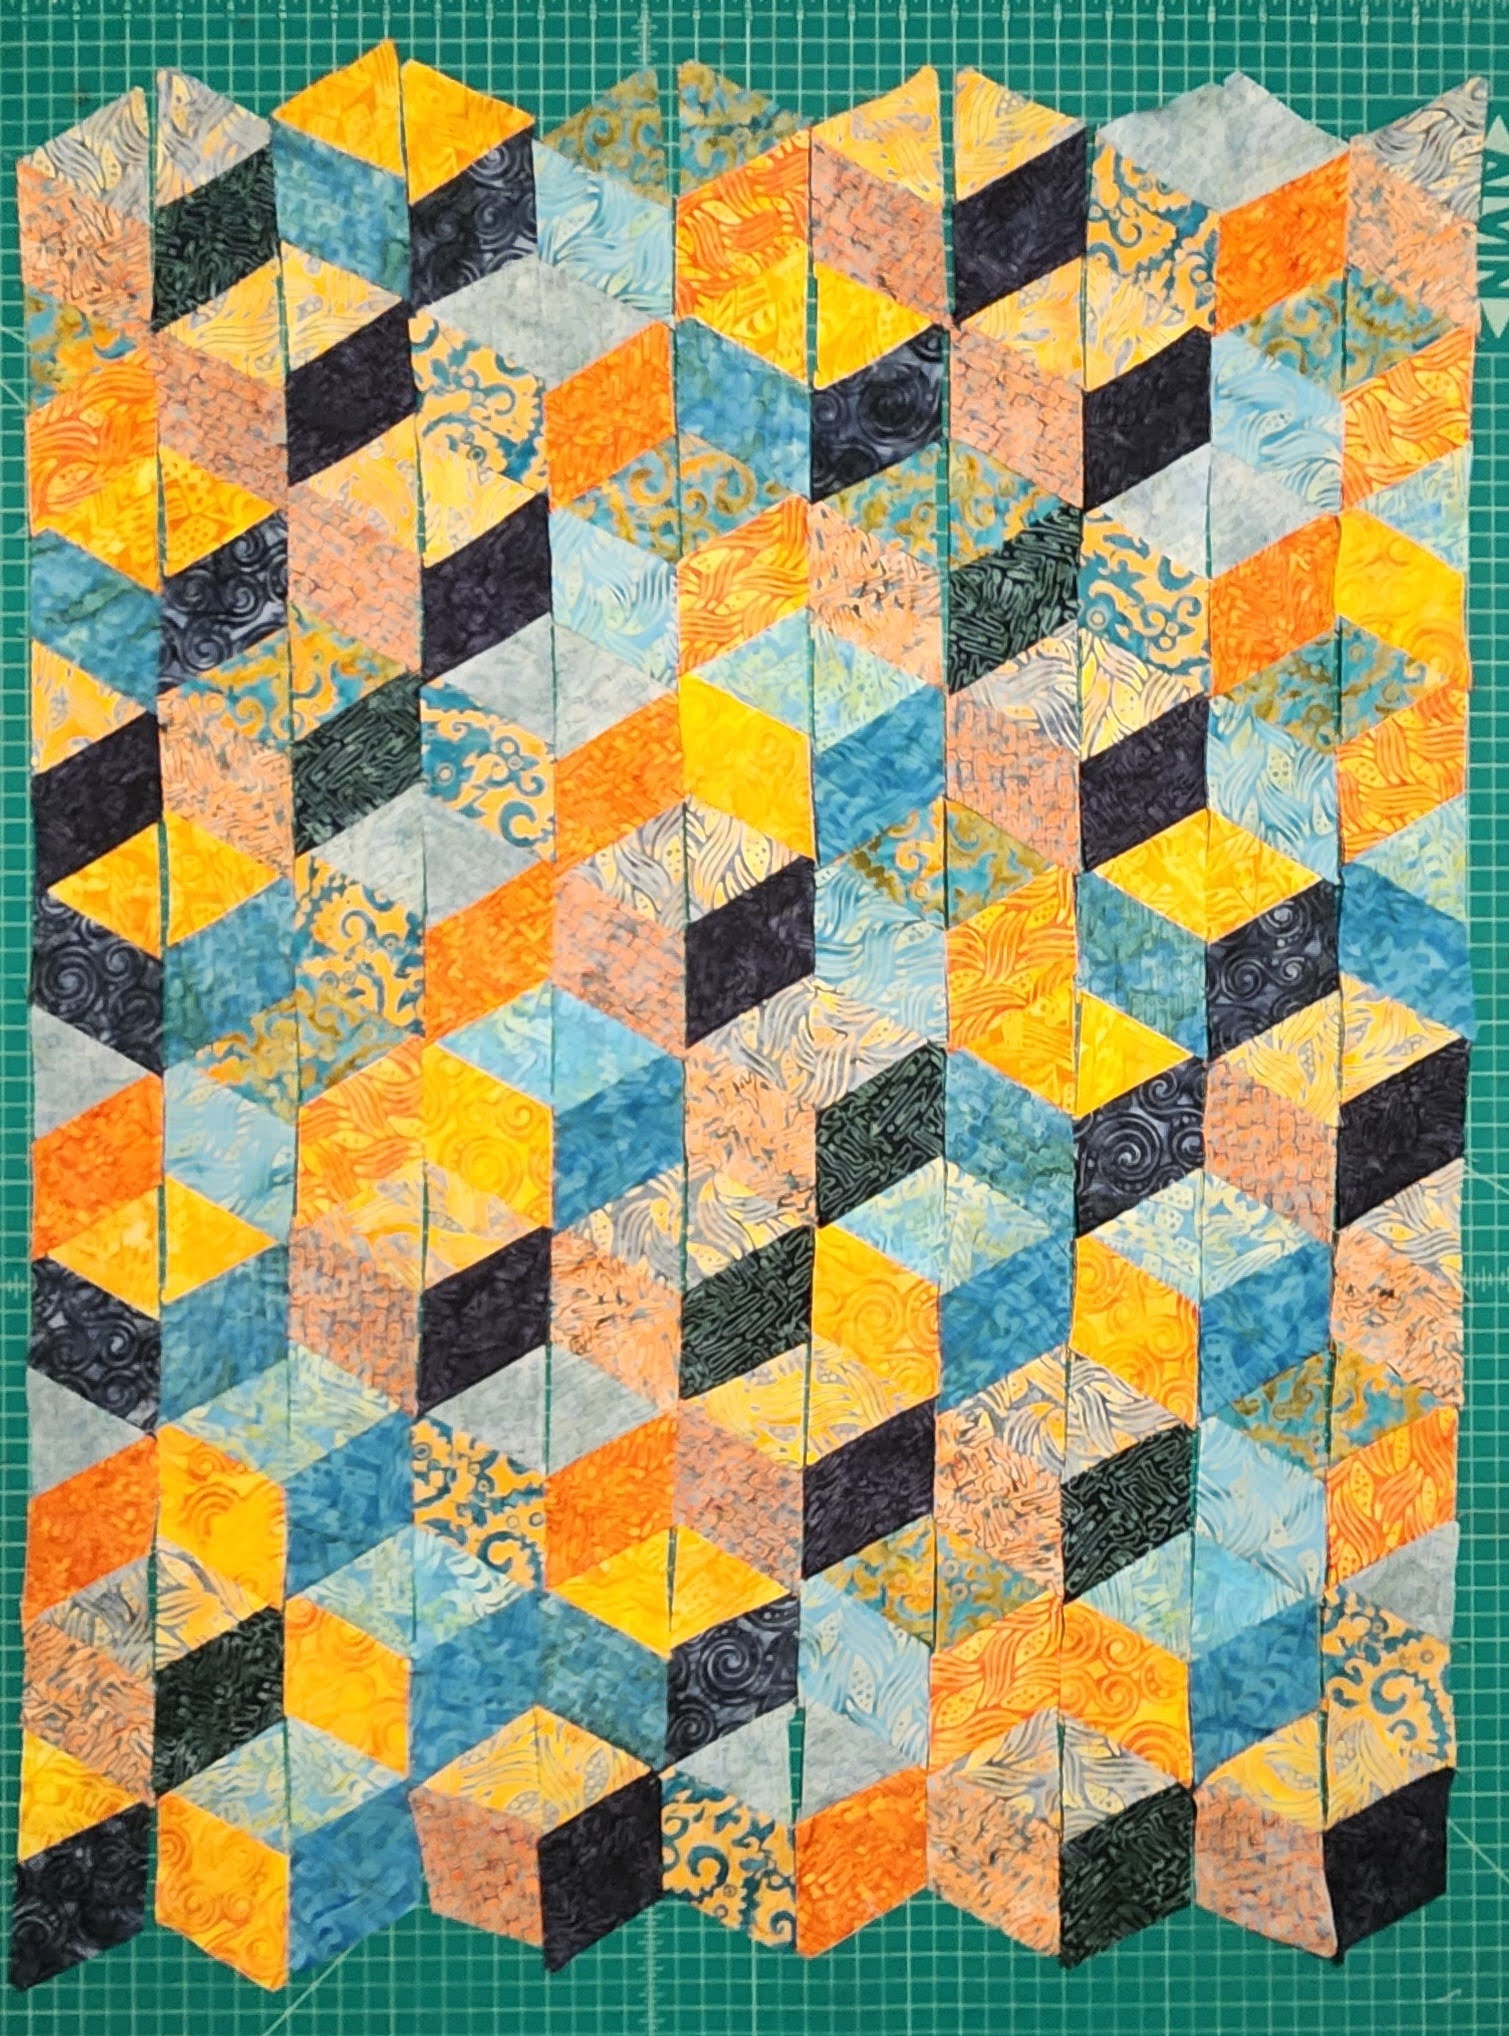
I made the quilt as wide as I wanted, 15 columns. The 1st and 15th row, had several 1/2 sections added to make the column straight. This kept me from having to cut into what was already sewn together.
I cut the other half of the fabric the same way. I kept adding sections down. I continued until I had the length I was looking for.
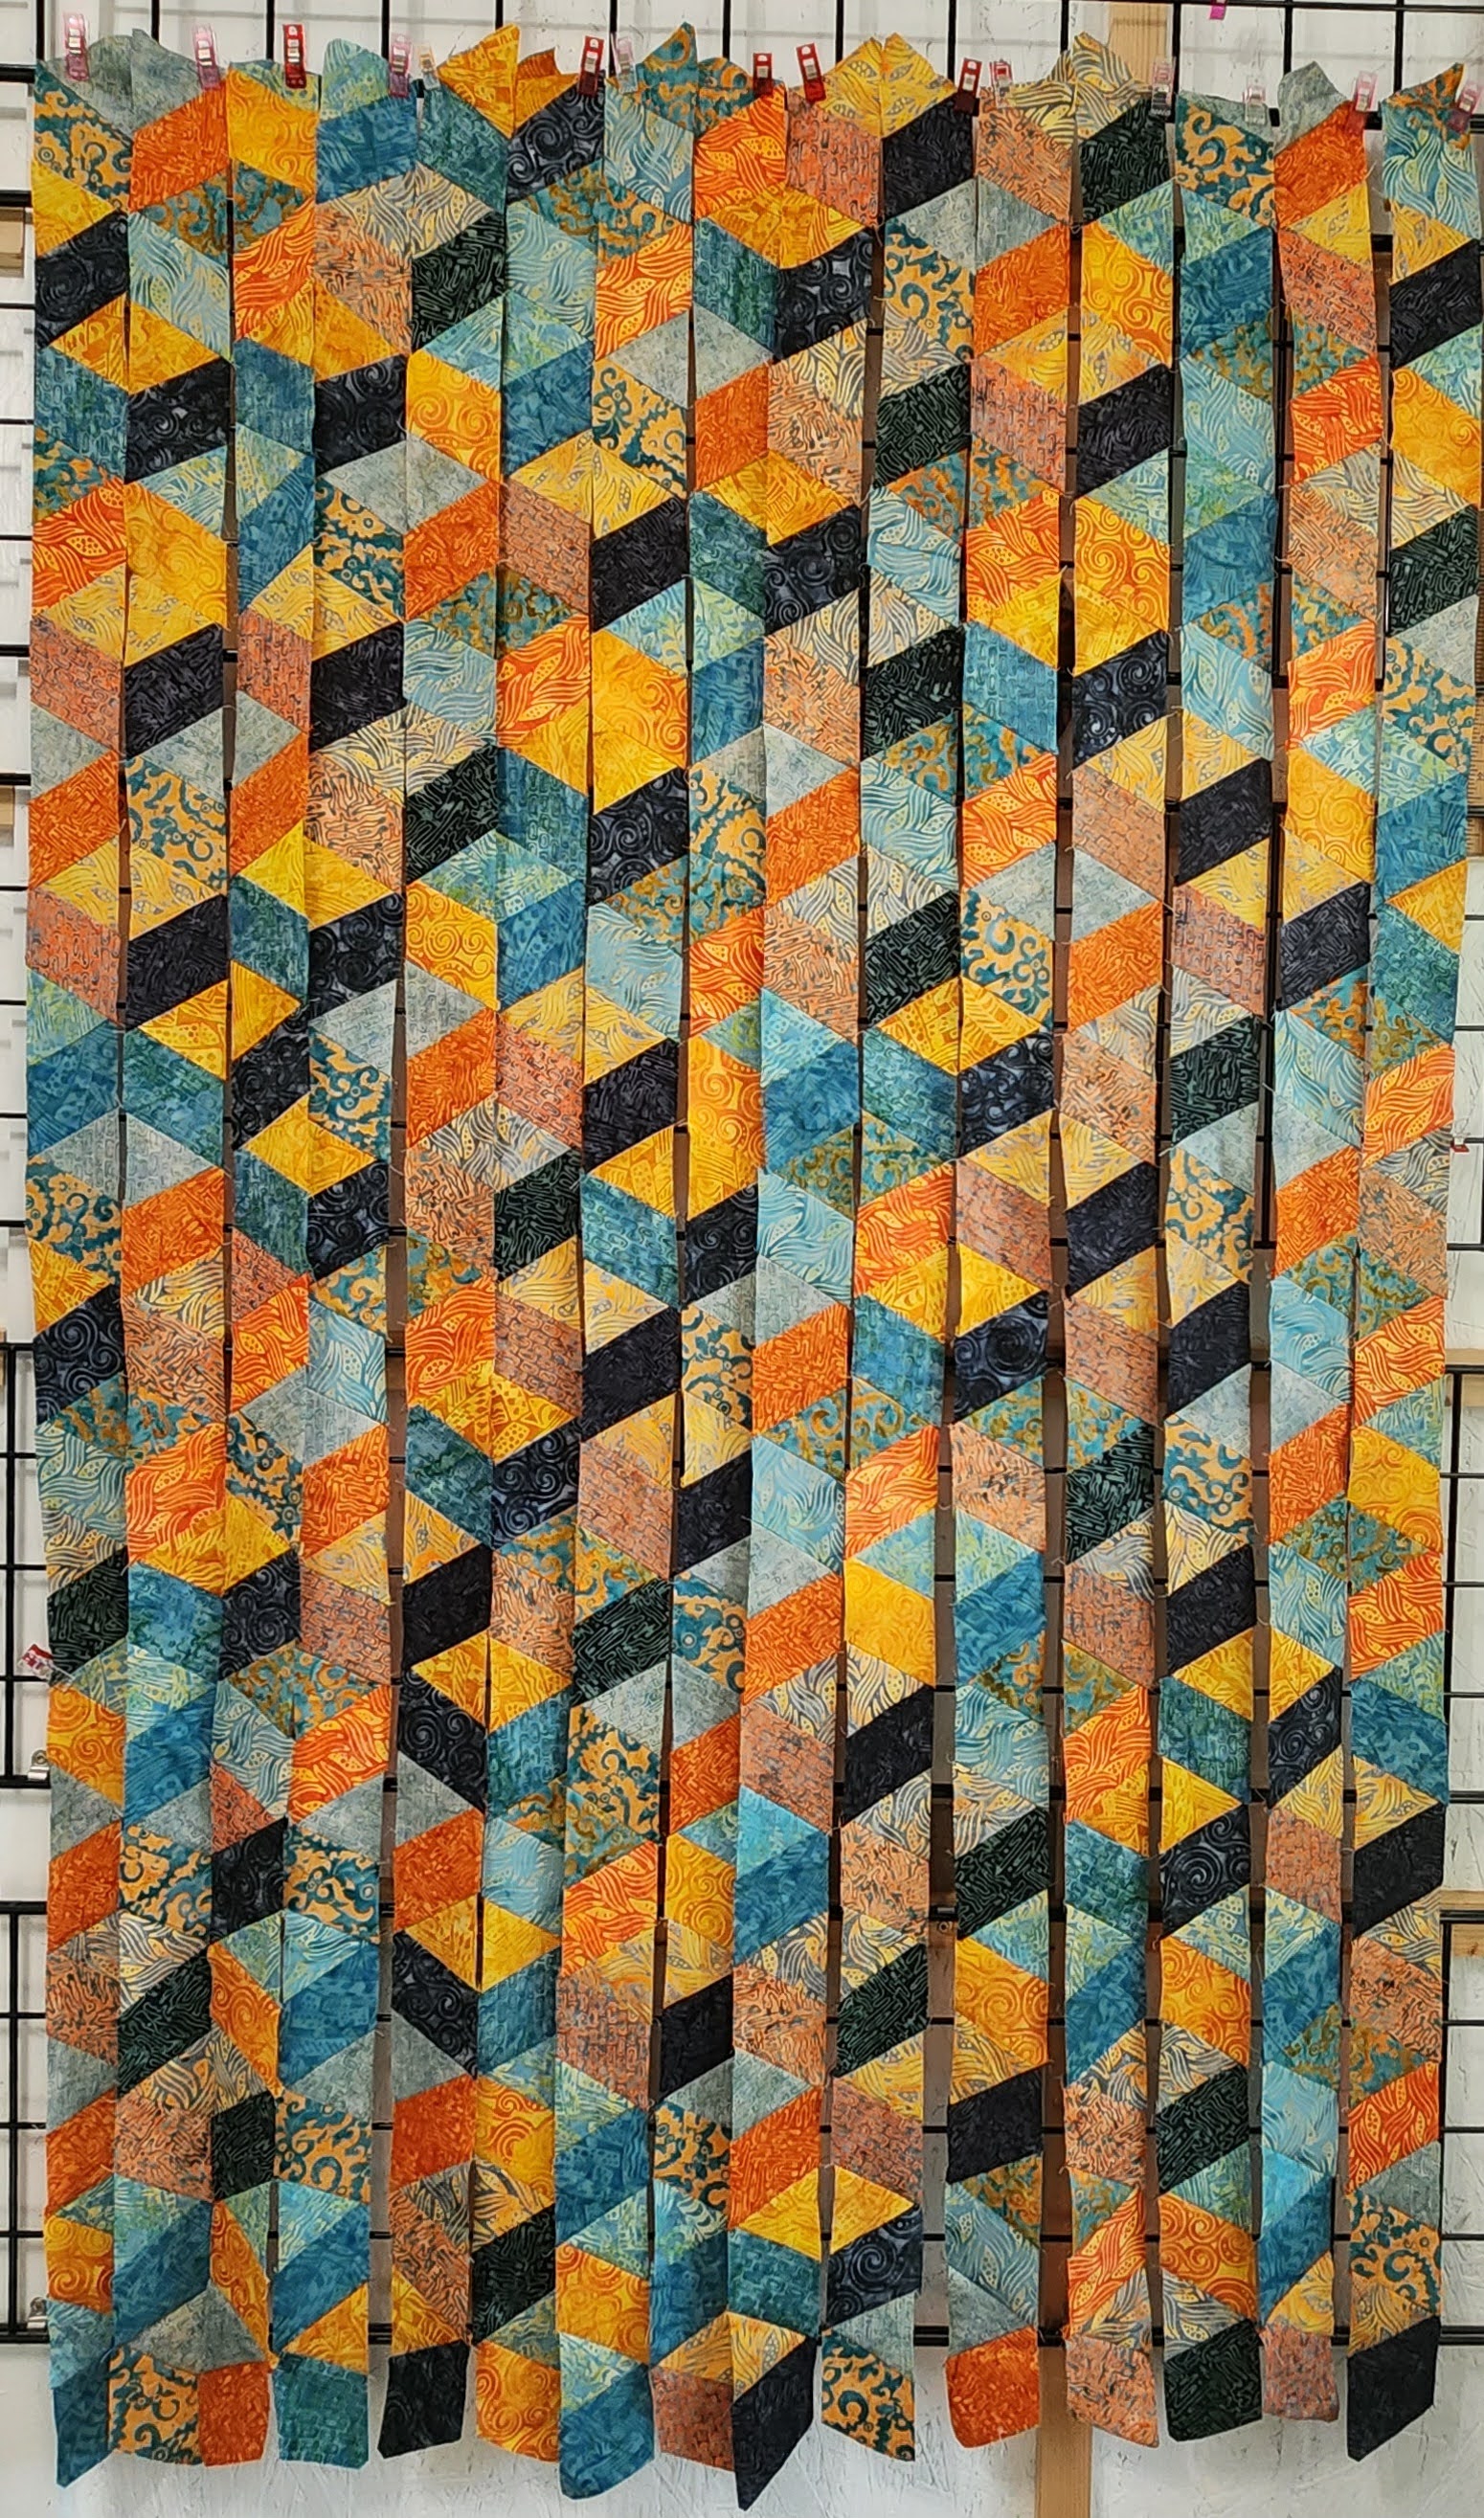
Once I had the length that I wanted. I then sewed the strips together. I made sure to alternate the direction of the sewing. By alternating the sewing direction, it helps keep the strips straighter. If you always keep the even strip on top, you will be alternating the direction of your sewing.
Once I had the strips all sewn together, I trimmed the top and bottom to make straight.
Press the top to make sure everything is flat and straight.
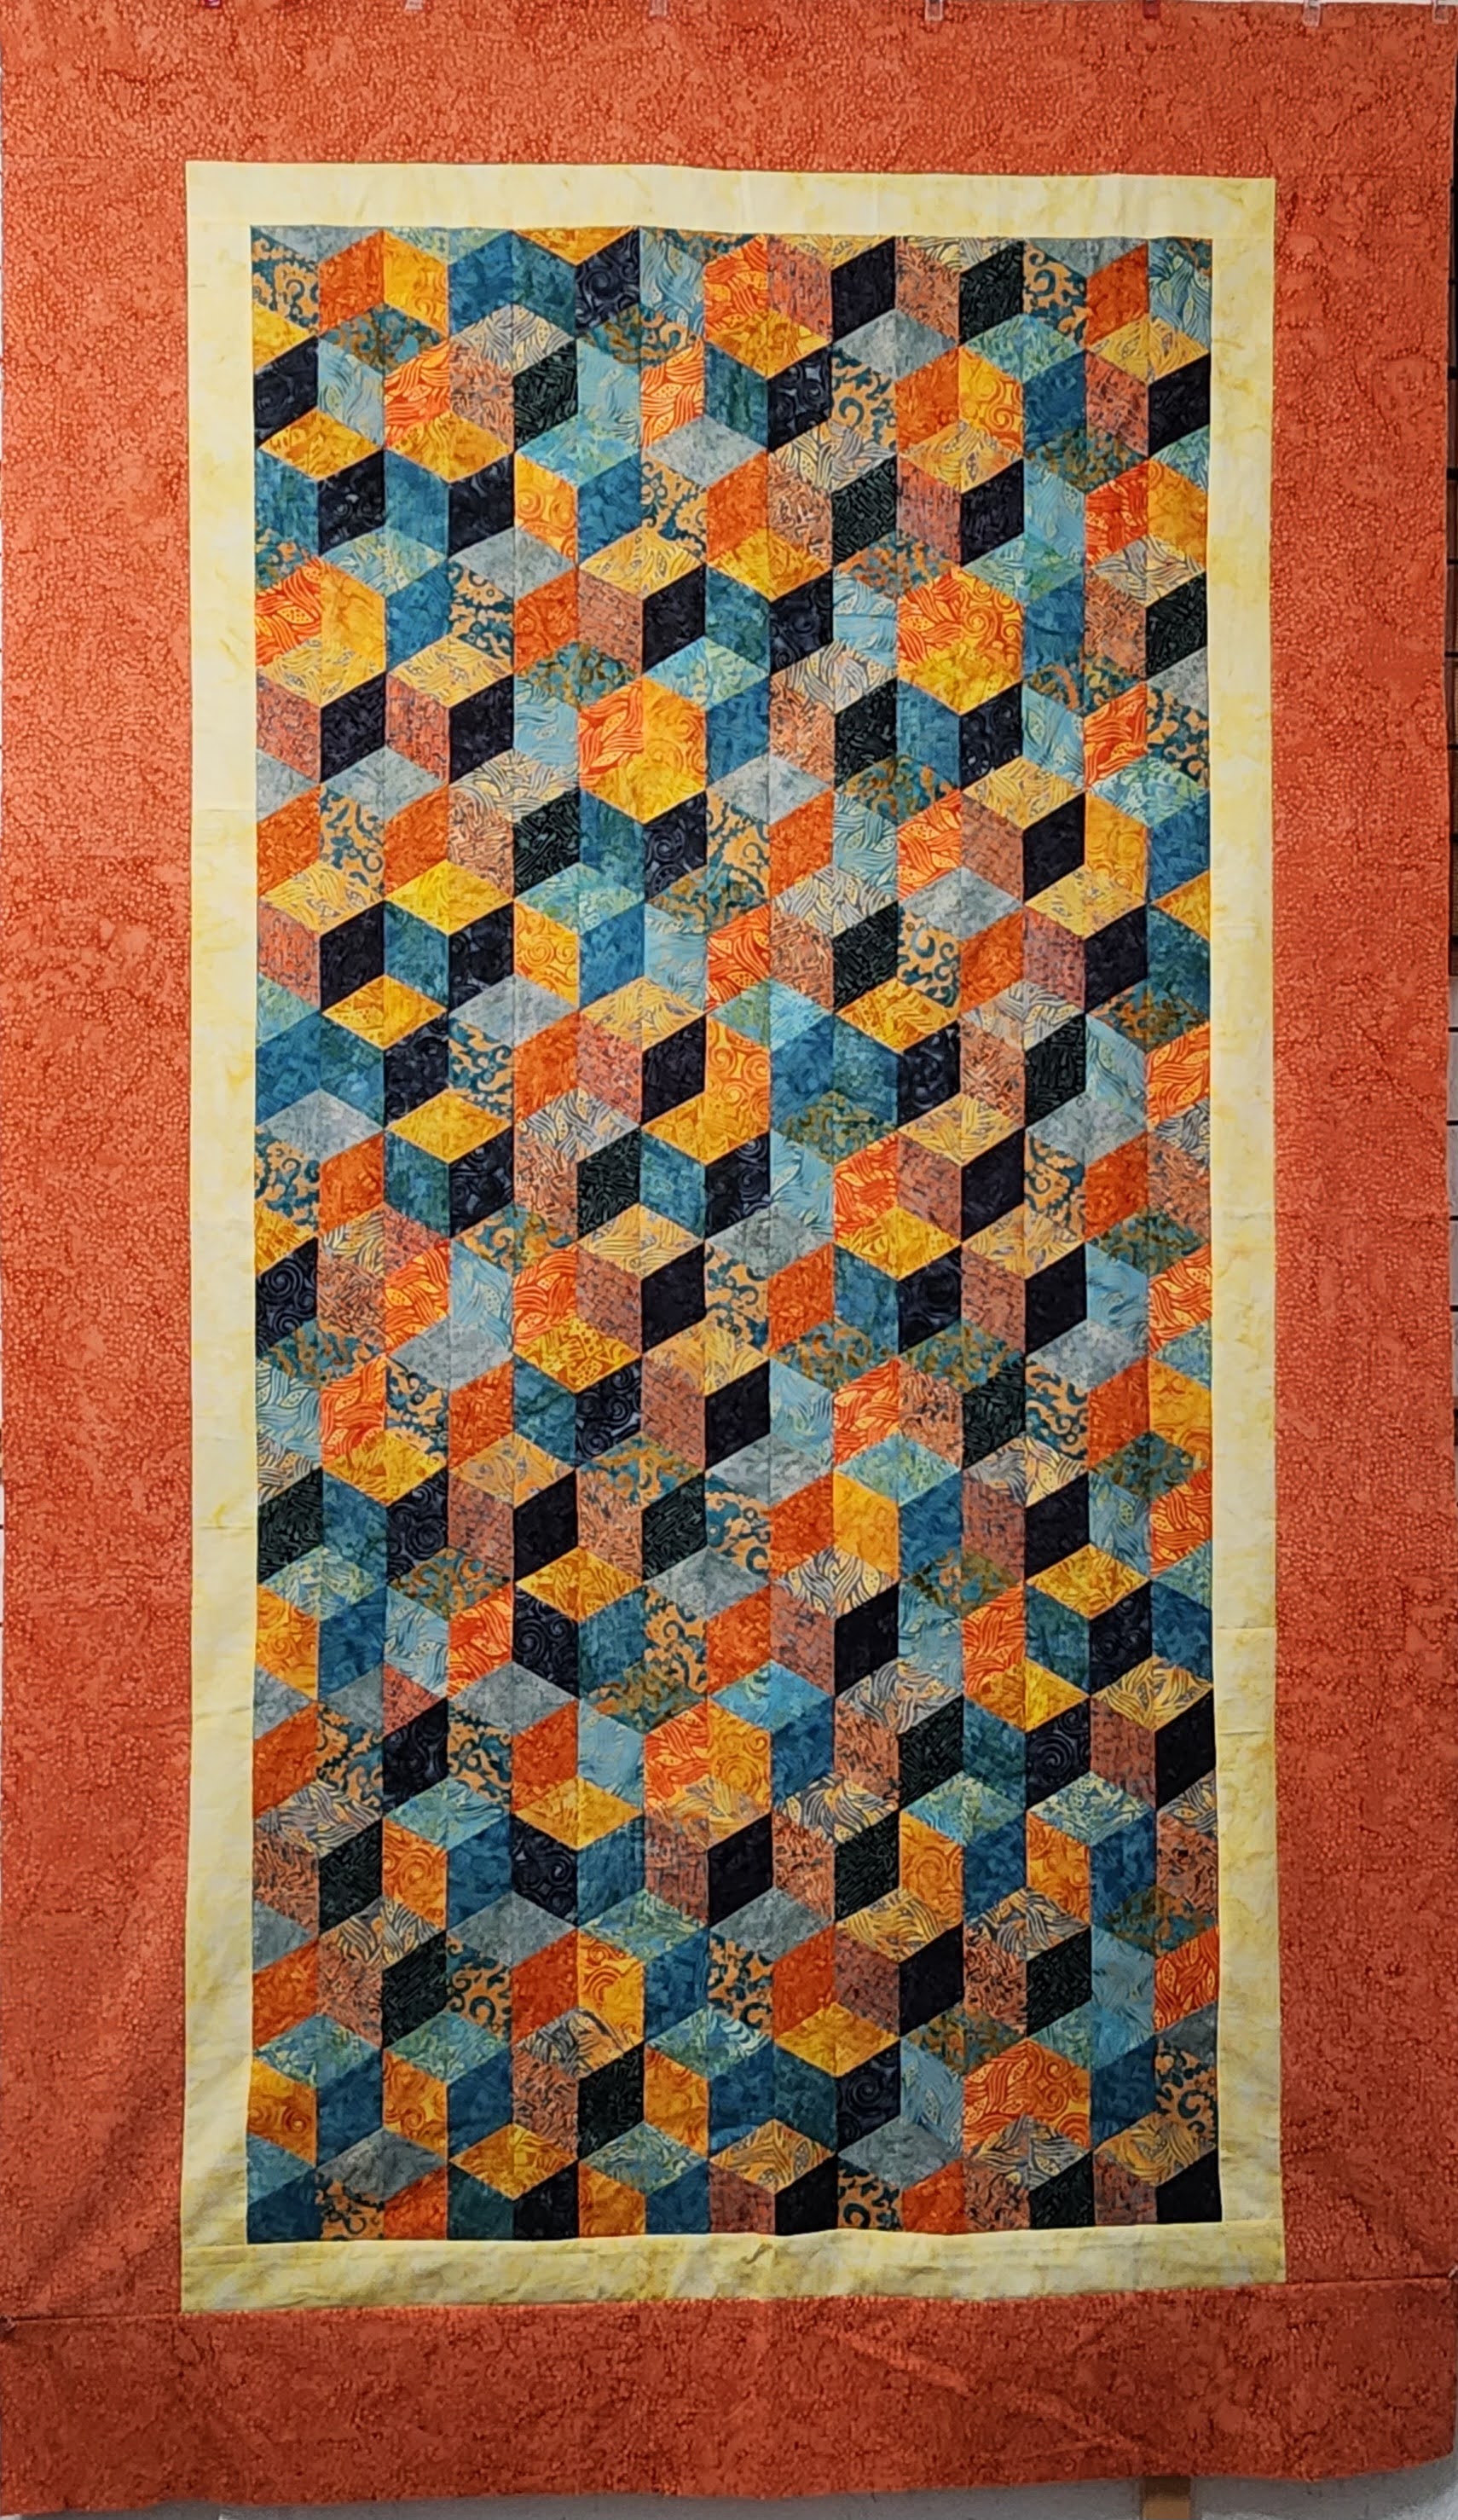
Next, I added two borders. I used a 2 1/2″ strip of the light fabric. The fabric is named Sunny and is part of the Opulent Oranges fabric line.
I pressed the seams towards the Sunny fabric, to reduce bulk.
Using the dark fabric, Bubbles-Salmon, from the Blenders line, I cut a 6″ strip, and added to all four sides.
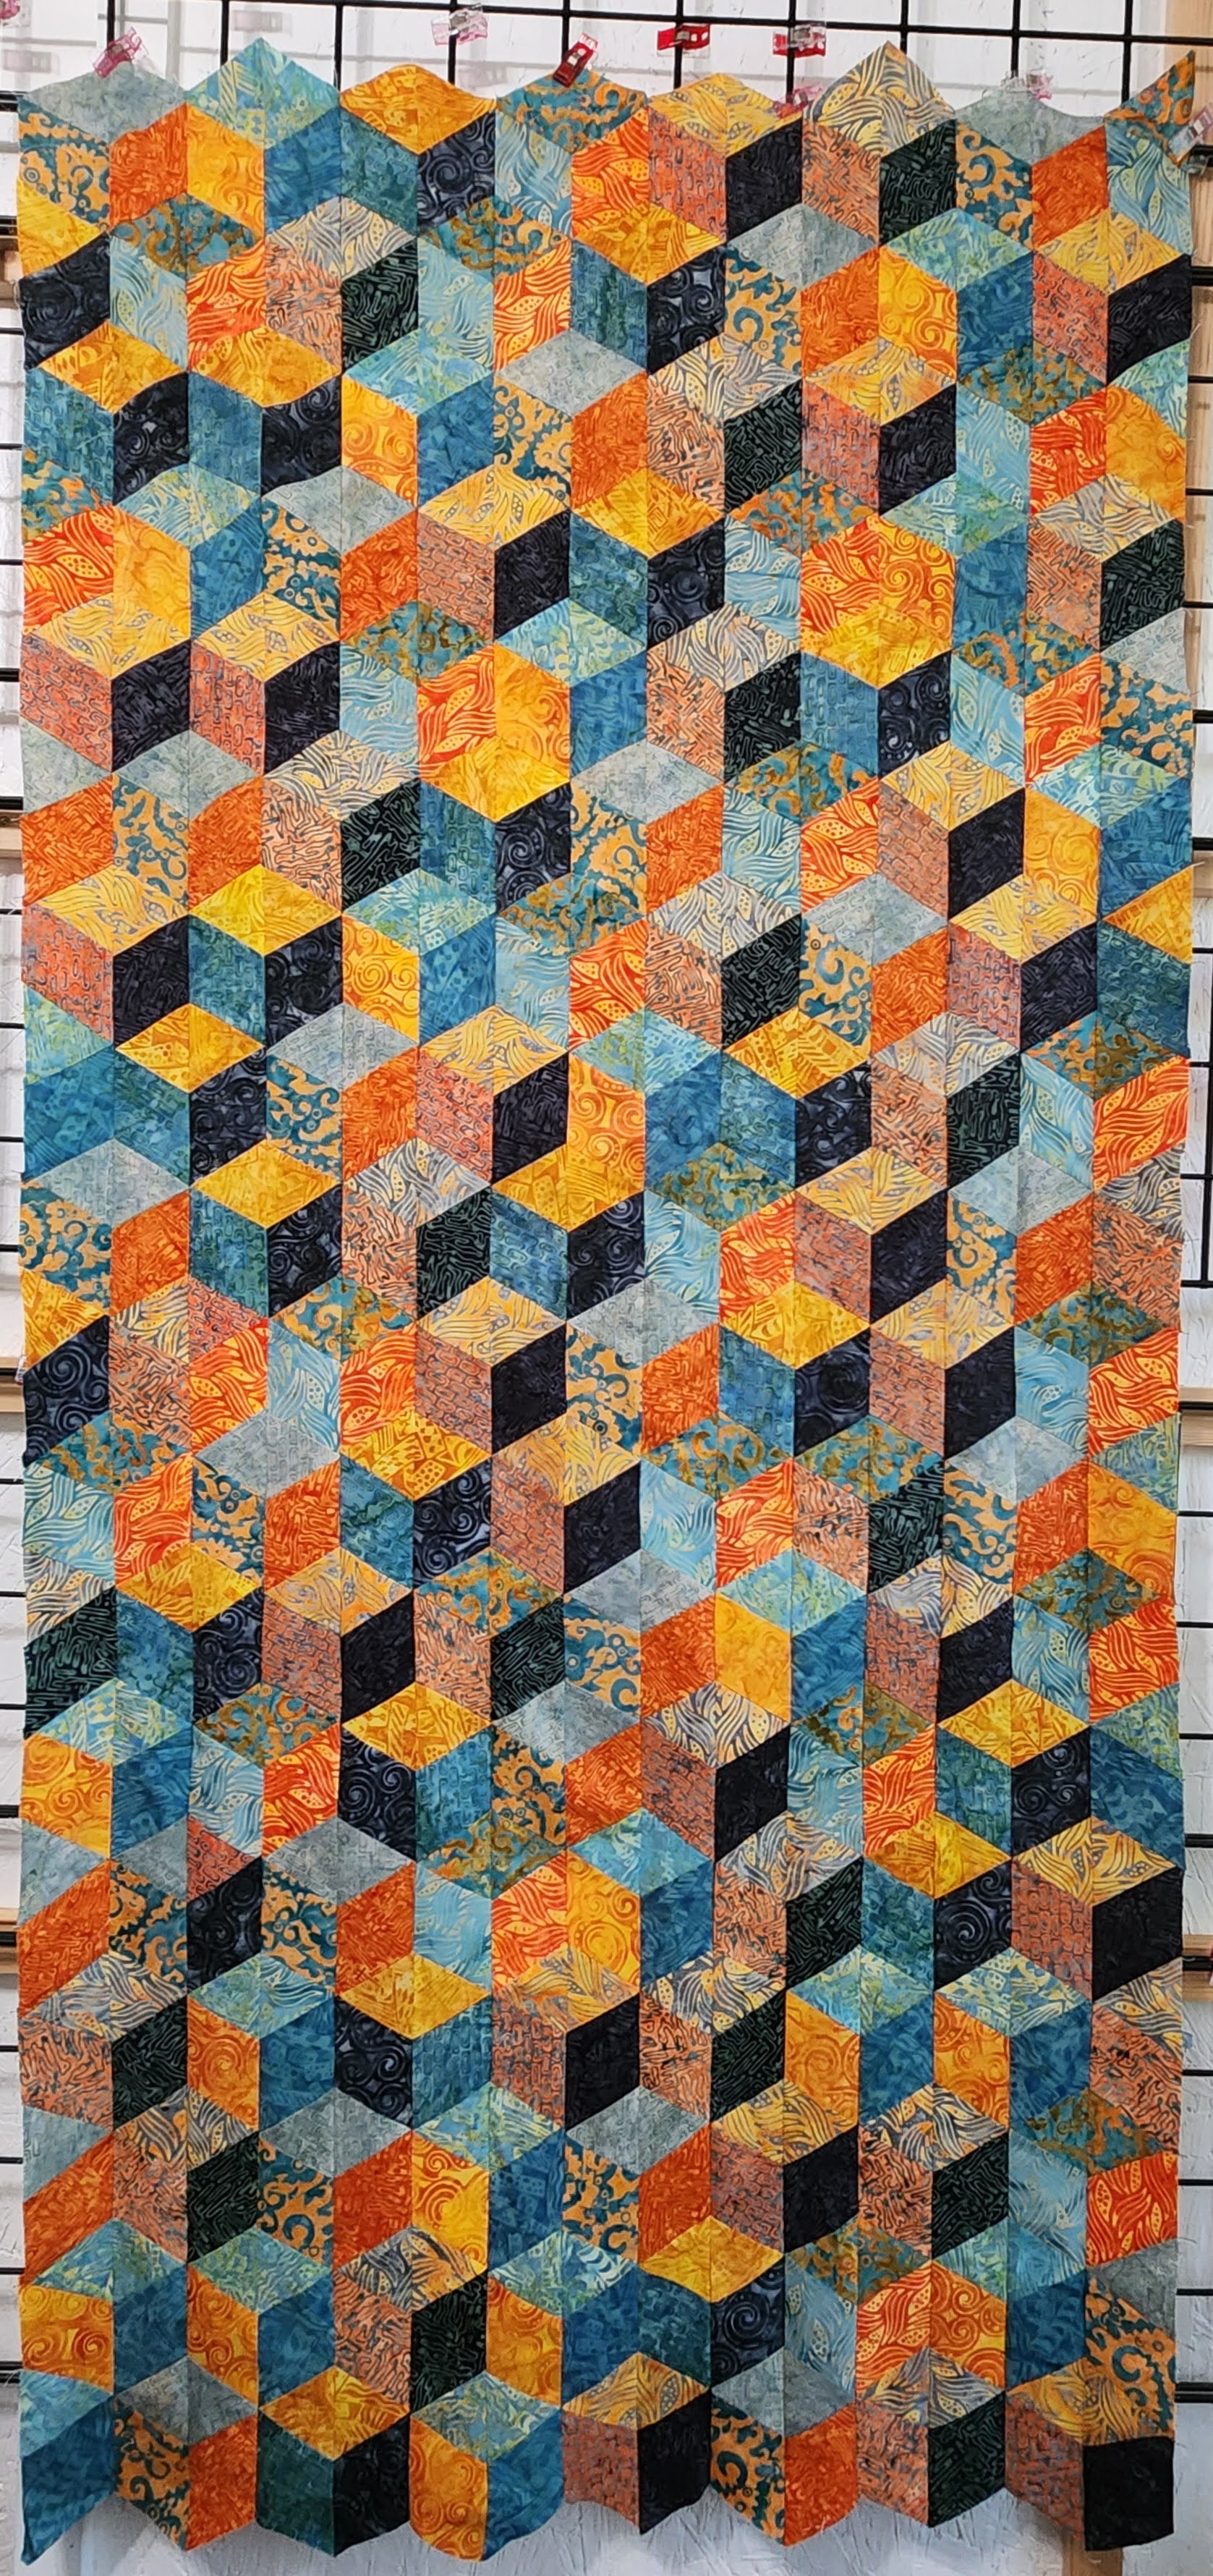
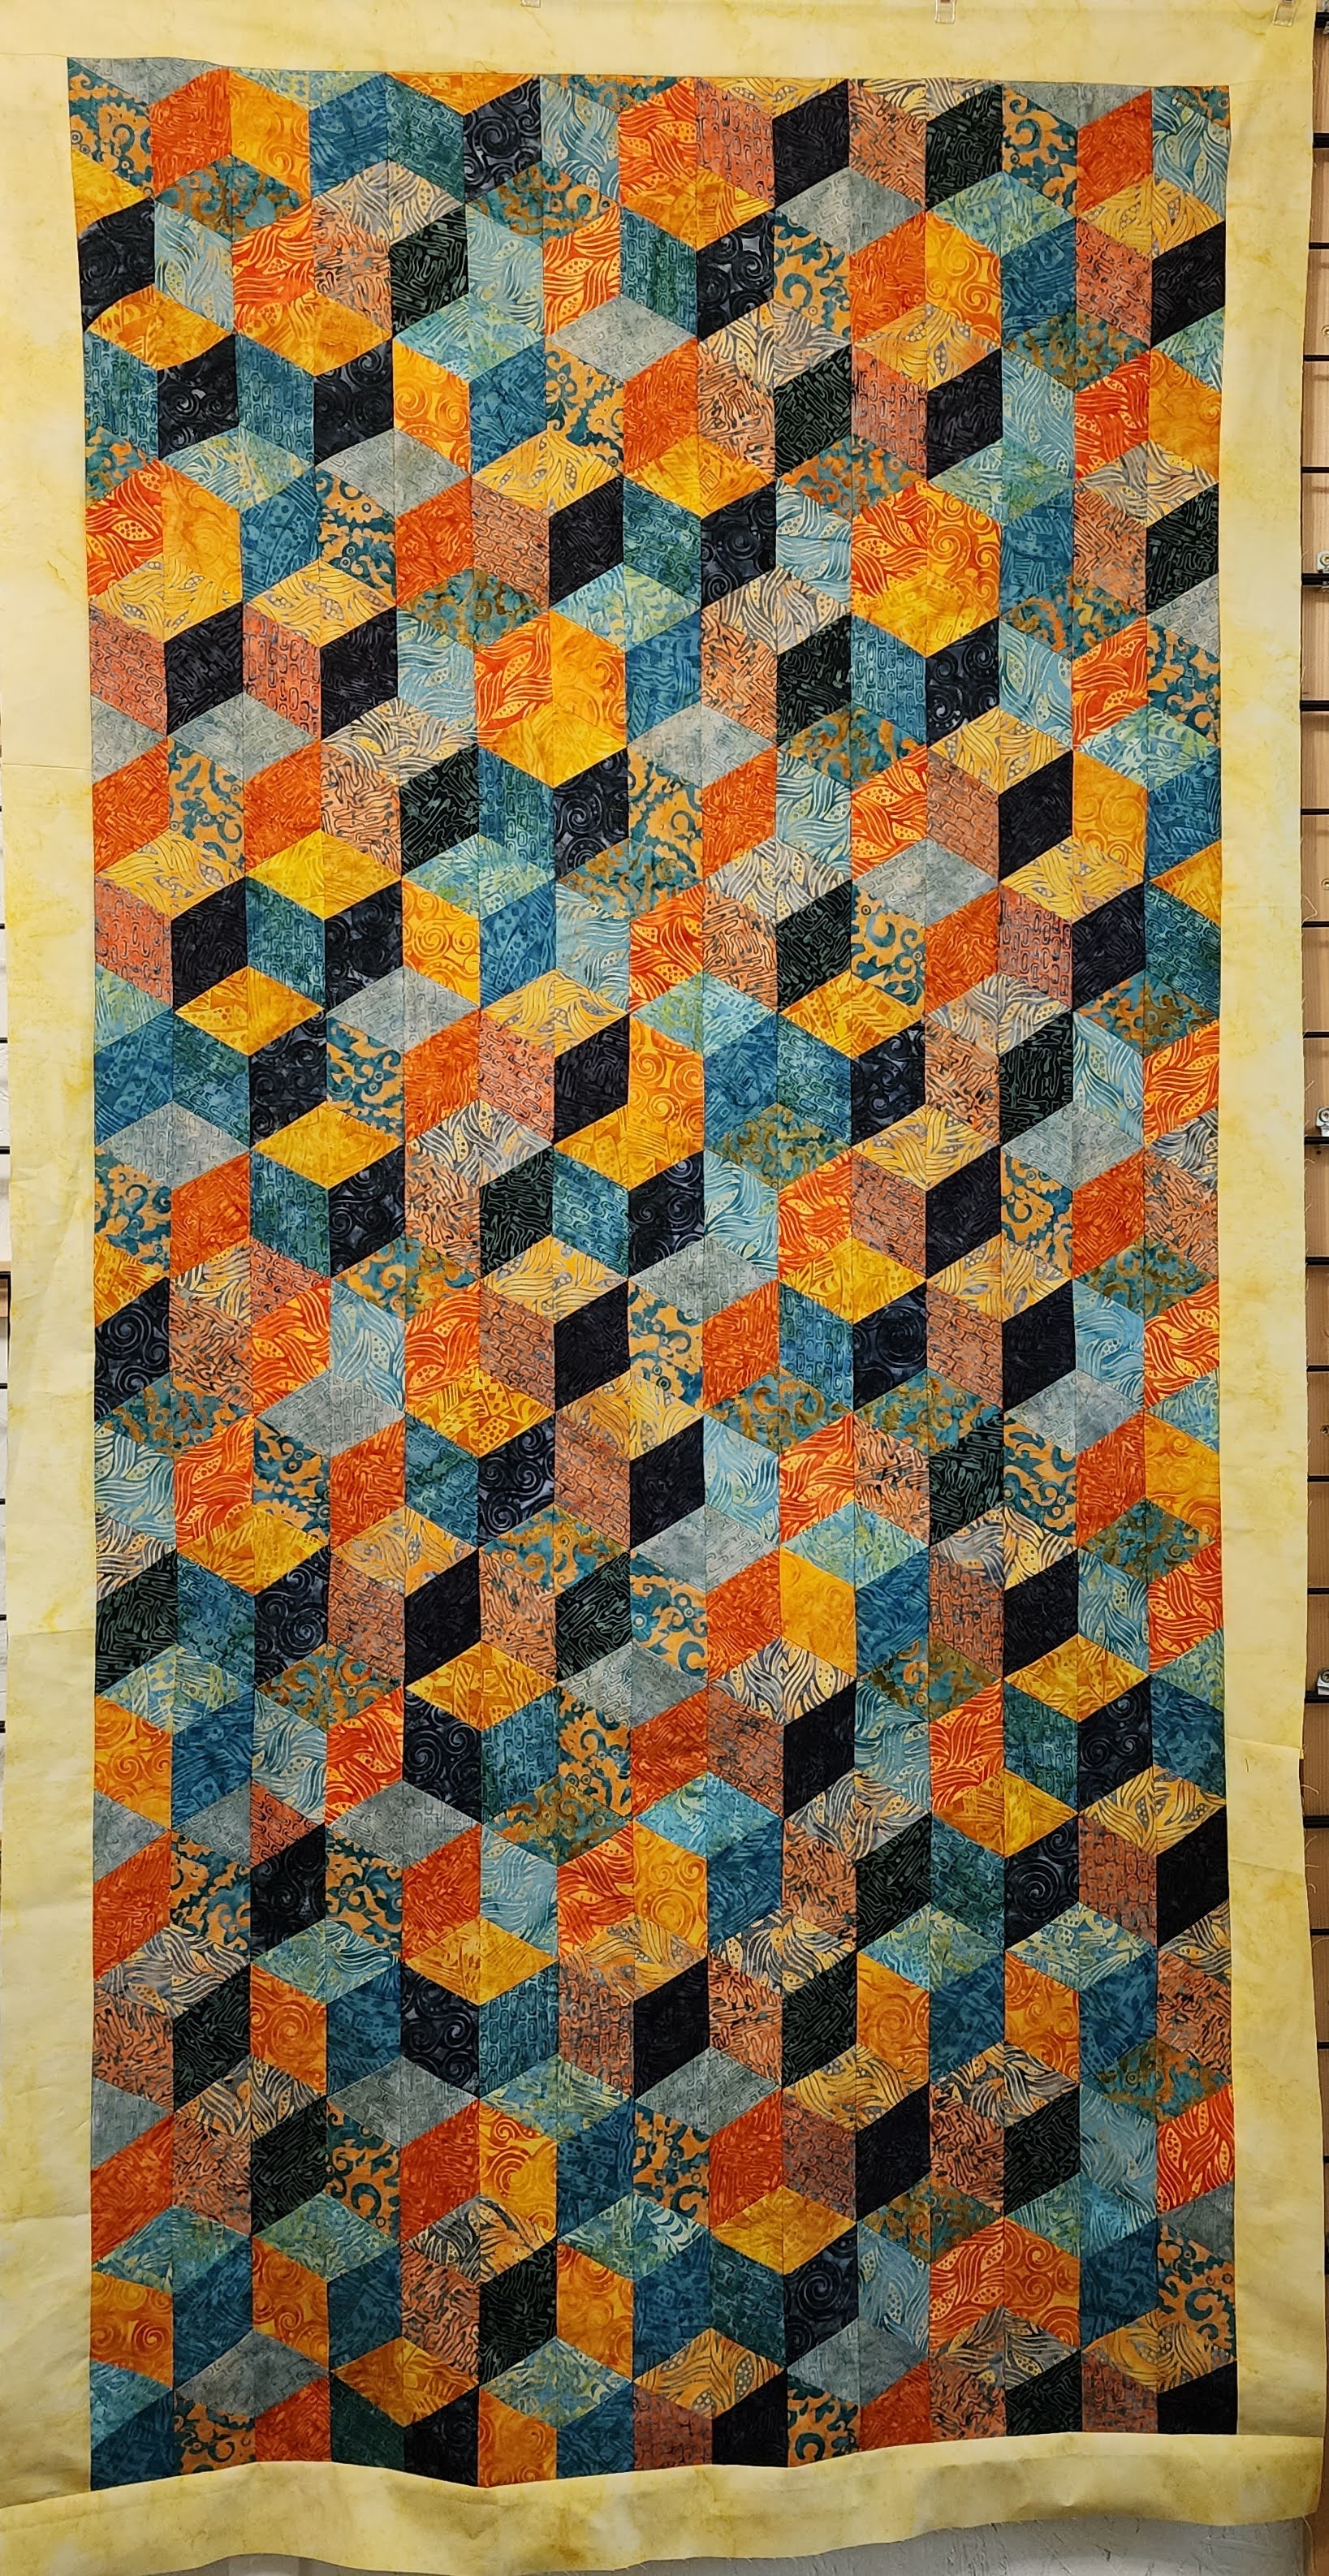
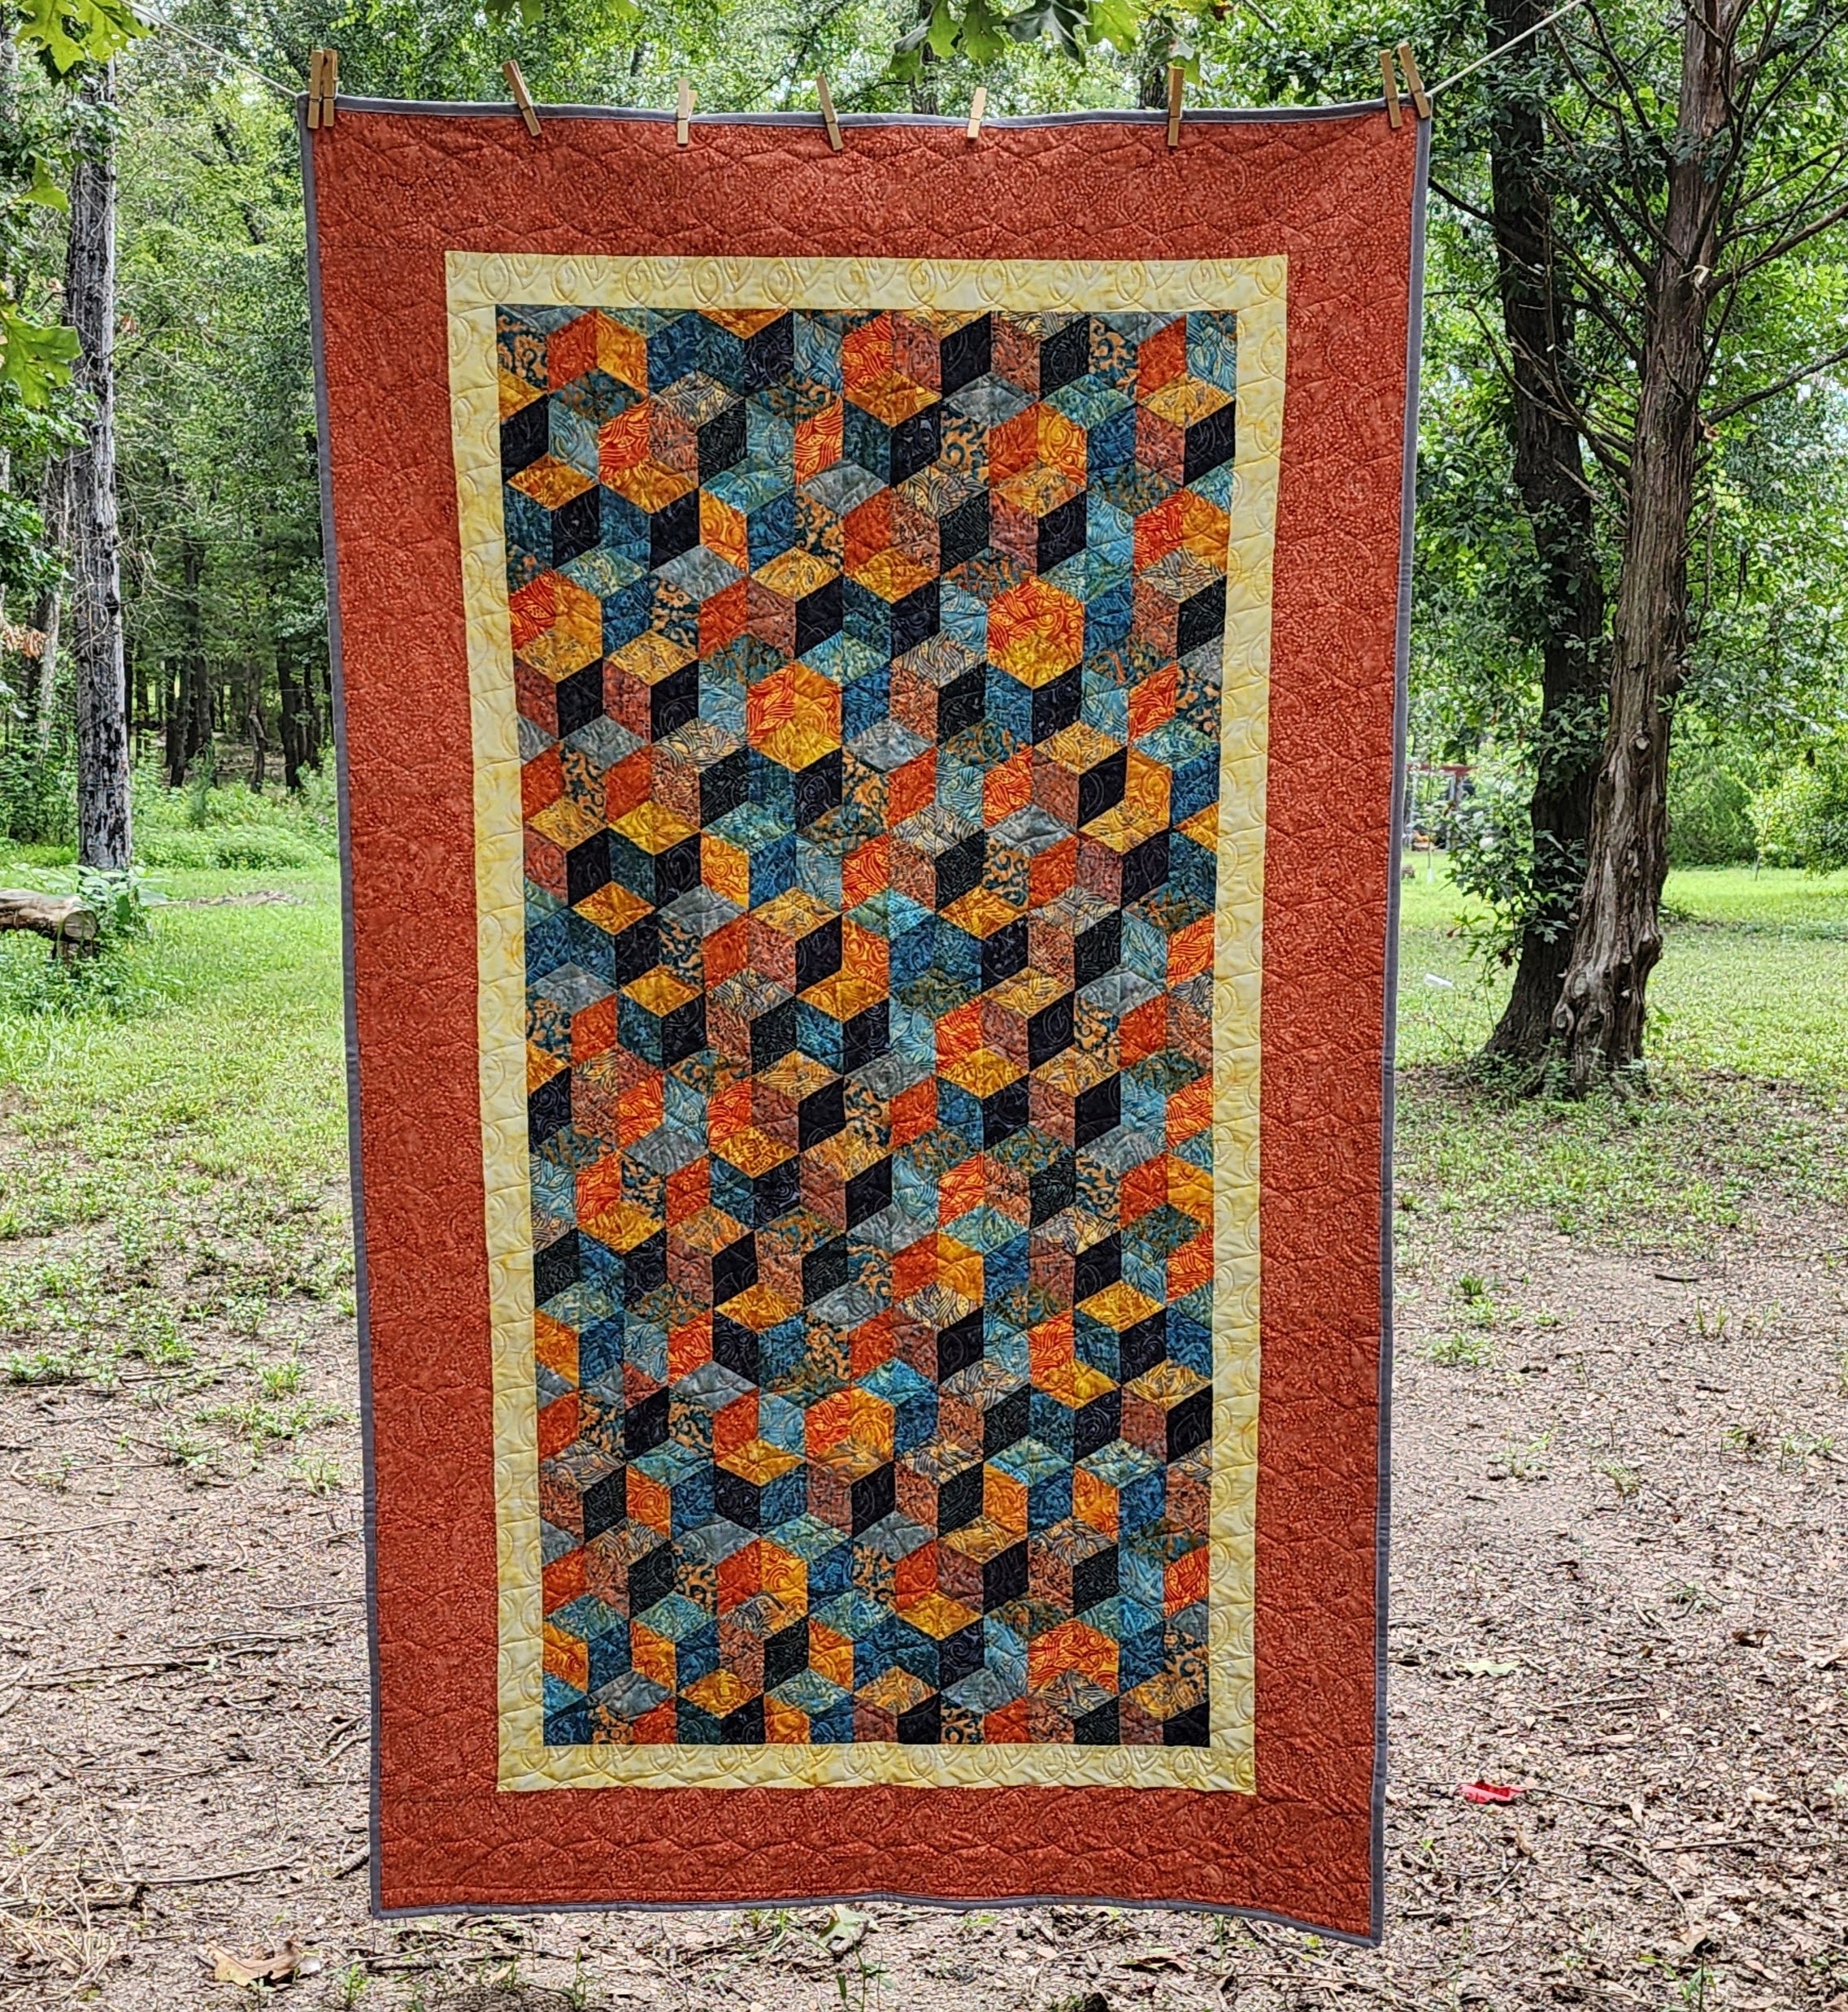
Here is the completed top. It is 46″ x 78″
Quilting
I used Hobbs Batting for this quilt. I picked out Thermore Batting, Queen Size. This is an Ultra-Thin, non-Bearding batting. My husband wanted something that was warm, but not heavy. Warmth to match the fall colors of the quilt. This batting was given to me free as part of my roll as an Island Batik Ambassador.
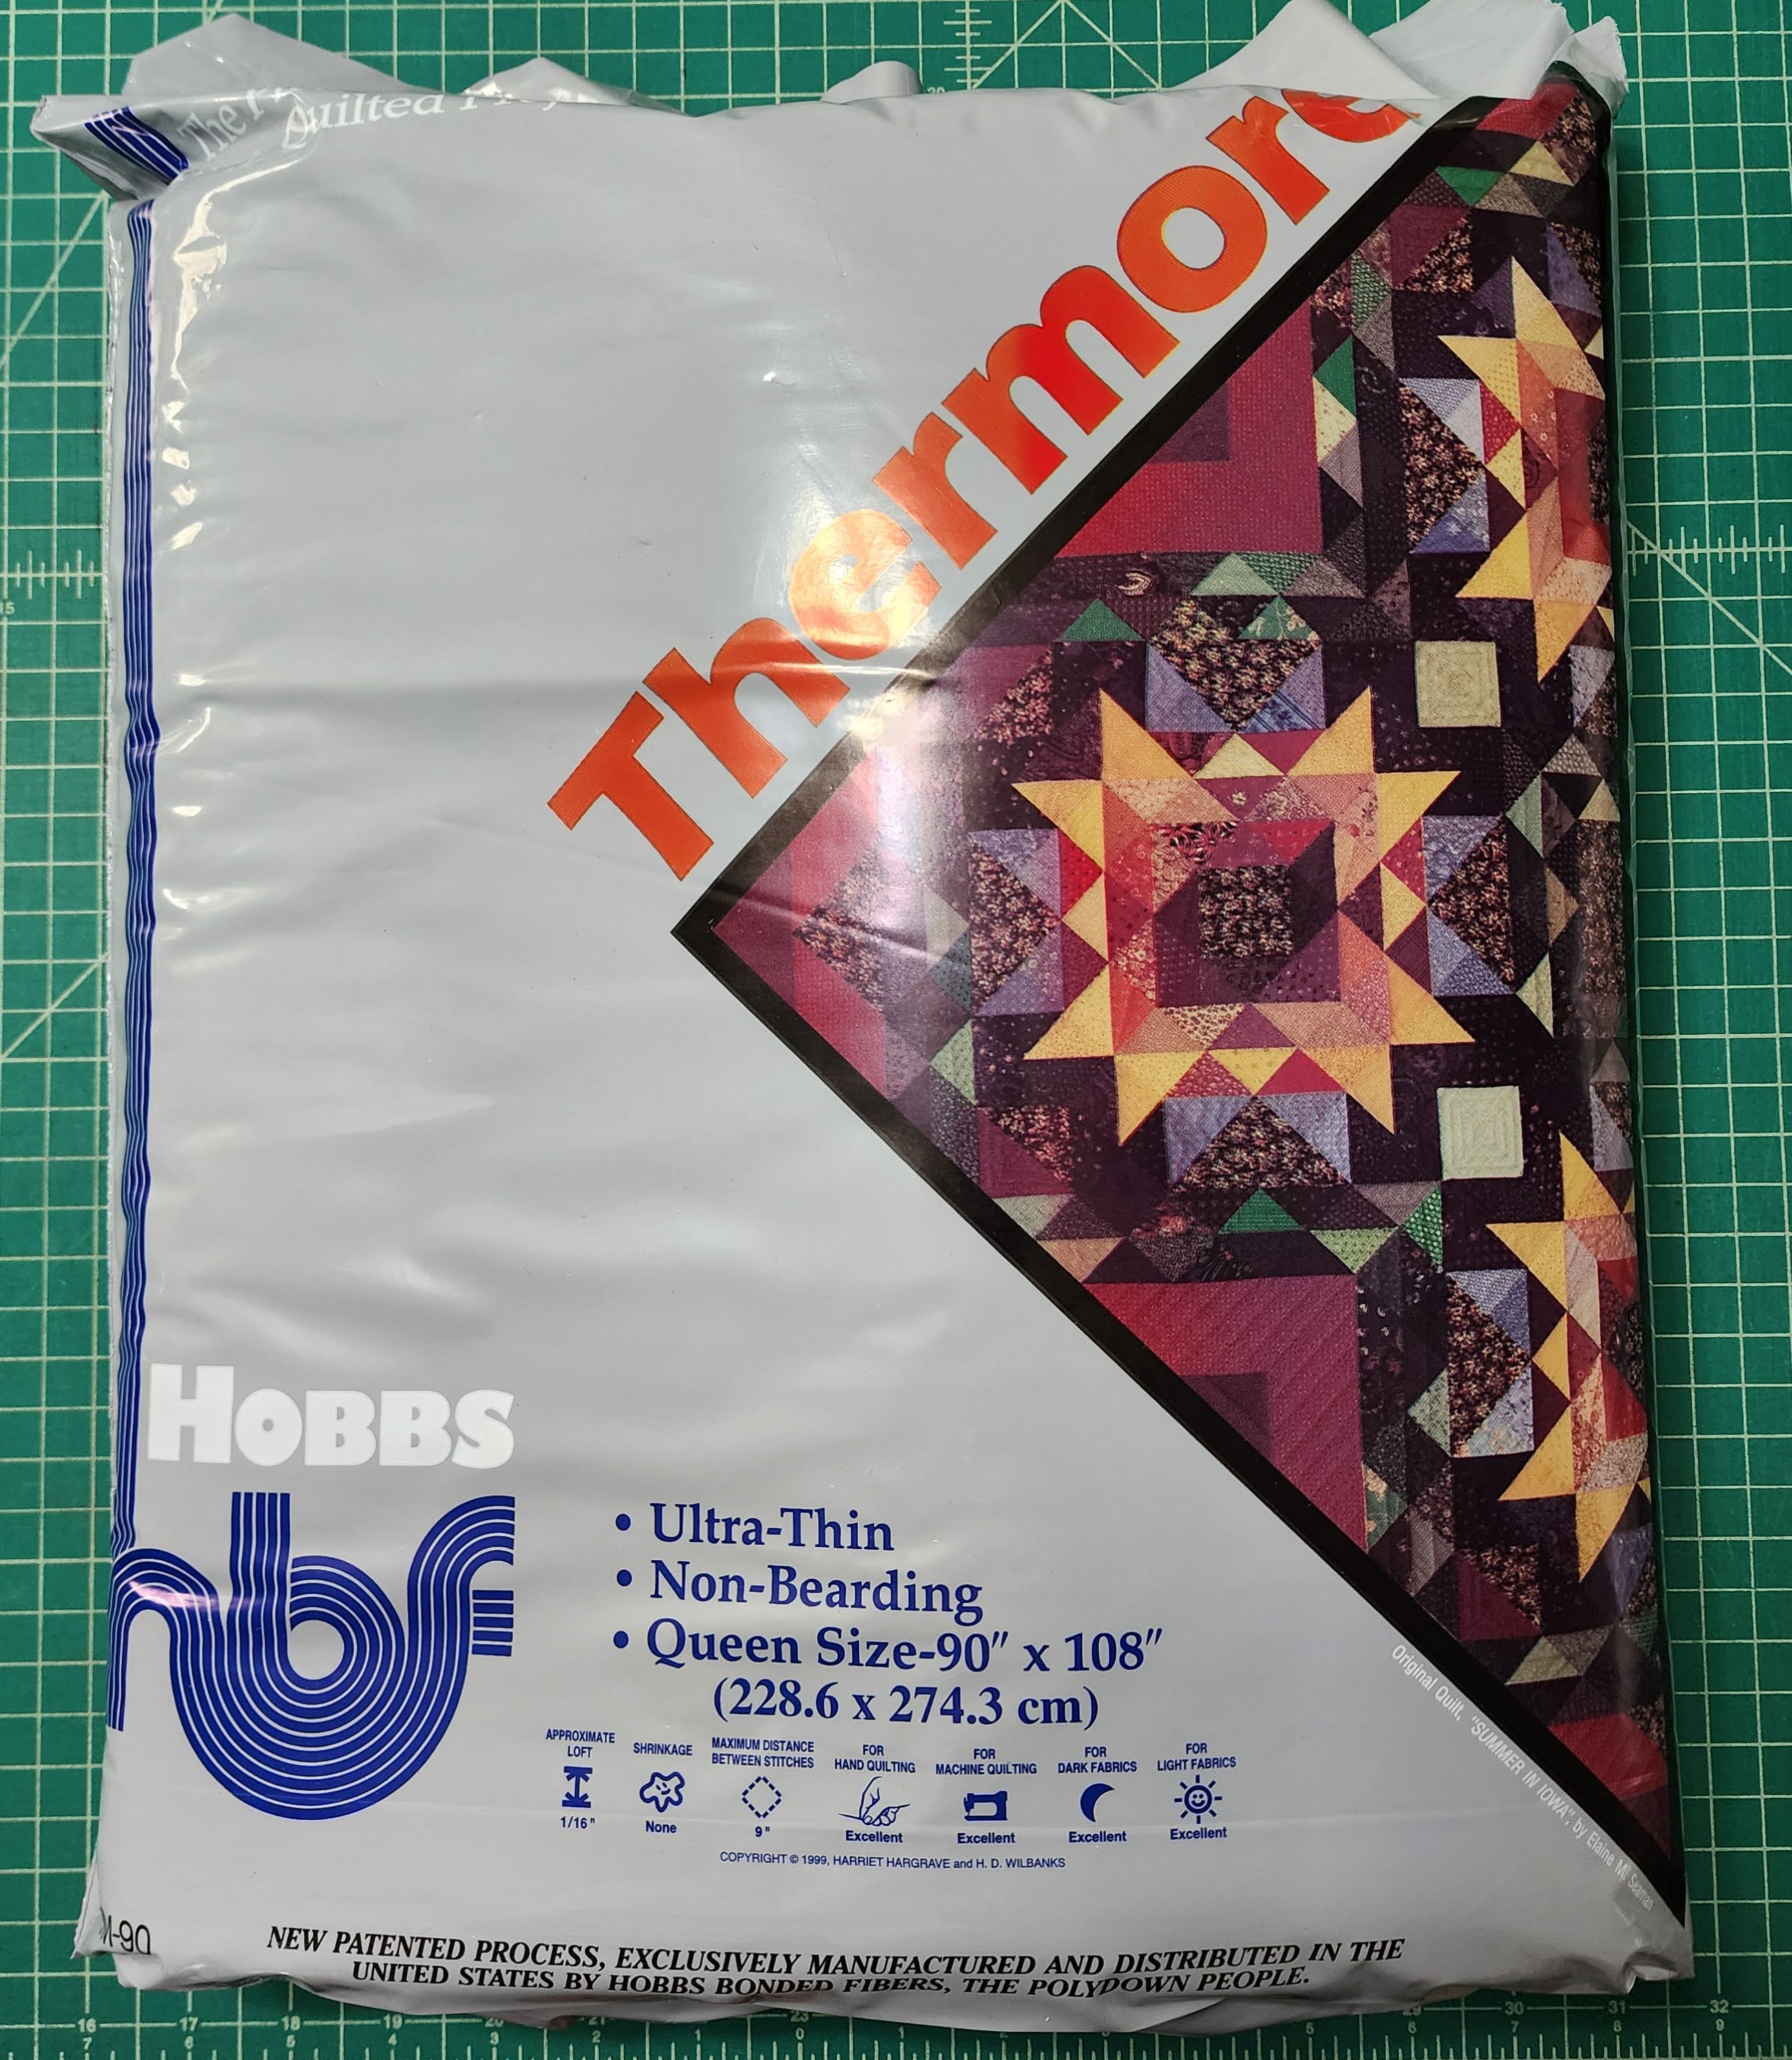
This batting is so easy to use and lays out very easy. I cut it down and saved the extra batting, a piece 56″ x 90″. I can make him another quilt with the left-over batting.
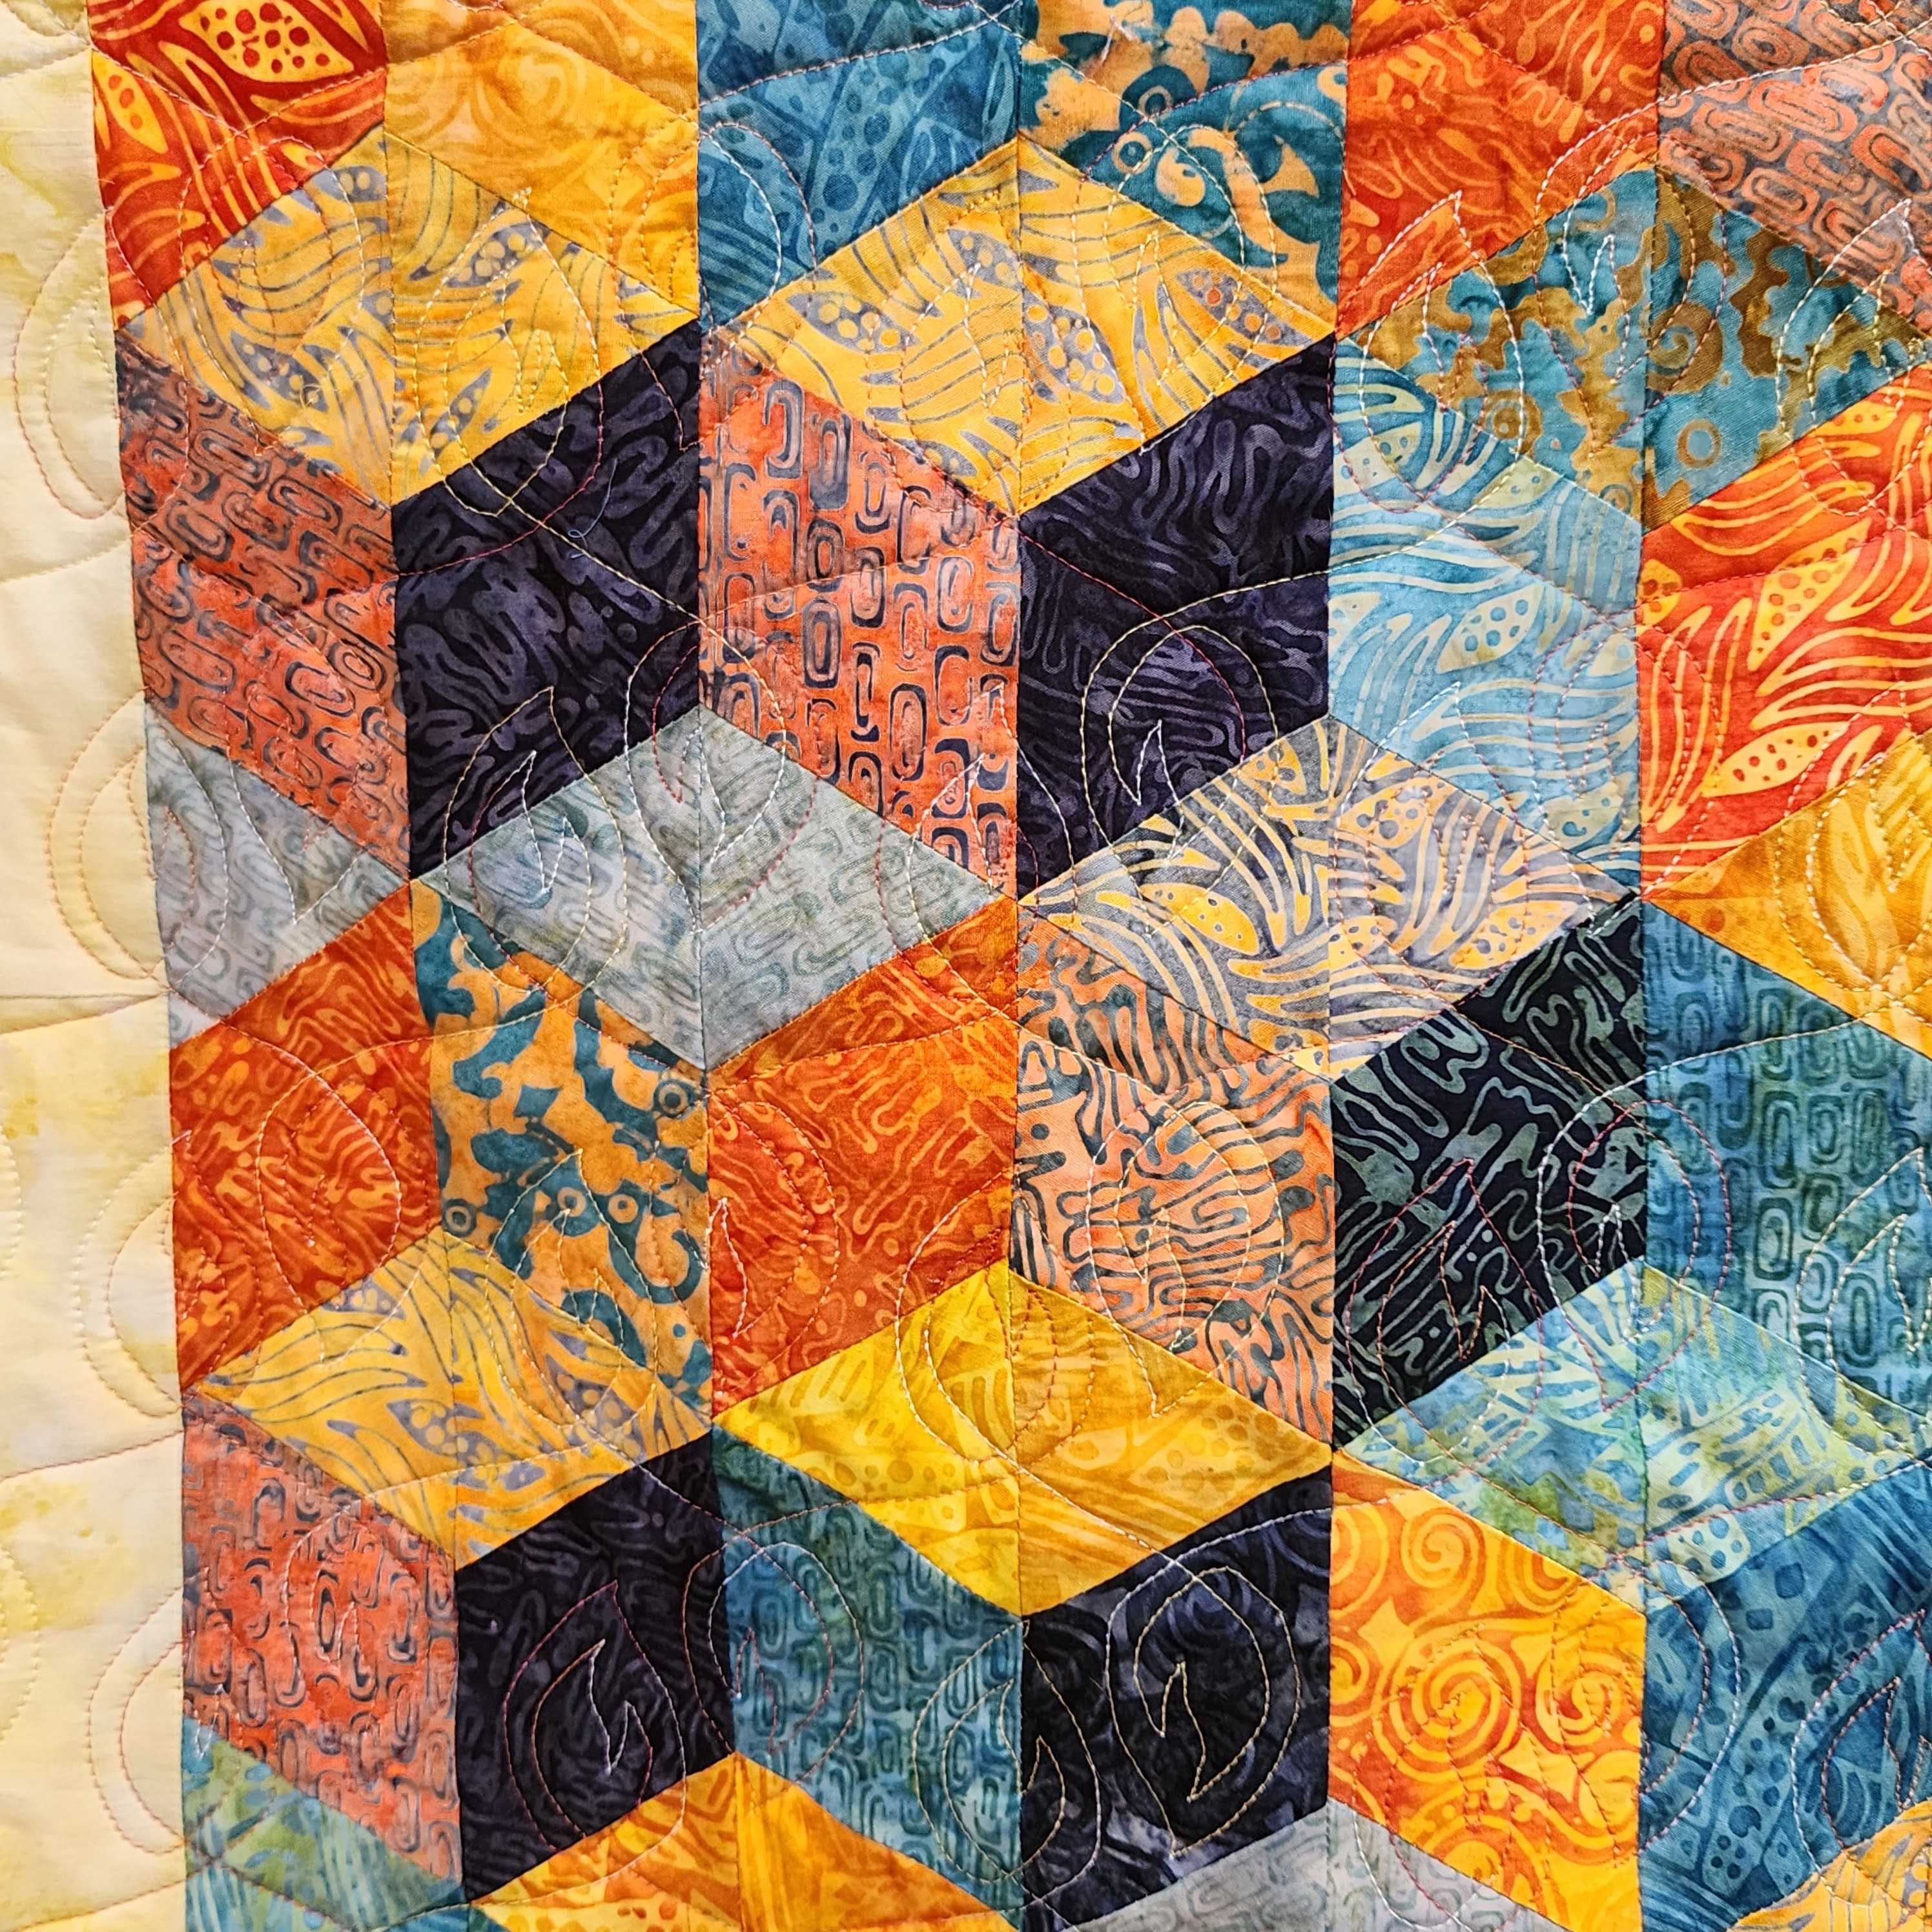
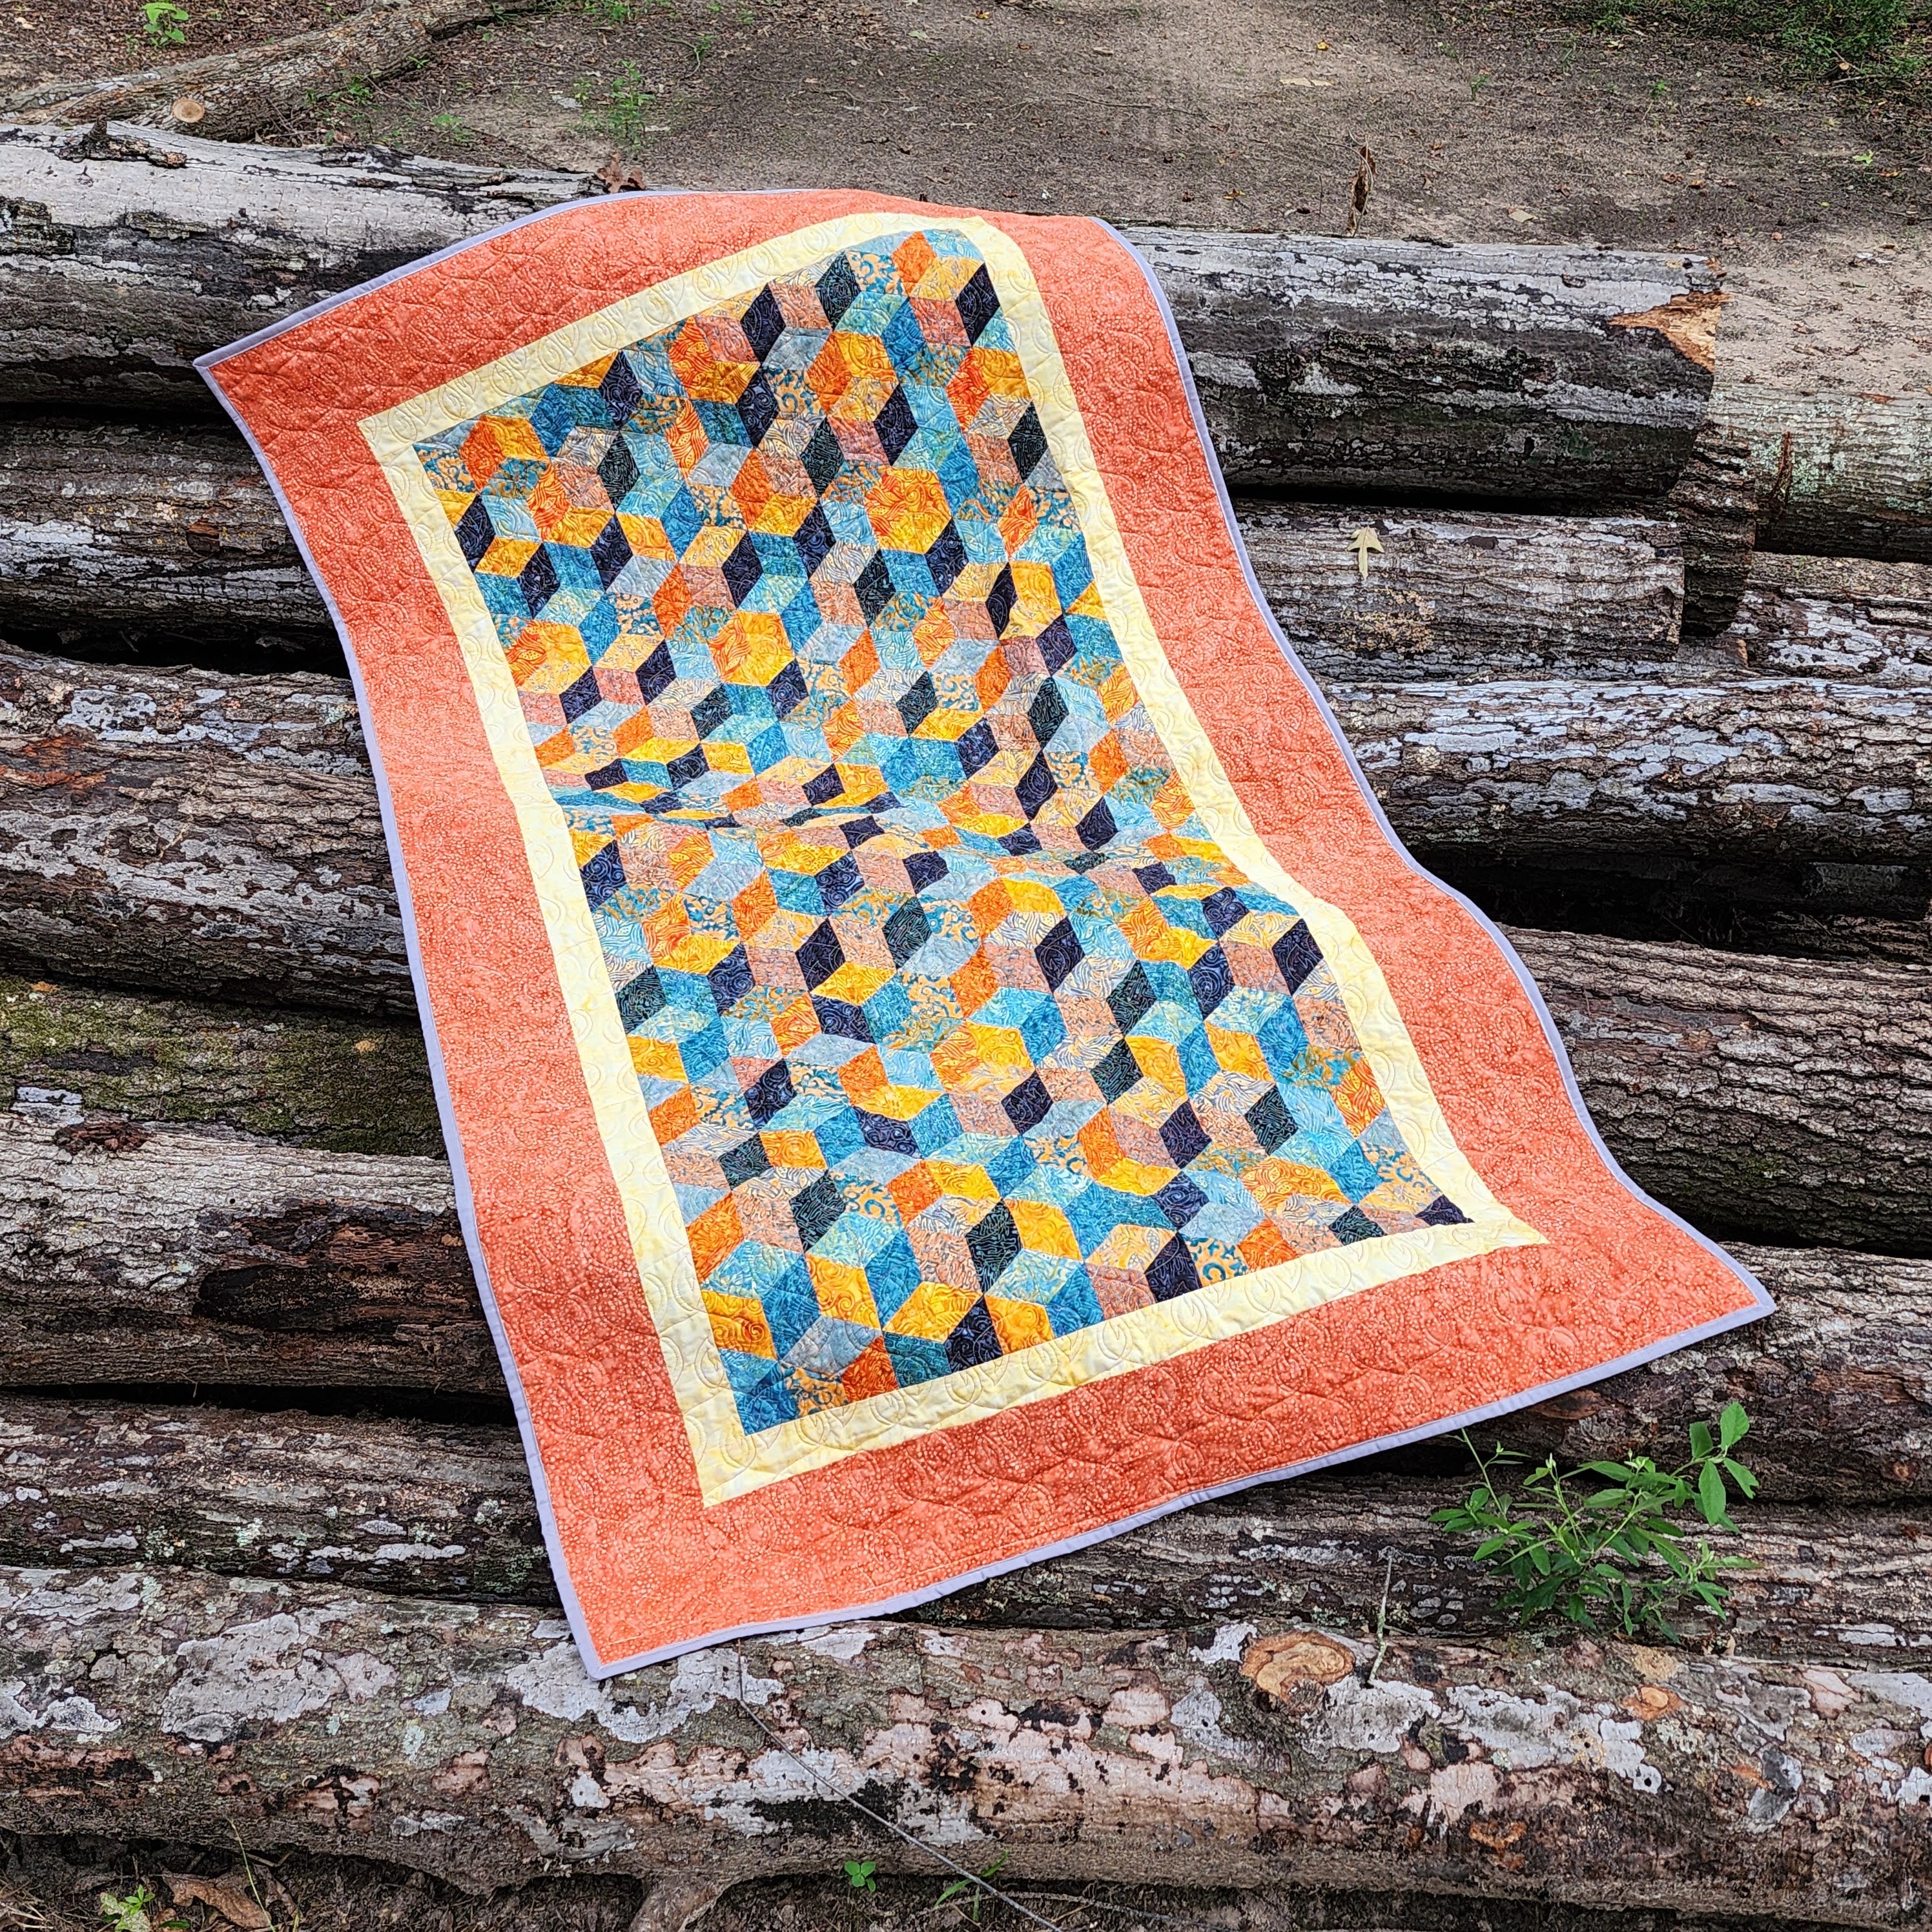
I quilted the top on my Juki Longarm, with Aurifil Black Thread #4657. This thread was part of Color Builder set, Bird of Paradise, that I purchased from Missouri Star. I used a design from Quilting Pantographs, called Flamed Leaves. This design was picked out by my husband, he liked how it would match the fabric. It fits him perfect. Quilting Pantographs has a great rewards program, and I got this design free with my points.

Here is my completed Quilt, Mini-Rhombus.
Let me know if you have make a Rhombus or Tumbling Block quilt, and how you made it.
You can buy the Rhombus templates. You can also buy Aurifil thread, Hobbs Batting, and Island Batik fabric from Missouri Star Quilt. If you use my link, you can get 20% off any purchase of $50 or more. I will receive a commission for any purchases.

#islandbatikambassador, #islandbatik, #iloveislandbatik, #juki, #aurifil, #hobbsinside, #msqcshowandtell, #msqcpartner

Great quilt! I’m sure your husband is going to LOVE it!
LikeLike