
During 2020 we will be doing blocks from the “One Hundred and one Patchwork Patterns” book by Ruby Short McKim. The book was published in 1931, and my husband’s maternal Grandmother learned to quilt from this book. These blocks are done in her honor.
This month’s block is V Block.
“The V Block is a perfect example of a pattern that gives entirely different effects depending on the way the quilt is “set up.” (McKim)
The original instructions were for a 14” finished block, Our block will finish at 12″ (12 1/2″ unfinished).
Fabric Requirements
Yellow – 2″ x 12″
White – 14″ x 24″
Pink – 4″ X 14″
Purple – 4″ x 14″
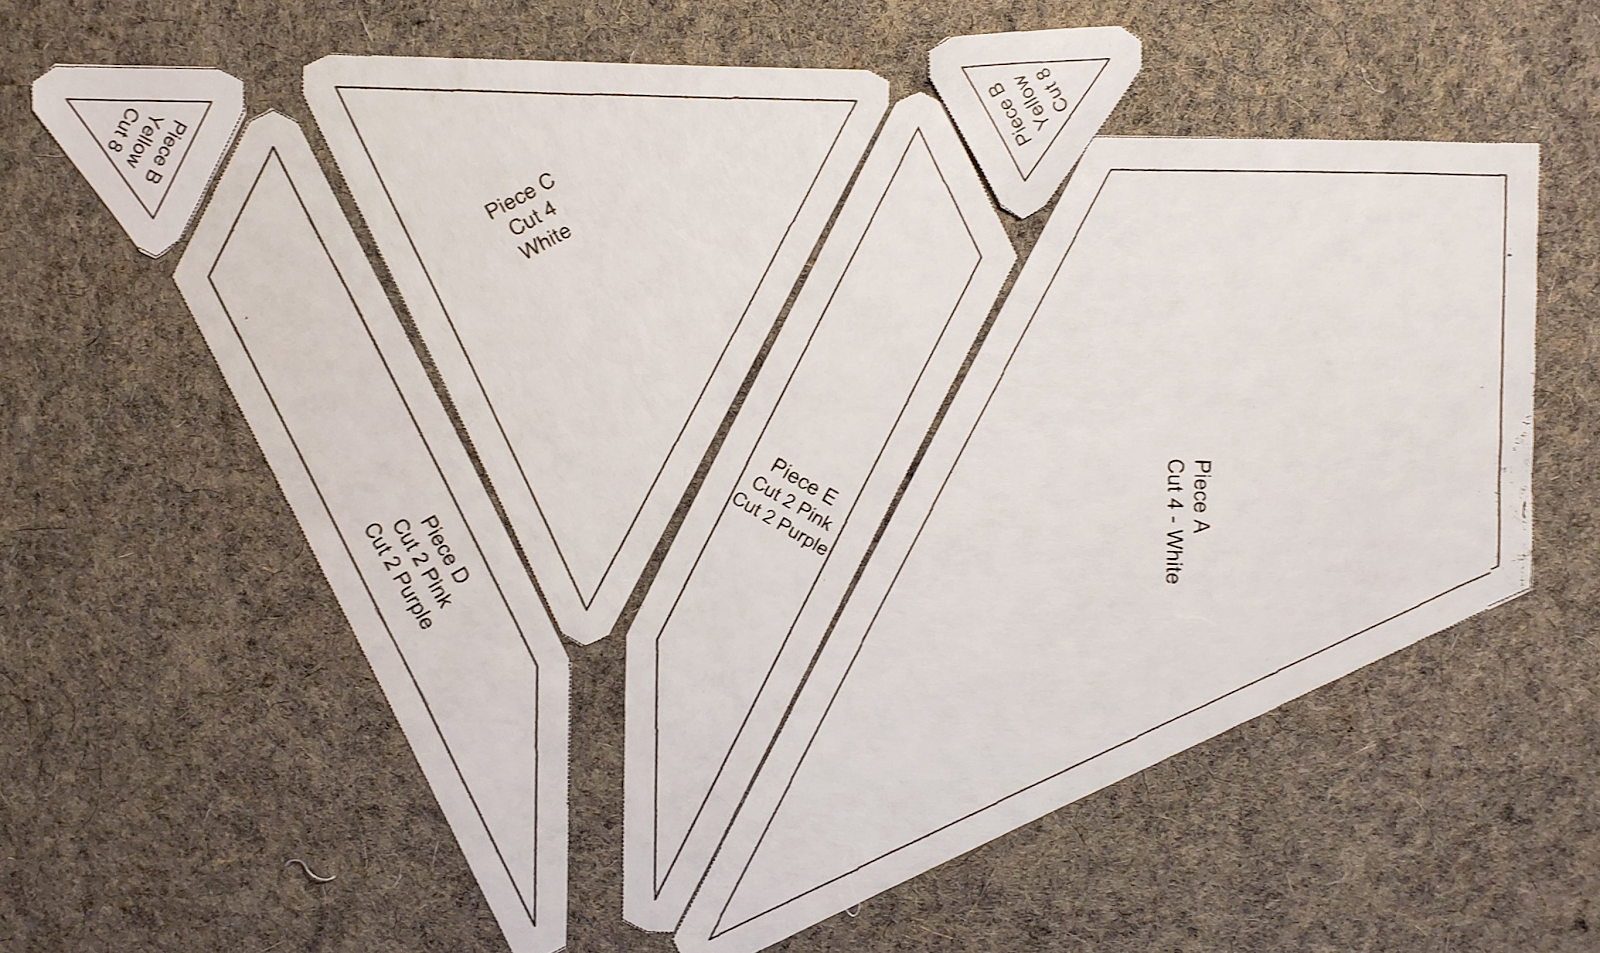
Templates – print
Print one copy of the Template PDF, making sure to check the 1″ block to make sure the pdf printed the correct size.

Fabric Cutting
Cut the following pieces
Pieces A & C – 4 of each piece (white)
Piece B – cut 8 of Yellow
Pieces D (cut two of each color Pink & Purple)
Pieces E (cut two of each color Pink & Purple)
Assembly
Will create 1/2 of the block, and then repeat for the second half.
Please note, there are 4 “y” seams in this block. The instructions will explain how to create these.
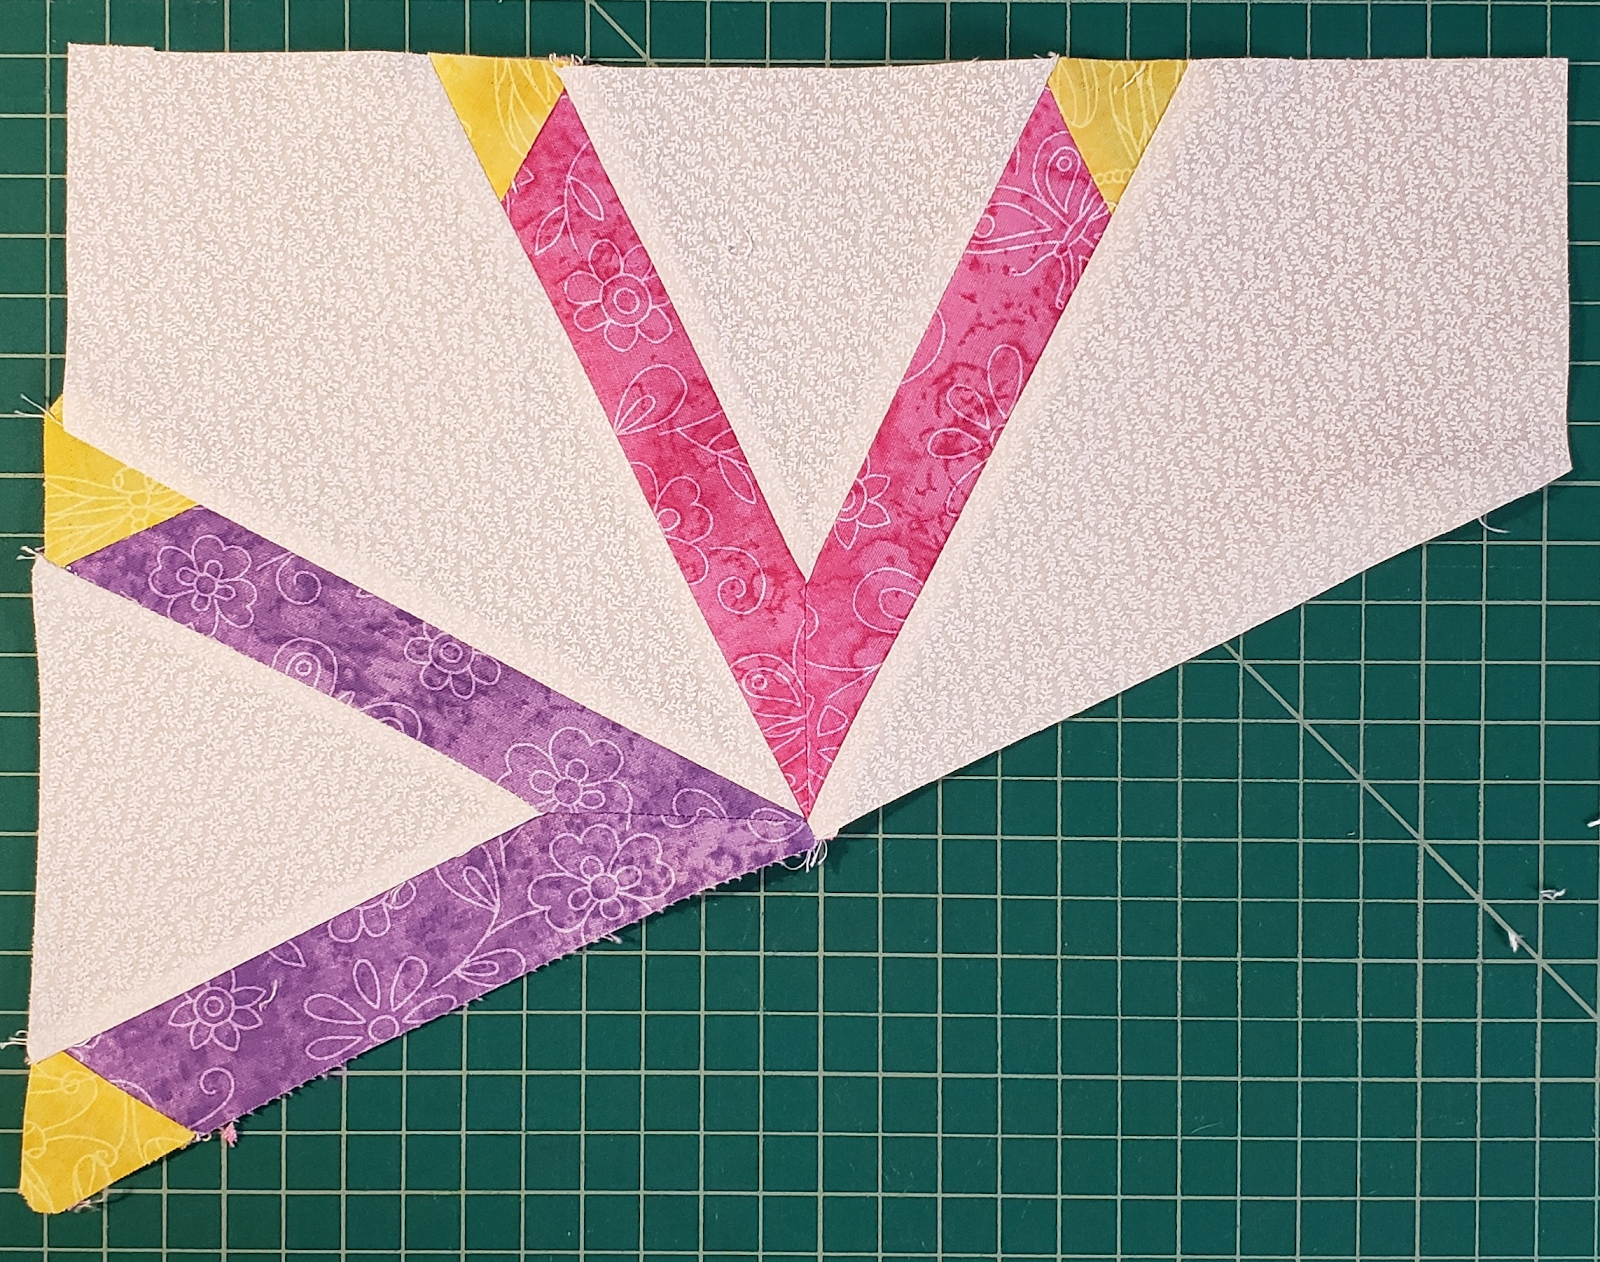
Layout the pieces according to this chart. Please take note of how pieces B & C (triangles) are laying, as they will make a difference in how the block goes together.
Using these pieces
- 4 (B)
- 1 of each color (D)
- 1 of each color (E)
- 2 (A)
- 2 (C)
Layout in this pattern

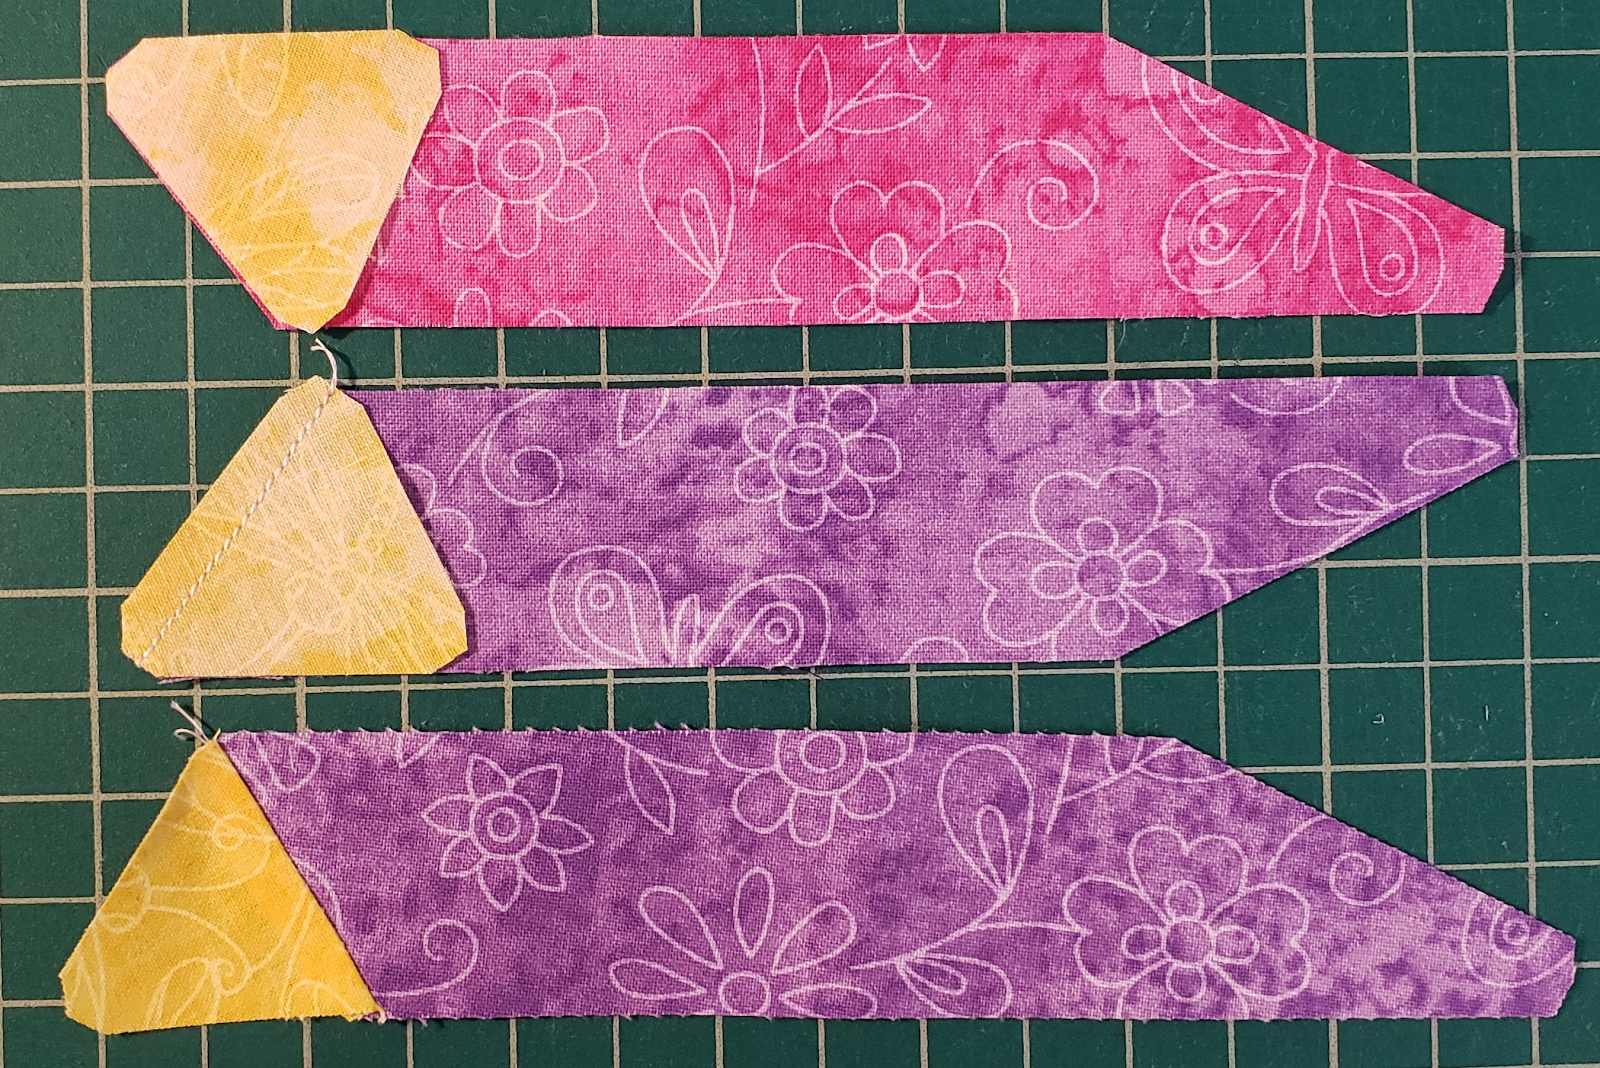
- Sew piece B to each of pieces D & E. Press seams towards B
- Sew piece D to piece C, press seams towards piece C
- Best practice is to sew with piece C side up, so you can stop at the end of the piece.
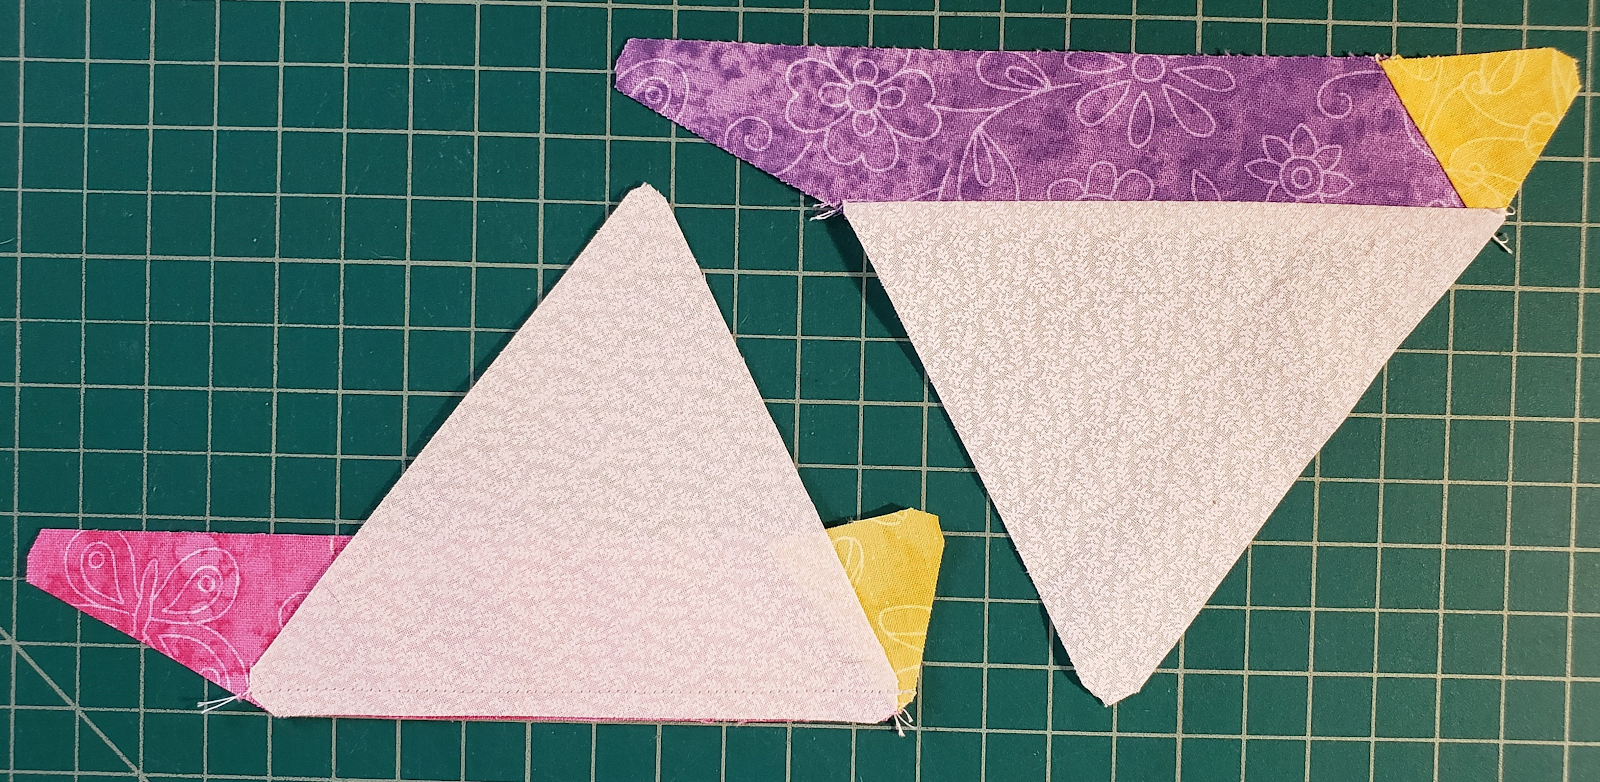
- Repeat for Piece D to Piece C, press seams towards piece C.
- Sew piece E to piece C, opposite side of the triangle.
- Best practice again, to sew with piece C side up, so you can stop at the end of the piece. (Very important)
- Wait to press

- Sew the piece E to piece C, opposite side of the triangle.
- Best practice again, to sew with piece C side up, so you can stop at the end of the piece. (Very important)
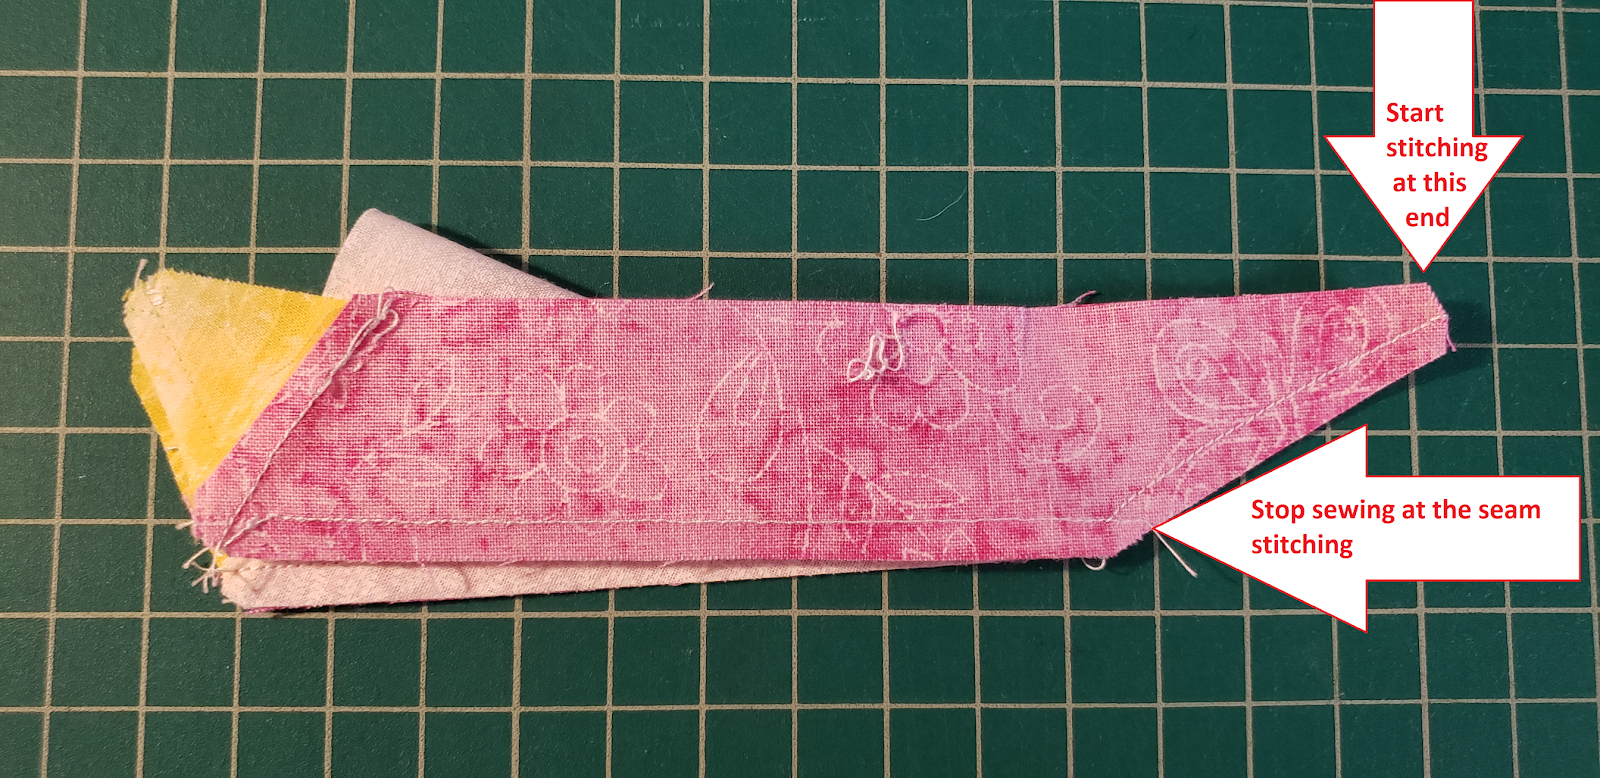
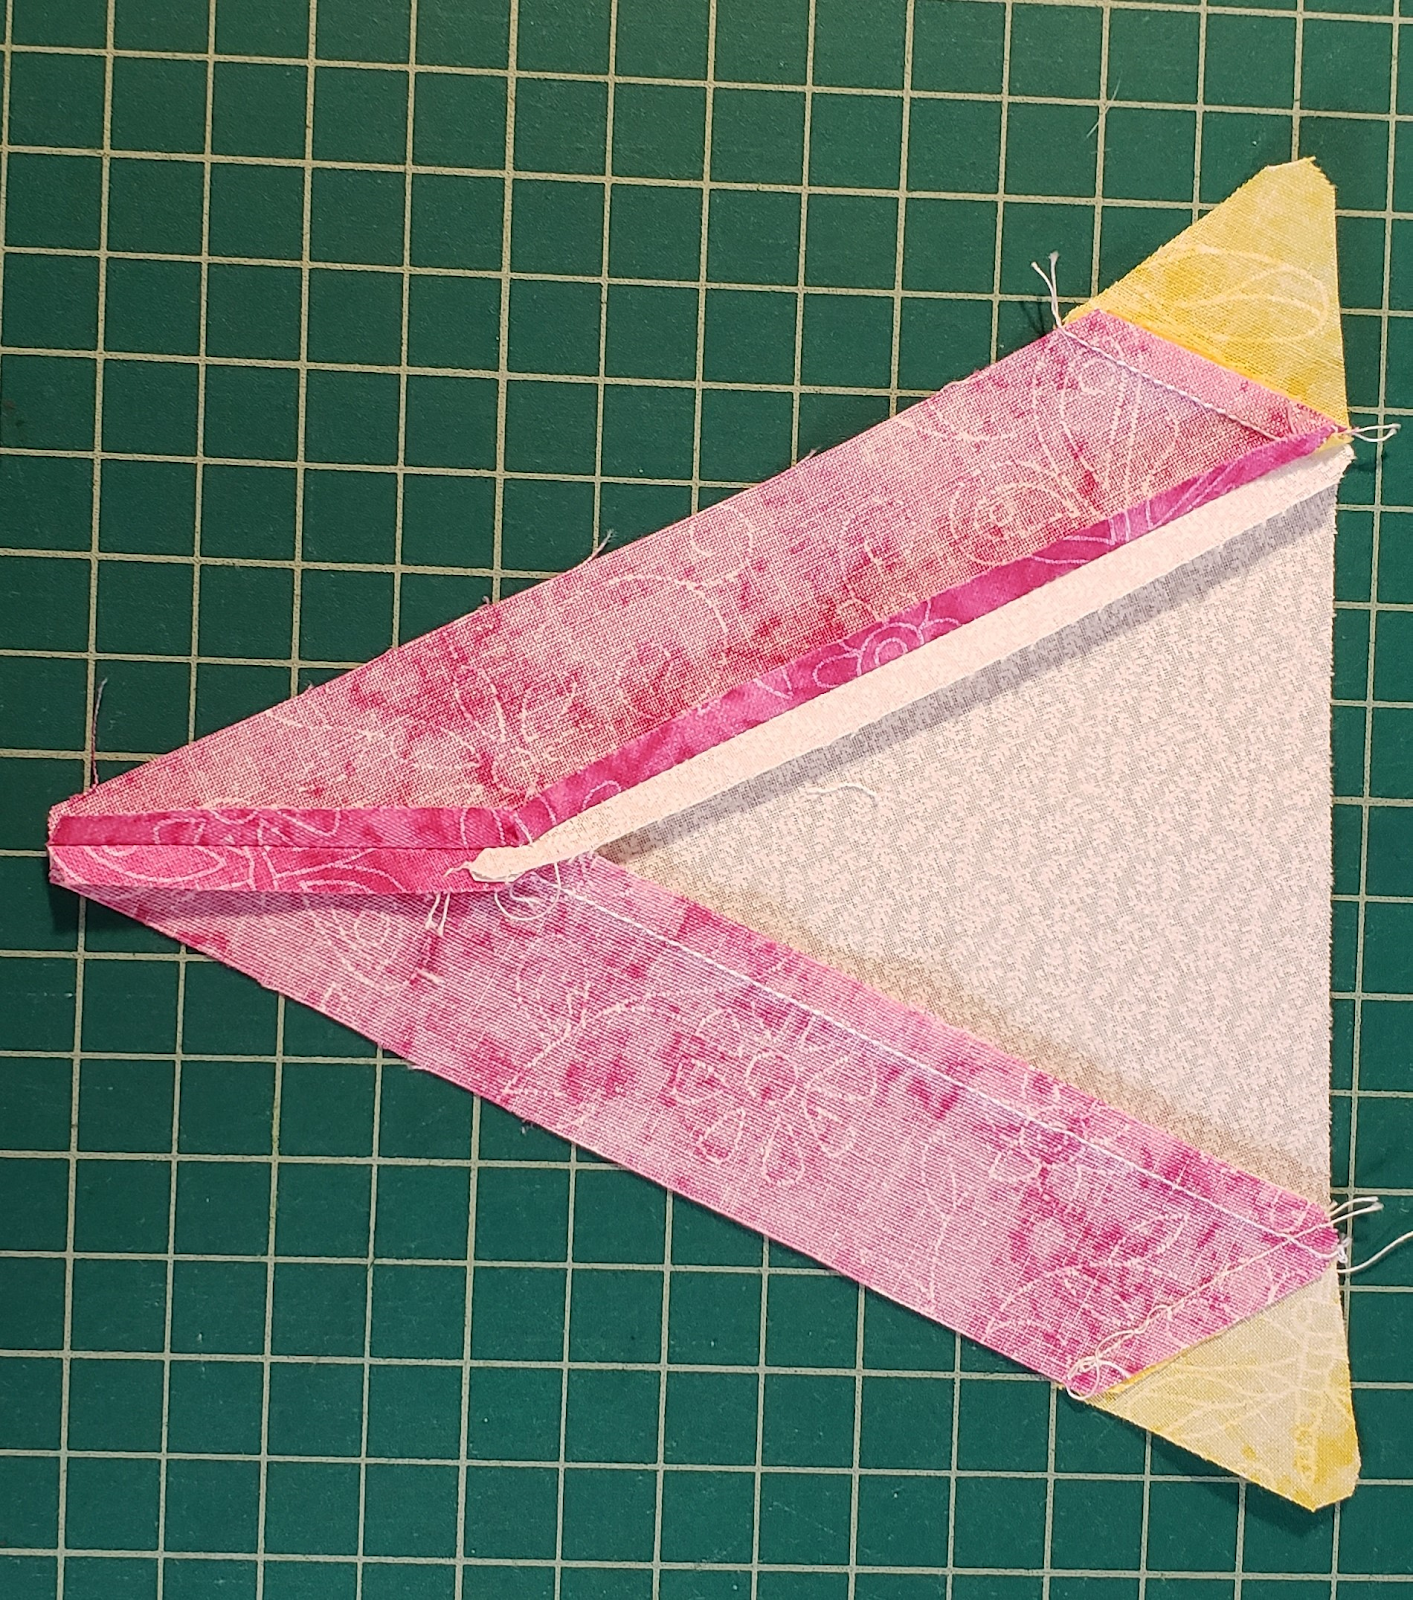
- Fold the piece in half, matching the pieces D & E together, while matching the tips together. Tuck piece c (triangle) inside the fold.
- Start stitching at the point, and stitch 1/4″ from the end going towards the seams.
- STOP stitching at the seam, so not go more than a stitch or two past the seam.
- Open up the piece, here is the backside, press seams open, from the point towards piece B on the one side. This will help reduce bulk when sewing the center of the block.
- Repeat steps 4 to 6 for the other color piece.
- Using the two triangles you created, add piece A to the side of piece E.

- Press seams open.

- Repeat for the other triangle. (make sure that you sew Piece A to the same side of the other triangle, so they will fit together correctly.
- Sew piece A to piece D.
You now have completed the first half of the block. Repeat these steps to create the other half.
Final assembly.
Sew the two halves created in the steps above together. Matching the center points. Press seams open, to reduce bulk.

You have now completed the V Block.

I look forward to seeing all your wonderful blocks! Make sure to post on the Facebook group!
Thank you for joining us for this block of the month!
You can view my video for this on my Youtube Channel.
Click Here for a downloadable PDF of the instructions. For the previous blocks, you can check under units in the Facebook group.

Thank you.
LikeLike
Thank you!
Sent from my iPhone 🇺🇸🏠
Jeri@JeriAnderson.net
LikeLike