During 2020 we will be doing blocks from the “One Hundred and one Patchwork Patterns” book by Ruby Short McKim. The book was published in 1931, and my husband’s maternal Grandmother learned to quilt from this book. These blocks are done in her honor.
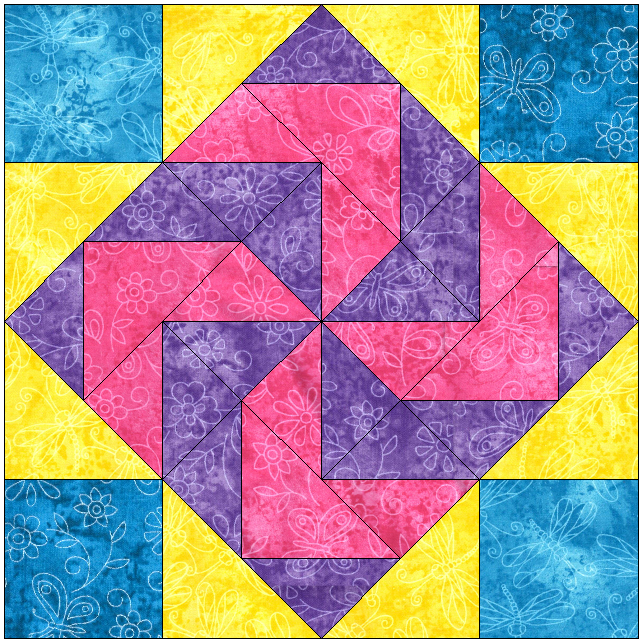
This month’s block is Crazy Ann.
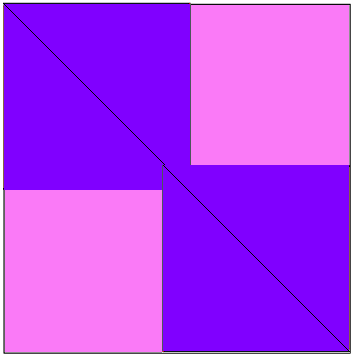
“Its complex appearance unravels very simply—first piece an oblong A and another with colors reversed. Join them to form B, then join four squares B to make the center to which four triangles C are added. Only one caution; the four pieced squares must go together in identical sequence in all of the blocks. If the whirl-like movement reverses in some, they will never set together properly” (McKim)
Please note that the middle symbol of this block has a long history of being a positive symbol.
“The word swastika comes from the Sanskrit svastika, which means “good fortune” or “well-being.” The motif (a hooked cross) appears to have first been used in Eurasia, as early as 7000 years ago, perhaps representing the movement of the sun through the sky. To this day, it is a sacred symbol in Hinduism, Buddhism, Jainism, and Odinism. It is a common sight on temples or houses in India or Indonesia. Swastikas also have an ancient history in Europe, appearing on artifacts from pre-Christian European cultures. (US Holocaust Museum). “
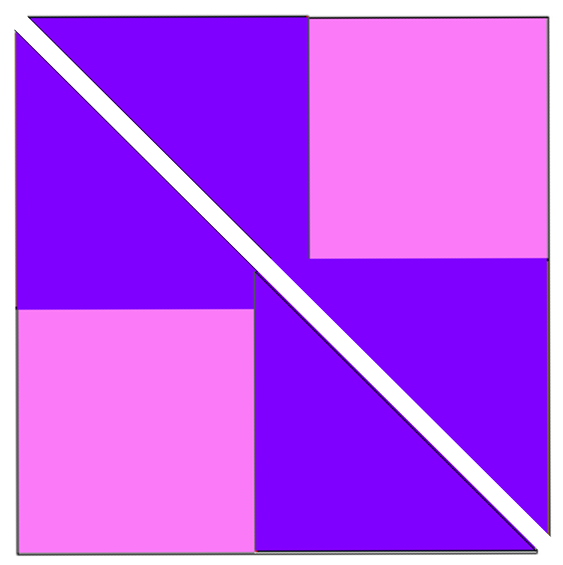
If you do not like the way the block looks, you can create the 8 flying geese and layout like the “Dutchman’s Puzzle” was done.
The original instructions were for a 12” finished block, Our block will also finish at 12″ (12 1/2″ unfinished).

Fabric Requirements
– Color A – Dark Teal 4″ x 8″
– Color B – Light Teal 4″ x 8″
– Color C – Yellow 8″ x 8″
– Color D – Pink – 10″ x 11″
– Color E – Purple – 10″ x 11″
Fabric Cutting

Assembly
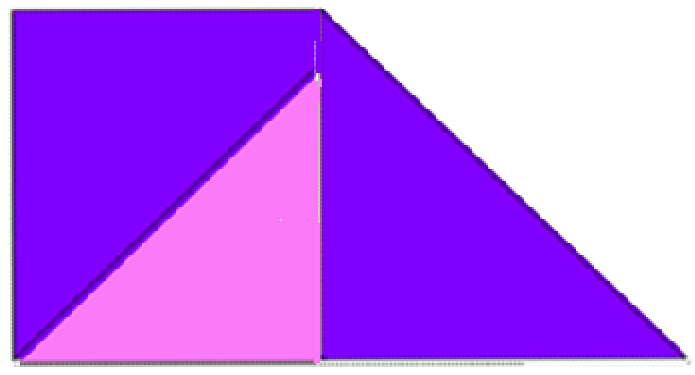
“No Waste Flying Geese” Color D – 5 3/4″ x 5 3/4″ piece and Color E – four pieces of 3 1/4″ x 3 1/4″ to create the first set of four Flying Geese.
1. Draw a diagonal line across the back of the smaller squares

2. Place two Color E on opposite corners of Color D, right sides together, with the lines flowing together.
3. Stitch 1/4″ along both sides of the drawn lines
4. Cut along the drawn lines
5. Press Open (press towards piece D to reduce bulk)

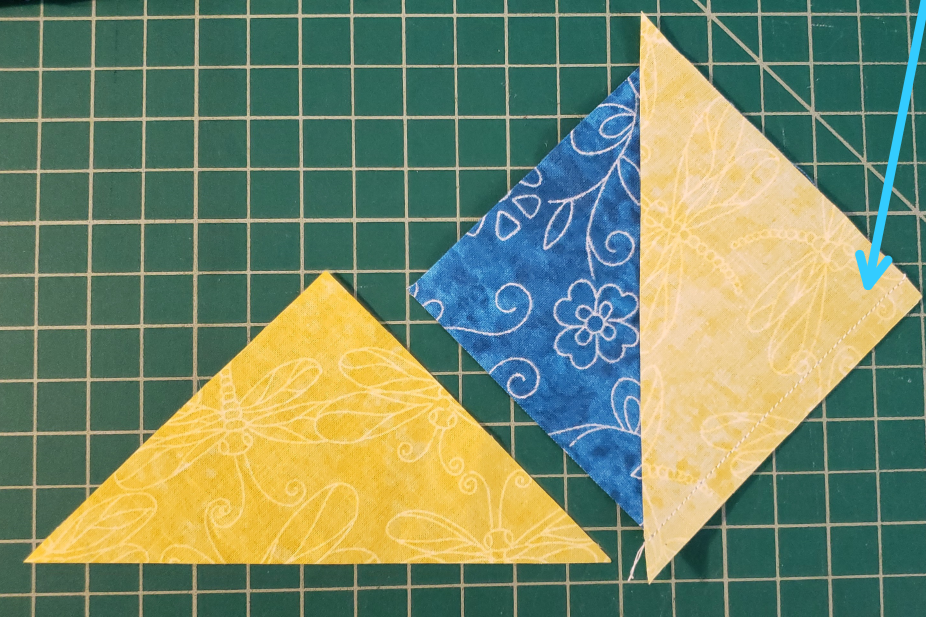
6. Using one piece, place one Color E, 3 1/2″ x 3 1/2″, on the corner, with the diagonal lines flowing into the middle of the triangles.
a. Stitch 1/4″ on each side of the line

7. Cut along the drawn line (creating two pieces like this)
8. Press both pieces open.
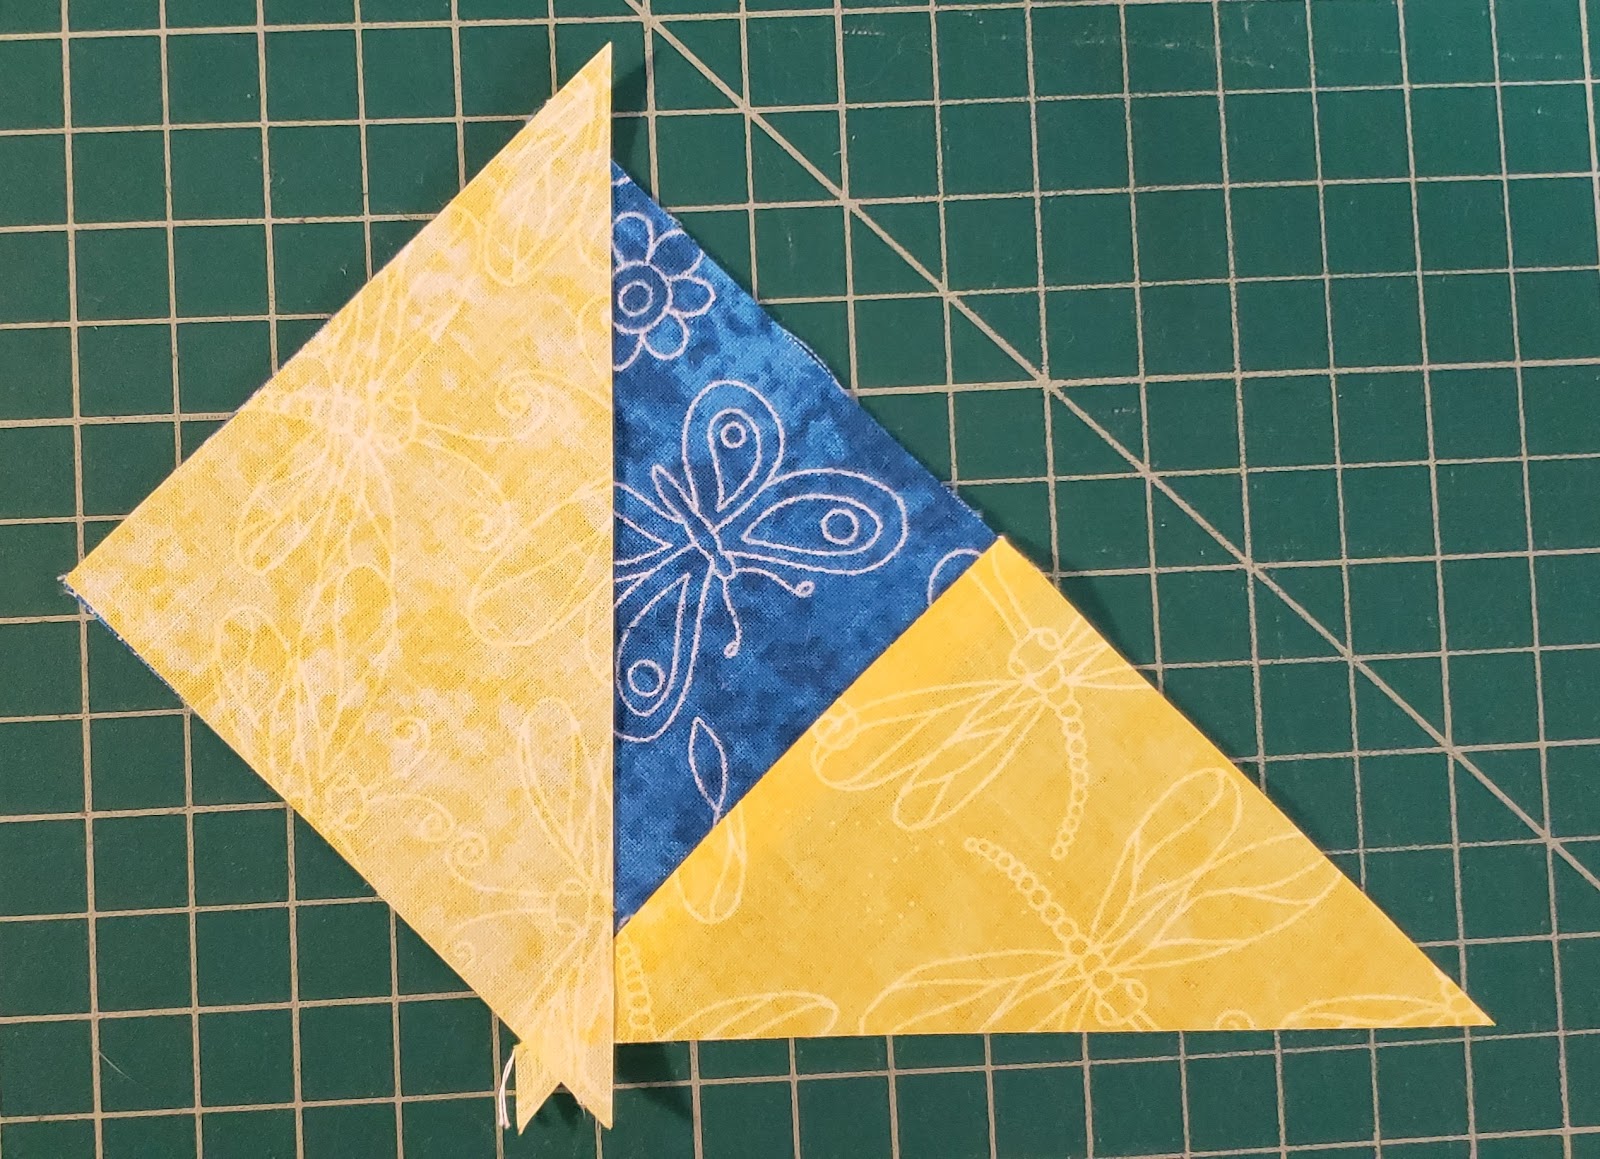
9. Square up the Flying geese to be 2 5/8″ x 4 3/4″.
- Remember to make sure you trim at the widest part of Color D (bottom of middle triangle), leaving 1/4″ above the center point for your seam allowance. If two wide, make sure to trim 1/2 from each side of the block, so it stays balanced. (mid point is 2 3/8″)
10. Repeat steps 6 to 9 to create the other two matching Flying Geese
11. Repeat all the steps using Color E – 5 3/4″ x 5 3/4″ and four 3 1/4″ x 3 1/4″ Color D, doing the opposite color flying Geese.
- If you are doing it like the Dutchman’s Puzzle, you will create using the same background fabric, with a different 5 ¾” x 5 ¾” piece.
You have now created the 8 Flying Geese.
12. Lay one of each design of the Flying Geese together. You will create 4 of these sets.
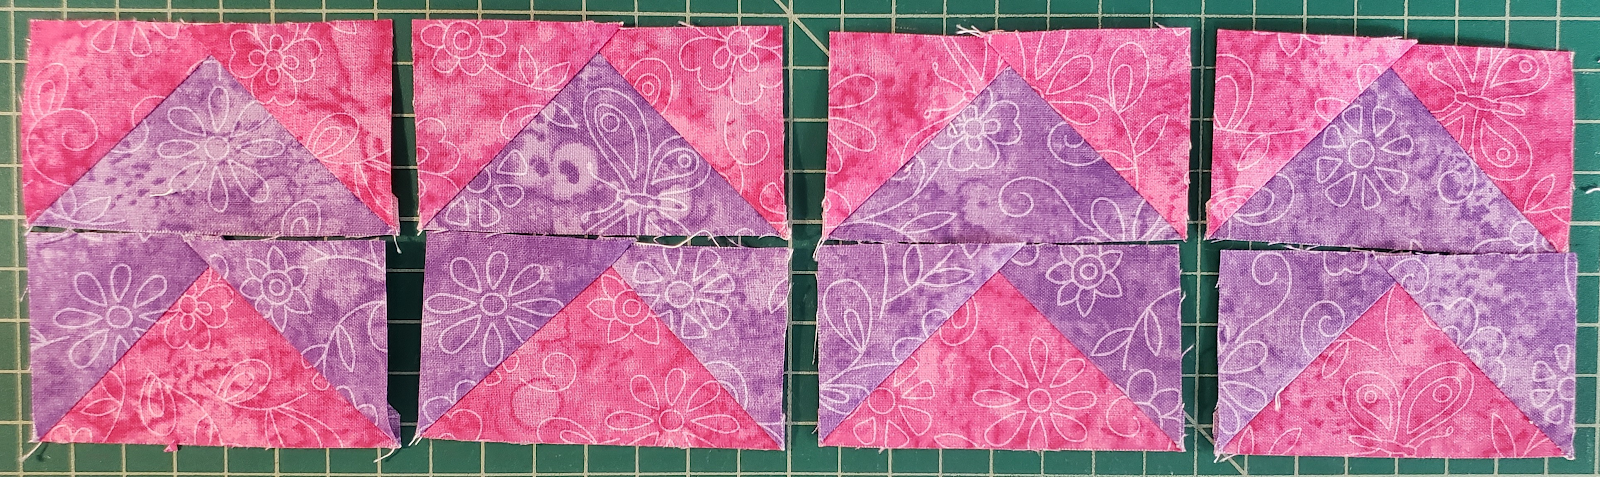
a. It does not matter which set is on the top, but they all need to be the same.
b. Sew together, creating 4 sets (press seams upwards, see picture, to reduce bulk)

13. Sew the four sets together like this, basically rotating each set one quarter turn to the right

NOTE: if you do not like the layout, you can change these to whichever way you would like them. They are all square, and can be turned whichever way you want.
14. Press seams
15. Square up to 9″ x 9″

Next Part…
16. Using the Color C pieces and Color A
a. Cut Color C diagonally in 1/2 to create triangles (you can do this to all four Color C pieces at once)

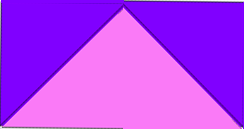
17. Layout Color A & Color C in this order to make sure you have a finished triangle

- Fold up Color C on the right, and match the edges

- Sew 1/4″ seam on the bottom right side
- Press open the seam

- Lay the pieces back down to make sure you still have them correctly. Then fold up the left side Color C, matching the edges of the fabric.
- Sew 1/4″ seam along bottom left side of Color C
- Press seams open, your piece should match

g. Trim the dog ears from the bottom

18. You will Create two of these Using Color C & Color A
19. Repeat steps to create two using Color C & Color B
20. Layout the pieces in the following pattern, by sewing the triangle pieces to the Flying
Geese center.

- Make sure that Color A (Corner Square) is opposite on your block, and Color B (Corner Square) are then opposite corners.
- You will sew one side at a time to the Flying Geese center.
- Line up the straight edge to one side of the Flying Geese, and the point of the Color A/B to the line in the flying geese, to make sure you have it centered.
- Making sure to press your seams as you go
- Continue to add one side at a time, going around the center, pressing as you go.
- Make sure that Color A (Corner Square) is opposite on your block, and Color B (Corner Square) are then opposite corners.
Your block is now complete.
I look forward to seeing all your wonderful blocks! Make sure to post on the Facebook group! Remember to add the hashtag #BomCrazyAnn
Thank you for joining us for this 2020 block of the month!
Click Here for a downloadable PDF of the instructions.
For the previous blocks, you can check under announcements in the Facebook group.

I just found your instructions for the Crazy Ann square. THANK YOU!! My friend, Ann (of course) wants this square in her sampler quilt I am making her. I have one question. The cutting list shows 4 squares of each color D and E for the flying geese portion at 3 1/4″. However, in the instructions for making the flying geese it says to use the 3 1/2″ square in the second portion of the instructions. I hope that’s just a typo! Please tell me if this should be 3 1/4″ or if I should be cutting 2 squares at 3 1/2″. Thanks! Kris
LikeLike
The 3 1/2 gives a little more room to trim and square up. Hope that helps.
LikeLike
That’s ridiculous. You tell us to cut 4 squares at 3 1/4” and mark the backs then you say that one of them should be bigger??!! You can’t add 1/4” after it’s been cut.
LikeLike
You forgot to mention that it is a part of the Indians culture also here in America.
LikeLike
Thank you, I know there are so many cultures that it is such a positive meaning.
LikeLike
Been reviewing all the comments of this BOM on facebook, and though I was not offended and plan on using this block, I know someone was, and there always is someone offended. Please do not be discouraged by this one individual. I enjoy every block and appreciate the hard work and talent you put into them. Some I like more than others, and I just plain can’t paper piece. I have tried and tried, and just wind up wasting time, fabric, and become too frustrated. But that said, I still enjoy seeing them and seeing everyone’s blocks using them. They are beautiful and I am envious of their talent.
I hope you continue with this site. I enjoy it along with several other quilt related sites, especially with all this craziness going on. They are for the most part, cheerful and pleasant. I have learned from them, and they have made me a better quilter and person.
Whatever your decision, you take care. All the best.
On Fri, Jun 12, 2020 at 10:03 PM Lisa’s Quilting Blog wrote:
> Lisa’s Compassion posted: ” During 2020 we will be doing blocks from the > “One Hundred and one Patchwork Patterns” book by Ruby Short McKim. The > book was published in 1931, and my husband’s maternal Grandmother learned > to quilt from this book. These blocks are done” >
LikeLike
Thank you. I appreciate your comments. I am trying to stay true to the original pattern, but understand people can be offended easily for little things. So there are options to move the center around to make it your own design.
LikeLike
Thank you for the block- I hope to get caught up over the summer. 😊
Sent from my iPhone 🇺🇸🏠
Jeri@JeriAnderson.net
LikeLike
We will slow down the number of blocks after the last of the 20 have been released. Most people are starting to go back to work or able to get out as the Stay at home orders are being lighted up. No rush, the instructions will remain available to view.
LikeLike