
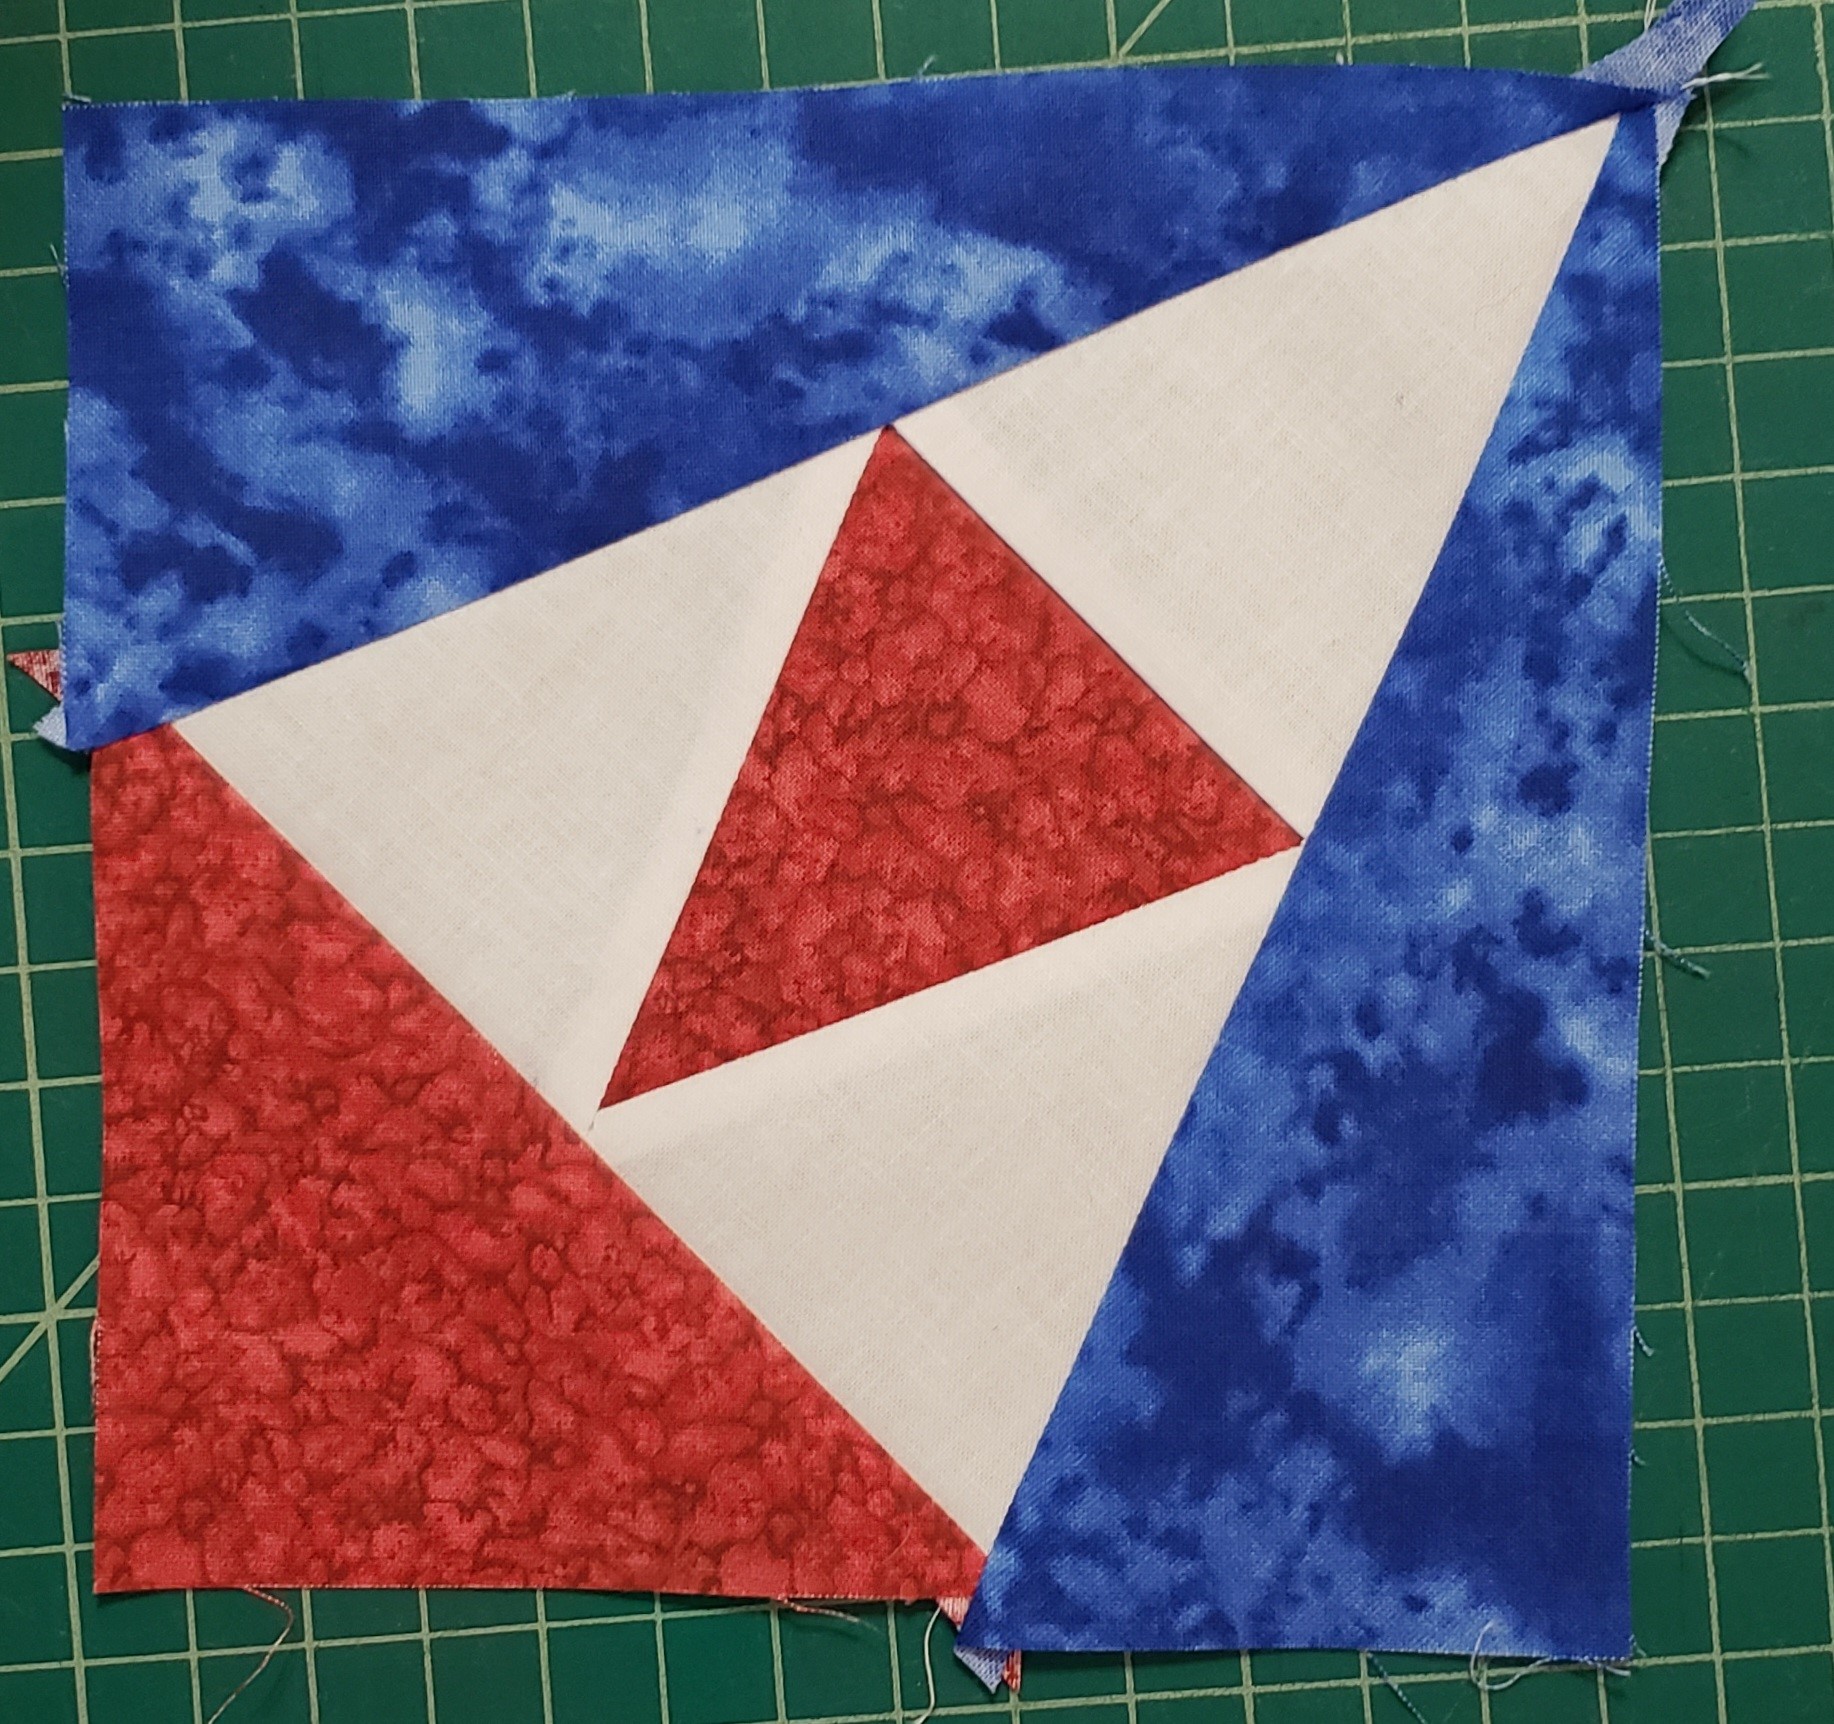
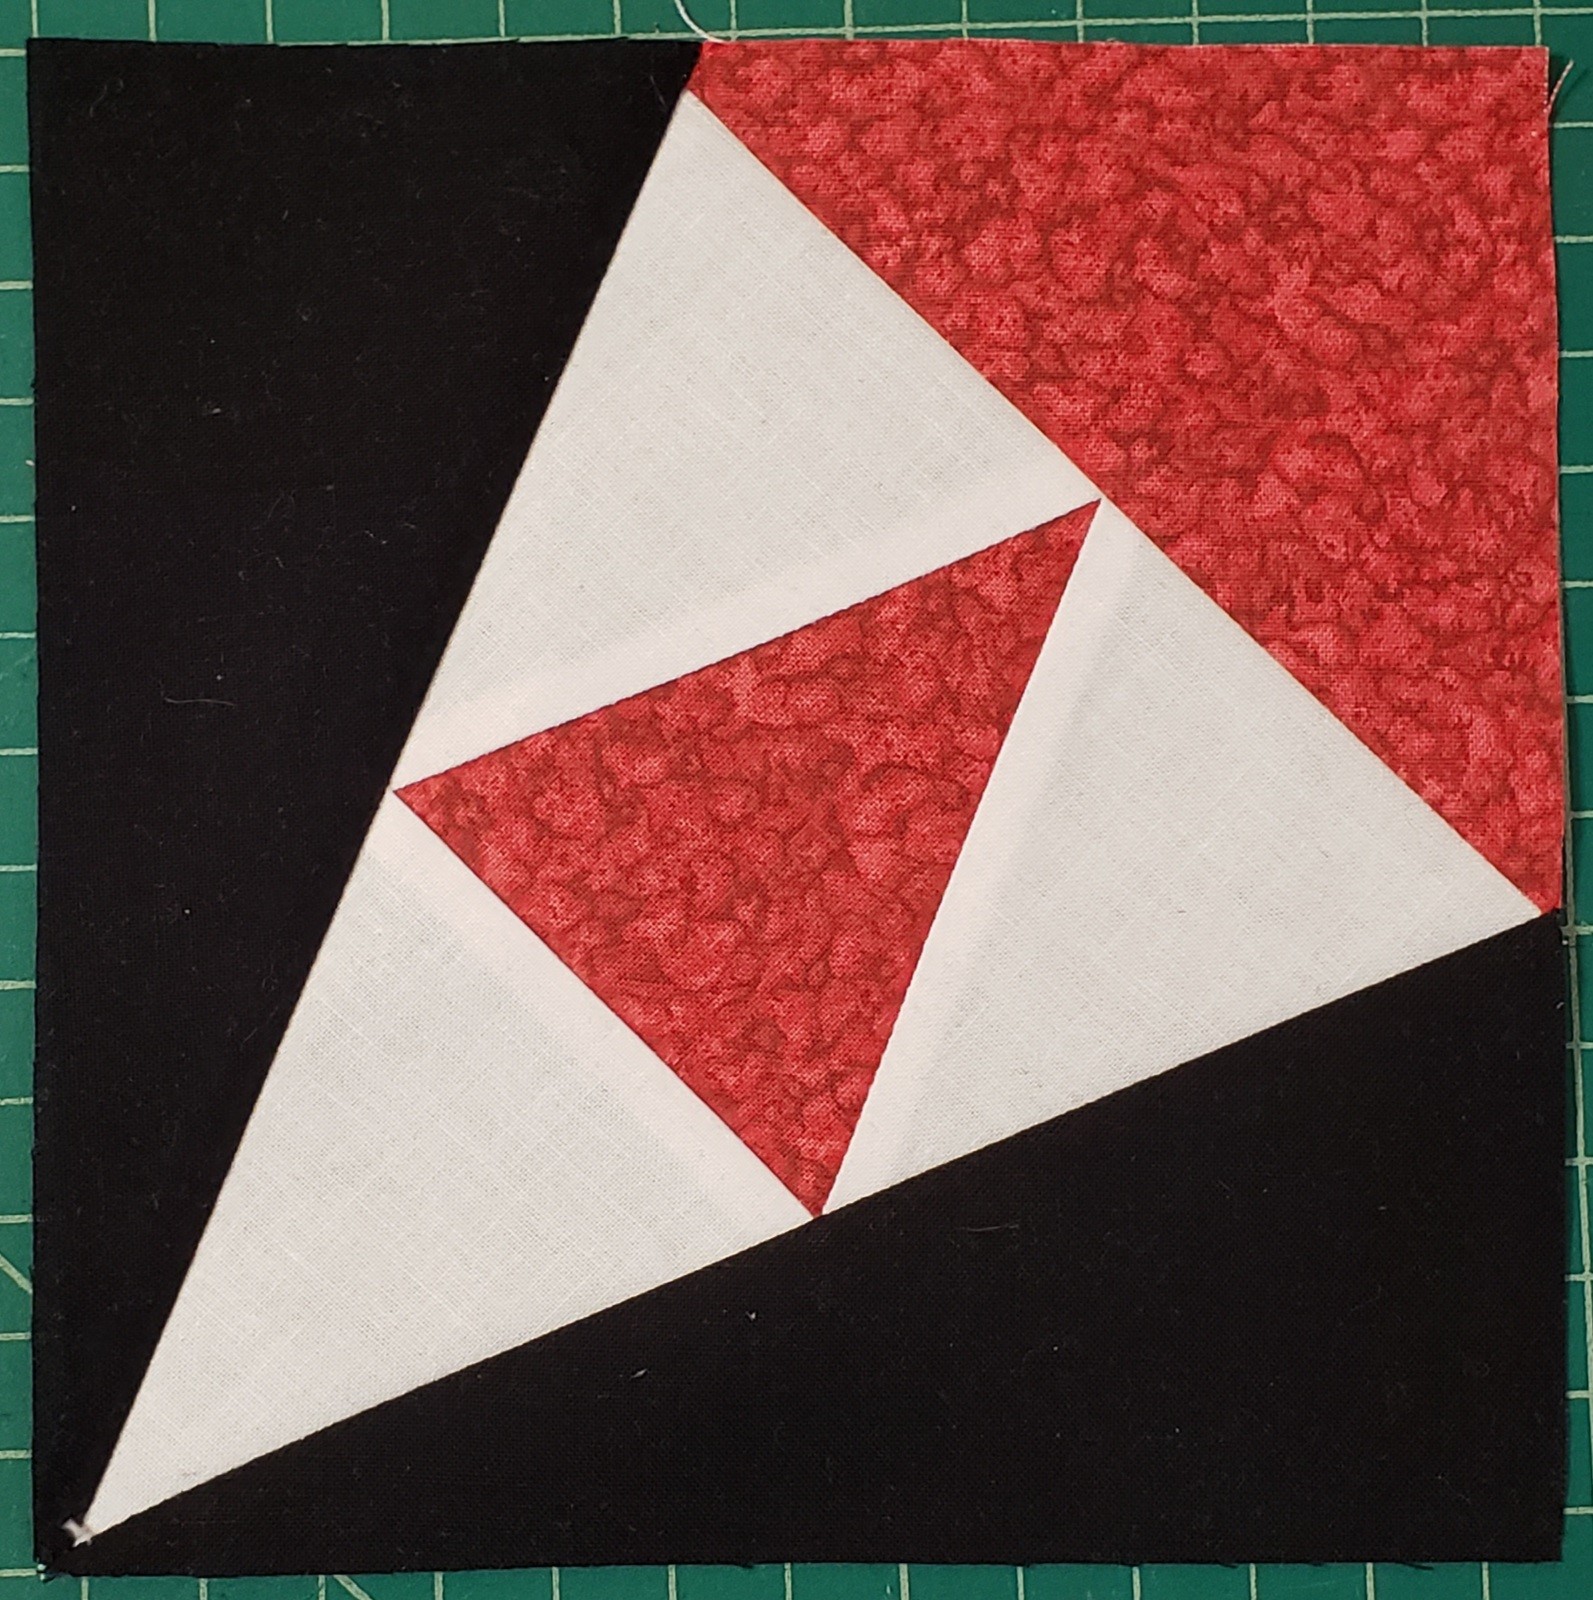
The first block for October 2021 is the Signal Lights, originally published in the Kansas City Star on June 17, 1942.
“Enthusiasm over quilt making spurred Mrs. B. R. Troutman, Ottumwa, IA, to create designs of her own. This pattern is most effective in sharply contrasting light and dark blocks.” (KC Star 1942)
The original block used several “Y” seams, and I have removed these by making the center square 4 triangles, so you have four corner blocks to sew together. “Y” seams can be a challenge and can be fun, I decided it was best to just remove those to make it easier to create.
I looked around for more information on this block, and did not find any additional information on this block, or other versions of this block. I think this is a fun block, and could be paired with the Crossed Canoes block. (See picture at end of instructions.)
The instructions are for cutting without templates. I have included a link to templates for this block if you would prefer to print them. If you want to make all four sections different colors, I recommend using the templates, otherwise you will have some waste.

This block will finish at 12″ x 12″ (unfinished 12 1/2″ x 12 1/2″).
Fabric Requirements
- Color A – 11″ x 16″ (white)
- Color B – 7″ x 8″ (blue)
- Color C – 9″ x 14″ (red)
- Color D – 7″ x 8″ (black)
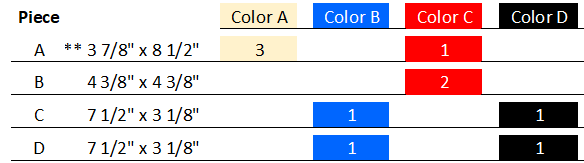
Fabric Cutting
Piece of paper/cardboard 3 1/4″ x 3 7/8″ to create a template for piece A
Note: ** If you want Piece A – Color A – you can cut a strip that is 24″ long x 3 7/8″ and cut all of the triangles with the templates, otherwise you can use the smaller pieces
Assembly
Step 1 – Cutting pieces getting ready
The Pieces need to be cut to the shape that are needed for the block.

- Piece A – Using a piece of paper or cardboard that is 3 1/4″ x 3 7/8″
- Fold piece of paper in half, along (short side). You can add a little mark at the middle to make it easier to see when cutting.
- Place your ruler from the bottom right corner to the center fold at the top, then cut.
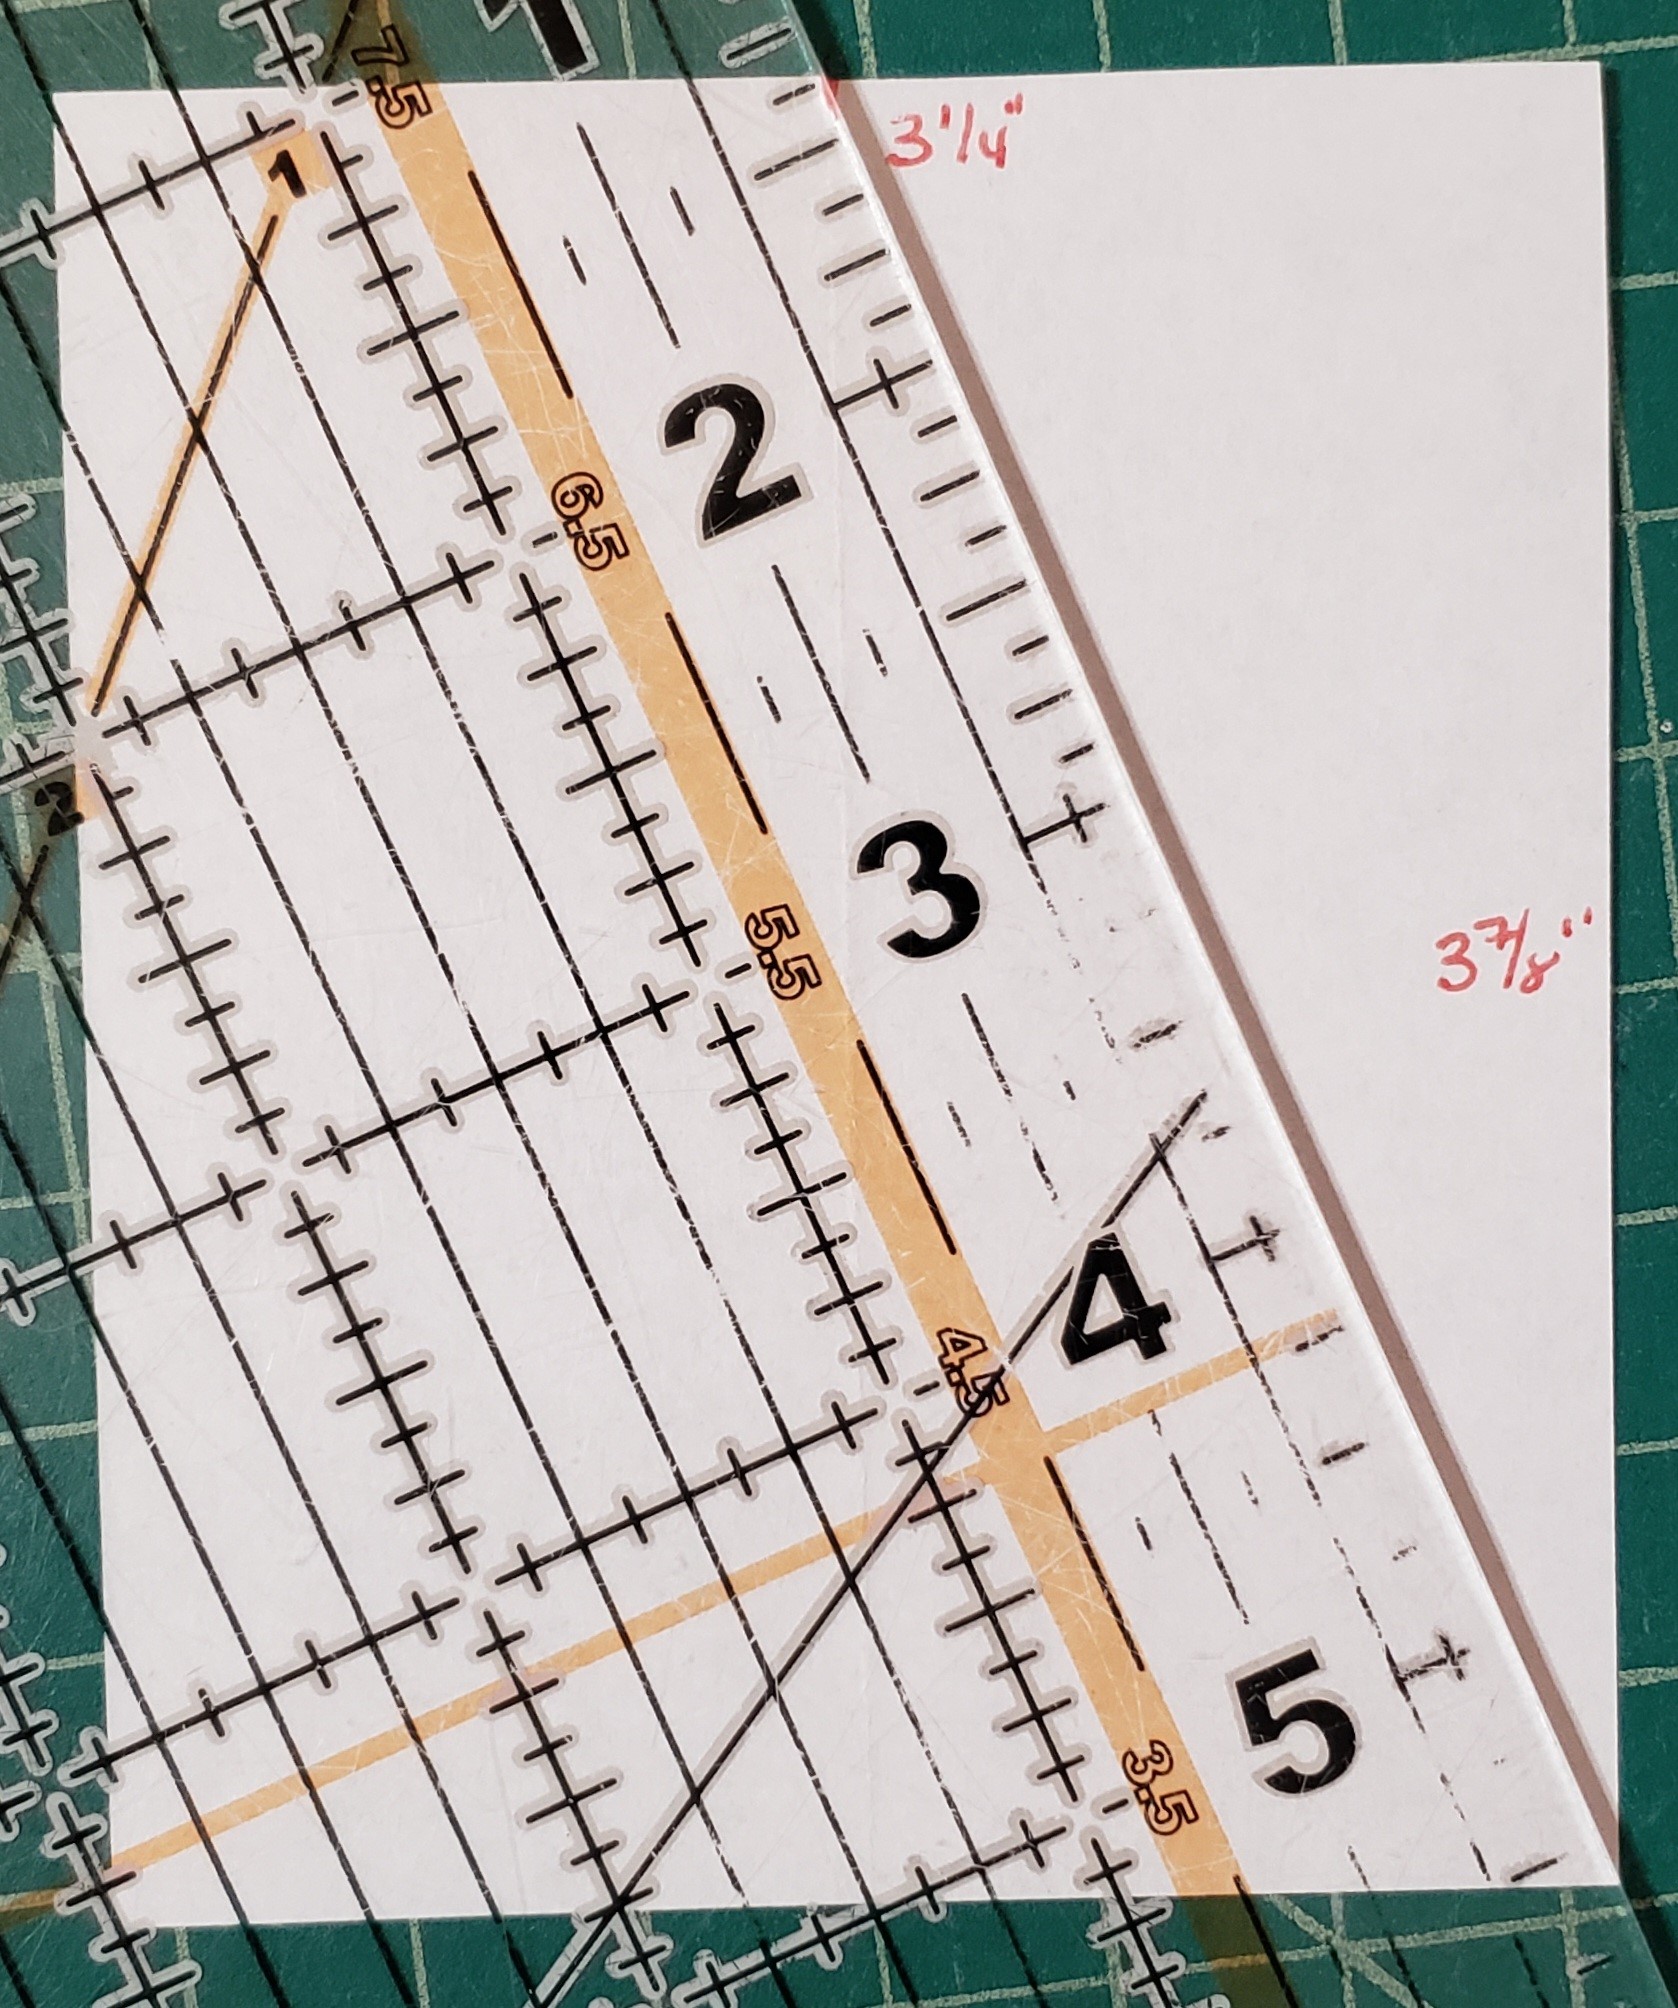
- Place your ruler from the bottom left corner to the center mark at the top, then cut


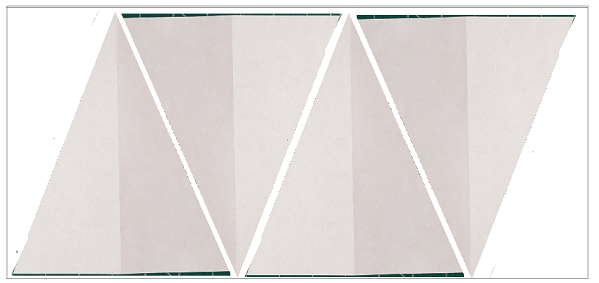
- Use the triangle template to cut 4 triangles from each Piece A, for a total of 12 Color A (white) and 4 Color C (red)
- Lay one with the bottom of the triangle down, then flip, continue across your piece .
- If you cut 8 1/2″ strips, you will get 4 pieces each, if you do a longer strip, you may be able to get them all cut, with only a little waste at the beginning and end of the piece.
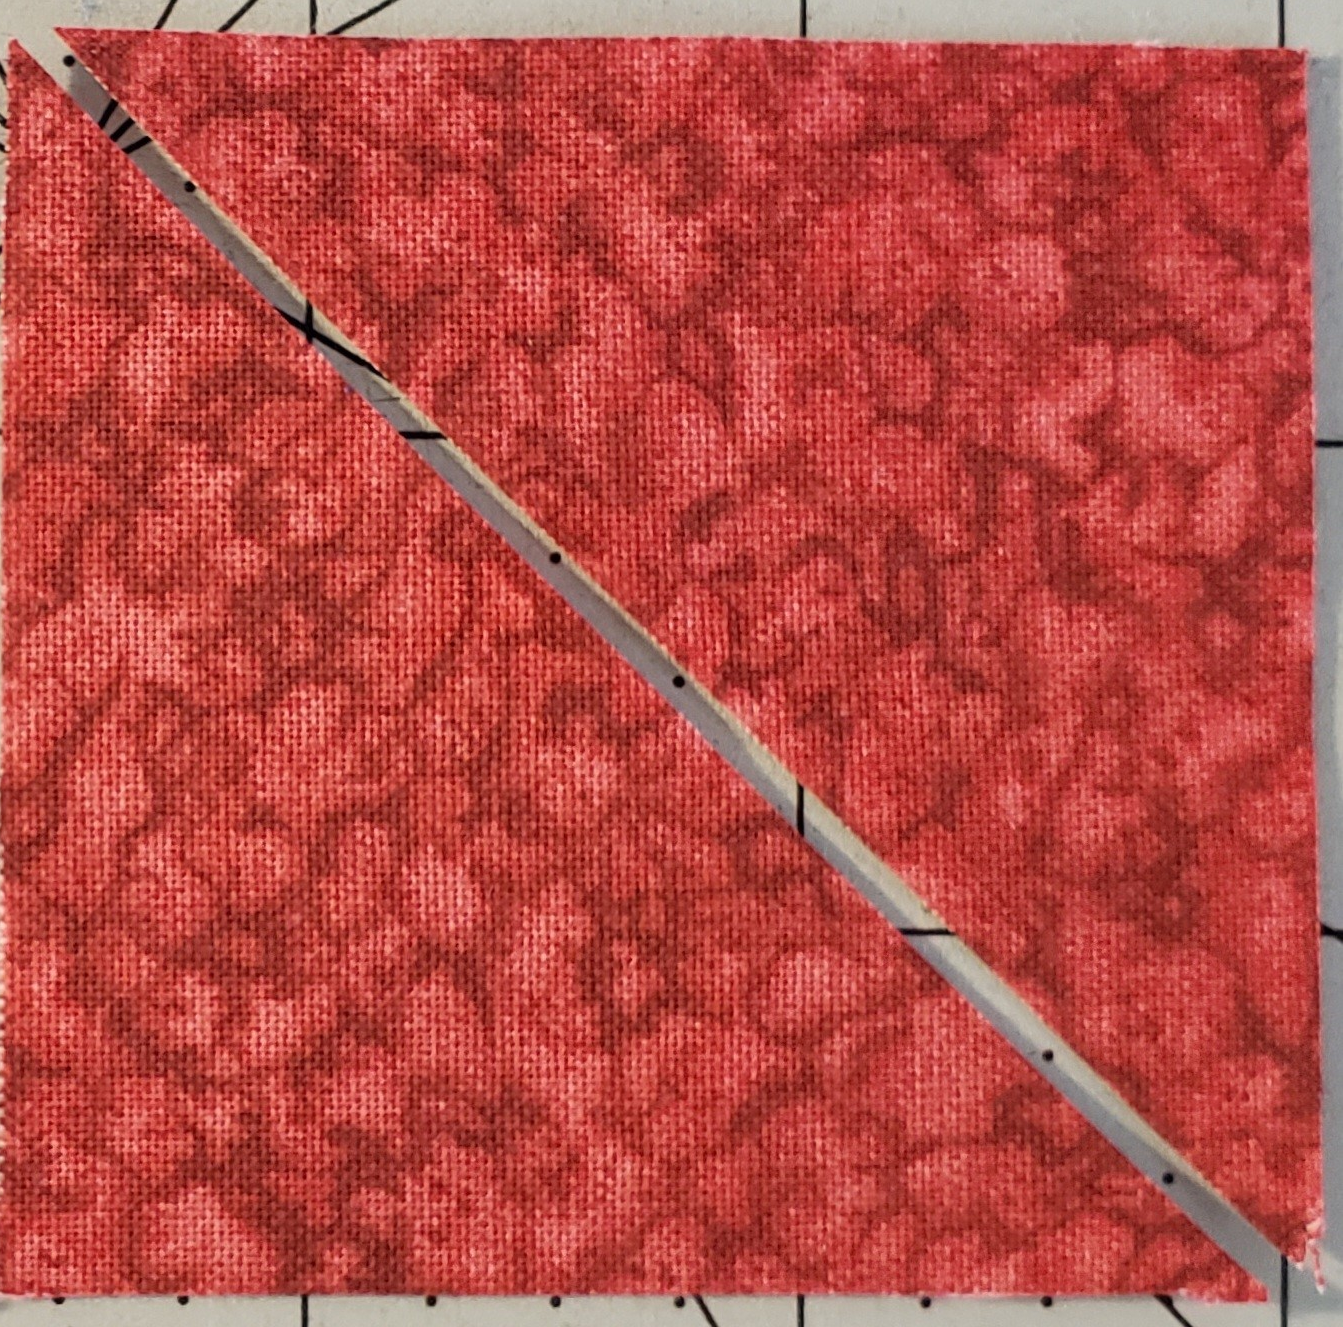
- Piece B (red) – Cut both diagonally across both pieces
Next two pieces, please look at picture to see how they should be cut, before cutting

- Piece C (blue and black) – with Right sides up, cut both diagonally in half. To create 2 blue and 2 black identical triangles.
- Pieces D (blue and black) – with right sides up, cut diagonally opposite of piece C. To create 2 blue and 2 black identical triangles.
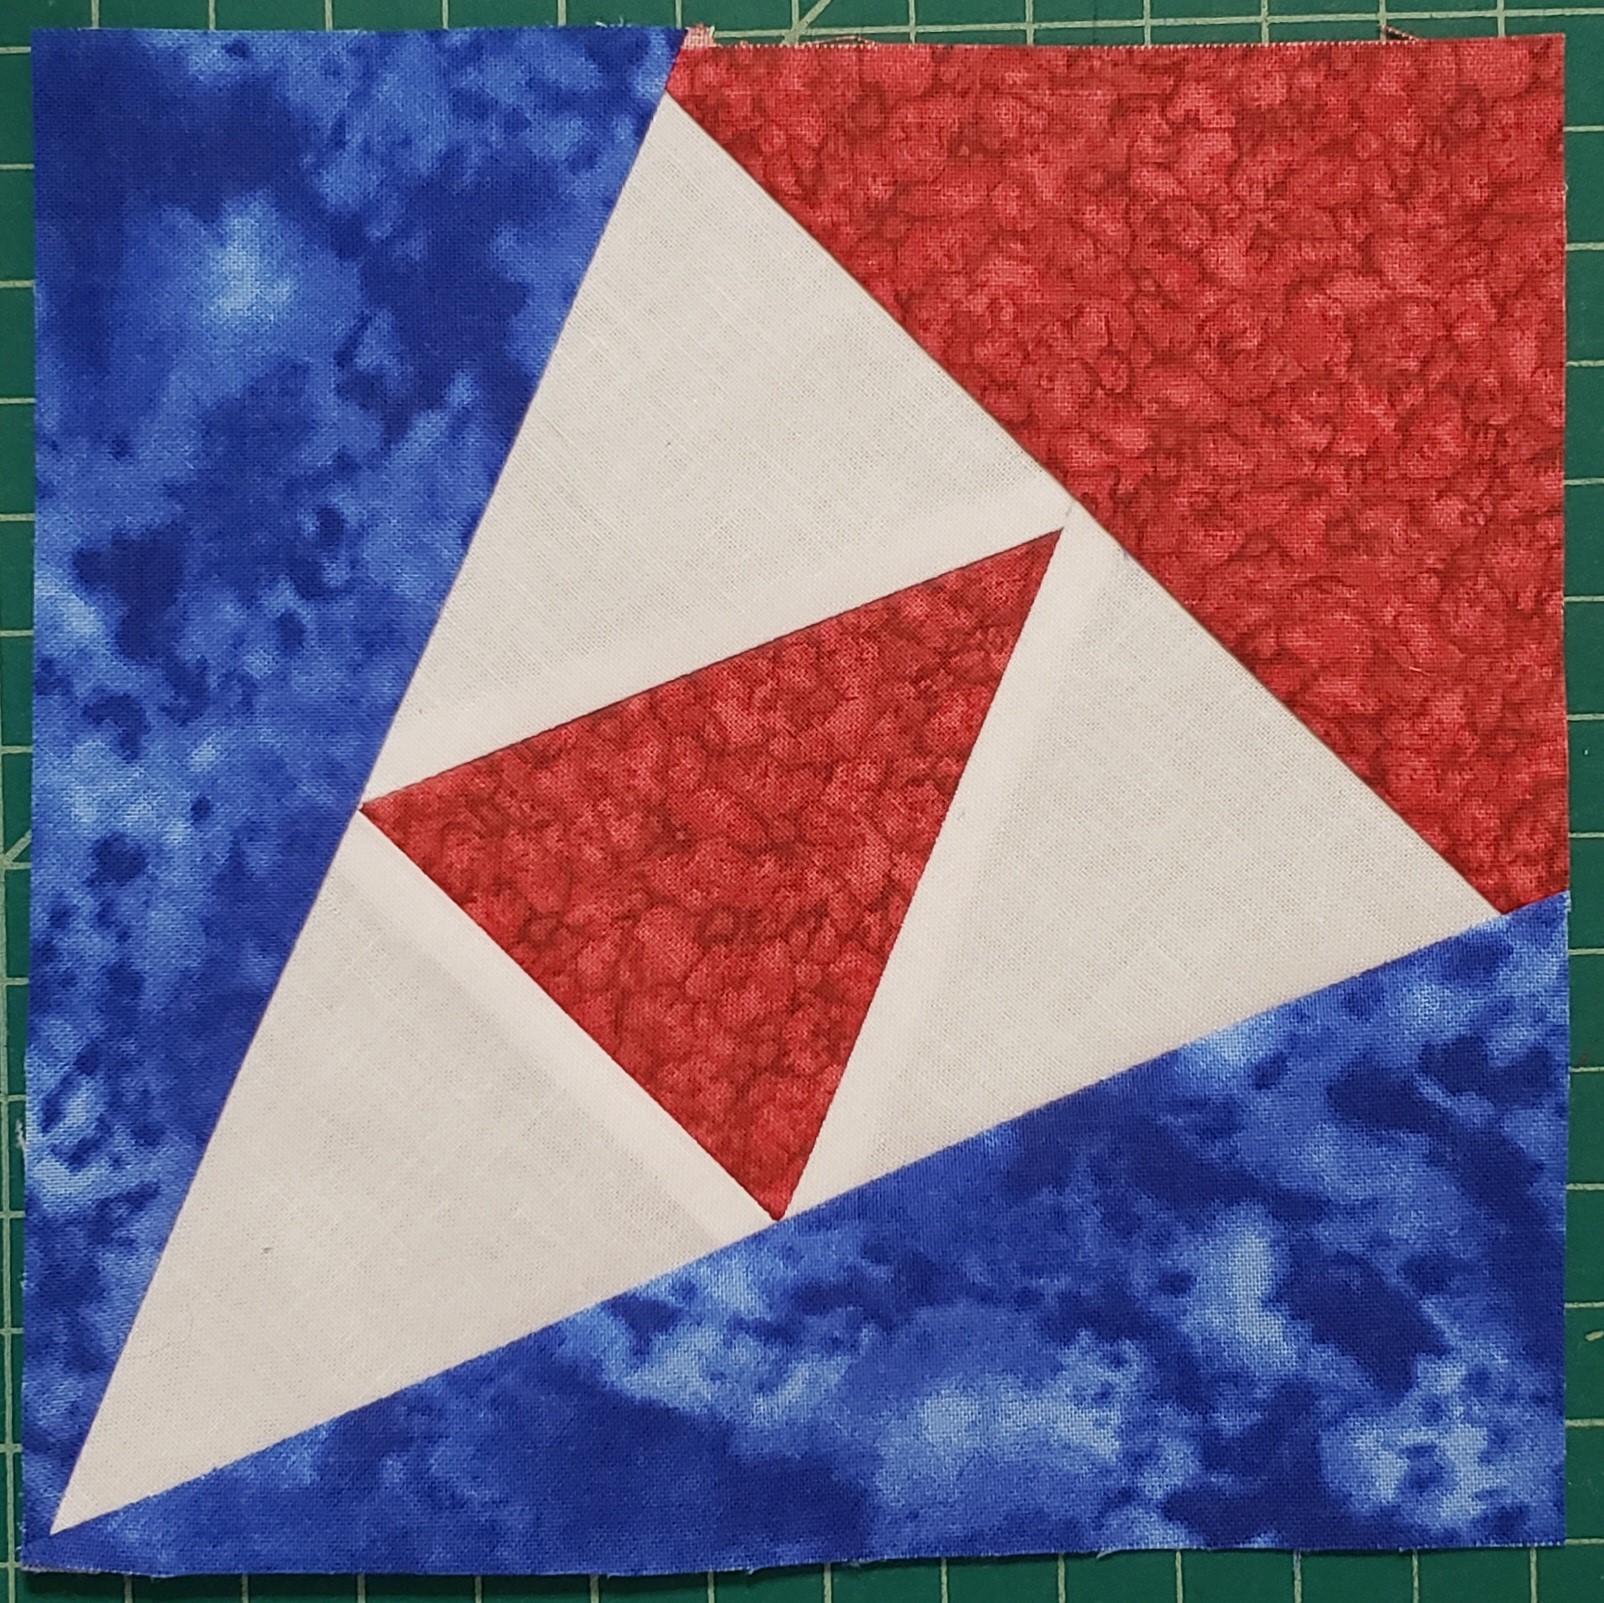
Step 2 – Quarter – color 1 (Blue)
Using the following pieces
- Piece A – Color A – 3 pieces (White) Piece A – Color C – 1 Piece (Red)
- Piece B – Color C – 1 Piece (Red) Piece C – Color B – 1 Piece (Blue)
- Piece D – Color B – 1 Piece (Blue)
Layout in the following layout.

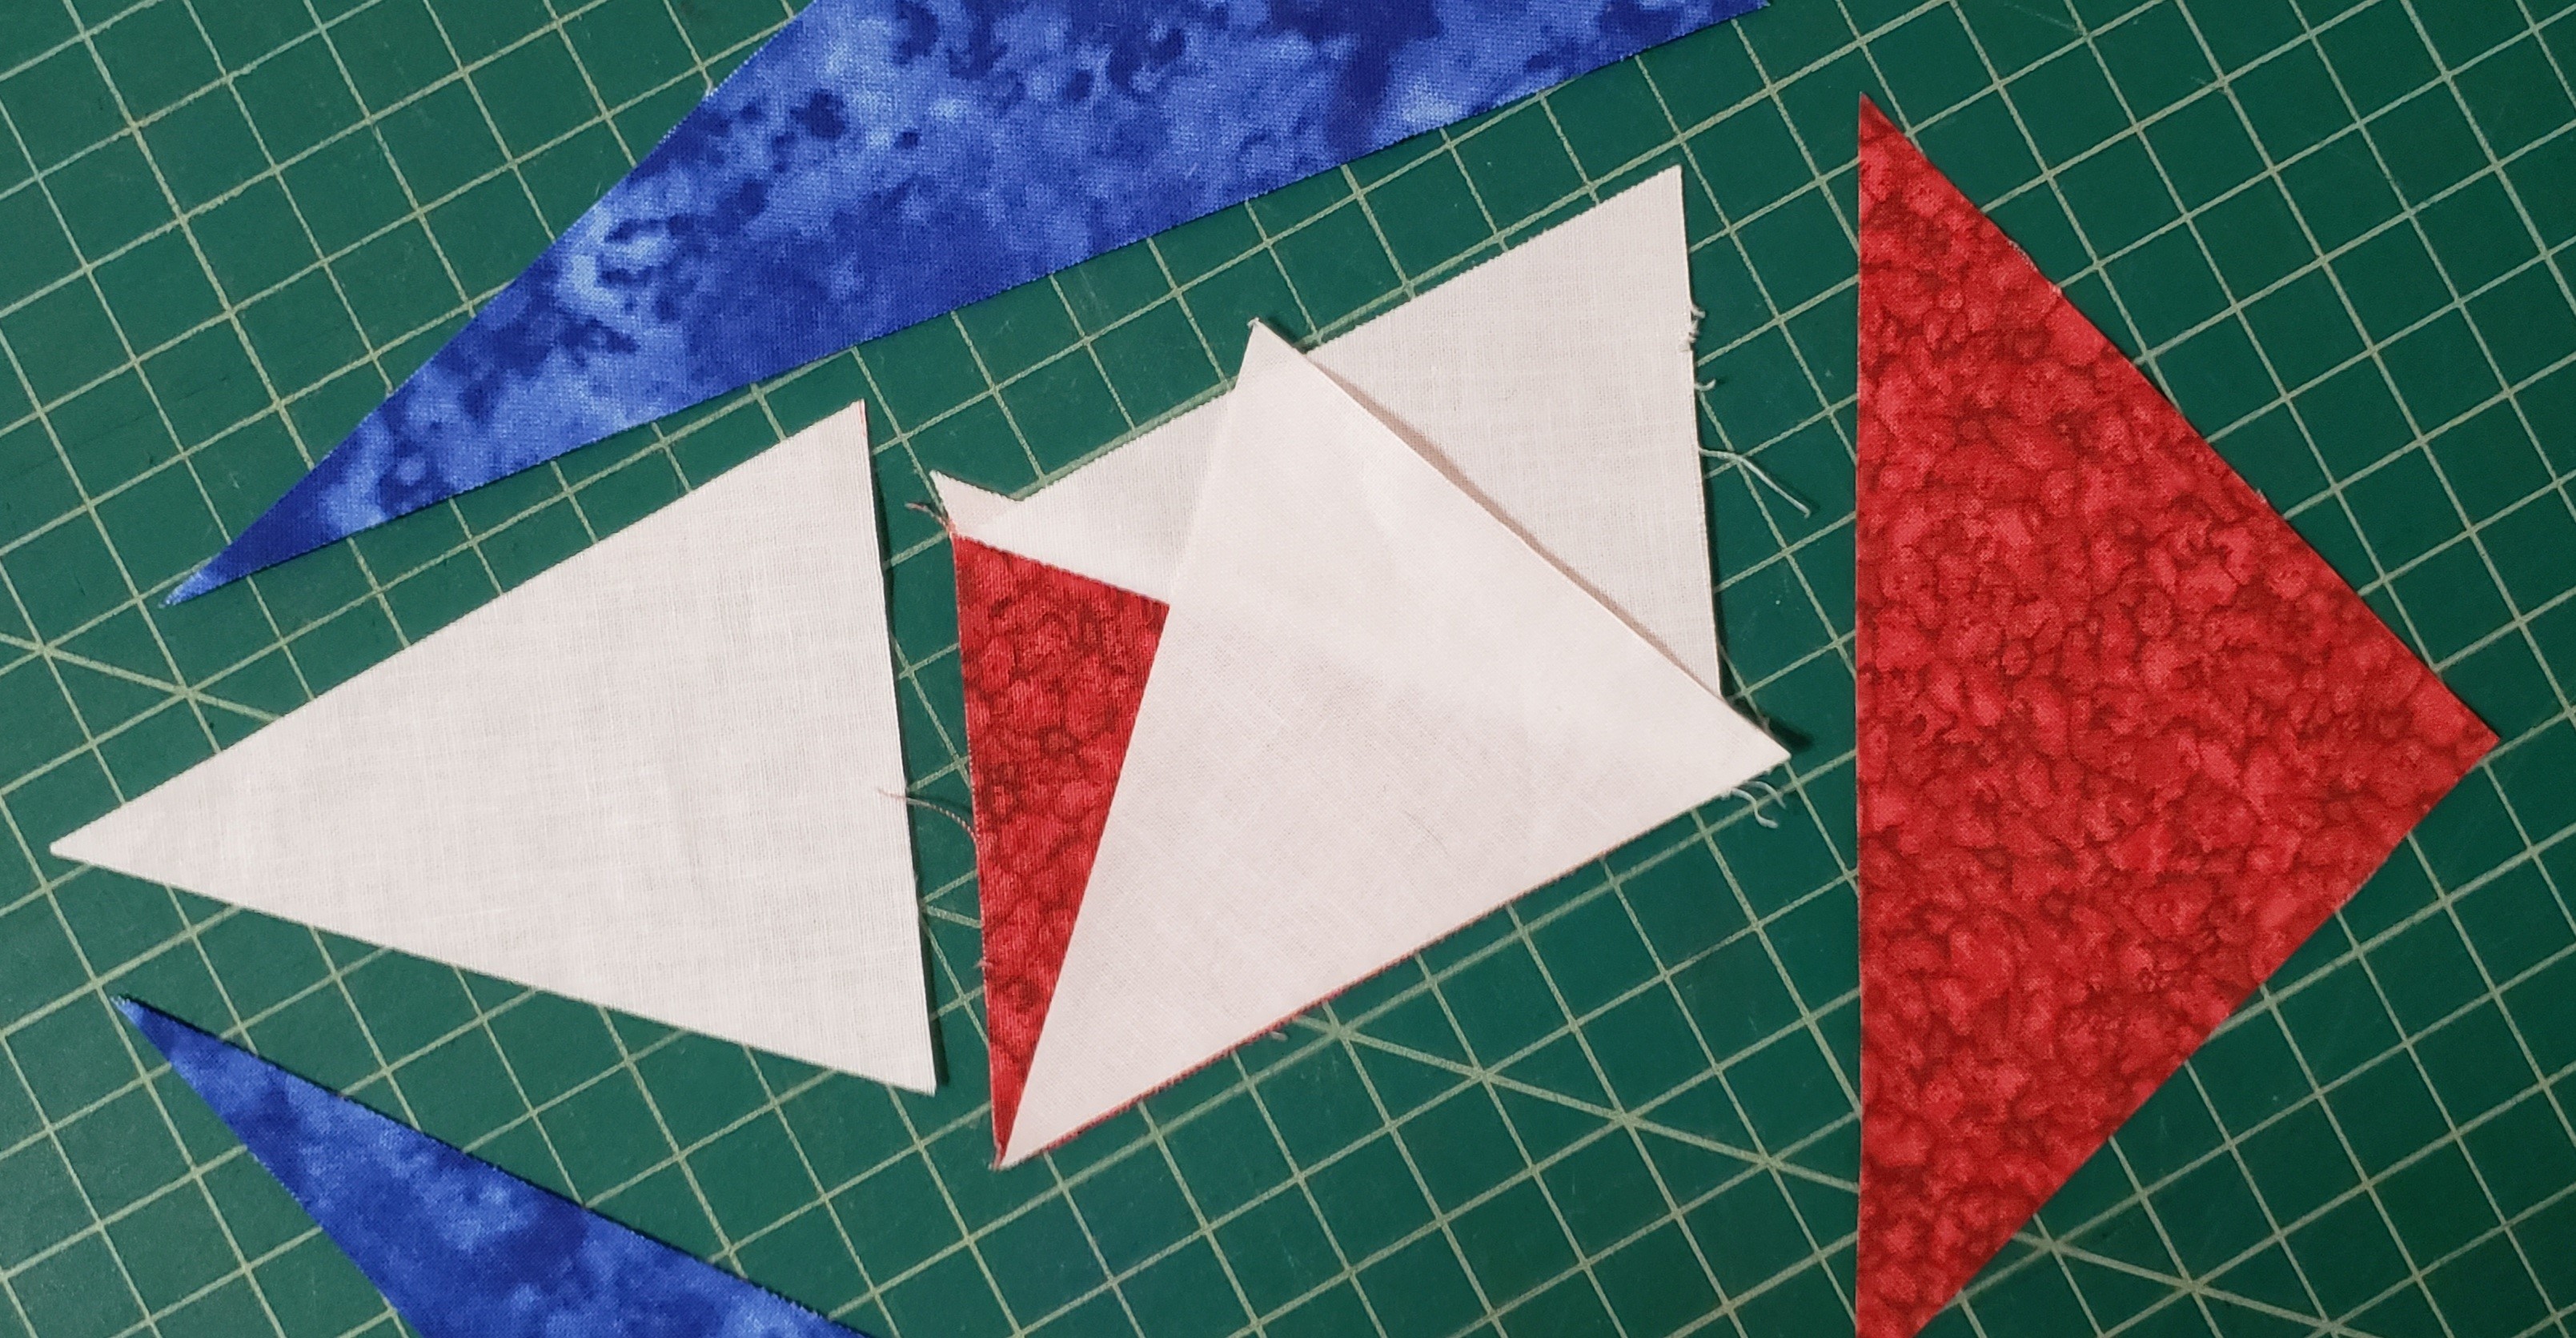
Fold over one piece A (Color A) onto Piece A (Color C), Stitch 1/4″ seam.

Press towards the outside (white)

Fold over the opposite piece, sew 1/4″ seam
Press towards the outside (white)

Fold over the last Piece A, make sure to center the piece
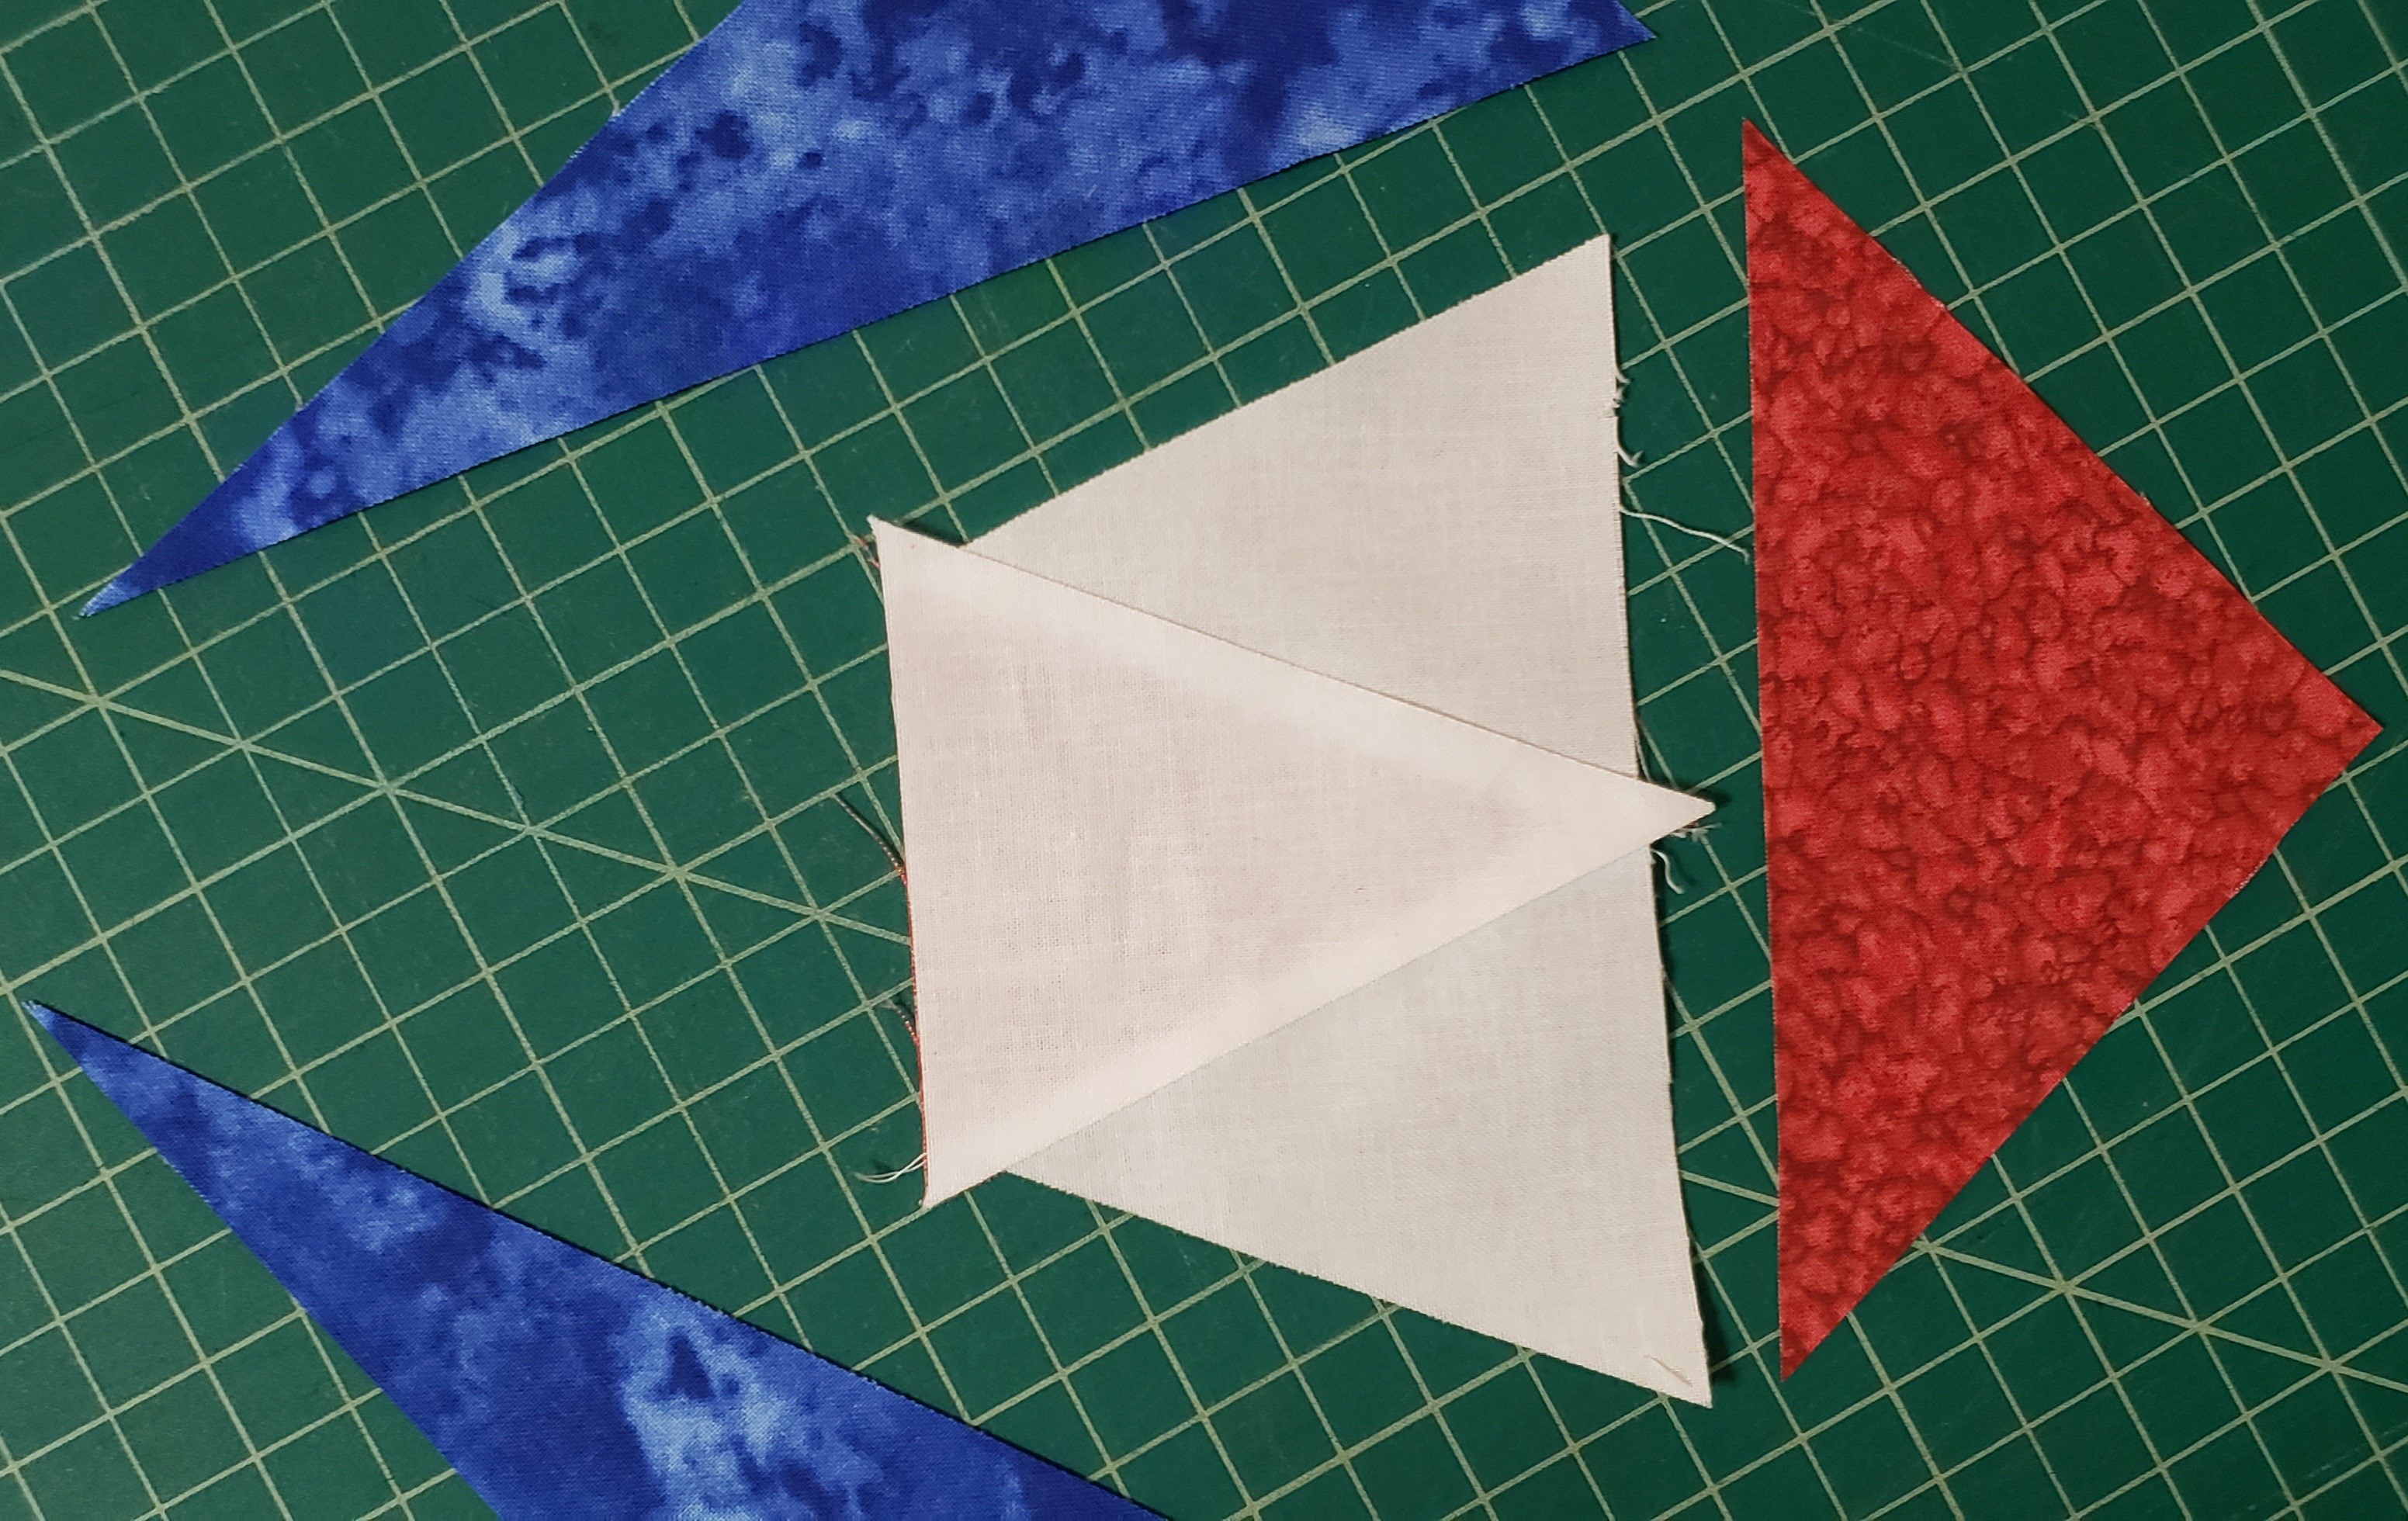
Press towards outside (white).
Lay Piece B on the center, and sew 1/4″ seam

Press seam toward the outside (red)
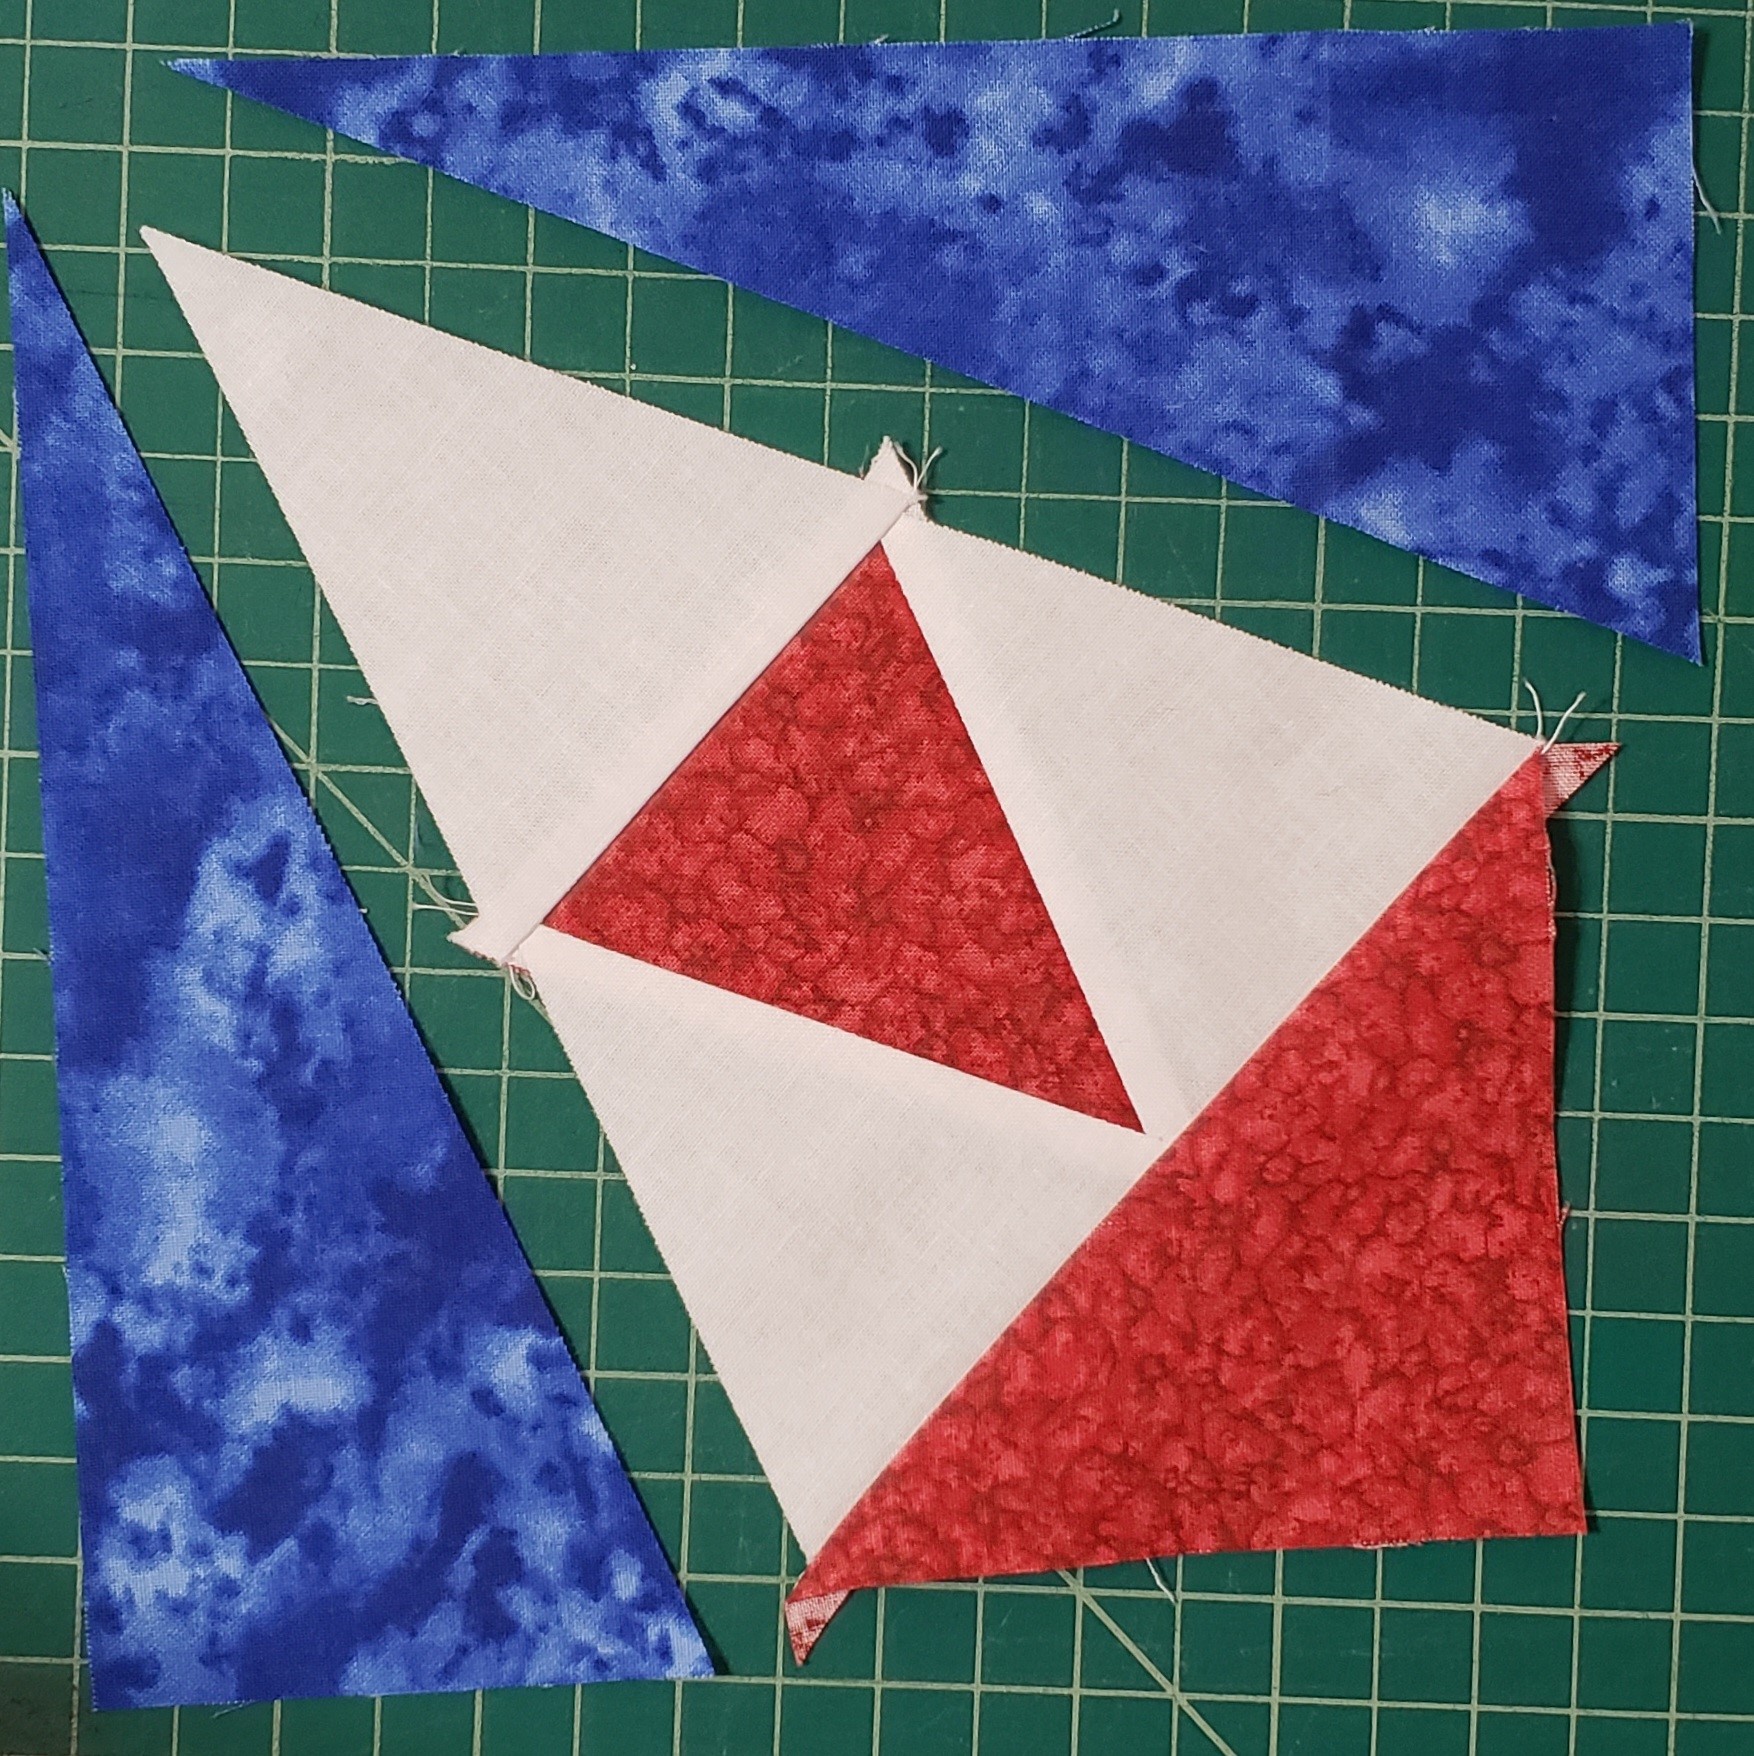
Make sure you lay your pieces correctly, so that they make a square, not a rectangle. If they make more of a rectangle, switch Piece C & D.
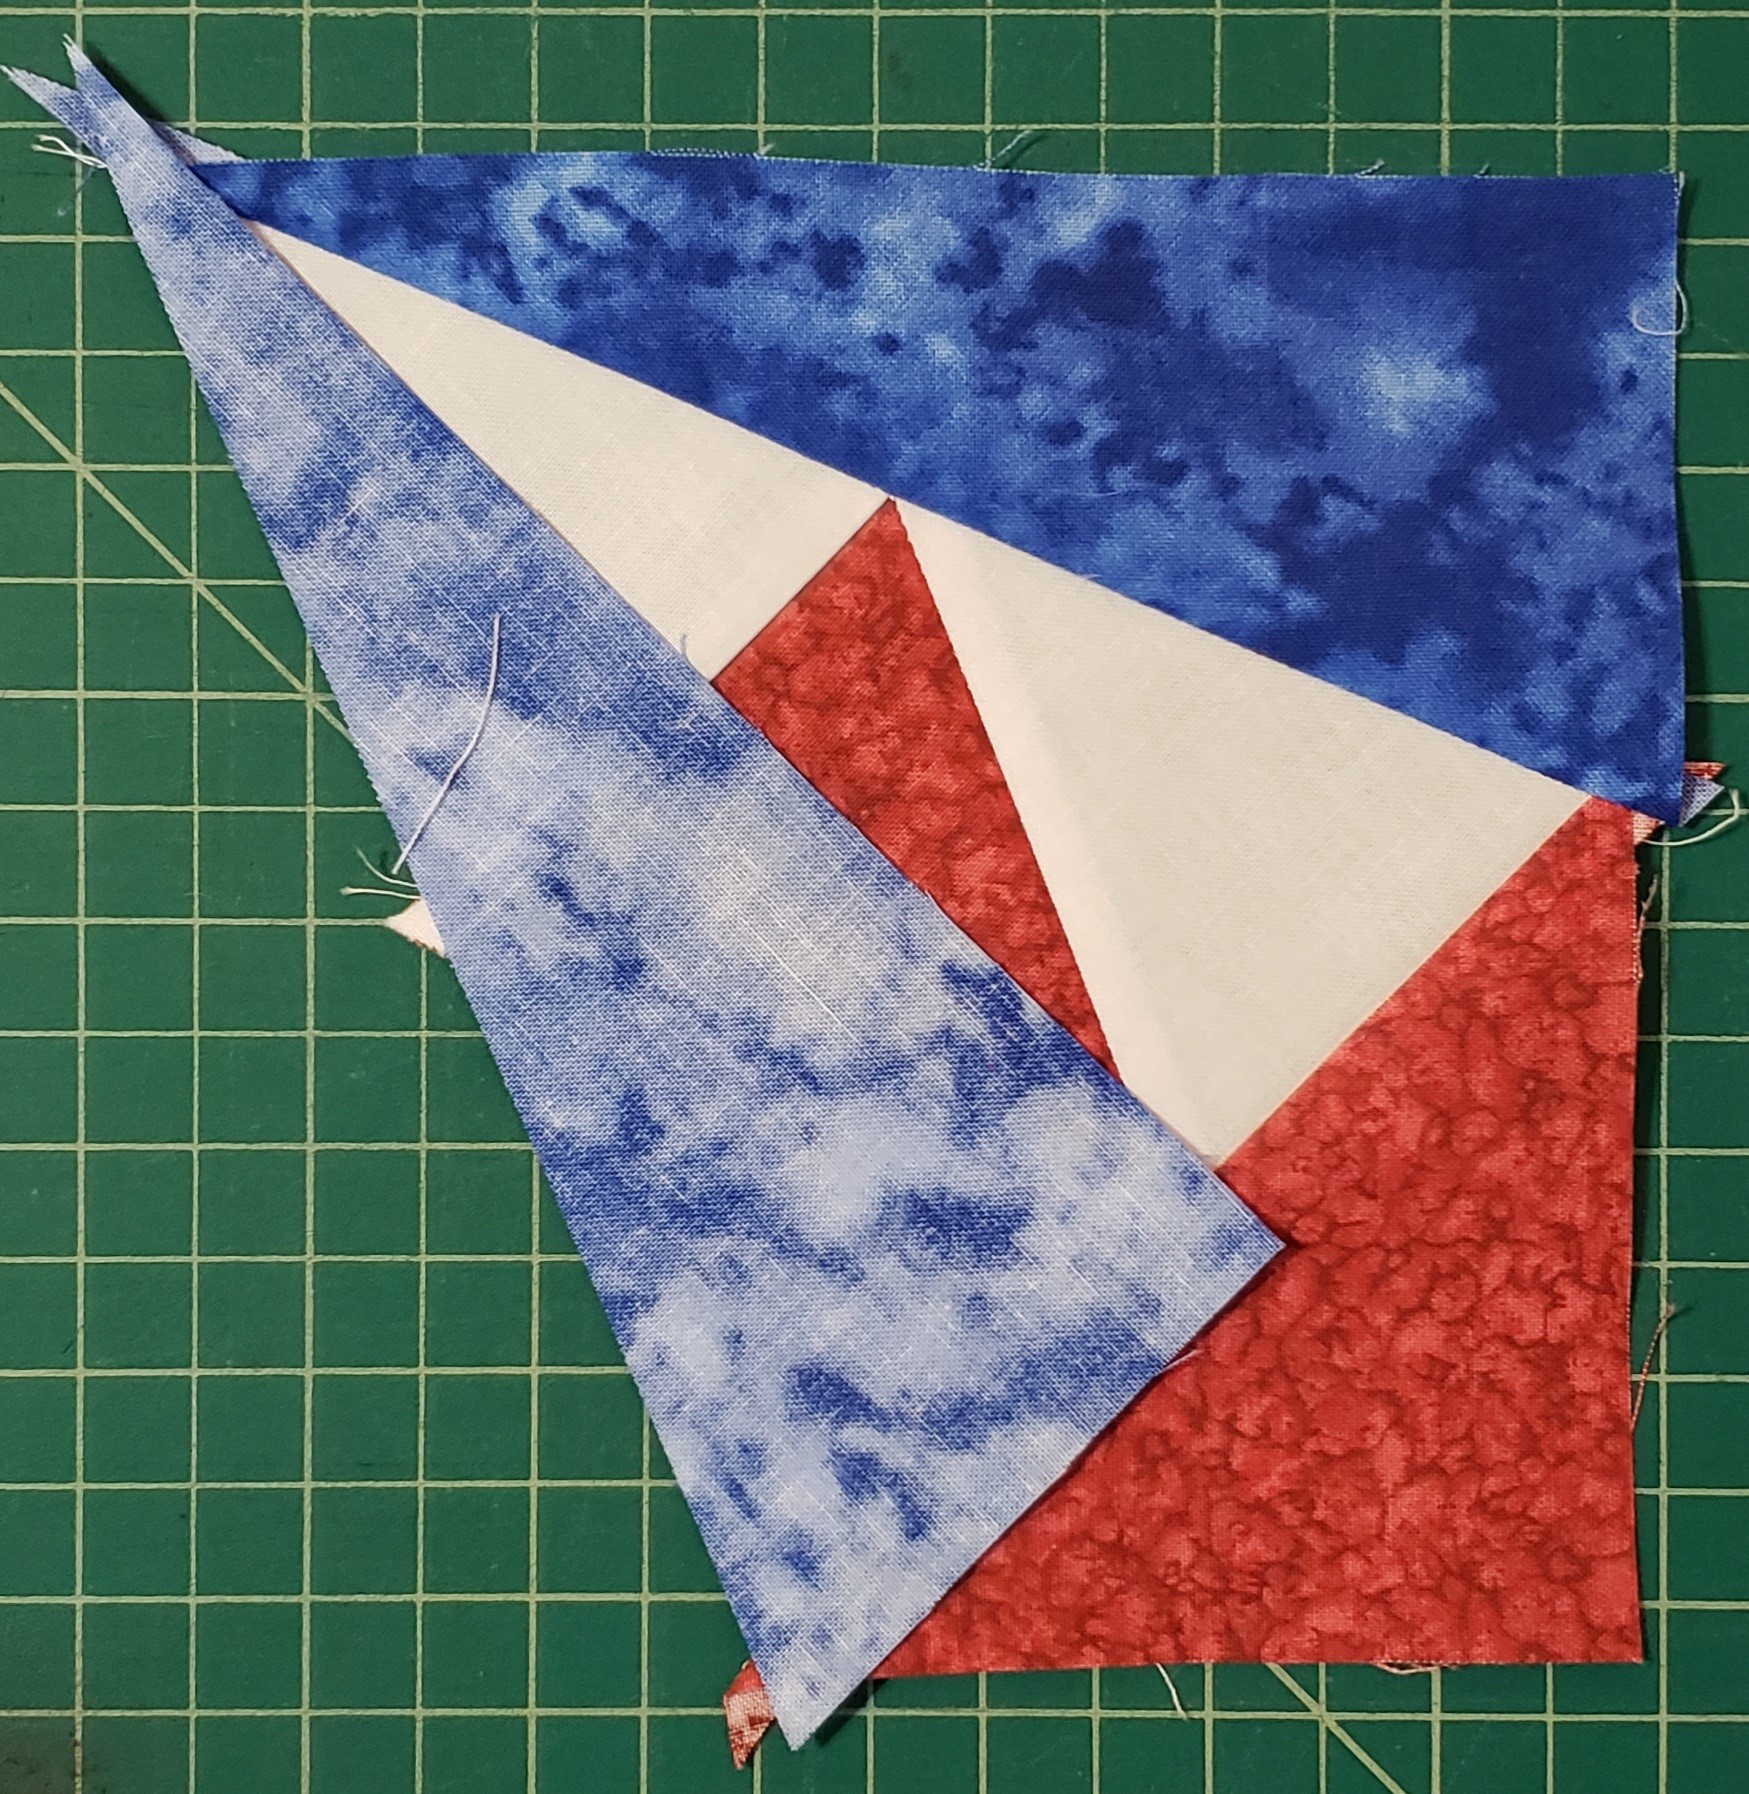
Fold over Piece C, sew 1/4″ seam

Press towards the outside (Blue)

Fold over Piece D, sew 1/4″ seam
Press towards the outside (Blue)
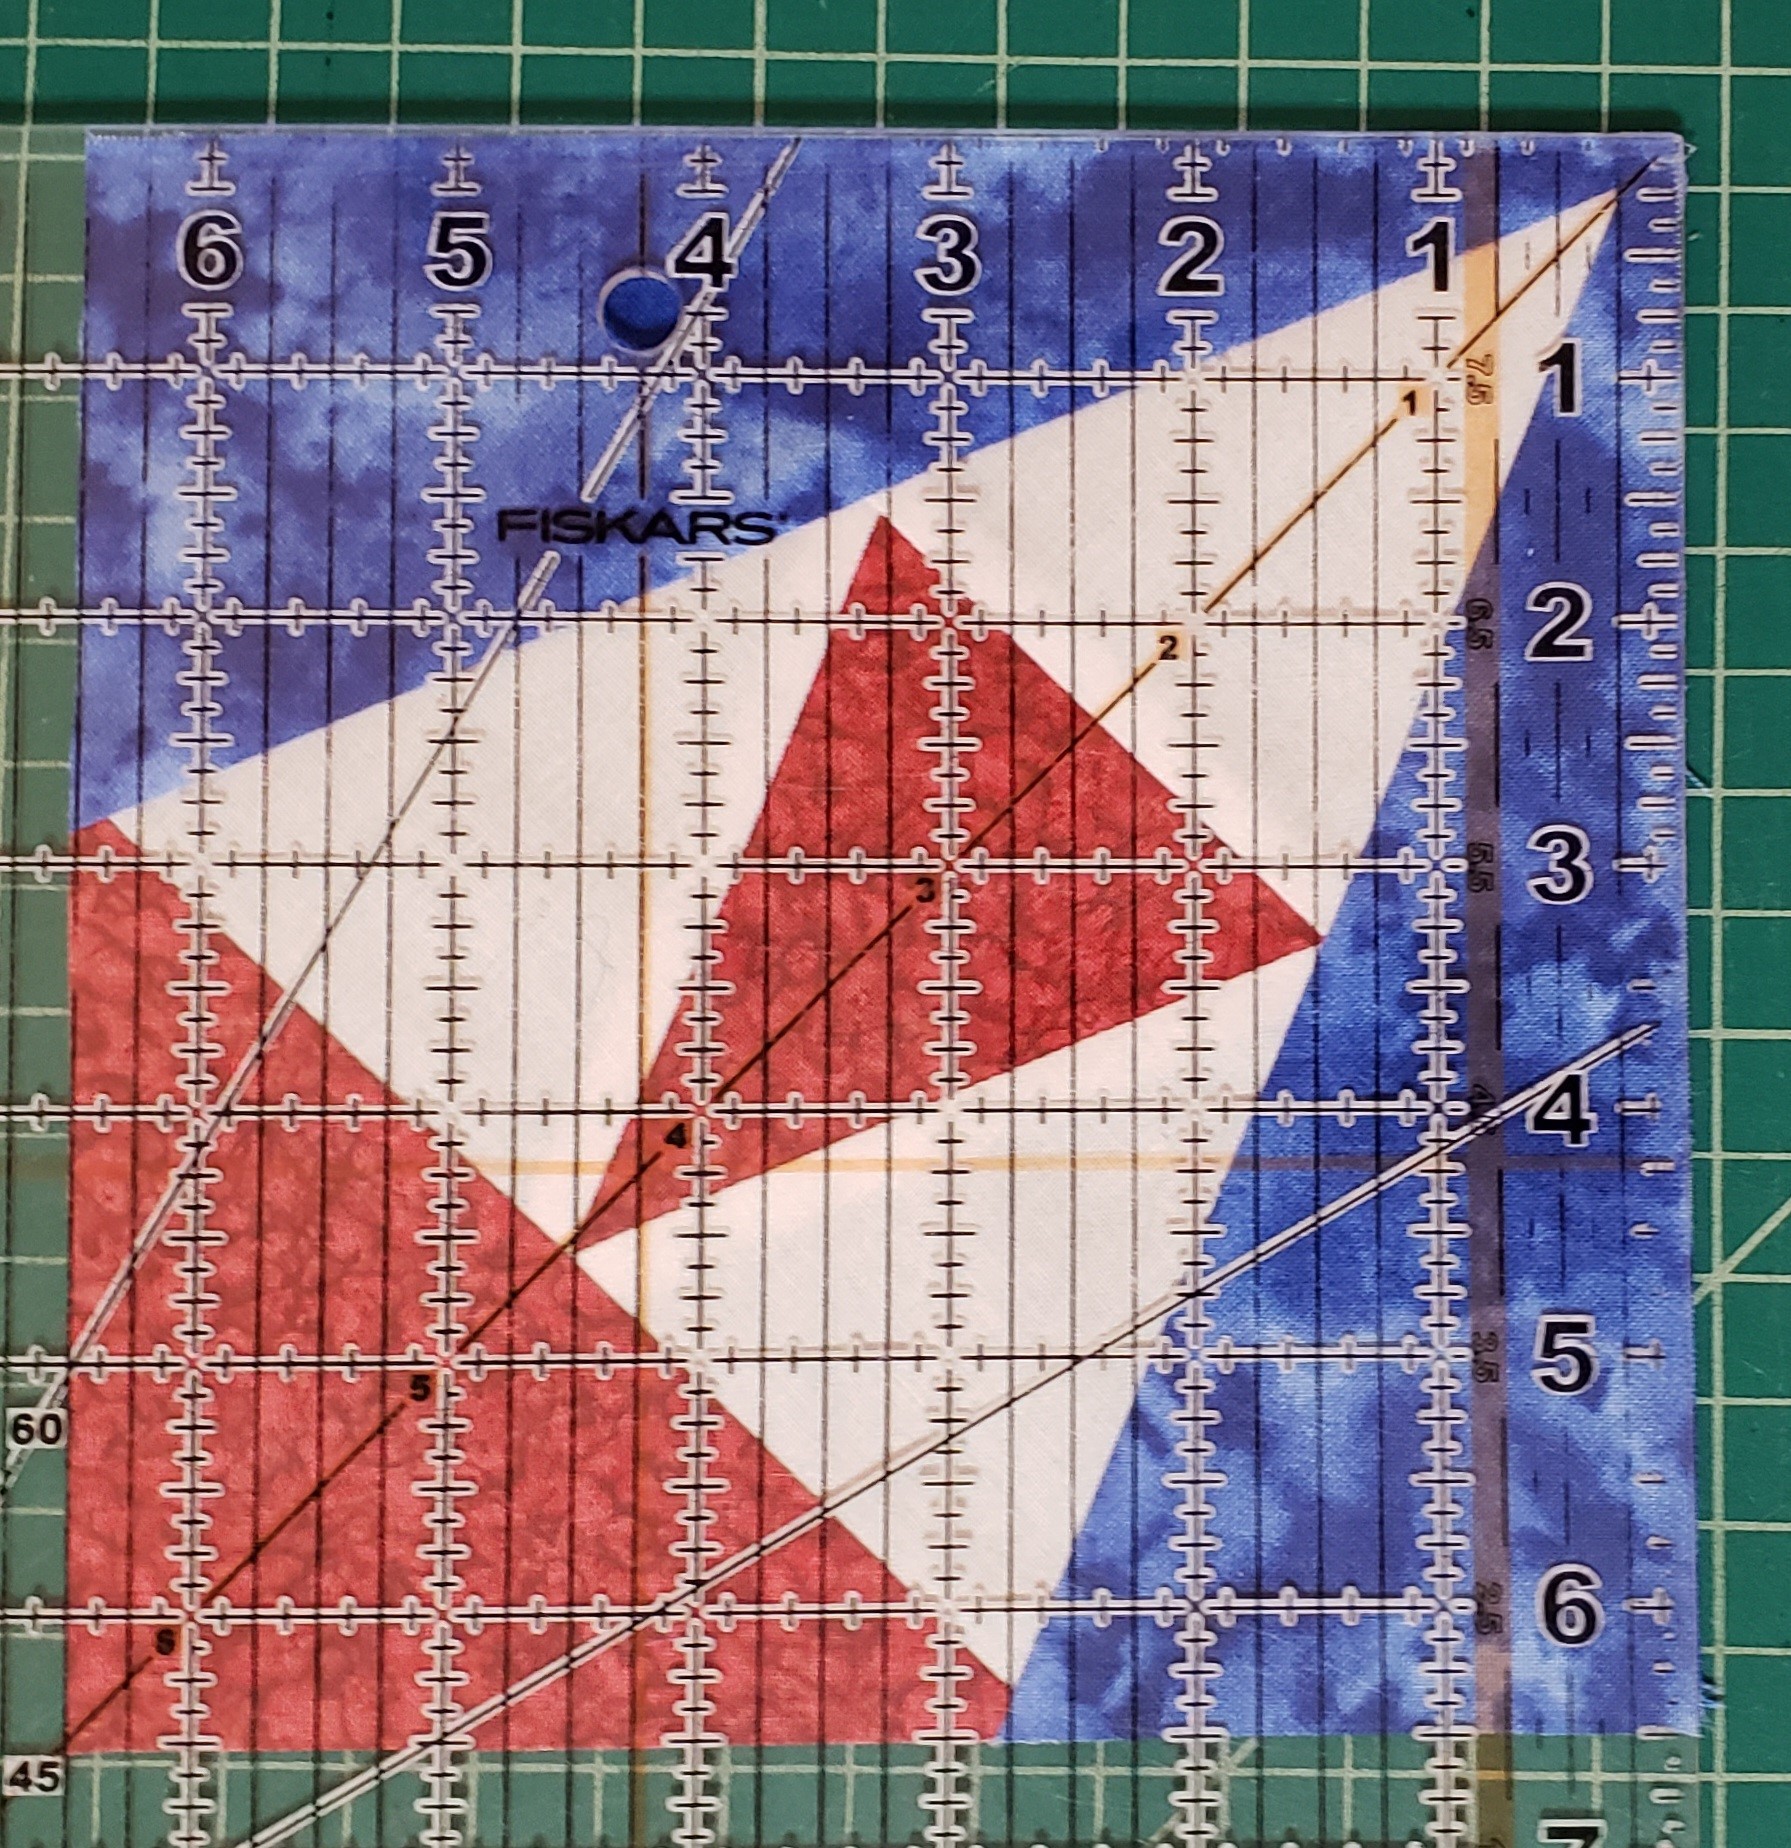
Square-up to 6 1/2″ x 6 1/2″ (make sure to trim from all sides to keep balanced.
If your ruler has a diagonal line, use it to go down the center of the points to the center, so you can trim from all sides, then rotate the block and trim the other two sides.
Repeat using the same colors for a second block.
Step 3 – Quarter color 2 (Black)
Using the same pieces as Step 2, except use color D instead of Color B.
Layout in the following layout.
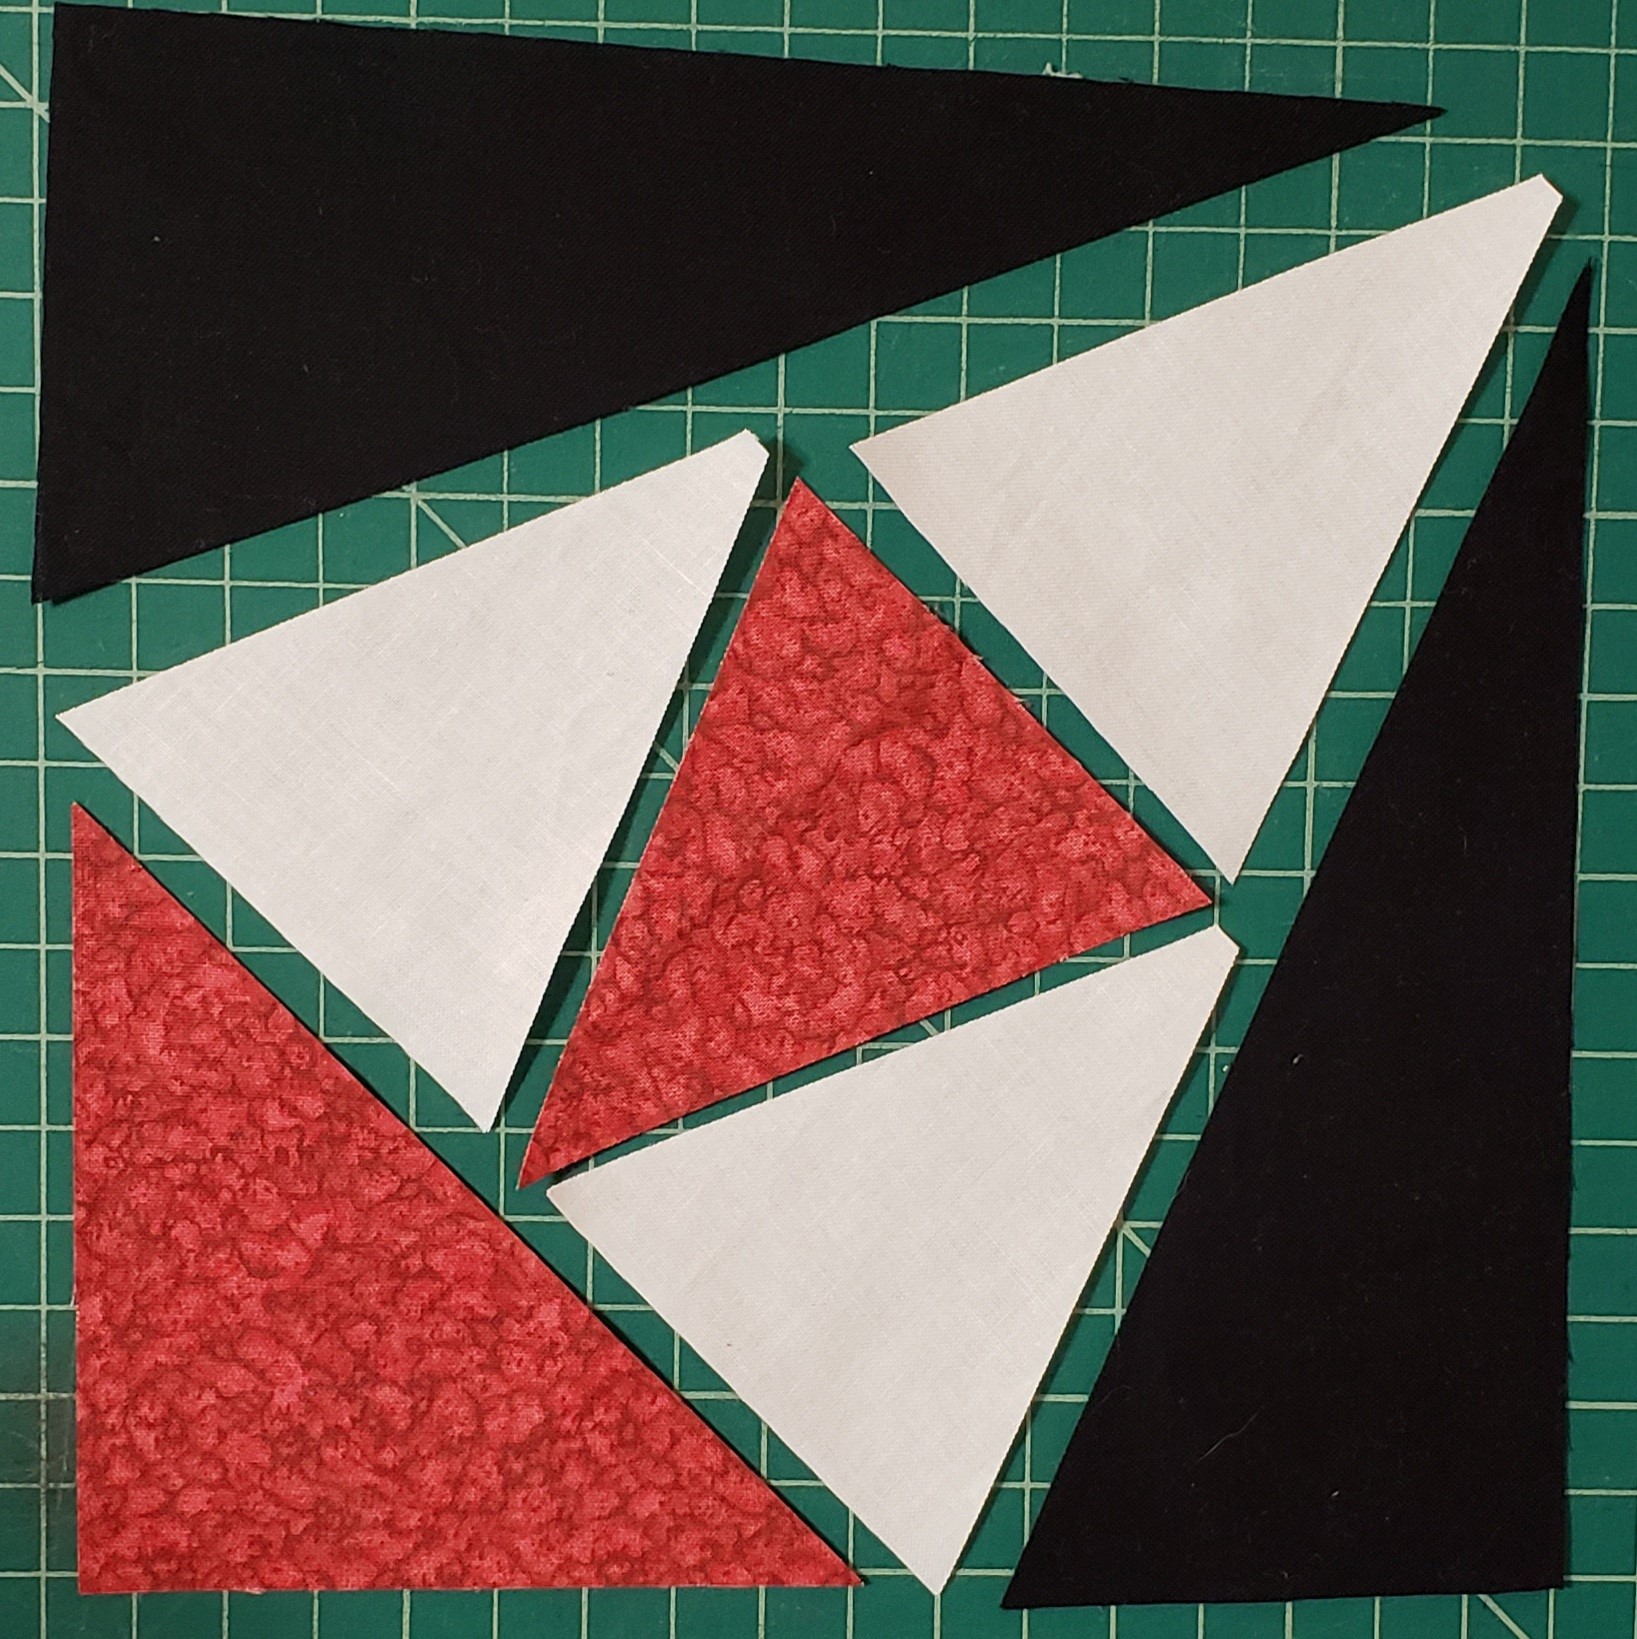
Repeat the same steps as Step 2, except using Color D.
Create 2 of this color.
Square-up to 6 1/2″ x 6 1/2″
Create 2 of these blocks.
Step 4 – Final Assembly
Layout the four quarter blocks in the following layout. Sew with 1/4″ seams.

Press Seams.
You have now completed the Signal Lights block.

I look forward to seeing all your wonderful blocks! Make sure to post on the Facebook group! Remember to add the hashtag #SignalLights.
Click Here for a PDF of the instructions
Printable Templates
If you print the templates, just cut the number of pieces on the templates, and then start at step 2.
Click here for printable templates of the block.
After printing make sure to check the 1″ block to make sure the pdf printed the correct size. The block will not finish at 12″ x 12″ if the 1″ block is incorrect.
Ideas of different color combinations


Signal Lights & Crossed Canoes combined.


veterano abogado penal acusado de volver a robar el letrero de una heladeria en un caso extrano
LikeLike
Thank you!
Sent from my iPhone 🇺🇸🏠
Jeri@JeriAnderson.net
LikeLike