The Island Batik Ambassador’s Blog-hop for June 2022 is the New York Beauty Block. Welcome to Week 2.

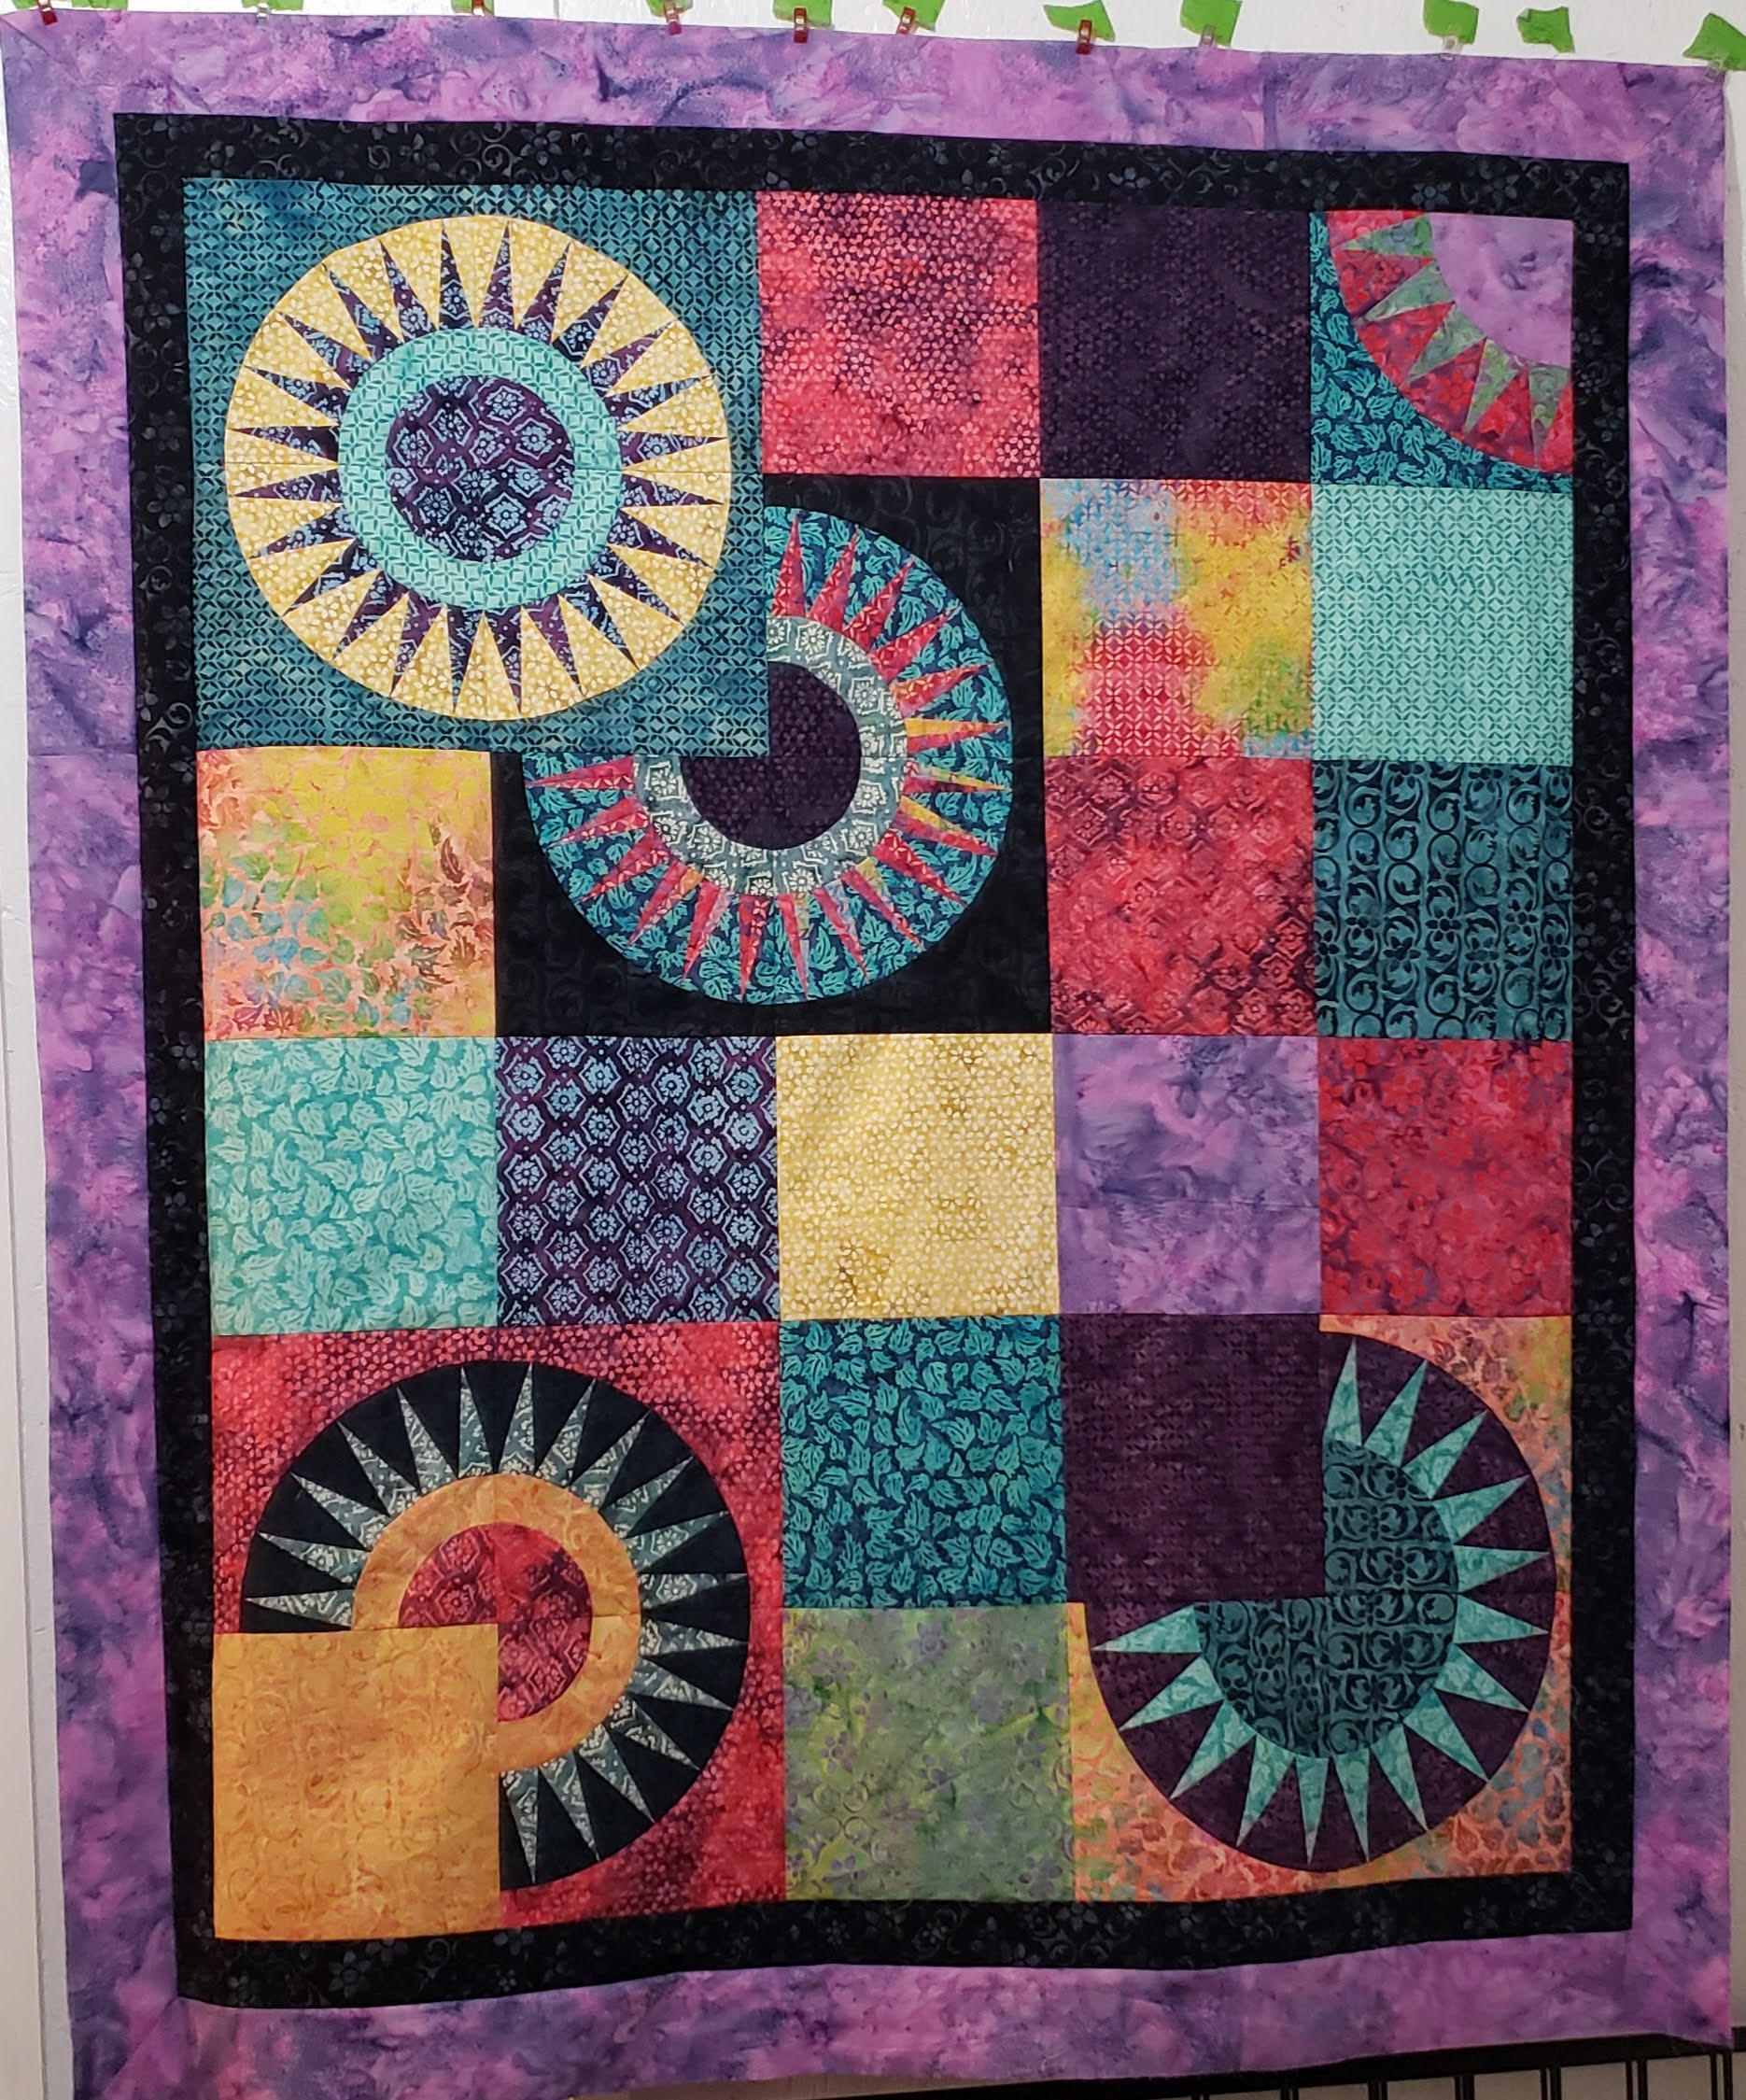
This was my first attempt at making the New York Beauty block. There are so many different layouts for the New York Beauty quilt, and it depends on the fabrics, and the person making the quilt. I was not sure if I wanted to make all the blocks with the curves, so decided to go with fabric squares of the fabric set as well. I created my layout with Electric Quilt 8.

The New York Beauty was first documented around 1850, and has been know by several names in the nineteenth century: “Rocky Mountain Road”, “Rocky Mountain”, ”Rail Through The Mountains”, “Crown of Thorns”, and “The Great Divide”.
It is most commonly referred to the New York Beauty now. In 1930, a division of the Stearns and Foster company, Mountain Mist, published a variety of quilt patterns to boost the sale of quilt batting, and this is where it got its common name.
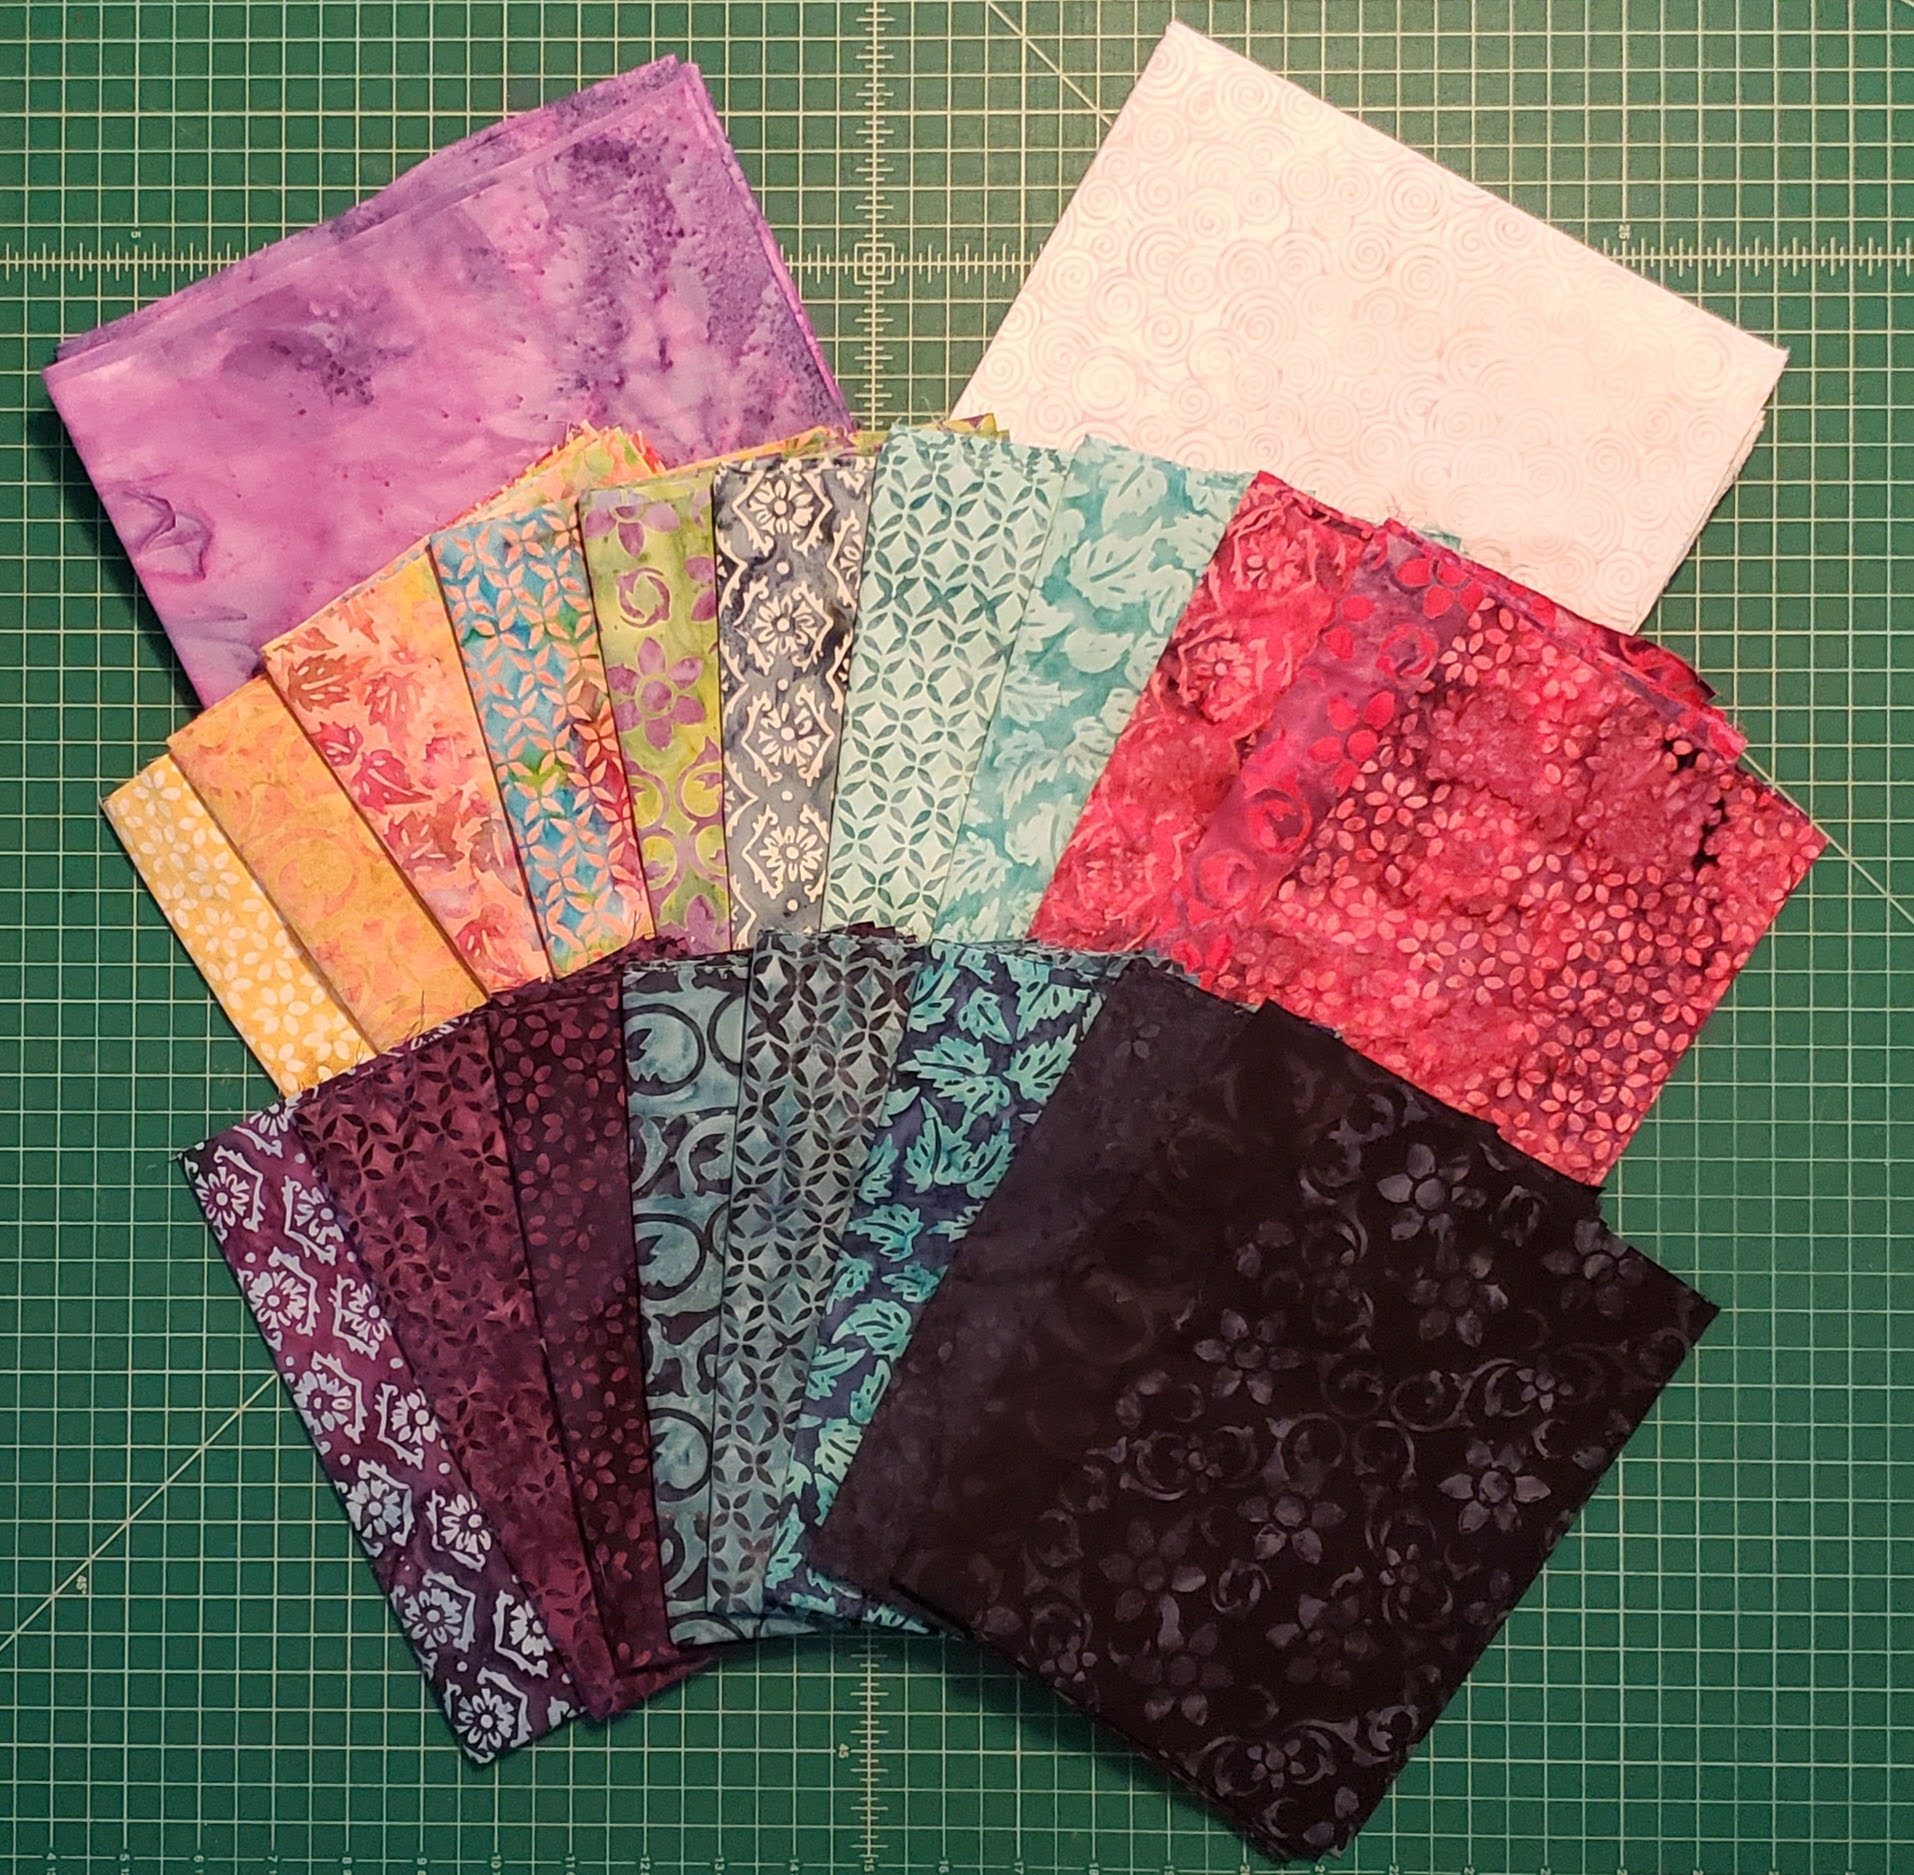
The fabric I used for the quilt was given to me by Island Batik, and is the Winter 2021 Collection, “Savannah” by Tammy Silvers by Tamarinis. I was given a half yard of each of the 20 fabrics, and 2 yards each of Light and dark neutral fabrics, Icing and Urchin. This fabric is being sent to the stores in June 2022, so check out your favorite fabric store for this fabric.

My quilt finished at 55″ x 64″.
The quilt top consists of 5 different color sets, with three different layout’s for the New York Beauty Blocks.
Block 1 – you will need to create 4 (layout 1)
Block 2 – you will need to create 3 (layout 2)
Block 3 – you will need to create 3 (layout 1)
Block 4 – you will need to create 3 (layout 3)
Block 5 – you will need to create 1 (layout 3)

You can use any layout for the different sets of the blocks, depending on your skill level. Layout 2 (block 2) is the most difficult of the three layouts, where layout 3 (block 4 & 5) is the easiest, with less curves. So you can mix and match as you would like.
You will need to pick your color sets for each of the blocks, making sure that the colors work together, and don’t get lost together. I tried different combinations, and some were so close, you didn’t see the difference between the fabrics.
This quilt top can be done as part paper piecing, and part piecing, or you can use templates to cut out all the pieces and piece together. Depending on what method you are more comfortable doing.

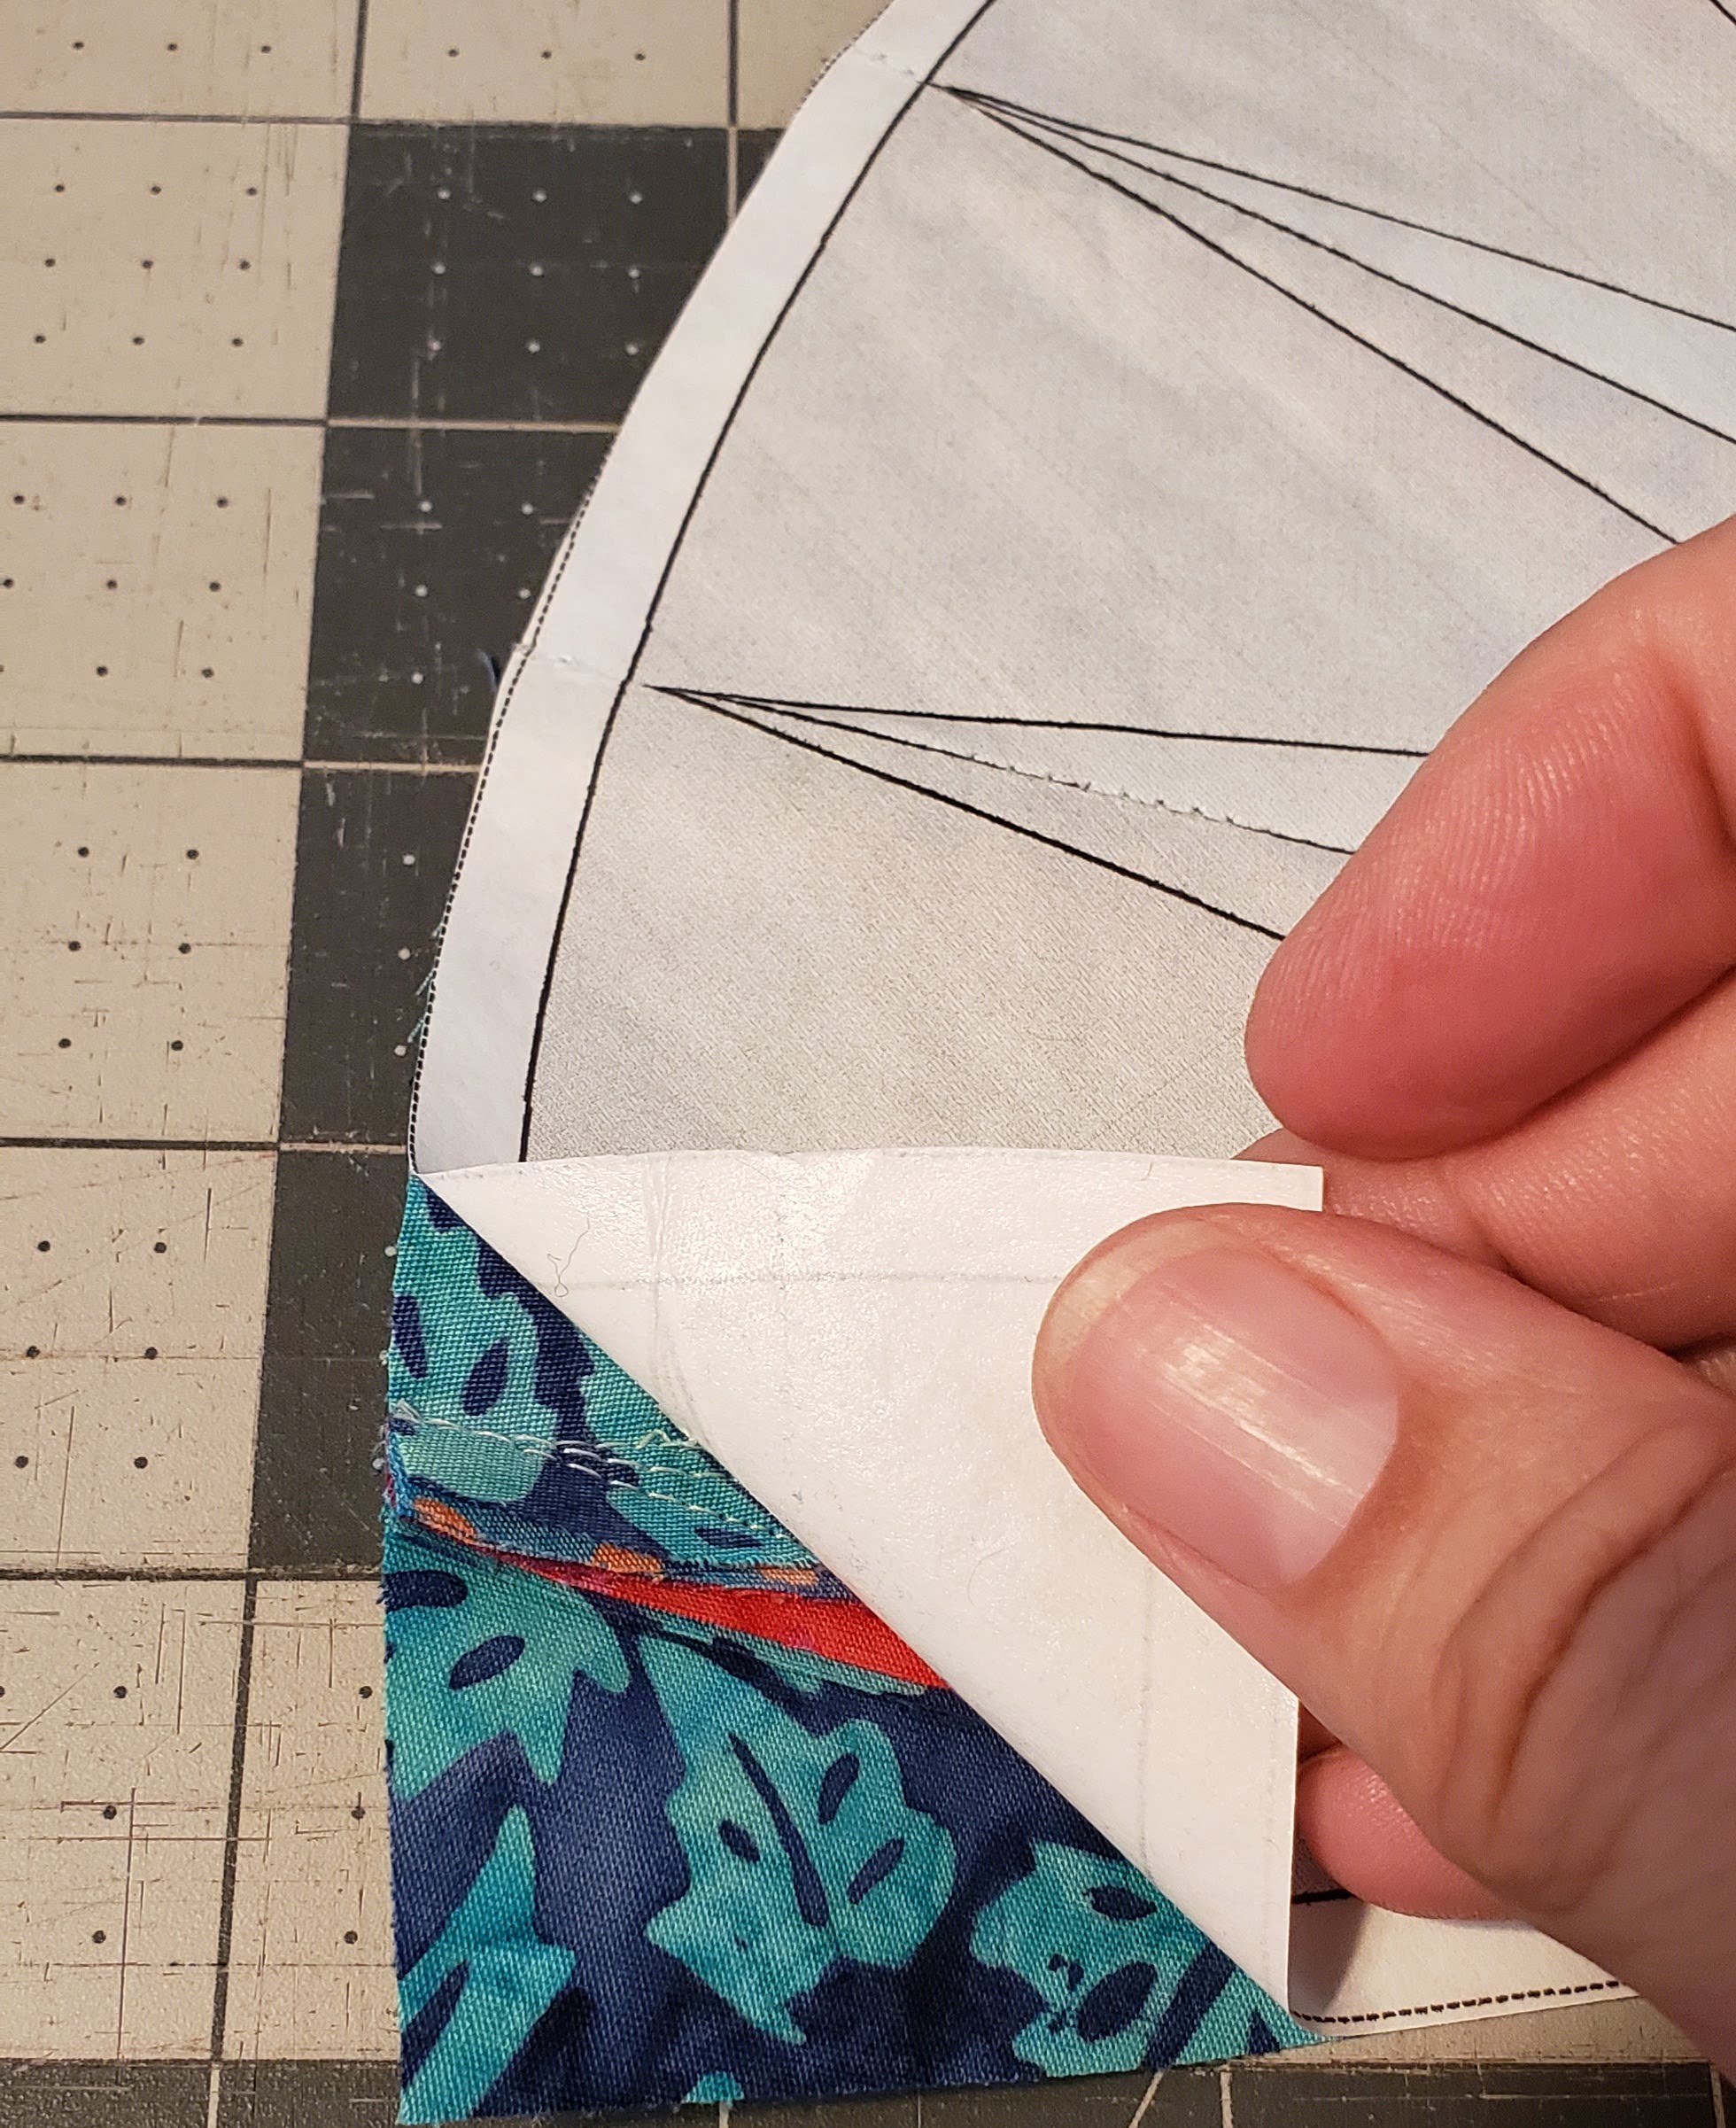
I used the curved area with the triangles as paper piecing, and the other three pieces were cut using templates. I did use the template pieces for the curved triangles, to give me an idea of the size of the fabric I needed cut.

I printed the print outs on freezer paper, so I could iron to the fabric for cutting. I used the freezer paper for the paper piecing, so I could reuse, and not have to pull paper. You simply fold the paper on the “stitch line” and stitch along, and then press the fabric, and fold back for the next line. Actually found this easier than doing the traditional way of stitching on the paper.

Cutting Requirements.
Depending on the block you are working on, will depend on the number of pieces you will cut. Use the templates to determine which pieces you need.
Each of the blocks gives different looks for the quilt.
I then cut out Sixteen – 9 1/2″ x 9 1/2″ squares of fabrics. I kept one unused, 4796, that I used as a 2″ finished border, before the Urchin outside border. I cut these strips with my new Accuquilt cutter.
For the back, I created four more of layout 3, except 8 1/2″ x 8 1/2″ finished, and I used a variety of 9″ x 9″ fabric squares, and 1 1/2″ Urchin strips, and 7 1/2″ strips of Icing for the outside border. This made the back a little wider than the front to help with quilting, and when centered correctly gave me the fabric to do self-binding.
Assembly
I printed the templates on Freezer paper for the sizes of fabric I needed. I ironed the paper to the back of the fabric, and it made it easier to cut the fabric.
I found it was best to do one set of blocks at a time. Since, Layout 3 is the easiest, I started with Block 5, since there was just one block of this color set.
I used the freezer paper to create the paper pieced strip with all the little pieces. By folding the paper back, I was able to use the same paper for all 4 sets of Layout 3 (blocks 4 and 5). And there was no tearing of paper.
I then created the three blocks 4, using the same templates and foundation pieces. These were the same layout, just different colors.
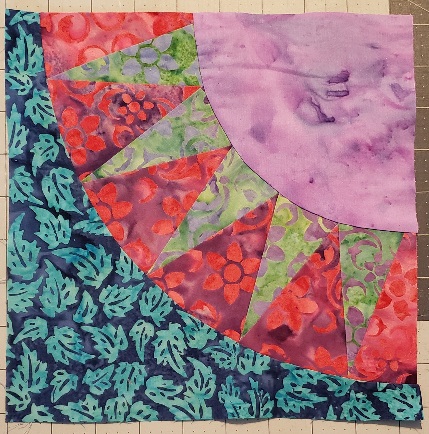
I then proceeded to create all of Layout 1. There are four of Block 1, that created a circle in the quilt. There are three of Block 3. Same layout, just different colors. These added an additional quarter circle to each block.

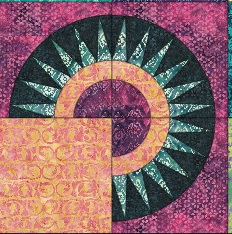
When those were done, I proceeded to create three of Layout 2, these were the hardest with the smaller pieces in the triangle strips. These took a little more time, as seams are important as you quilt tiny pieces, so you blocks will be the correct size.

Layout
The layout will depend on how you feel you blocks look best. This is a good time to layout the blocks, and see how the feel. In my two bottom blocks, I added the forth block as a matching square to part of the other blocks.
Block 3 – I used the smaller circle fabric
Block 4 – I used the fabric that matches the darker triangles

Once I laid out the fabric, I moved the 9 1/2″ x 9 1/2″ blocks around to get the look that I like.
After I decided on the layout, I started sewing the rows in strips across, and then down.
I added a border of the darkest fabric 2 1/2″ strip around.
I then added a 3 1/2″ strip of matching Urchin fabric. I had a two yard piece of this coordinating fabric.
The quilt top was completed.
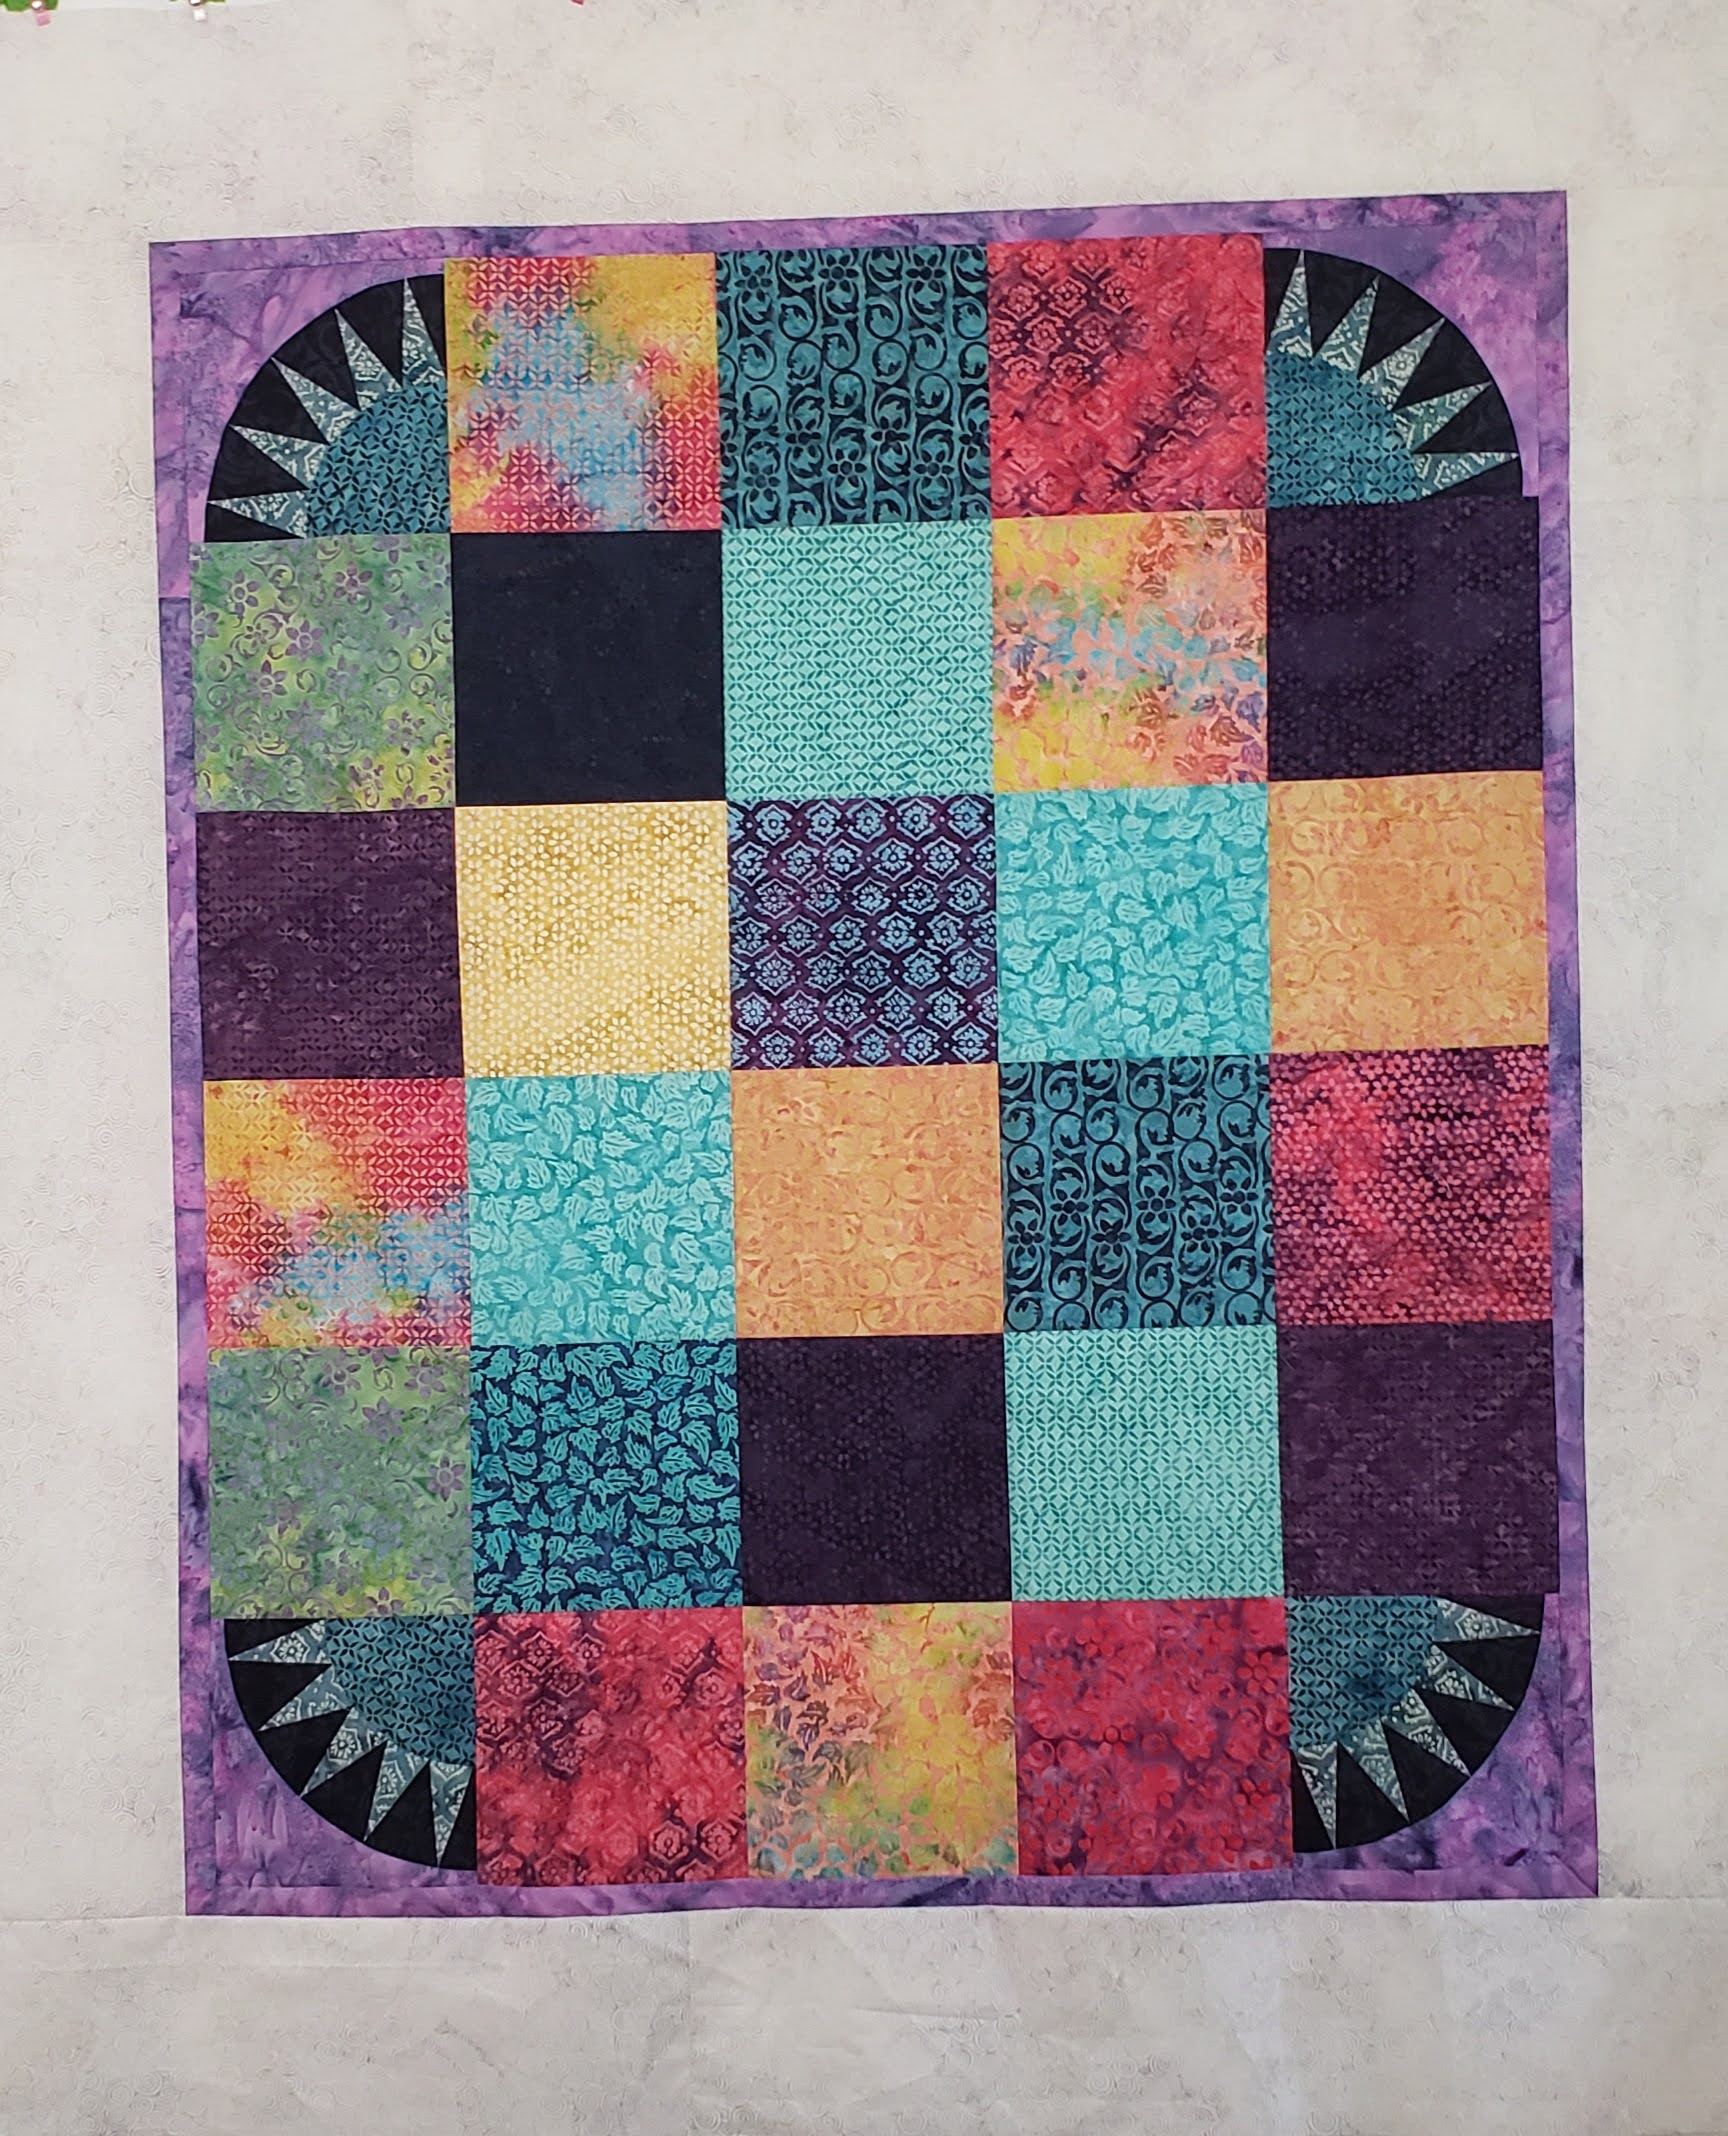
The Back.
When finished, I decided I wanted to create a matching back for the quilt. I created four more of the Layout 3, except I used 8 1/2″ x 8 1/2″ finished blocks. I cut out a variety of the fabrics in 9″ x 9″ squares. I put the four New York Beauty blocks in the corners. I wanted the back to match the theme of the front, as well as the fabric.
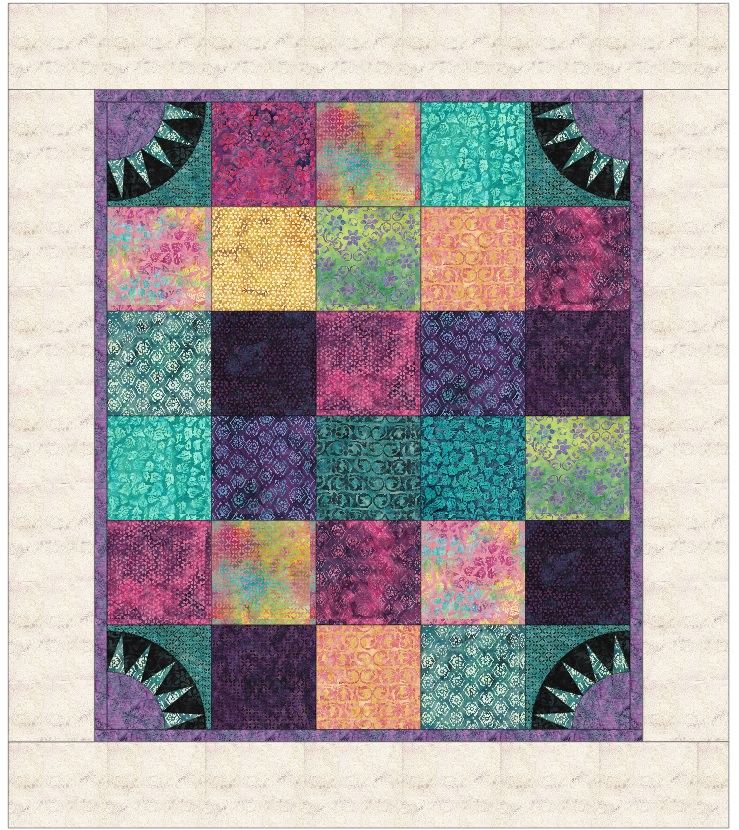
I added a 1 1/2″ strips of the matching Urchin fabric, and a 7 1/2″ strips of matching Icing fabric as an outside border. This does make the back a little larger than the front, to help with centering and leaving extra on the back to fold over for Self-binding.
Depending on how you plan on quilting, you may need to make the outside border wider.
Here is the completed Back of the quilt.
Quilting the Quilt
I used Hobbs Cotton Batting, and I pieced and quilted using Auriful thread. Both of these items were given to me as well as the fabric used in this quilt.
I quilted using an embroidery edge-to-edge design, Dots and Daisy’s, (I purchased from by JuJu Designs) on my Janome 500e. I enjoy the finished look of these designs more than my free-motion quilting that I do on my Juki machine.

Finished quilt and quilted back.


This week there is a new giveaway! Island Batik has put aside two Fat Quarter bundles of two new complete Original Island Batik collections created by Guest Designers – Savannah by Tamarinis and Santorini by Claudia Pfeil!
http://www.rafflecopter.com/rafl/display/d463e29d41/ To enter for your chance to win one of these these stunning batik bundles, please follow the easy-to-use prompts on Rafflecopter!

Instructions for the three different layouts and assembly will be posted over the next few weeks. Please note that the templates are available free until end of September.
Thank you to Island Batik, Hobbs Batting Aurifil Thread and Schmetz for providing me with the materials to make this quilt.


If you enjoyed my Winter 2021 Collection “Savannah”, New York Beauty quilt, Check out the New York Beauty challenge projects from my fellow Island Batik Ambassadors for more inspiration!
Brenda Alburl ~ Songbird Designs
Megan Best ~ Bestquilter
Pamela Boatright ~ Pamelaquilts
Elizabeth DeCroos ~ Epida Studio
Jennifer Fulton ~ Inquiring Quilter
Preeti Harris ~ Sew Preeti Quilts
Mania Hatziioannidi ~ Mania for quilts
Jane Hauprich ~ Stitch By Stitch Custom Quilting
Reed Johnson ~ Blue Bear Quilts
Connie Kauffman ~ Kauffman Designs
Emily Leachman ~ The Darling Dogwood
Denise Looney ~ For The Love Of Geese
Leah Malasky ~ Quilted Delights
Maryellen McAuliffe ~ Mary Mack Made Mine
Anorina Morris – sameliasmum.com
Lisa Pickering ~ Lisa’s Quilting Passion
Claudia Porter ~ Create with Claudia
Gail Renna ~ Quilt Haven Threads
Brianna Roberts ~ Sew Cute And Quirky
Michelle Roberts ~ Creative Blonde
Gail Sheppard ~ Quilting Gail
Andi Stanfield ~ True Blue Quilts
Sandra Starley ~ Textile Time Travels
Jennifer Thomas ~ Curlicue Creations
Suzy Webster ~ Websterquilt
#islandbatikambassador #islandbatik #iloveislandbatik #hobbsbatting #aurifil #aurifilthread #juki #Schmetz #Accuquilt #Janome

Your quilt is beautiful! And thanks for the detailed post with tips on sewing a quilt like this!
LikeLike
beautiful quilt, I always make mine 2 sided.
LikeLiked by 1 person
Thank you, it is so fun having them double sided. More work, but fun
LikeLike
Beautiful, front and back. Thanks for the explanation of the process.
LikeLiked by 1 person
these fabrics are lovely. your quilt is gorgeous. I really love how creative you were with your NY and squares. and that you made the back co-ordinate with the front. this is going to be so fun to use. thankyou for sharing and for inspiring.
LikeLiked by 1 person
Love both the front and the back, Lisa!!
LikeLiked by 1 person
Thank you.
LikeLiked by 1 person