
The Island Batik Ambassador Blog Hop for December is the Lone Star Quilt. Welcome to the final week, week 3!
We were sent the fabric in July, and it was wrapped in purple as “Surprise”.
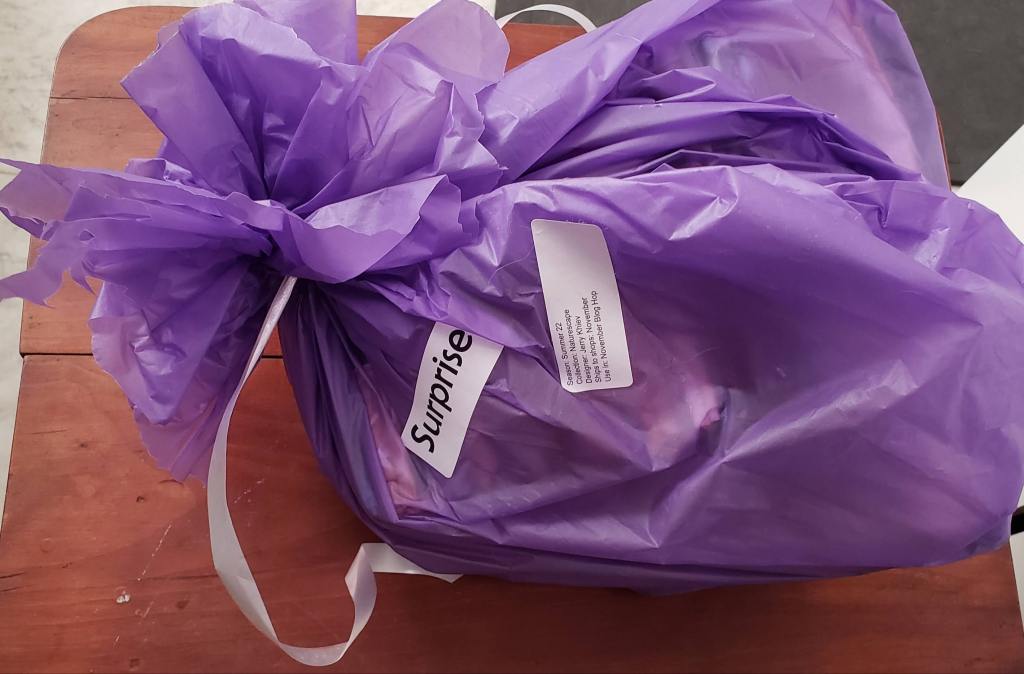
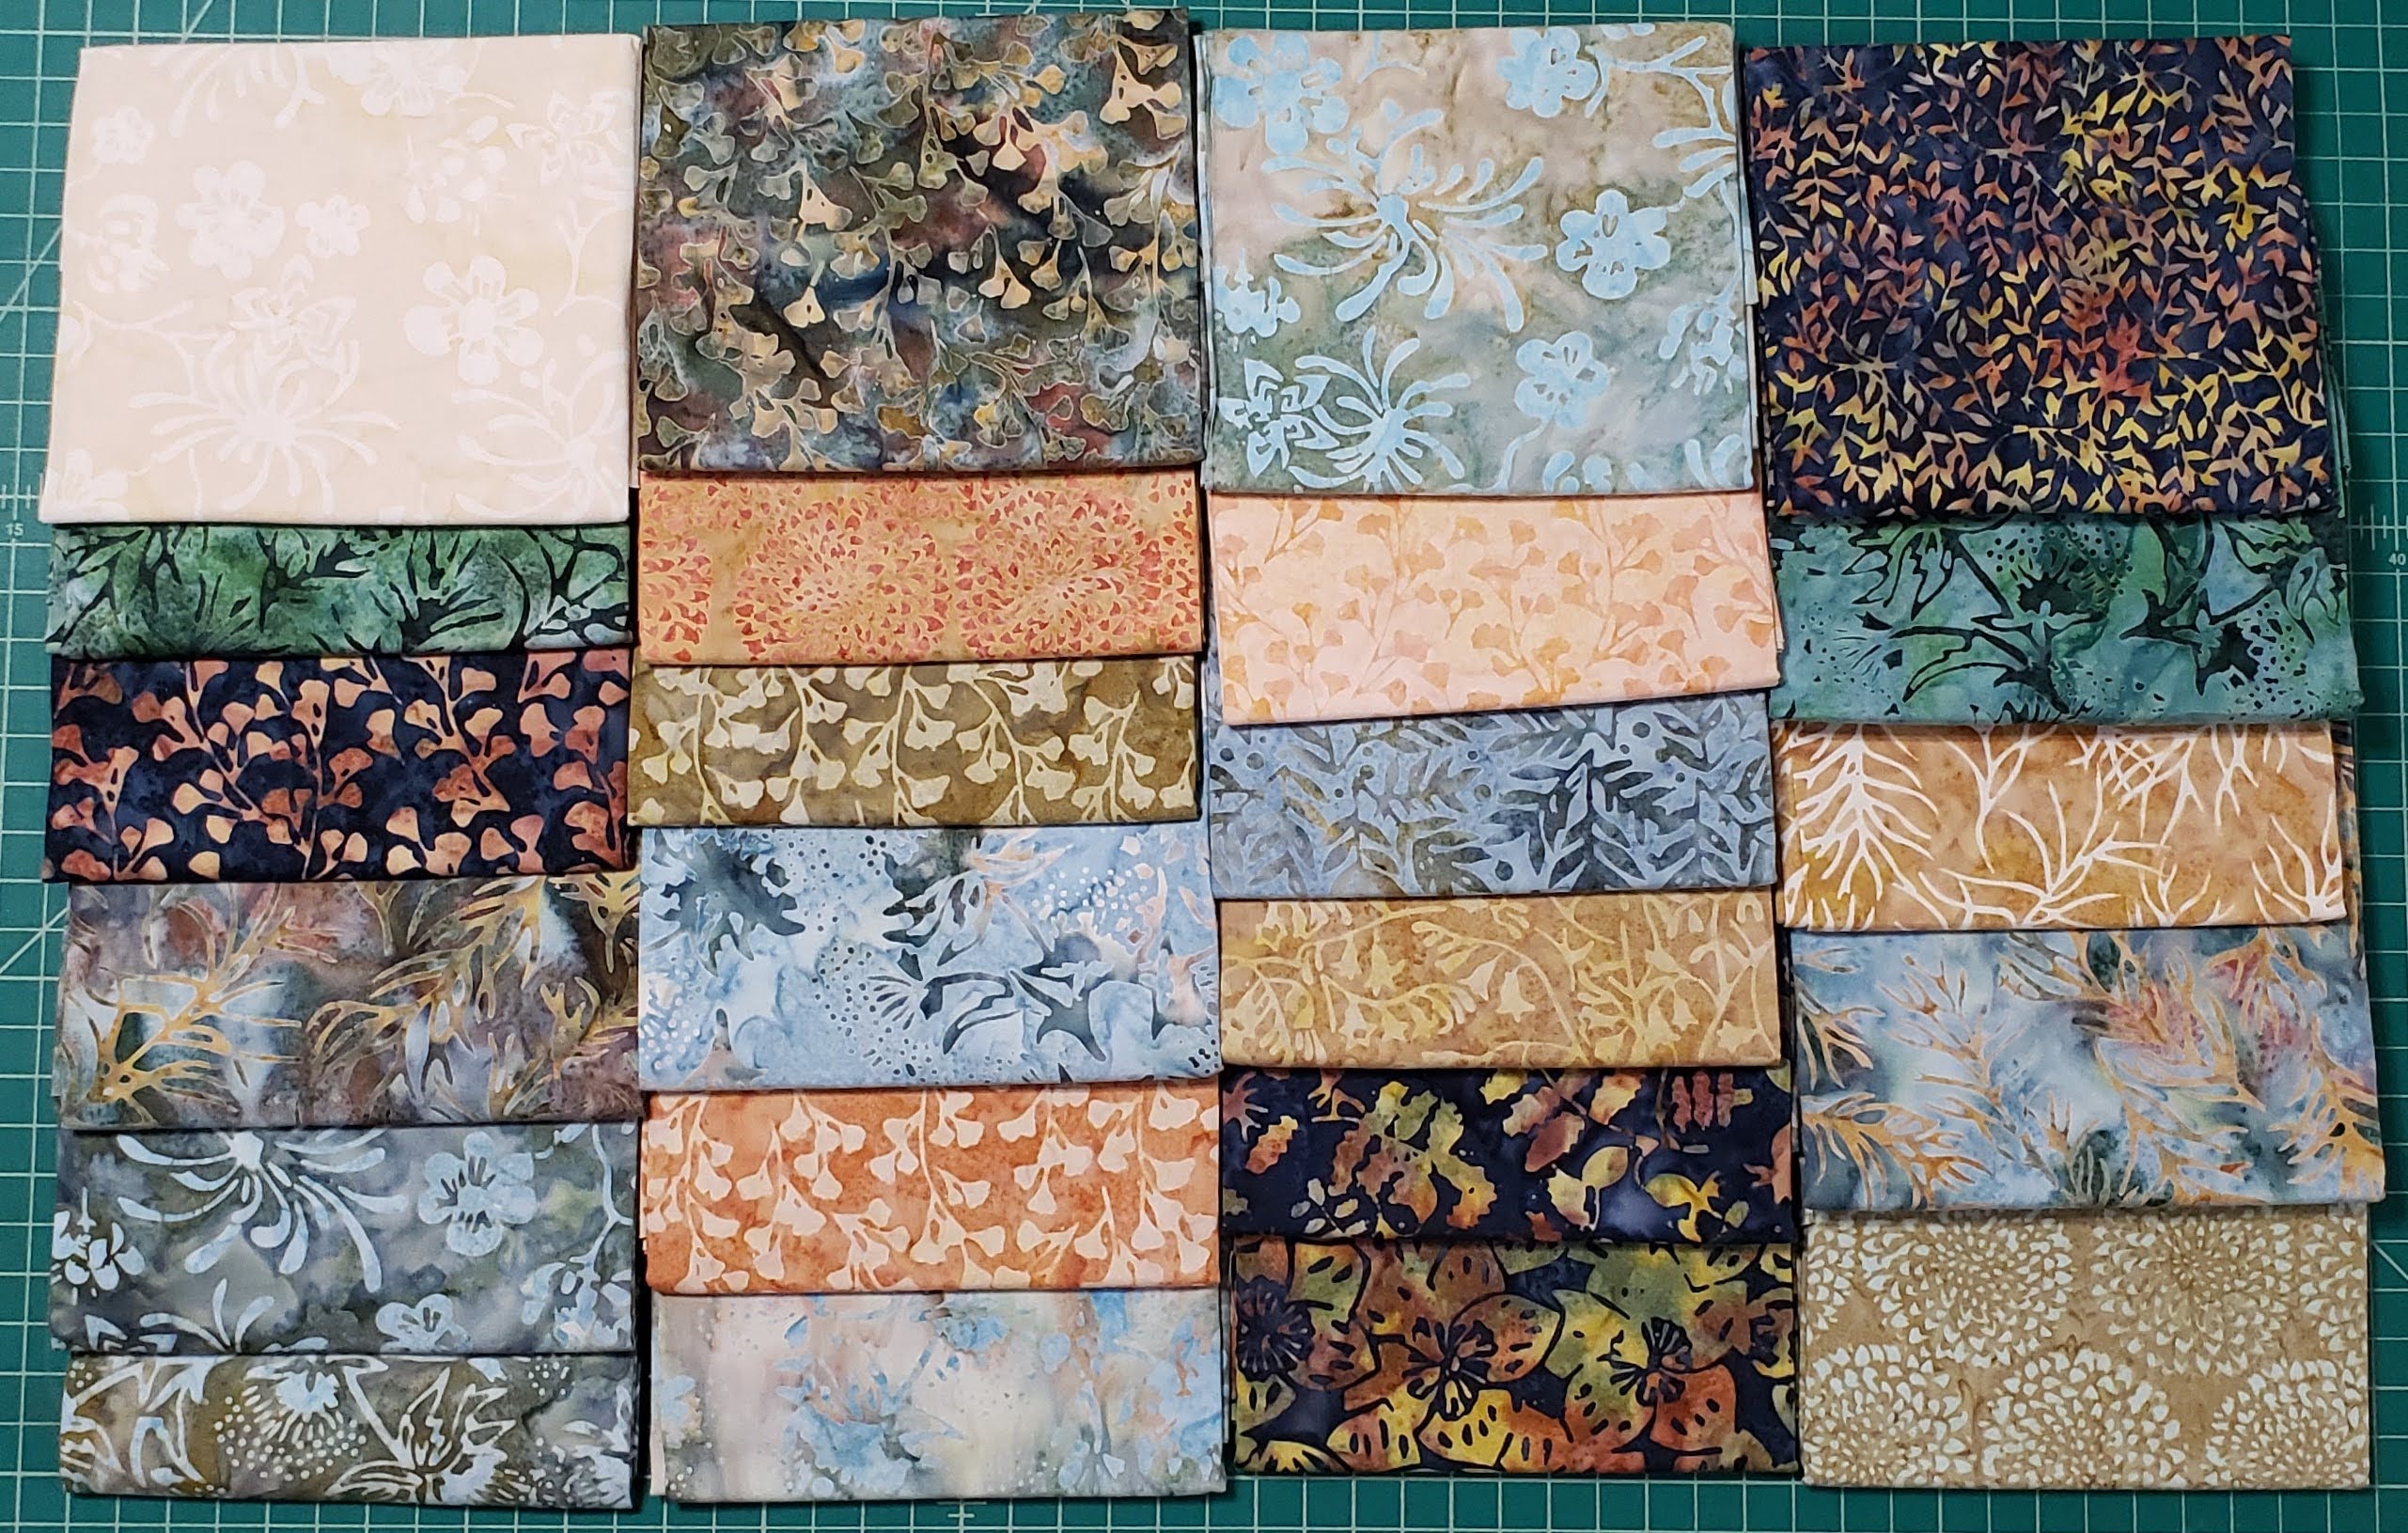
The collection is Island Batik’s “Naturescape” by Jerry Khiev. I received a bundle of half yard of 23 fabrics in the line. I love this fabric and perfect fall colors. I decided to use some Island Batik Gray fabric as my background fabric.

Look how pretty these fabrics are.
All materials are provided free to me by Island Batik and their industry partners Hobbs Batting, Aurifil Thread, Studio 180 Designs, Accuquilt and Schmetz Needles in my role as an ambassador.
To be honest, I have been putting this one off since we were given the fabric. It looks so hard and challenging, and I wasn’t sure what I wanted it to look like. There are so many options, each row from the center out is a color, going from dark to light, or light to dark. Some were twisting colors, and some were a variety of colors.
While looking for inspiration, I came across a website and a video on how to make a Lone Star Quilt with a Jelly Roll. The website was Jordan’s Fabrics Rainbow Lone Star Quilt. She makes it look so easy, and quick. I loved how she used some of the extra triangles to make some squares, to make the quilt more rectangle than square.
To start, I needed to cut 2 1/2″ strips of each of the fabrics, I needed a total of 36 strips, so some I needed to use two strips.
To make fast work of cutting these strips, I used my Accuquilt 2 1/2″ strip die, and cut two strips of each of the 23 fabrics. The strips are all the correct width, and so quick and easy. I used to think I could cut the strips out myself but using the Accuquilt dies are so quick and easy. I cut 5 1/2″ strips of the fabrics, and then I laid three different fabrics down at the same time on the die and was able to knock the strips out in no time. I did cut 46 strips, so I have some for another project, as I wasn’t sure which ones, I wanted to use two sets of.

Once I had the strips cut, I decided on the fabric that I wanted to be the star in the center. I wanted it to be all the same fabric, so that it stood out. I used two strips of that fabric.
I then laid the strips down into sets of three, with the center star fabric on the outside of two sets. I needed a total of 12 sets of three strips.
I sewed the strips together, making sure to rotate the direction that I stitched, so that it would remain straight. I laid the center strip on top of one side, and stitched 1/4″ seam allowance, then opened up the two pieces, and laid the center on top of the other side strip, and because I kept the center strip on top when I sewed, it forced me to sew from the opposite end of the strips.
I sewed all 12 sets, and then pressed the seams to the side. Looking back, I would have pressed the seams open.

Next using one set at a time, you fold a strip in half, and then using your mat, lay the strips along the 45-degree line.

Using a ruler, you cut a strip going across with the lines on the mat. This gave me the 45-degree angle to start the row. Make sure to cut off the selvage edge as you cut.

Carefully, I used a ruler, and cut four 2 1/2″ strips. There are a total of 8 pieces cut (4 sets pf 2). Set the extra fabric aside to use later.

Separate the top 4 pieces into one stack (right side up), and the bottom 4 (back side up) into a second set.

Continue cutting all the strips and separating the top and bottom pieces into two stacks.
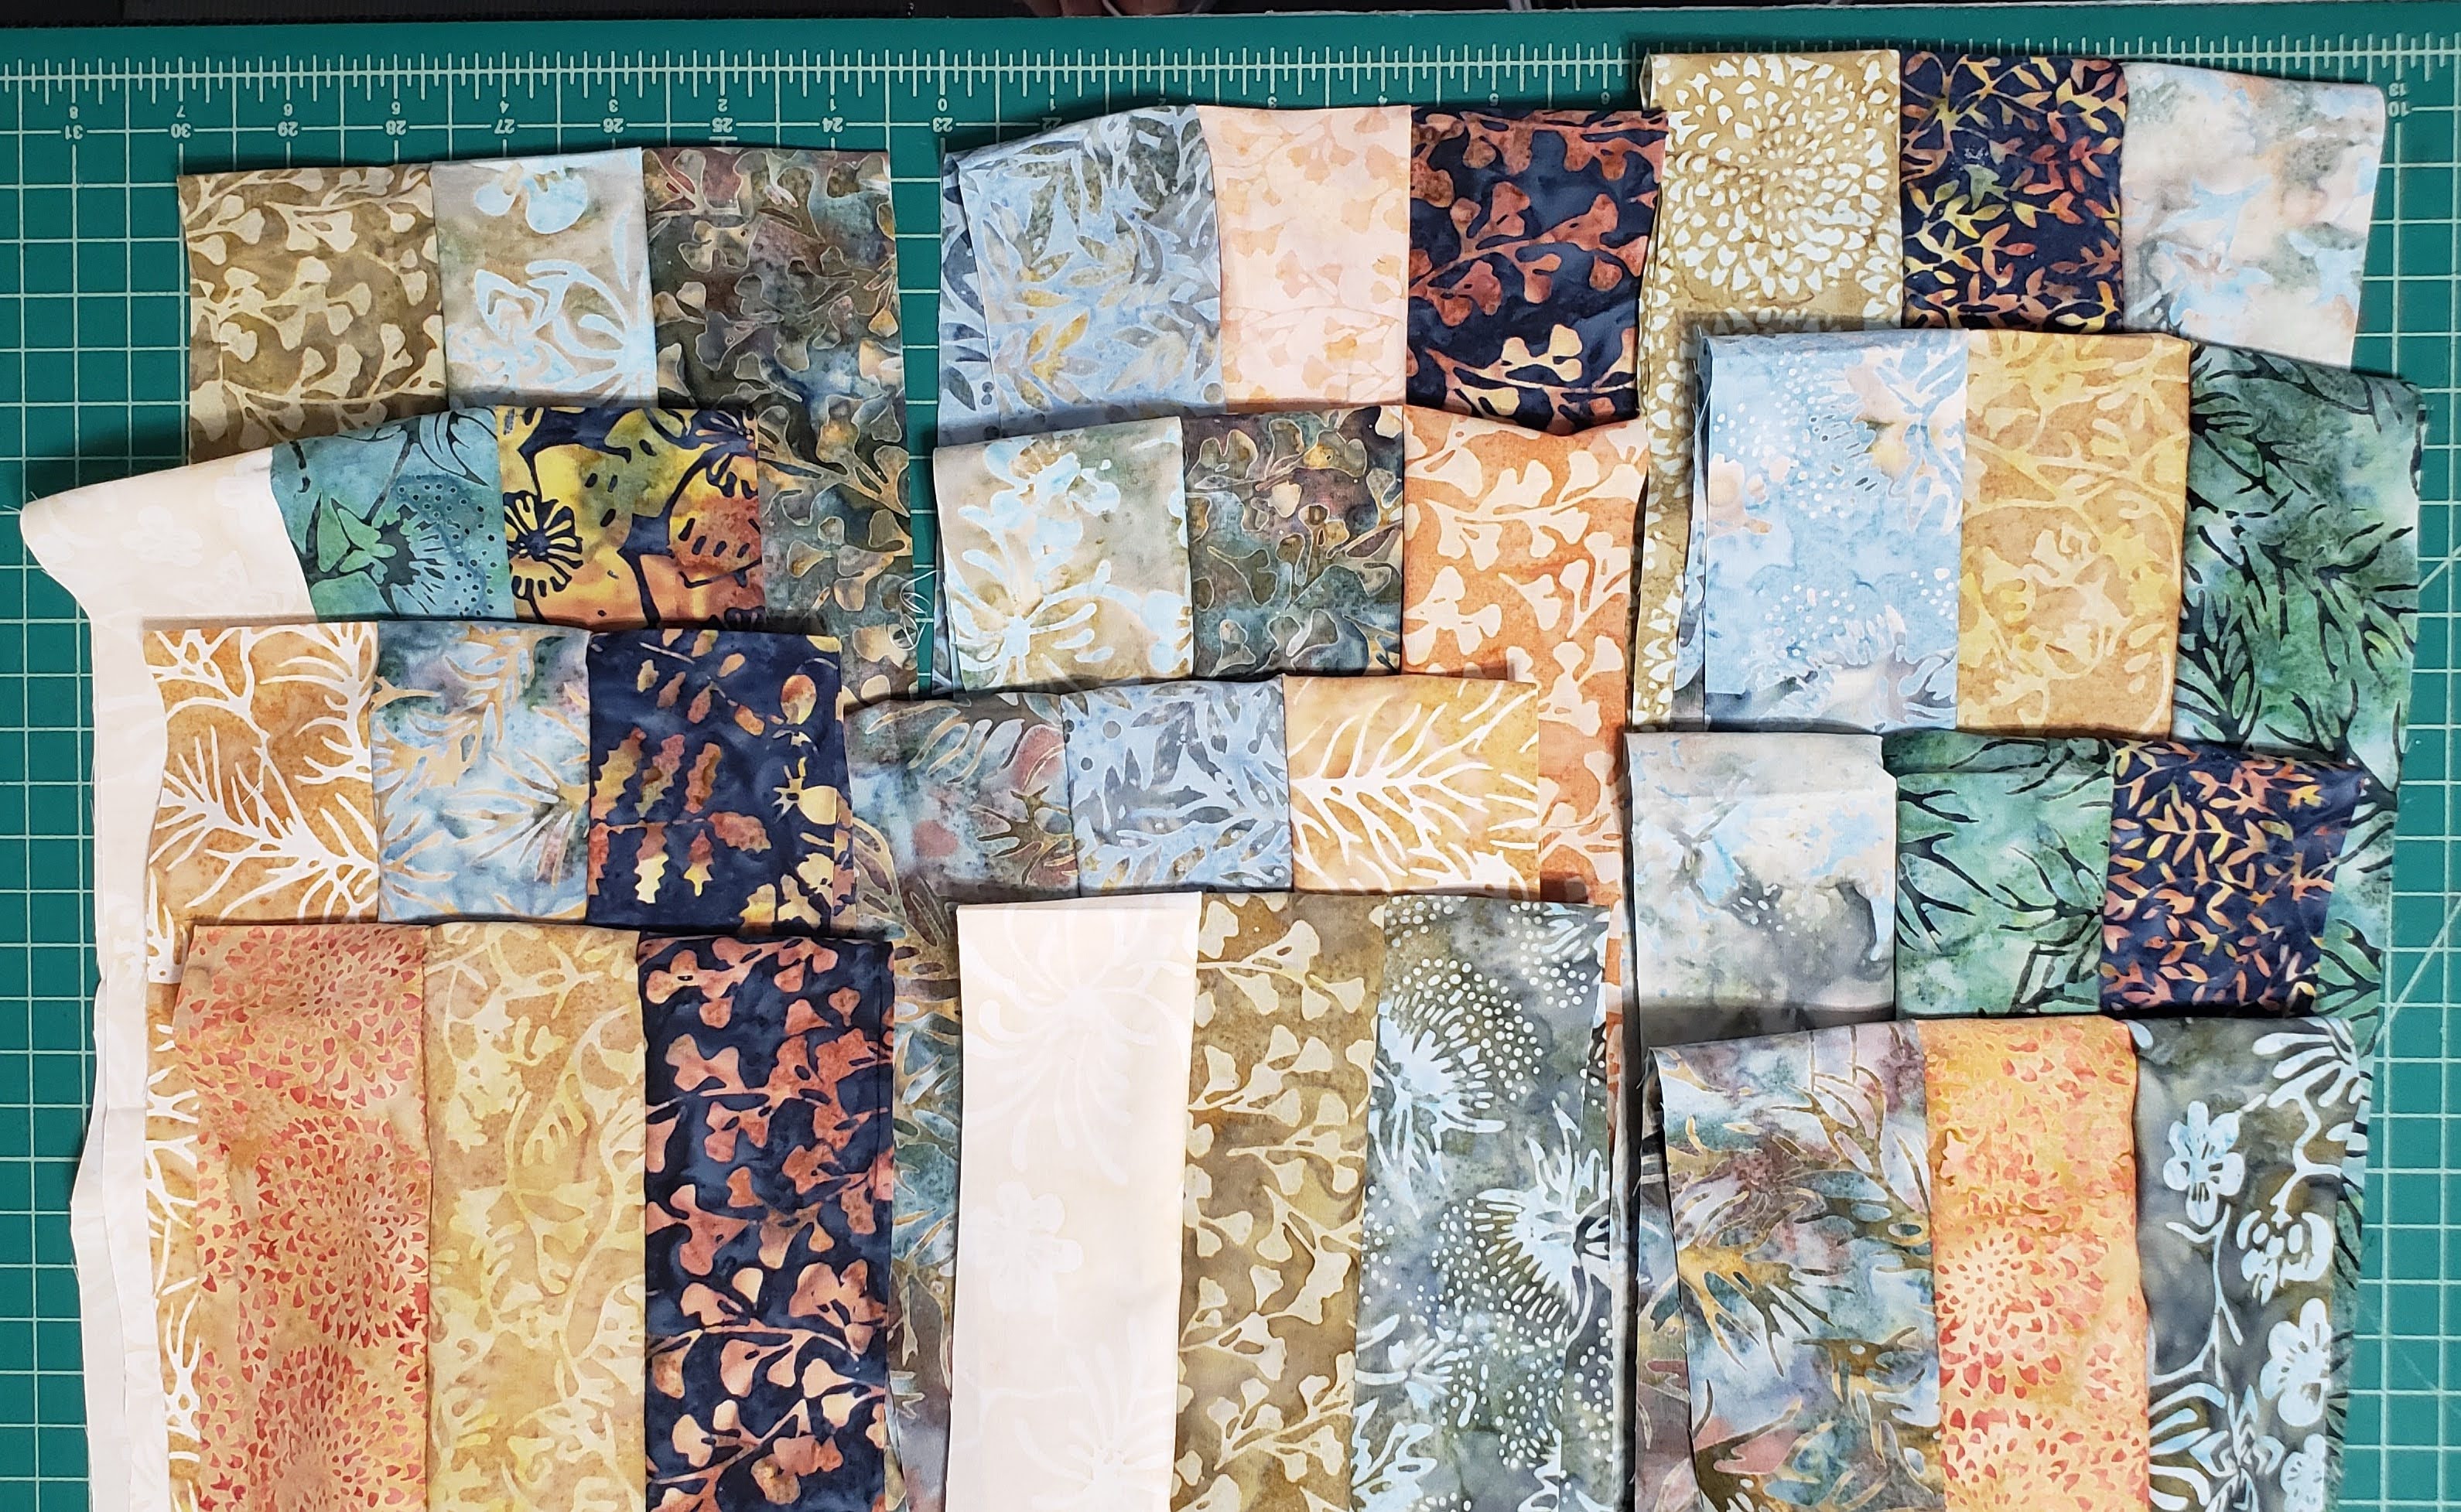
After cutting the strips, I laid out the pieces, to create the diamond in the pattern that I like. They are basically 4 different sets of 3 strips. I moved them around until I was happy.

A good practice is to leave the matching pieces together, so you don’t have to try and recreate it as you will sew together 4 sets of this layout. (Yes, I learned from my mistake.)
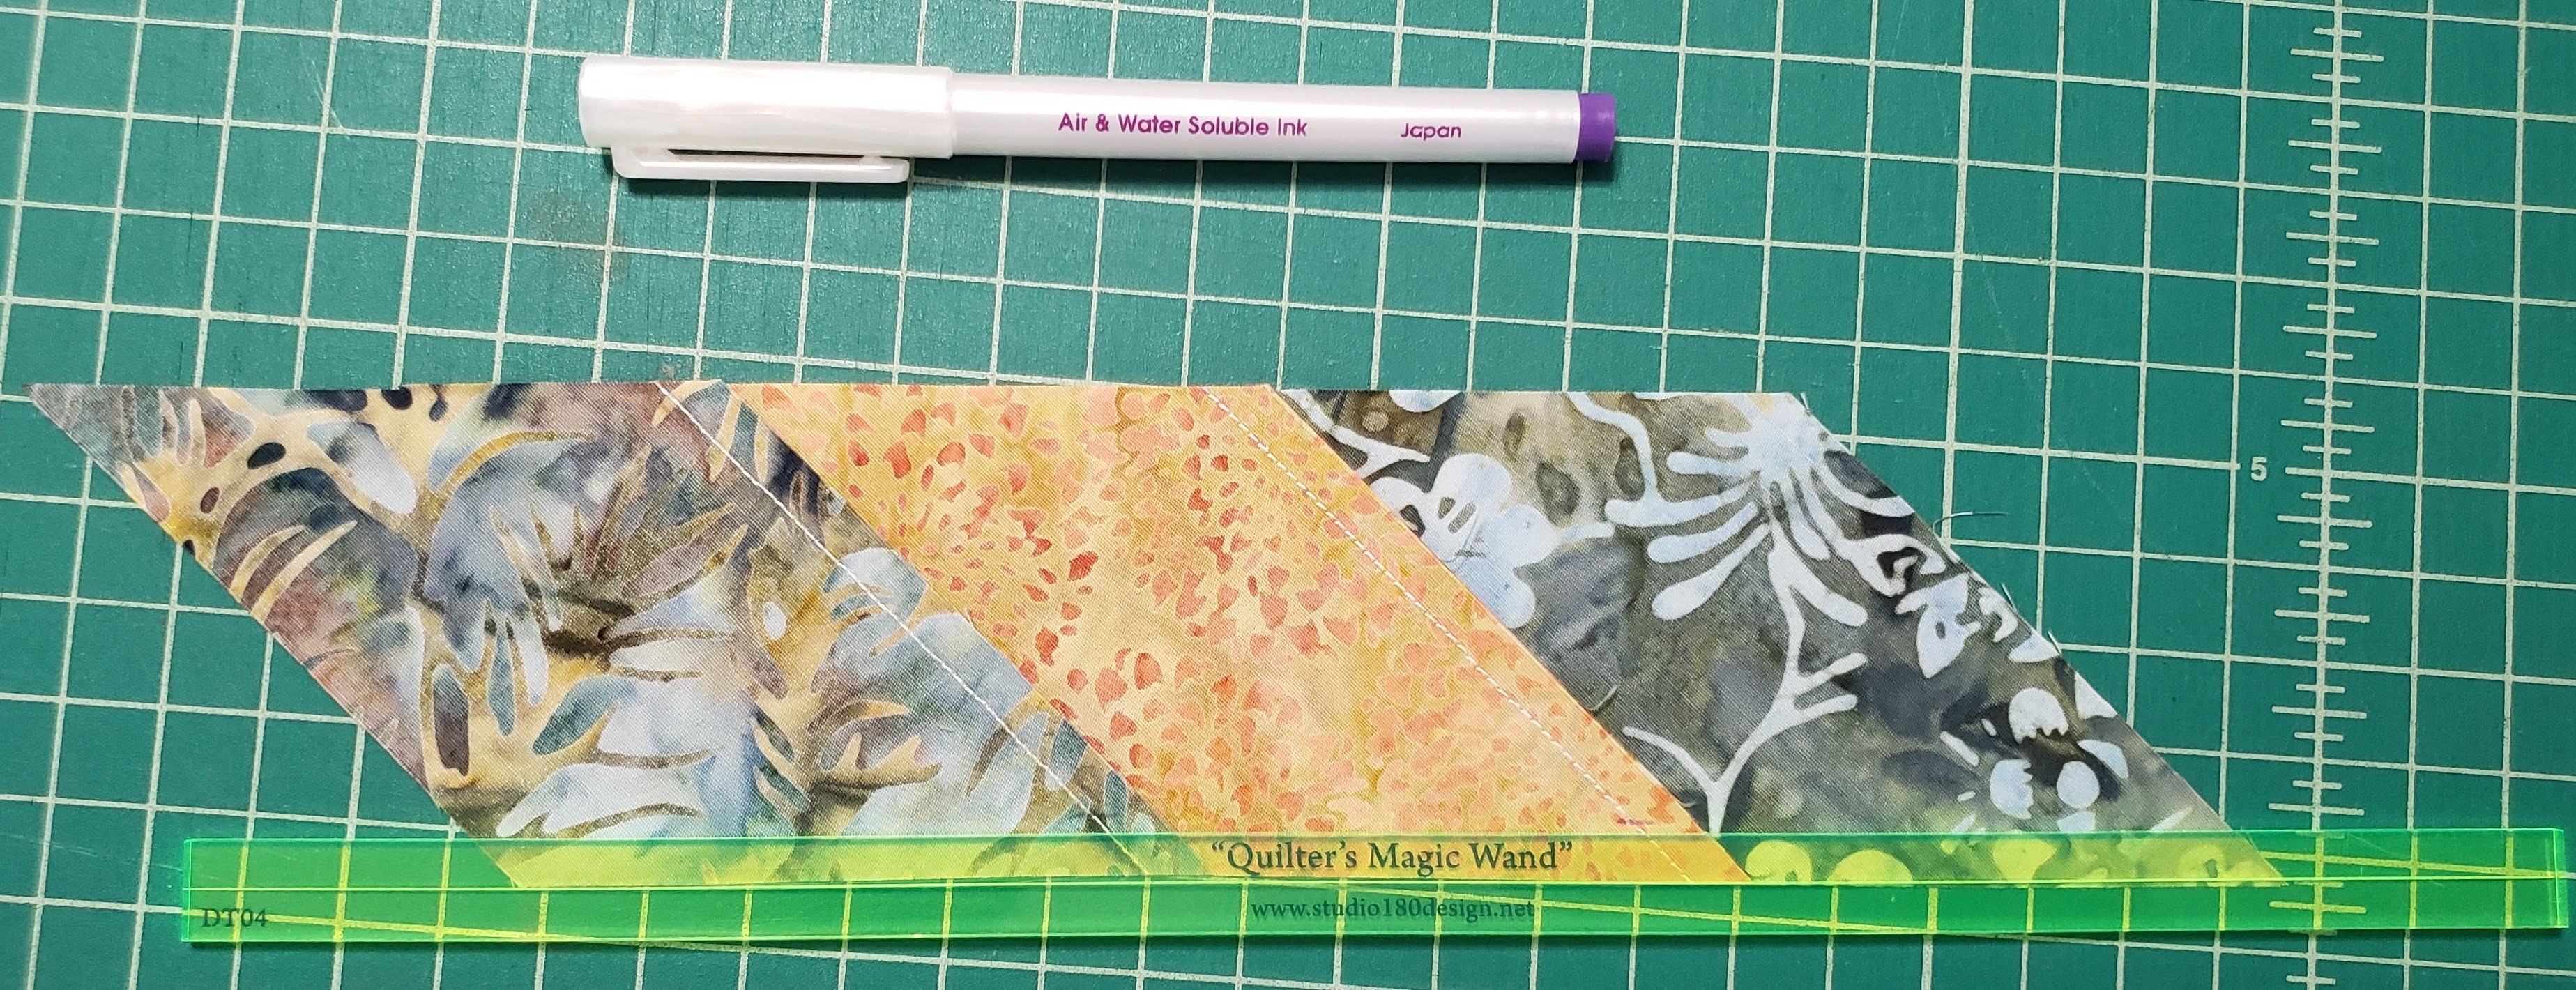
When piecing the strips, you do not just match the ends and sew together, you need to match the point where the stitch line will go, so that your seams match. I had received as part of my Island Batik Ambassador a “Quilter’s Magic Wand” from Studio 180 Designs. This ruler is 1/2″ wide, with a line down the middle for 1/4″. This ruler as a life saver, and really helped with making this quilt.

I split the large diamond into 4 sets of three strips.

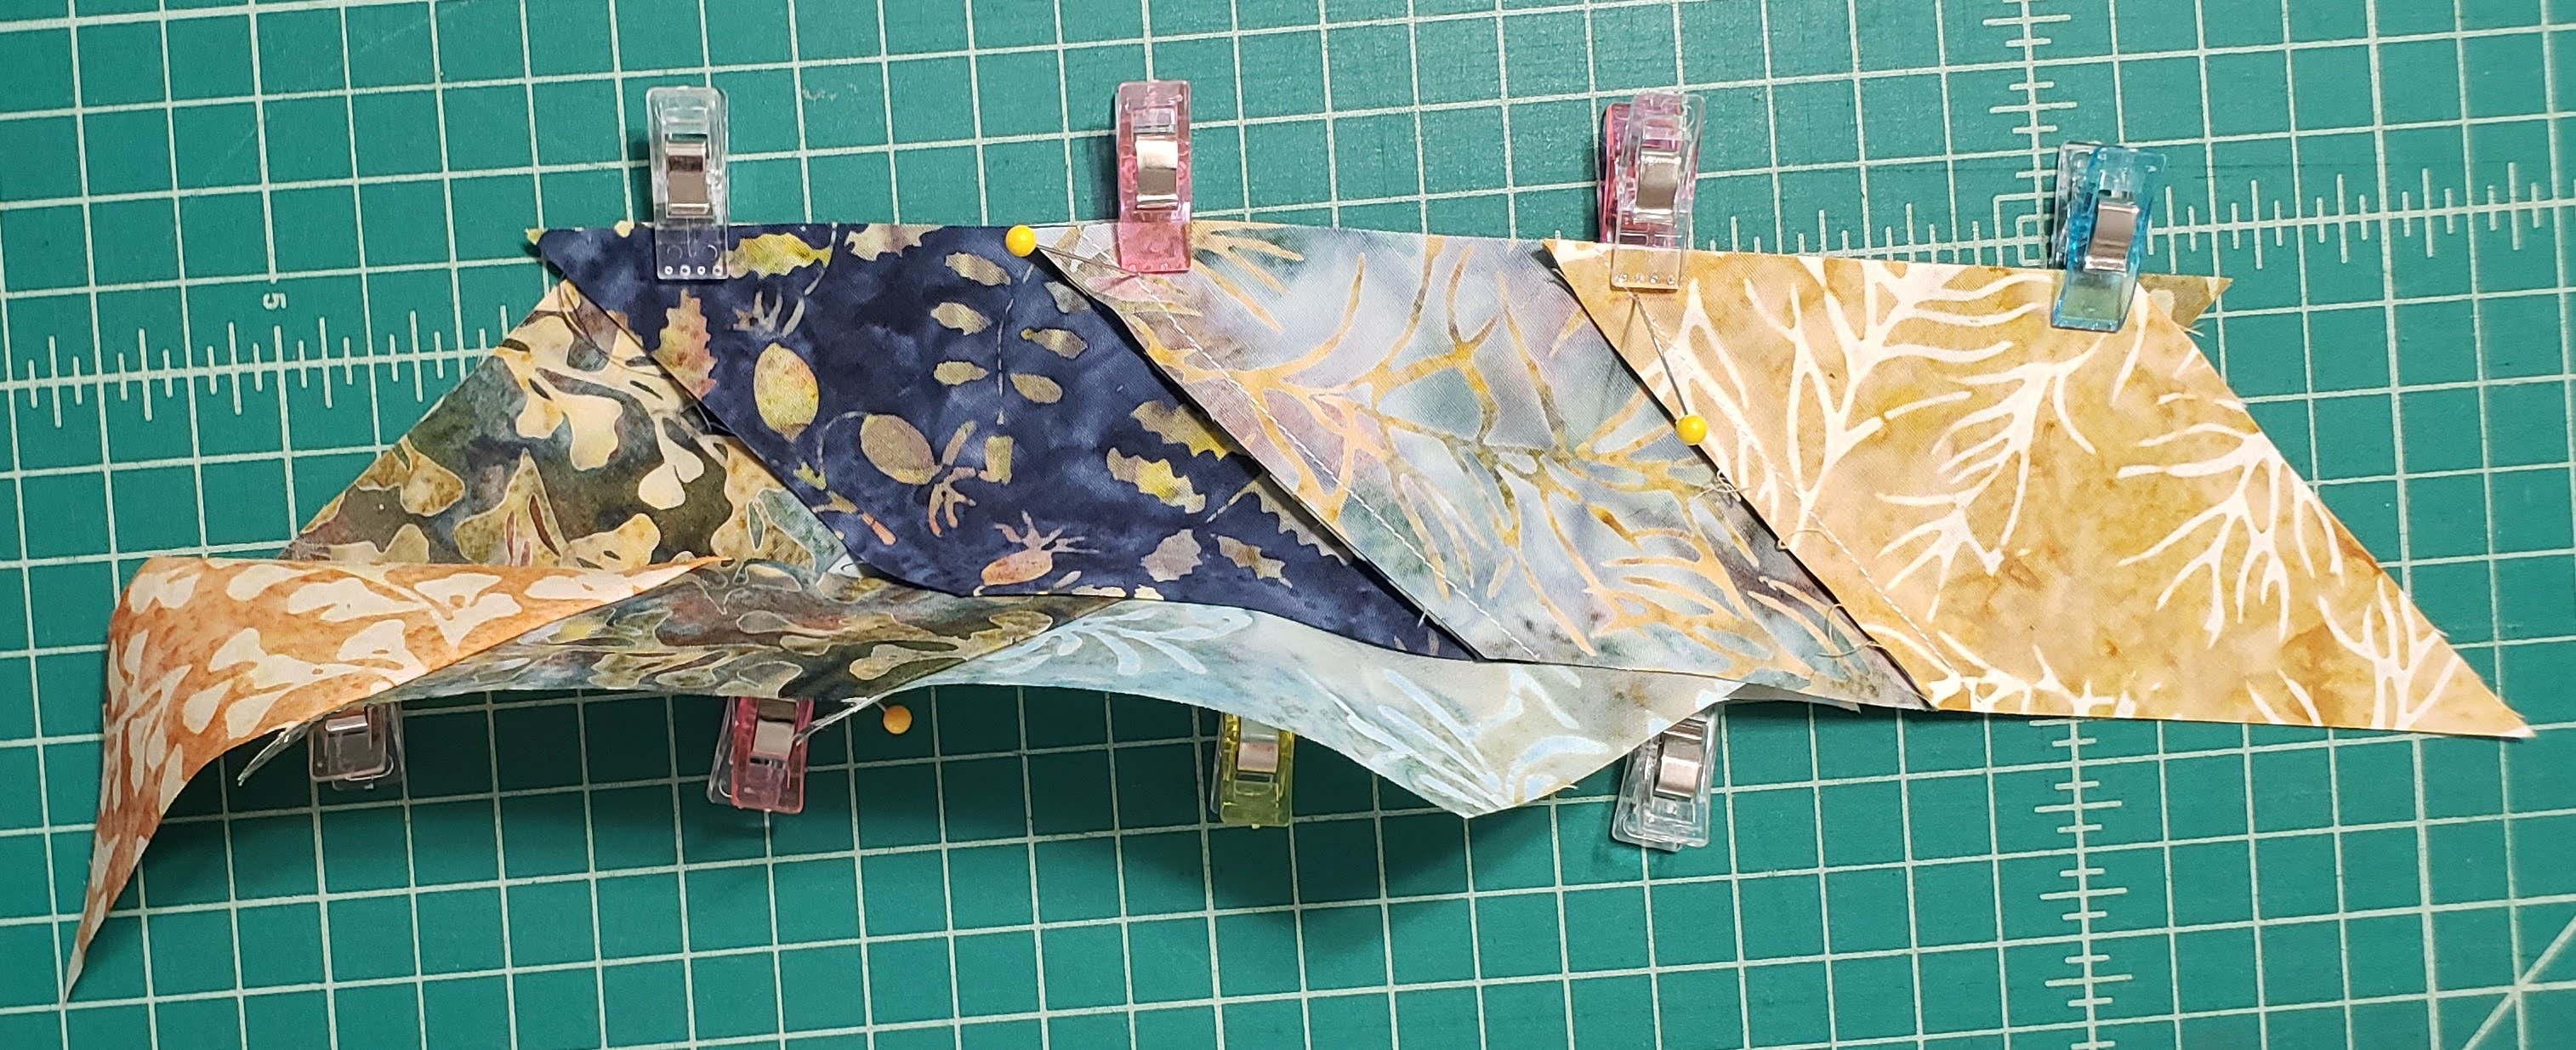
Working with each set, I marked the center piece at 1/4″ from the edge at each seam, I did this on the front of the fabric. Then on the back of the side pieces, I marked 1/4″ from the edge at each seam.
Then using pins, I matched the 1/4″ stitch line at the seams. I first added all the pins thru the fabric, then laid the fabric straight and then put the pins all to stay. I used a clip on each end to hold the pieces together.

I added both sides to the center piece.
On my machine, and stitched 1/4″ seam, carefully removing the pins as I go. Again, I rotated the end that I stitched from, to try and keep the fabric from curving.
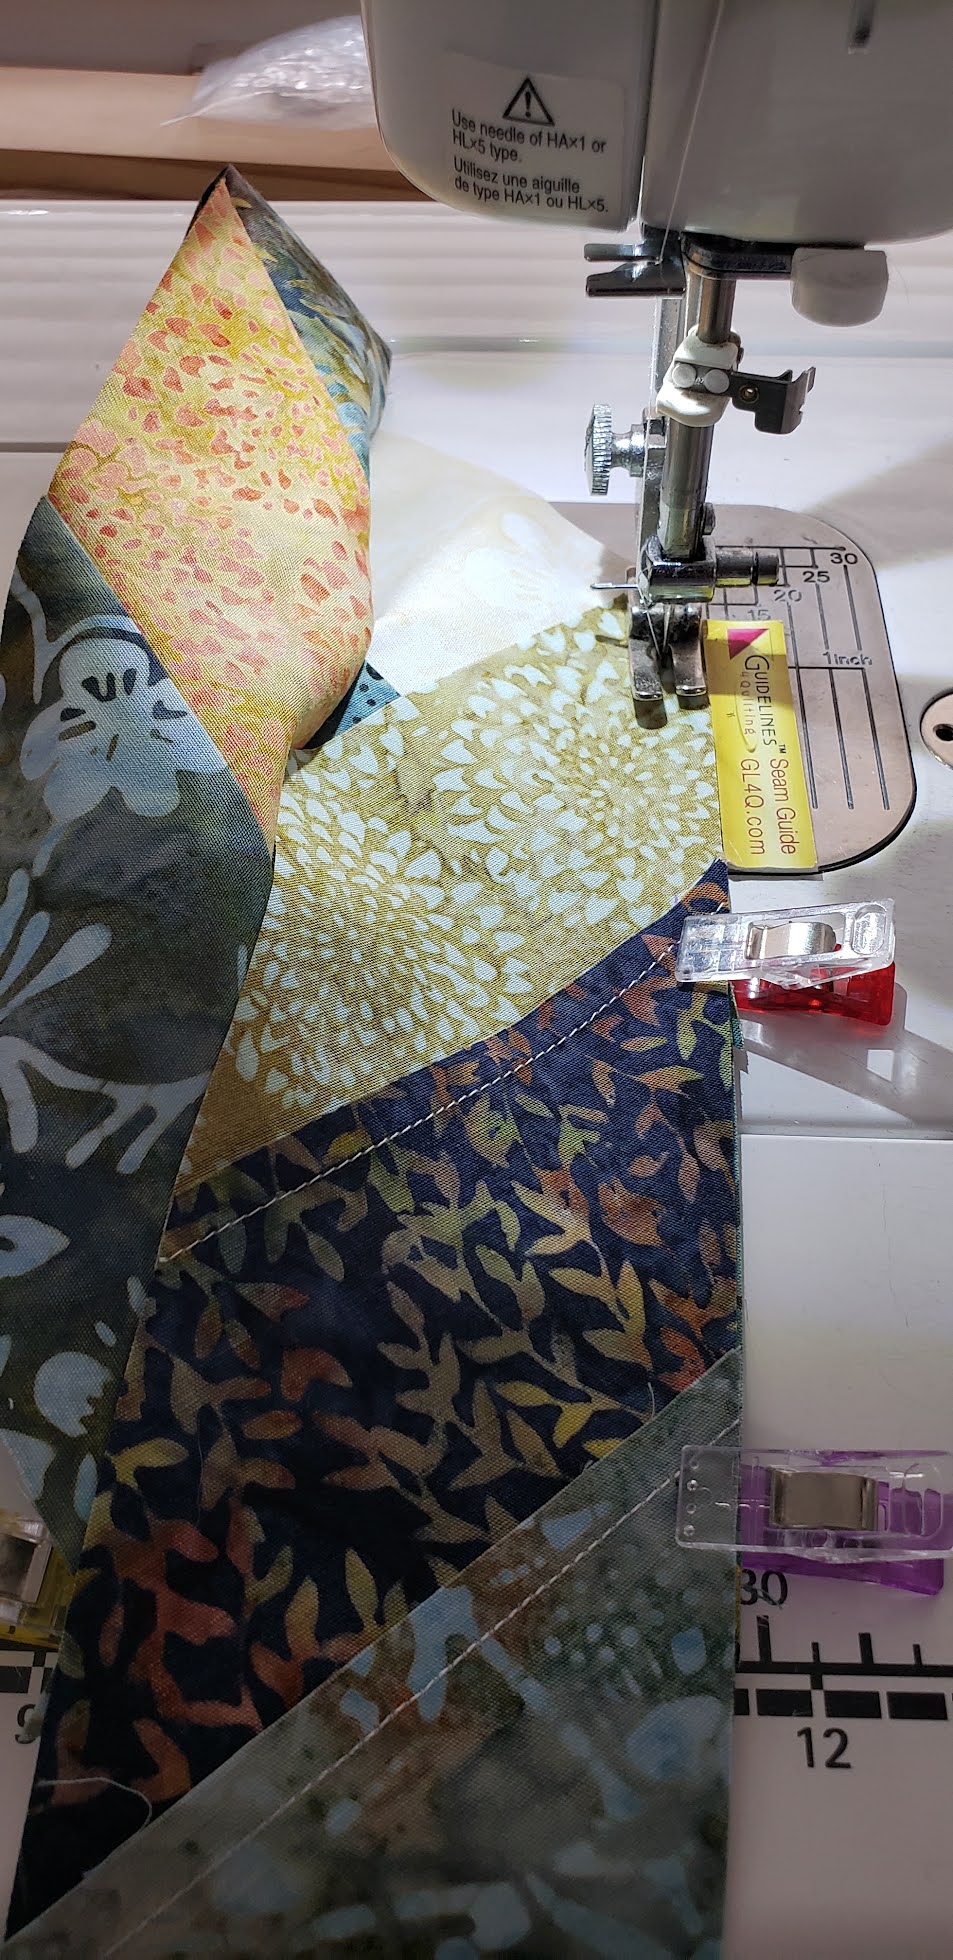
I checked at each seam to make sure I was matching (or at least close to matching). Some of mine are a little off, so don’t stress if they don’t match exact.
I did decide to press the seams open. Since you do not need to nest the seams, it reduced the bulk as I was sewing. You can press to the side if you prefer.
I make four identical sets of 3 strips, then continued with the next set of 3, until I had the four sets of 3 strips.
I repeated the process by sewing the four into two pieces, again marking the seams, and using pins to attach at the correct point along the seam.
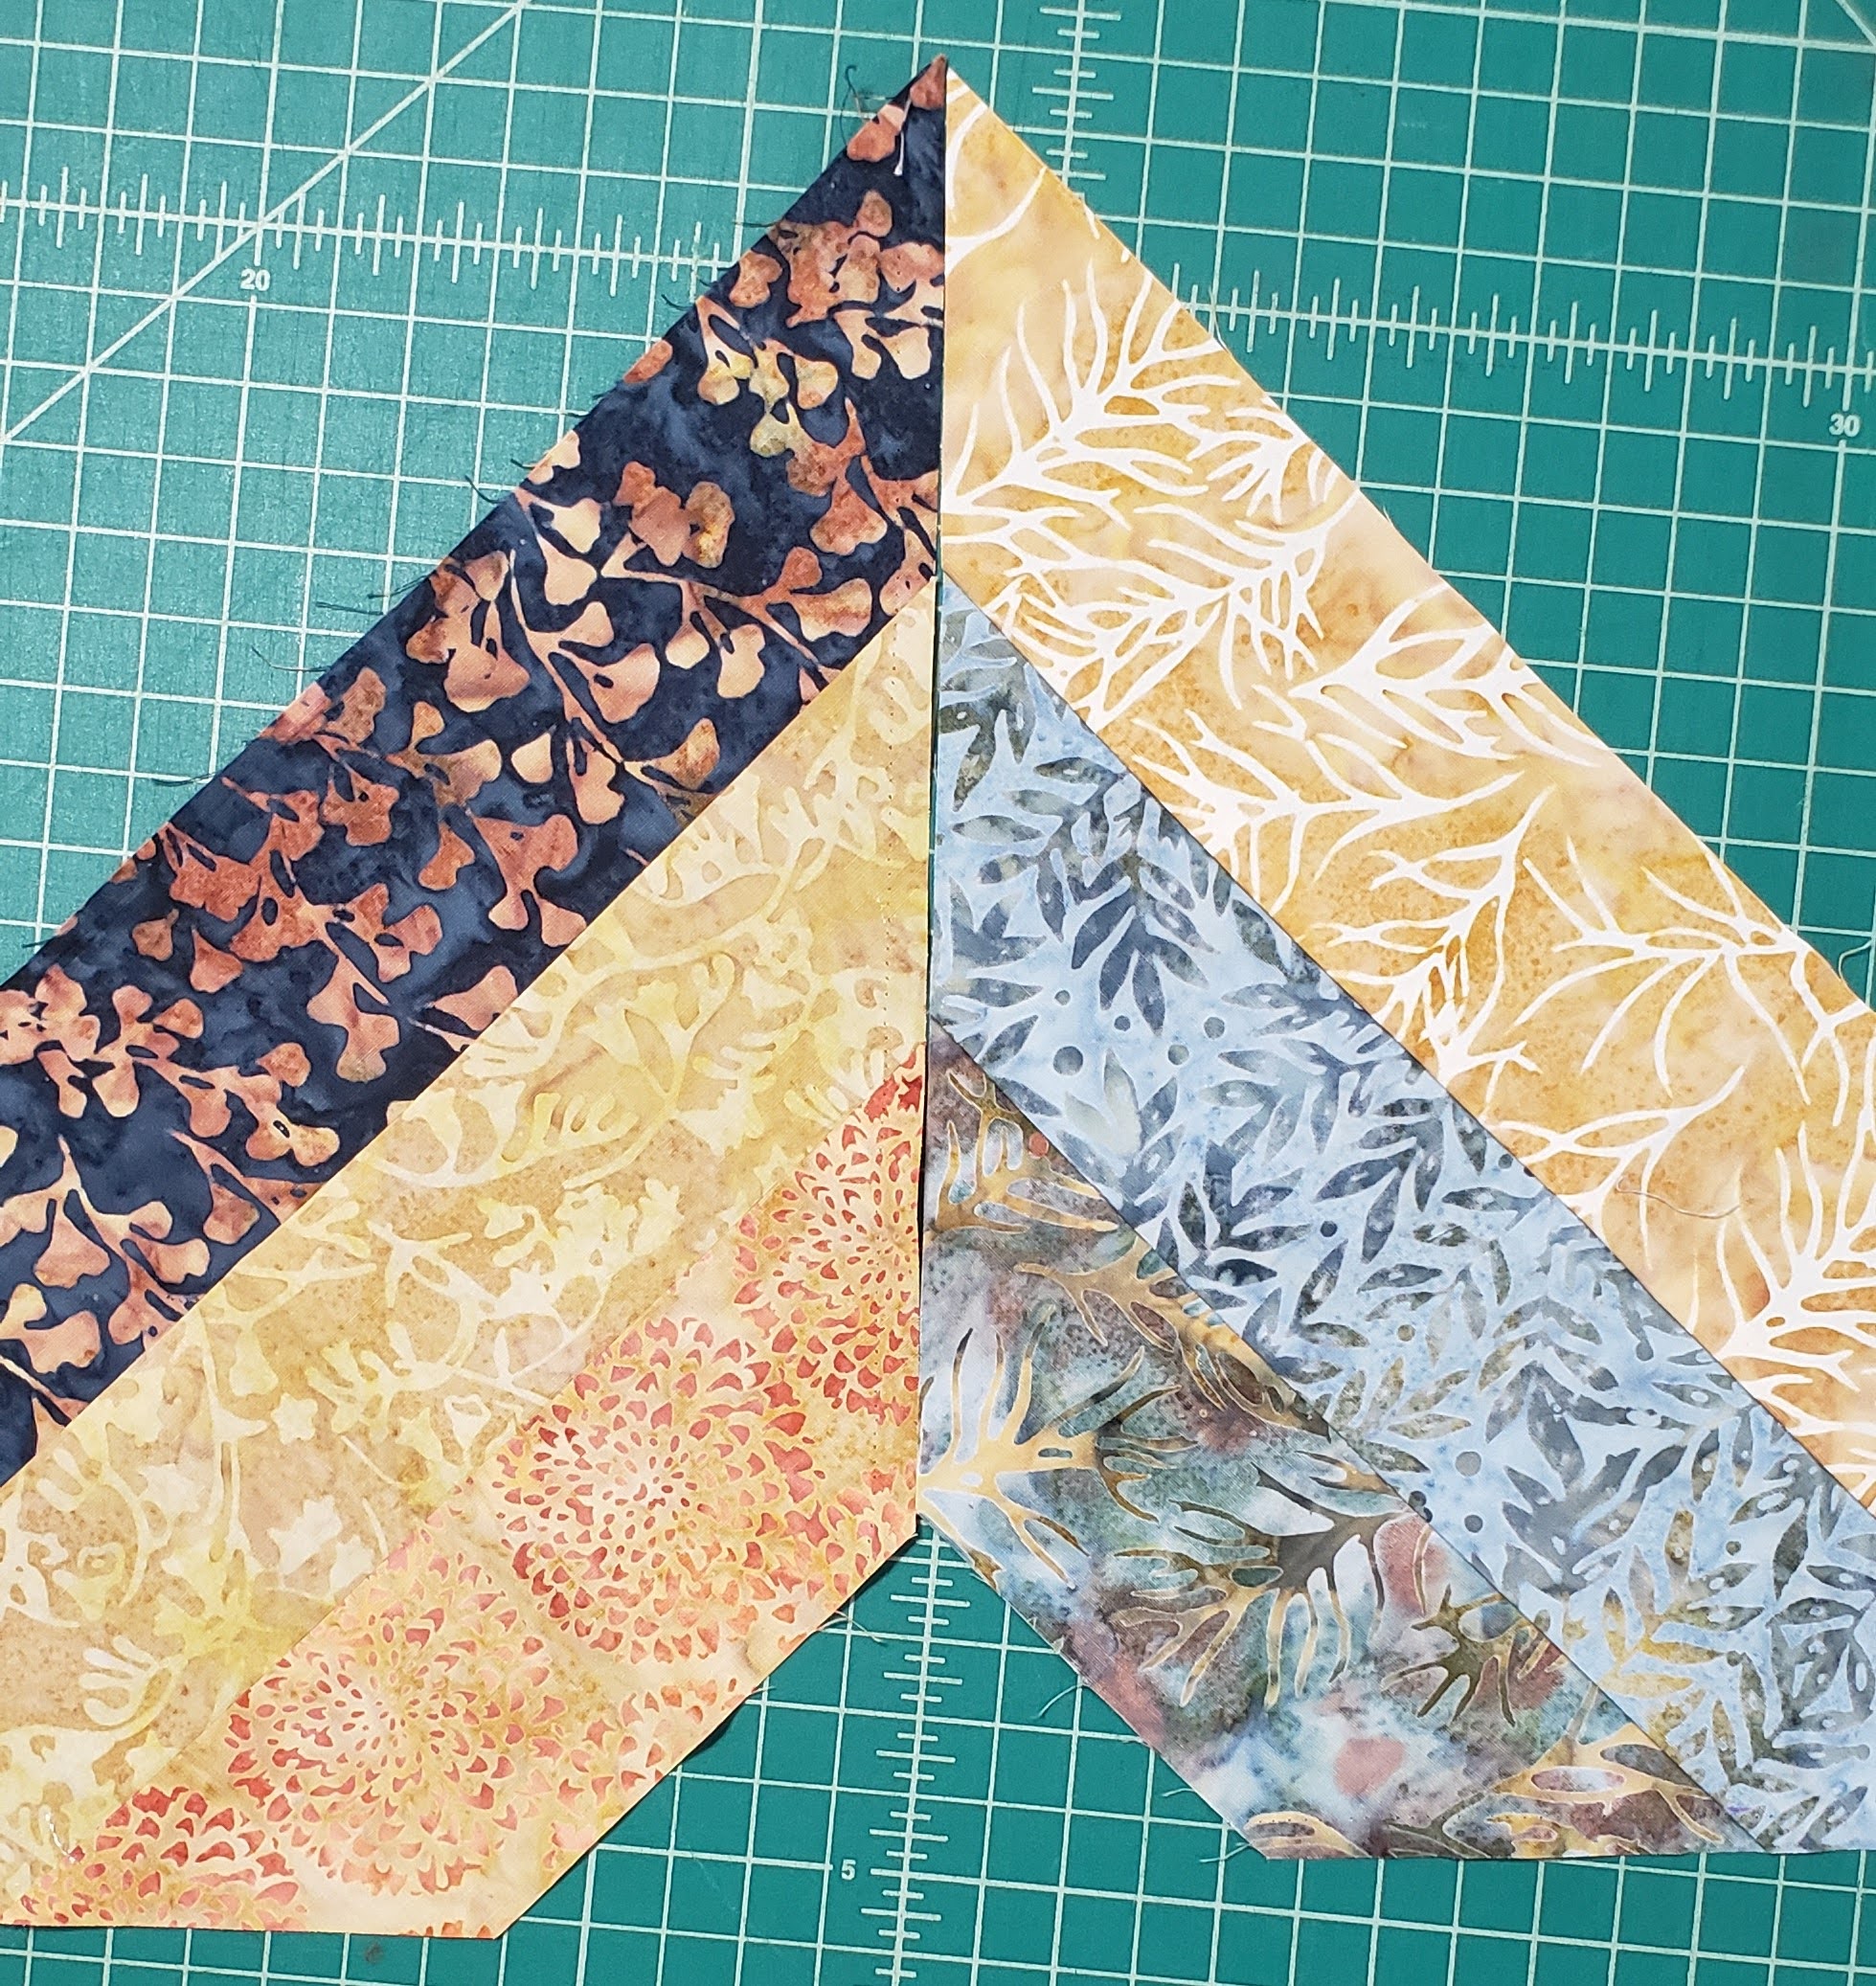
After sewing into two pieces, I sewed them together to create one big triangle. Again, I pressed the seams open.

Repeat this for all four pieces, making sure that you do not turn any of the pieces as you pin and sew. (This is a scrappy version, so if you turn a couple pieces, it won’t be the end of the world, either fix, or just leave as it is.)
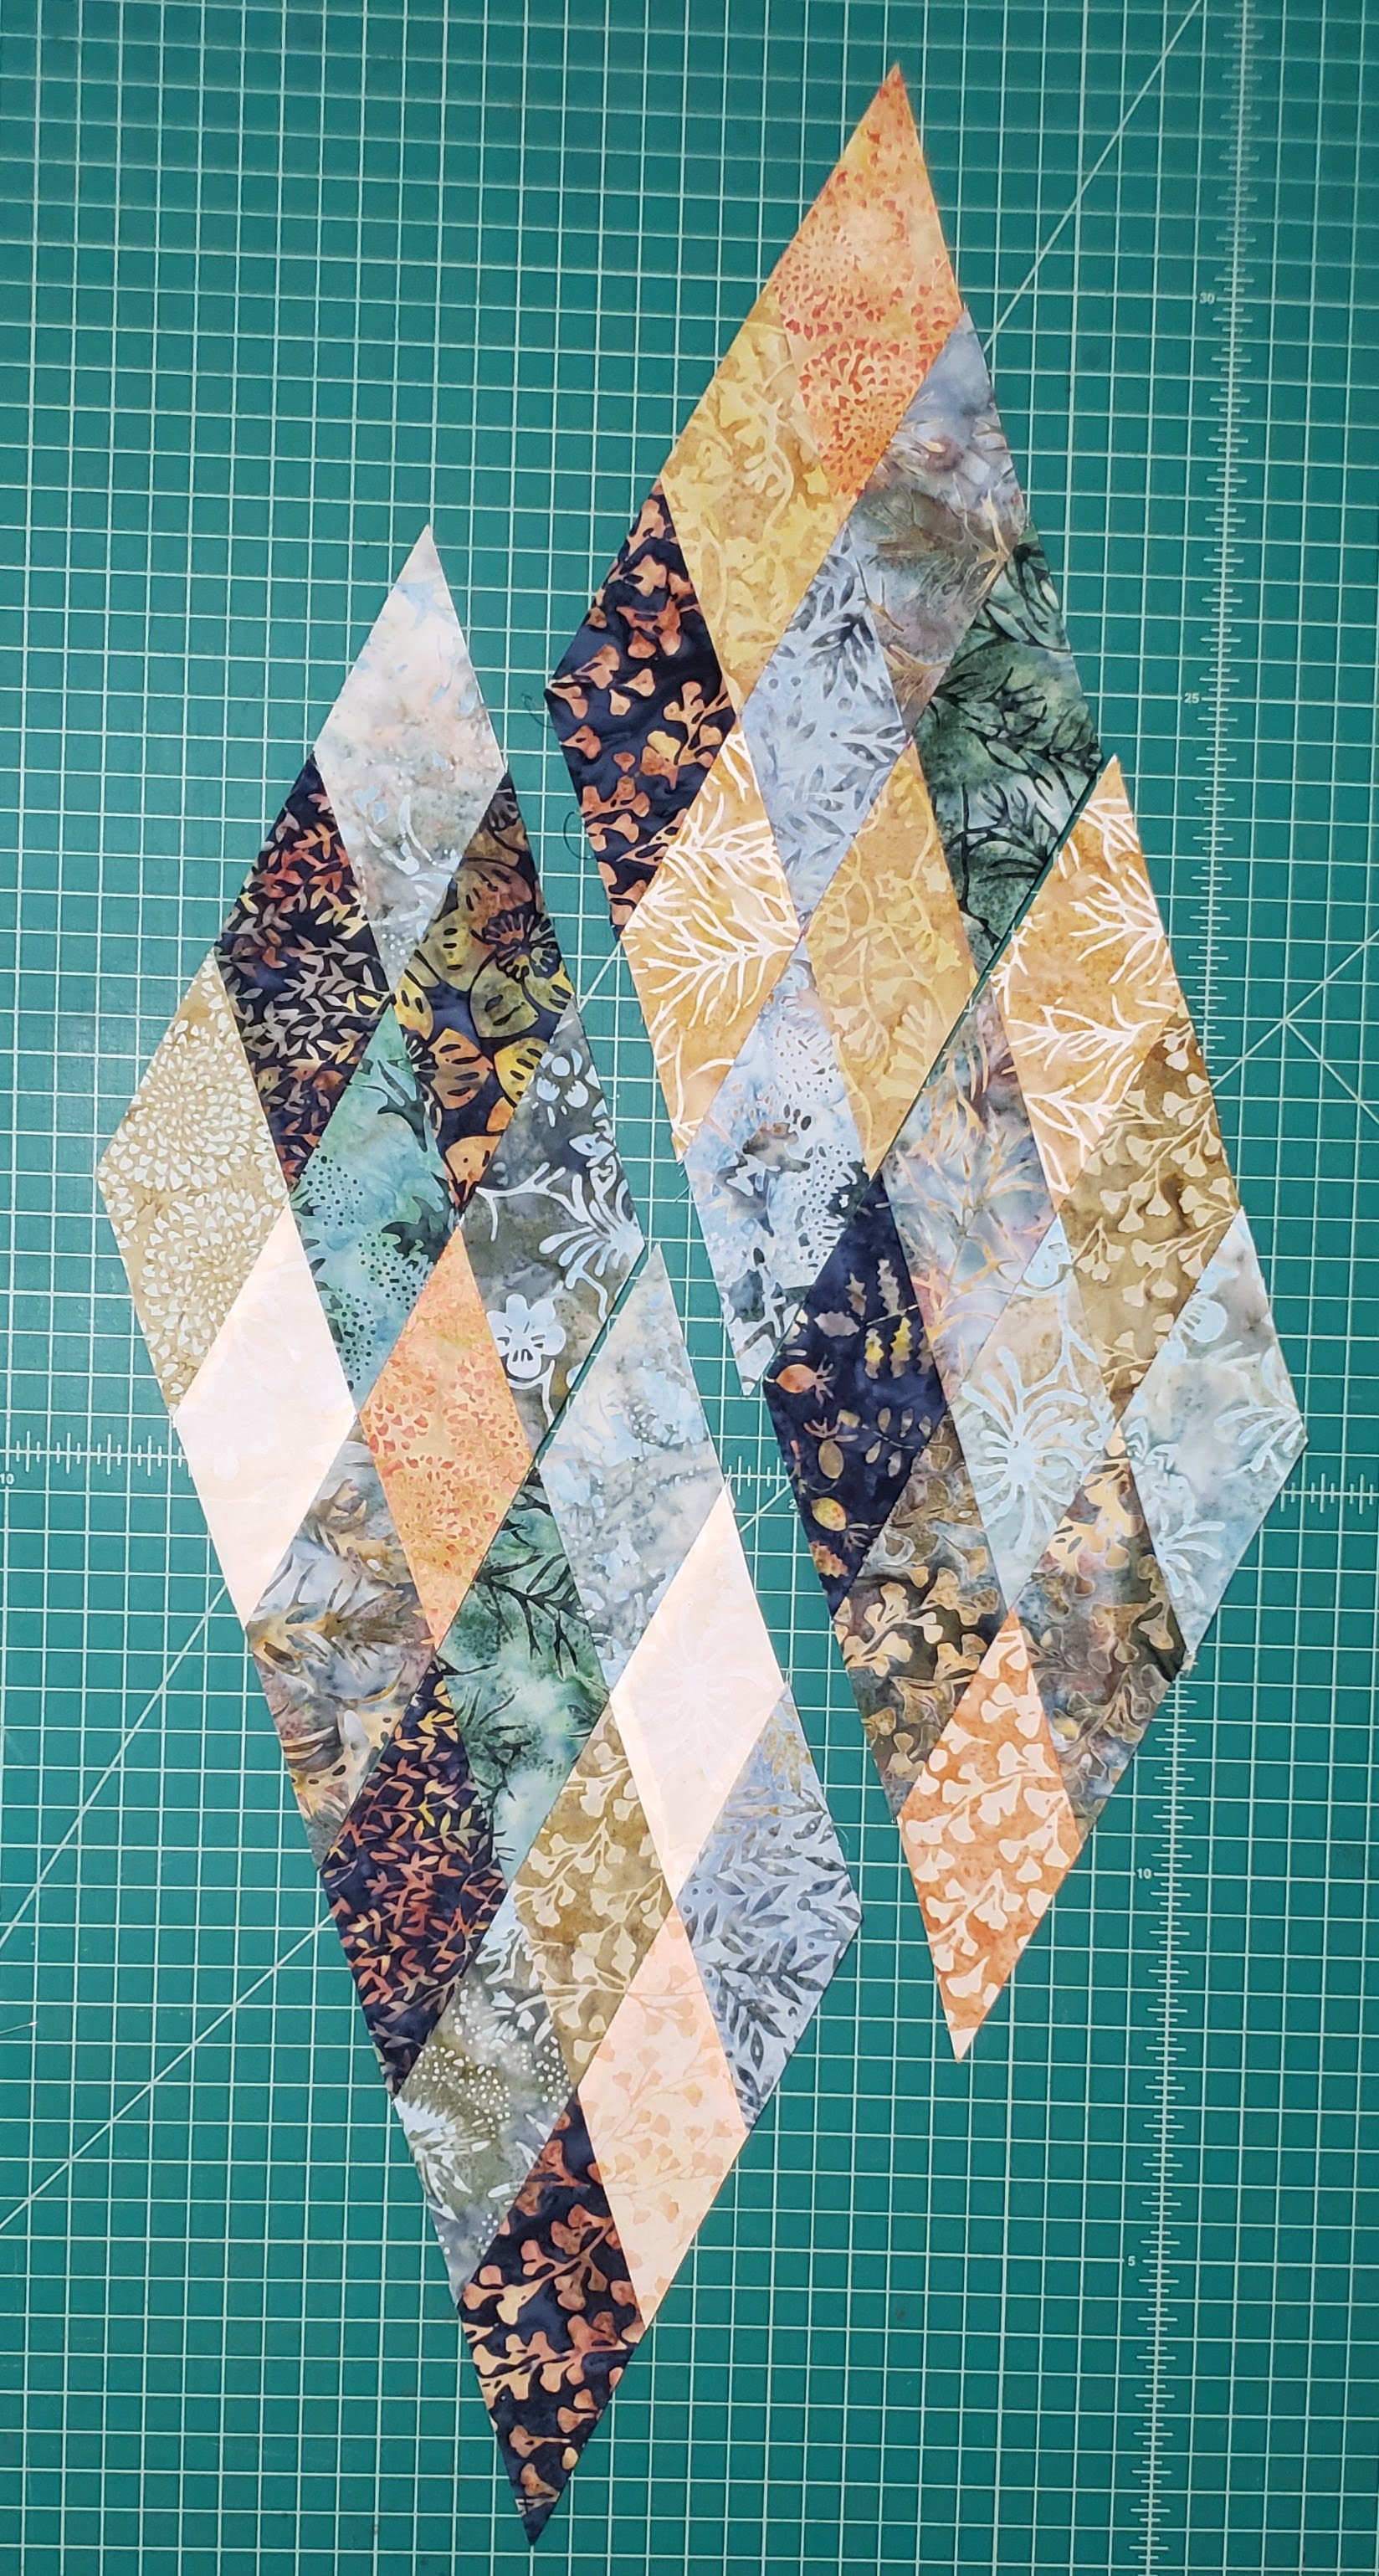
Set these four pieces aside. I used the other pieces that I had sat aside and laid out in a different pattern. The pieces are opposite of the other, so they will not look like you used the same layout. Find the pattern that you like.
I used the same center point fabric, to create the matching center.
I did lay the first pieces next to the layout, to make sure that I like how they looked together. Then sewed the pieces together in the same process.
While it does take a lot of time to mark and then pin, it is so much easier than having to seam rip, because you are off. I can say I didn’t use the seam ripper creating the four large diamonds, but I did use it putting the background color together.
I pinned the diamonds to my design wall, to get an idea of how they looked, to prepare for the next step. (Lighting wasn’t the best, as the colors are much brighter in person.)

Then I cut the background fabric and attached as Jordan’s instructions show. If you are new to sewing, you can cut the squares a little larger, so it doesn’t matter as much when you are matching if you are off a little. I wish I had cut just a little bigger, and maybe I wouldn’t have had to take out so many seams.

The part of Jordan’s pattern that I like, is using some of the left-over pieces to create squares. One thing with her pattern, is it didn’t say what size to square-up the squares to, so I had to do some guessing. I had made them 6 1/2″, since the strips, are 6 1/2″ wide, but that was too big for the background triangles.
Sew the pieces together, so that they come to a point, if they lay out straight, they will not come out the same. (As me how I know.)
After sewing together, and pressing seams open, and after a little calculating, I decided on 6″ unfinished squares, to finish at 5 1/2″ squares. This worked with the background triangles I had cut. The 6 1/2″ unfinished squares were too big. If you want more space on the sides, just make the squares a little smaller.

As you can see at one corner, the pieces are smaller than the opposite sides. This is the way you want them to look.
Using the background pieces, you layout the pieces in a row to find the pattern you like.

With the gray triangles in between. I liked all the squares going in the same direction, but you can rotate, or switch them to the pattern you like.
After you sew all the pieces together, you will trim the two ends, to 1/4″ seam.

Add the smaller rectangle pieces to the ends, to make it the length of your center. I attached them a little larger, and then trimmed them down.

Repeated to make two strips of 7 squares.
Attached one to the top, and one to the bottom. Depending on how you want your squares to like, you can place them the direction you want. I like the small pieces towards the center and the larger to the outer sides. Like it is pointing away.

Then using my Accuquilt 2 1/2″ die, I cut strips to add to the outside edges of the quilt top.

I then added a 5″ strip to the outside of the lighter coordinating fabric. (I forgot to take a picture of the additional border, was so excited to get the top done.)
About a week before, I had my new Juki J-350 Long arm installed, so I am still learning how to use it, but I just had to use it on this quilt, as it was 72″ x 87″. So I loaded the long arm with Hobbs Cotton Batting, my favorite batting, Queen size and the backing and top. I was ready to get this quilt finished.
Hobbs Cotton Batting is so easy to use, it comes in different sizes, lap, queen, and King. It laid down easily, and the quality is consistent across the entire piece.
I realized that I didn’t have enough left of the Auriful gray thread to also quilt on the long arm, so I went to my local quilt store, and they didn’t have any light gray, just very dark. So she recommended another brand of thread. I told her what I was using it for, and she said it would work great. Nothing like waiting until the last minute to get things done.
Ok, this thread was thick, hard to work with, lots of lint balls along the thread, and kept breaking, so after several hours of frustration, with my husband’s encouragement, I called another Quilt shop to see if they had what I needed, and they did. They put the thread back for me, so my husband and I got in his truck Saturday afternoon, and drove to Tyler, Texas, about 40 miles to get Auriful 2600, Light gray. WOW, what a difference, I was so smooth going, no issues, and I was able to get the top quilted in a few hours. AND it looks awesome. (Thank you to my wonderful husband who dropped what he was doing to drive me to get this Awesome Auriful thread.
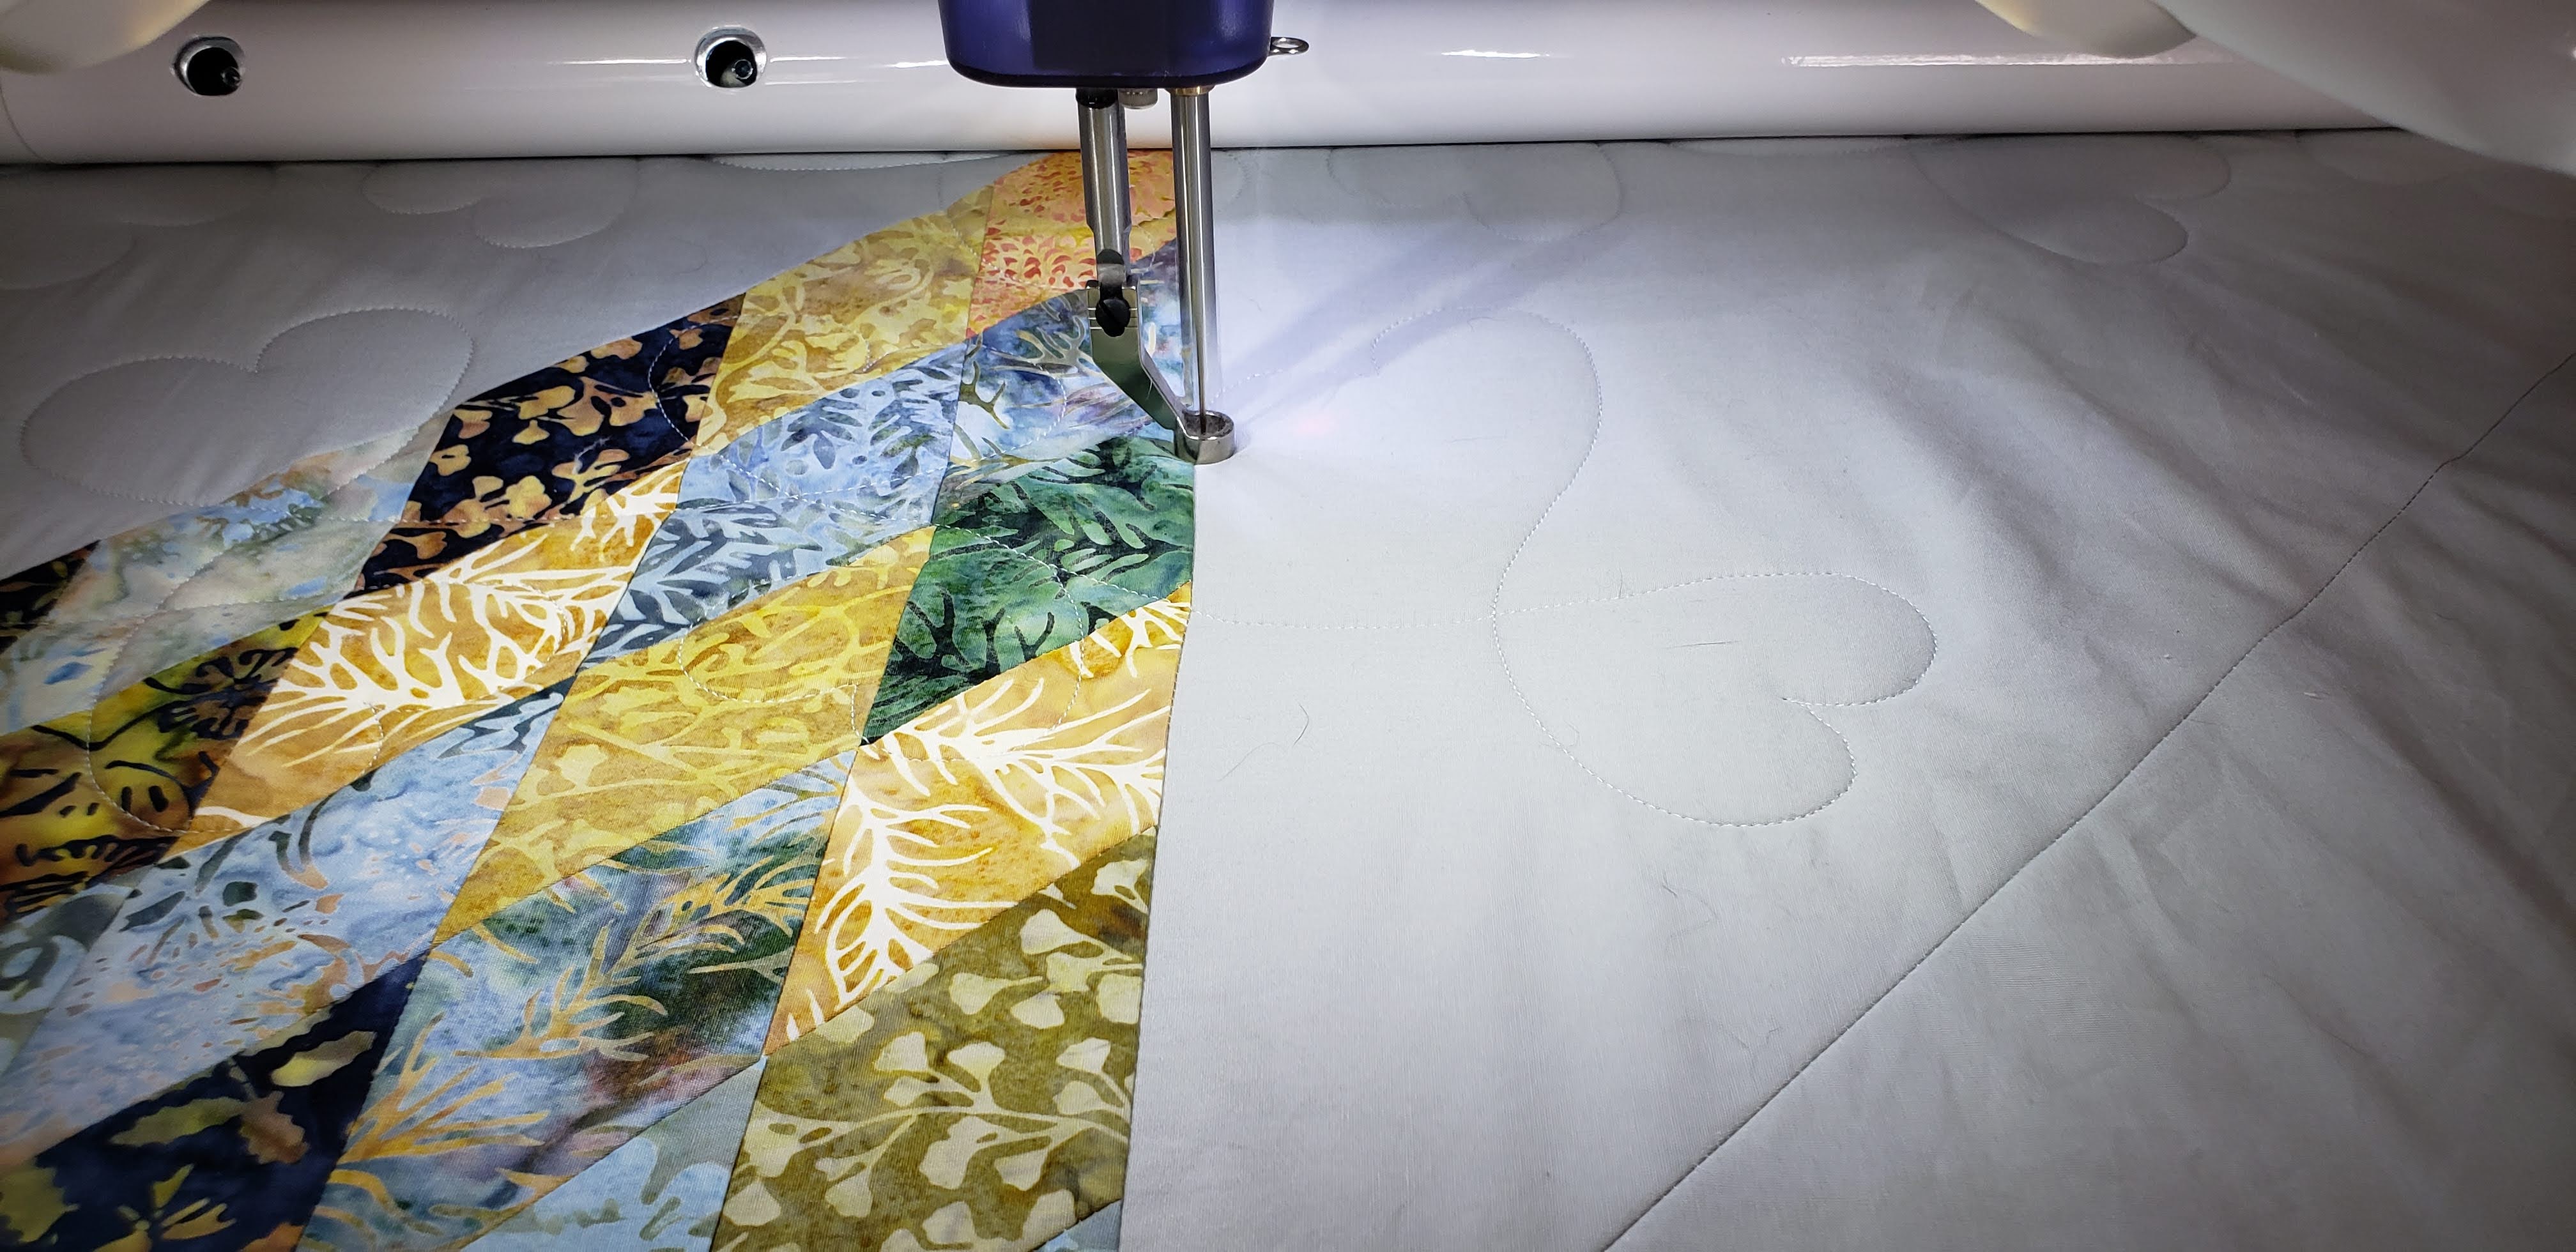
With the stitching removed, I got back on my long arm, and used a design that was in the software, Hearts to quilt the top. (I still need to learn how to add new designs).
Using more of the dark green fabric, I cut more 2 1/2″ strips to bind the quilt. I used a dark Green Auriful thread I had purchased a few months back.
Here is my completed, Lone Star Quilt, using Island Batik’s “Naturescape” by Jerry Khiev.

The Lone Star Quilt was perfect for me, as I live in the “Lone Star” state of Texas, and the color of these fabrics, match the woods at my house. Great fall quilt (well in Texas, December is Fall, the leaves are just starting to fall).
This is our last project for 2022, and after 12 months, I have learned so much, and have loved all the wonderful products our sponsors have sent to us to use. If you had asked me 13 months ago, what I thought of these products, I wouldn’t have been able to tell you much, but I have loved working with them and all the other sponsors from this year.
- I have always loved Batik’s but Island Batik fabric is soft and awesome to work with, and the colors and fabrics are wonderful.
- Hobbs batting is so much better than the cheap brands I had been purchasing, and now, I look for Hobbs brands only.
- Auriful, you can see how much I love it, the thread doesn’t break like those cheap brands, which means my quilts will not fall apart because of cheap thread. They will last a long time.
- The ruler from Studio 180 designs is the best for making this quilt. I would have used a seam ripper a lot a more, and berated.
- Schmetz Needles are great and are sharp and sewing with them are so nice and there seams to be less thread shredding, and no missed stitches. These are the best needles I have used.
- Accuquilt, is another wonderful product, and so worth the money. I actually purchased a whole bunch of their cutting dies at the Houston Quilt Festival in early November.
All materials are provided free to me by Island Batik and their industry partners Hobbs Batting, Aurifil Thread, Studio 180 Designs, Accuquilt and Schmetz Needles in my role as an ambassador.
.
If you enjoyed seeing my Lone Star quilt, you have to check out the other Island Batik Ambassadors, to see their interpretation of the quilt, they are really amazing!
Brenda Alburl ~ Songbird Designs
Megan Best ~ Bestquilter
Pamela Boatright ~ Pamelaquilts
Elizabeth DeCroos ~ Epida Studio
Jennifer Fulton ~ Inquiring Quilter
Preeti Harris ~ Sew Preeti Quilts
Mania Hatziioannidi ~ Mania for quilts
Jane Hauprich ~ Stitch By Stitch Custom Quilting
Reed Johnson ~ Blue Bear Quilts
Connie Kauffman ~ Kauffman Designs
Emily Leachman ~ The Darling Dogwood
Denise Looney ~ For The Love Of Geese
Leah Malasky ~ Quilted Delights
Maryellen McAuliffe ~ Mary Mack Made Mine
Anorina Morris – sameliasmum.com
Lisa Pickering ~ Lisa’s Quilting Passion
Claudia Porter ~ Create with Claudia
Gail Renna ~ Quilt Haven Threads
Brianna Roberts ~ Sew Cute And Quirky
Michelle Roberts ~ Creative Blonde
Gail Sheppard ~ Quilting Gail
Andi Stanfield ~ True Blue Quilts
Sandra Starley ~ Textile Time Travels
Jennifer Thomas ~ Curlicue Creations
Suzy Webster ~ Websterquilt
#islandbatikambassador, #islandbatik, #iloveislandbatik, #hobbsbatting, #hobbsinside, #aurifil, #aurifilthread, #schmetzneedles, #studio180designs

You gave a great tutorial and your quilt is stunning. I love the border, such a different way to center the eye.
LikeLiked by 1 person
I love your quilt, Lisa!! I’m glad to see you used the left overs for your border. I didn’t have time to add those and saved them to use for another project! Your woods were a perfect setting for it! So glad your hubby drove you to get the Aurifil and you were able to successfully use your new longarm!! Machines can be picky! LOL
LikeLiked by 1 person
wow this really turned out gorgeous. I like your story about the thread. I have done that. what we go through for the right thread. you may have procrastinated but you did a fabulous job. and look how it looks using your new machine. fabulous thanks for sharing and inspiring
LikeLiked by 1 person
Your quilt is very beautiful and I love the added stars. But, wow, i was really impressed by all the work you put into it. Great job!
LikeLiked by 1 person
I love your quilt, Lisa! It really sparkles and I like how the squares in the border fit with the star. Great explanation of how you made it. You are so lucky to have a husband willing to drive you to get the supplies you need. That is beautiful. Have a wonderful day.
LikeLiked by 1 person