The February Island Batik Ambassador’s Blog Hop is “All Puffed Up”!. We were challenged to create a Puff Quilt, also known as a Biscuit quilt. Making a puff quilt is a little different than making a traditional quilt.
To create a puff quilt, you can plan out your design by using a grid design of squares. Depending on the fabric or colors, you can create different designs, or just go scrappy.
I’ve made puff quilts as baby shower gifts, and one person told me that she has hardwood floors, and loved being able to put her baby on the quilt for the extra padding. I made one for my niece Emma when she was born and her big brother, Dexter kept taking it, so I made him a dinosaur one. They are great for sitting on the floor to play video games, or rolling up for a pillow or to add extra padding when on hard surfaces.
If you need a weighted blanket for someone, you could add the little beads along with the batting to give the extra weight, but to would still be fluffy. I made a Twin extra-long Puff quilt, and the weight of the quilt and stuffing was enough weight, we use it as a padding on the floor when someone comes to visit, or when we go camping, but it is bulky and heavy.
I have tried different techniques, made all the puff’s then tried to sew together, ok, that was hard, and extra bulky. Then I tried stitching all the squares together, without filling, and then clipped little holes on the back fabric, stuffed, then stitched closed (that is how I made the Twin quilt). That took forever, the easiest method I found is stitching in rows and stuffing as you go, this I how I made this Puff Quilt.
All materials are provided free to me by Island Batik and their industry partners Aurifil Thread, and Schmetz Needles in my role as an ambassador.
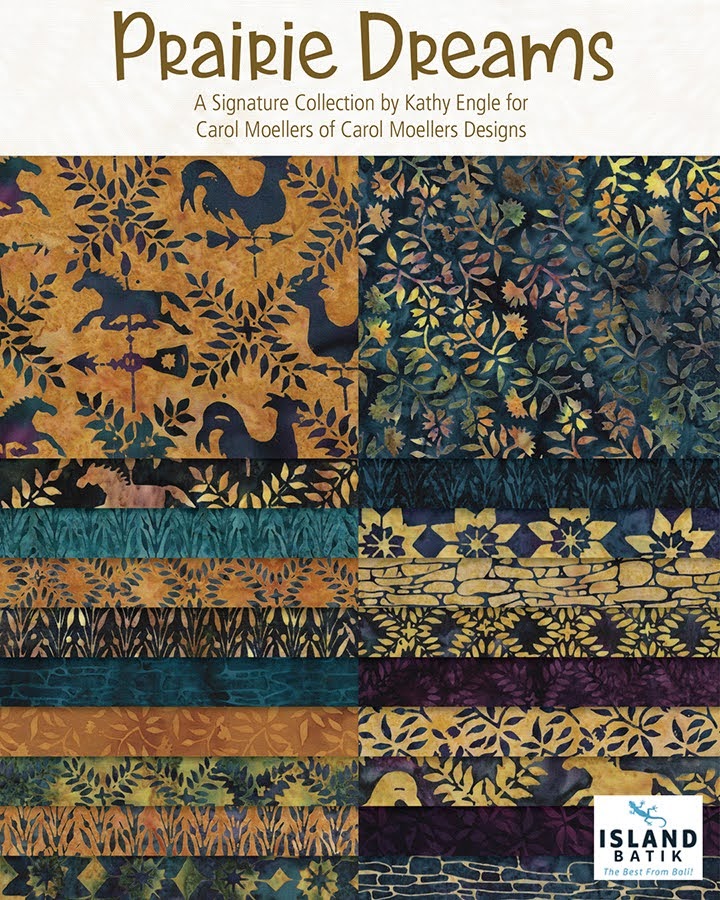
The fabric I used is called “Prairie Dreams”, a signature collection by Kathy Engle for Carol Moellers Designs. I received a half yard bundle of twenty fabrics, along with two coordinating fabrics.
Check out my new Instagram feed for a close up of the fabric.
Step 1 – Cutting Fabric Squares
When making a puff quilt, you will have two layers of fabric, along with the back. The two layers are different sizes, resulting in the “puff” of the quilt.
The first thing I did was cut a strip 4″ by width of fabric (WOF), and then cut into 4″ squares, I was able to get 11 squares per strip. You only need 8 of each fabric.
Using one of the coordinating fabrics, I used the lighter fabric I needed 20 of the 4″ x 4″ squares, so I used two 4″ x WOF strips. You will have more if you cut the entire strip.
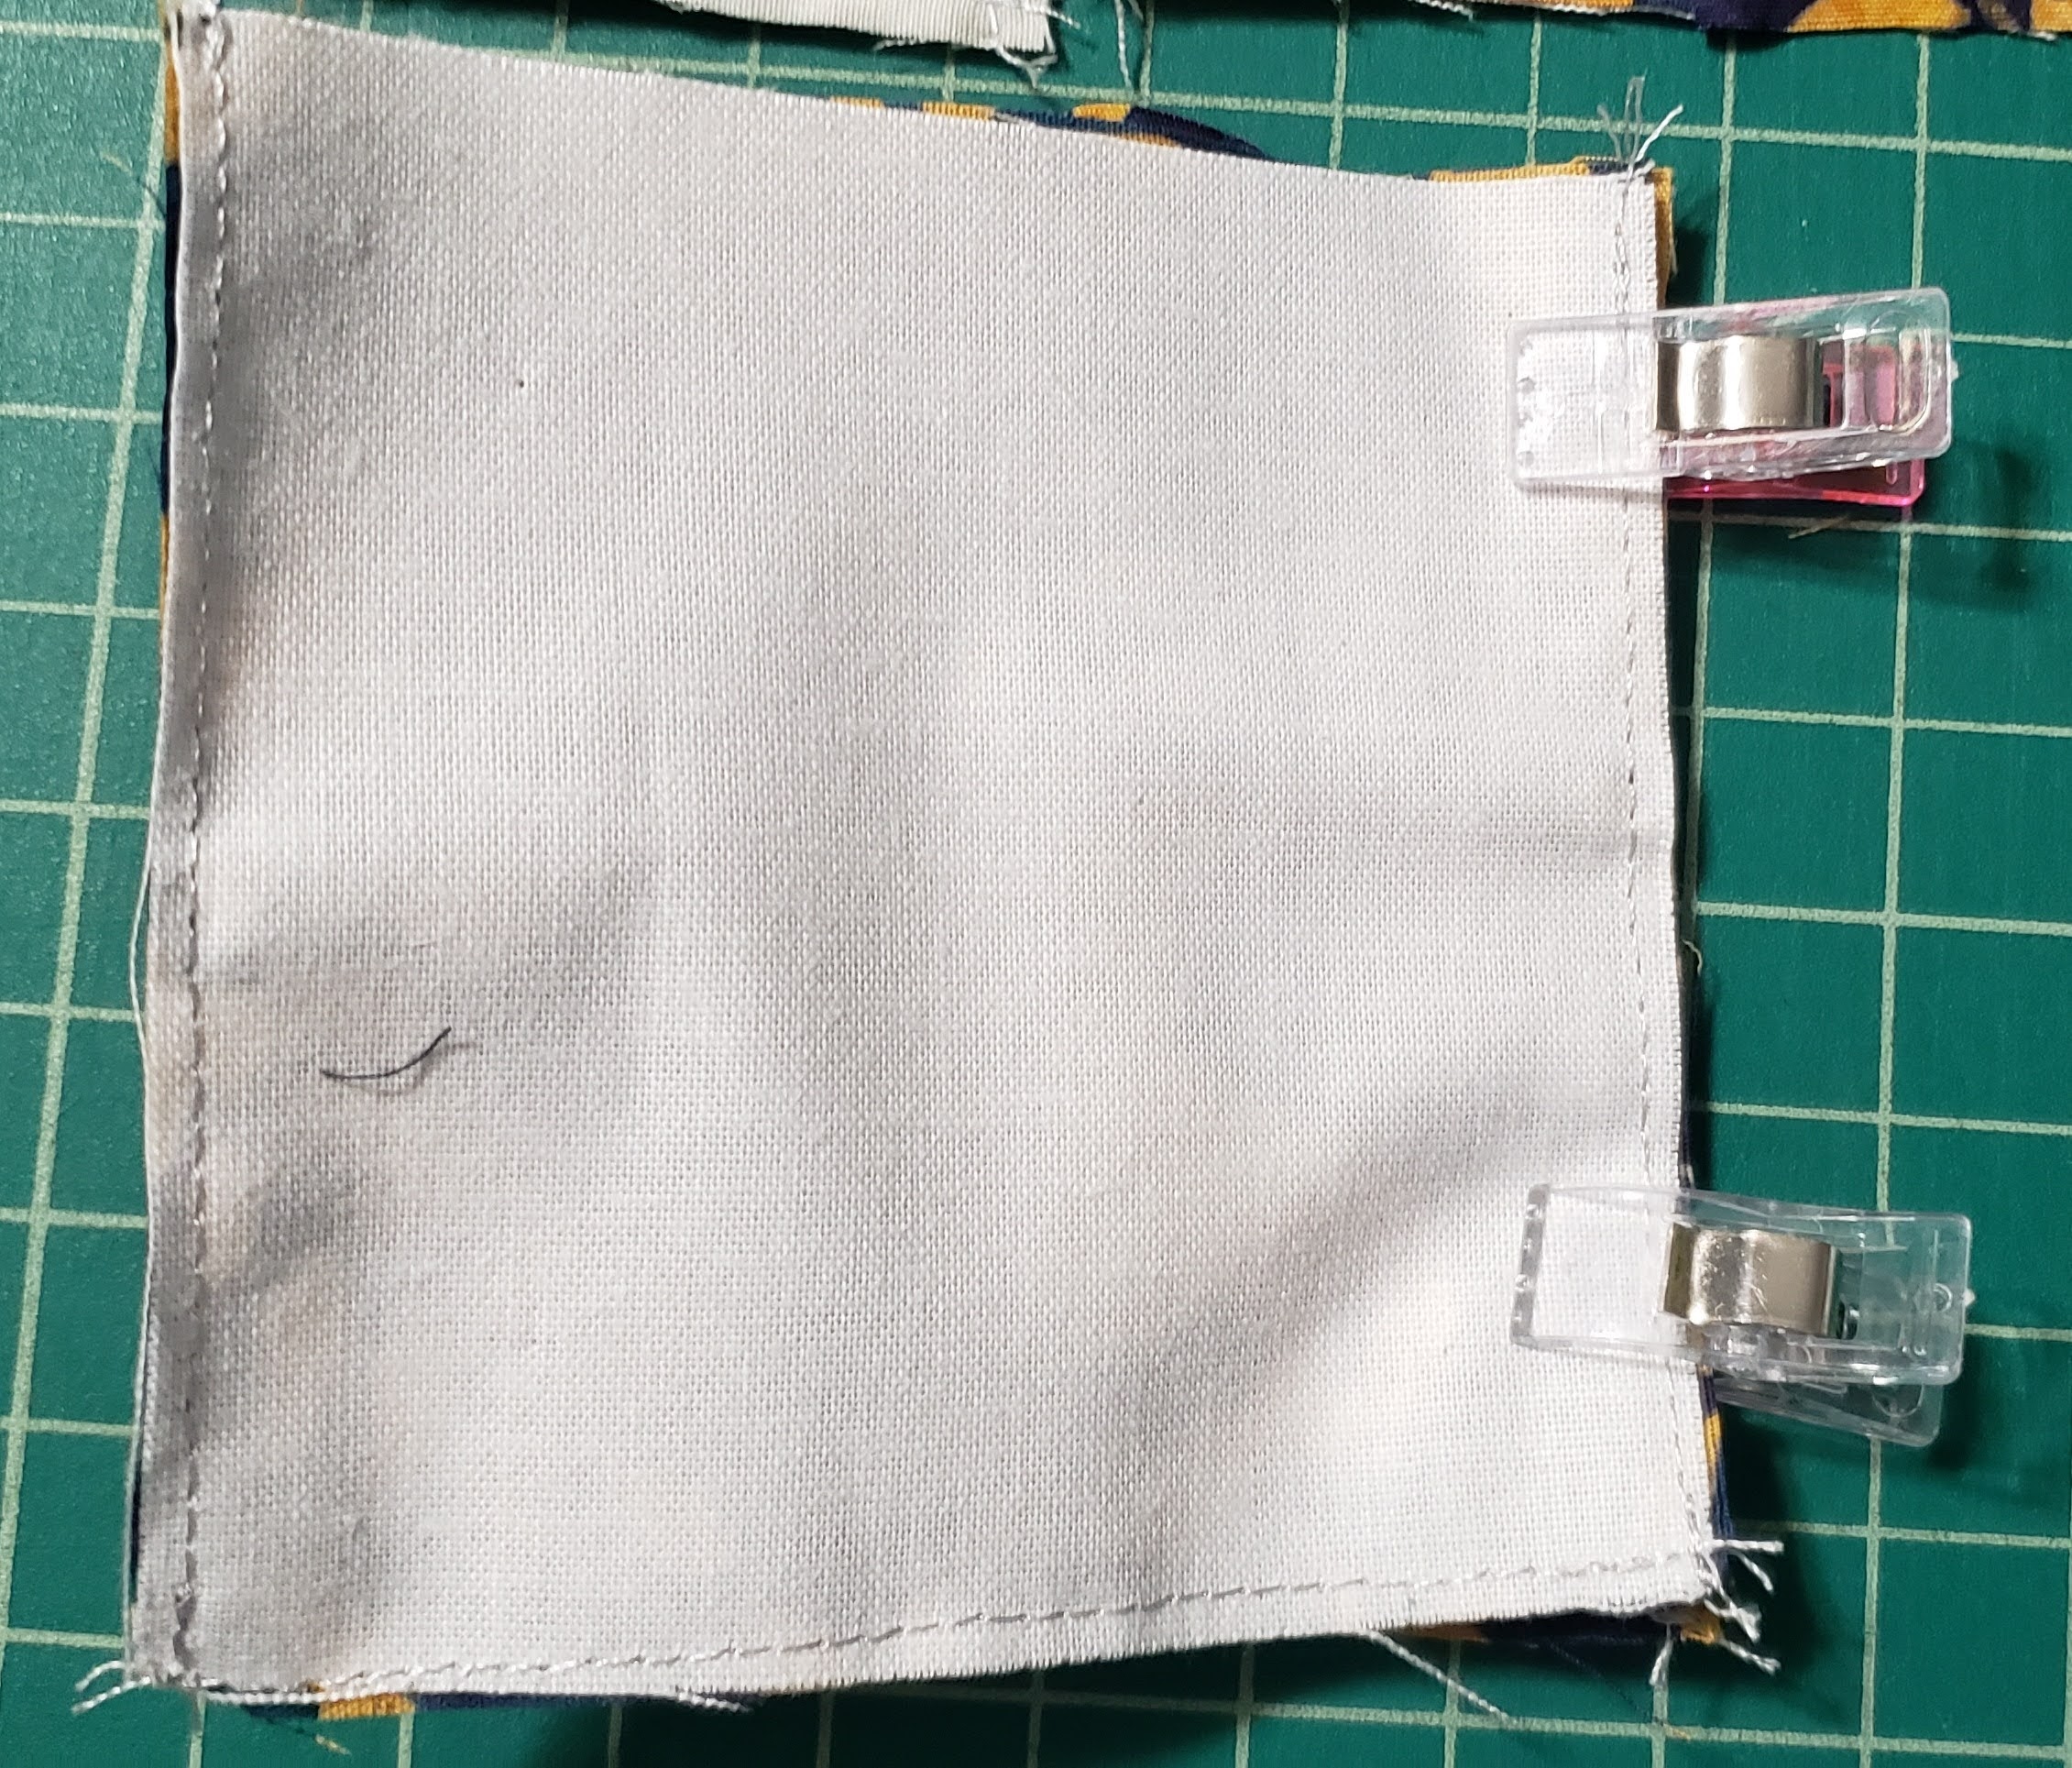
Next cut 3 1/2″ squares of white fabric, this can be any fabric as it will be hidden inside your quilt. You will need a total of 180 of these squares. You need one for each of the color fabric and coordinating fabrics. I will call these the “back” squares.

Each puff square consists of two pieces of fabric, one you will see and one you will not.
Step 2 – Preparing squares – 180 total
Use one color square (4″ x 4″) and back square (3 1/2″ x 3 1/2″).

Match one corner of each together, with wrong sides together.

Use a pin to hold together.

Go to the next corner, and match, and pin.
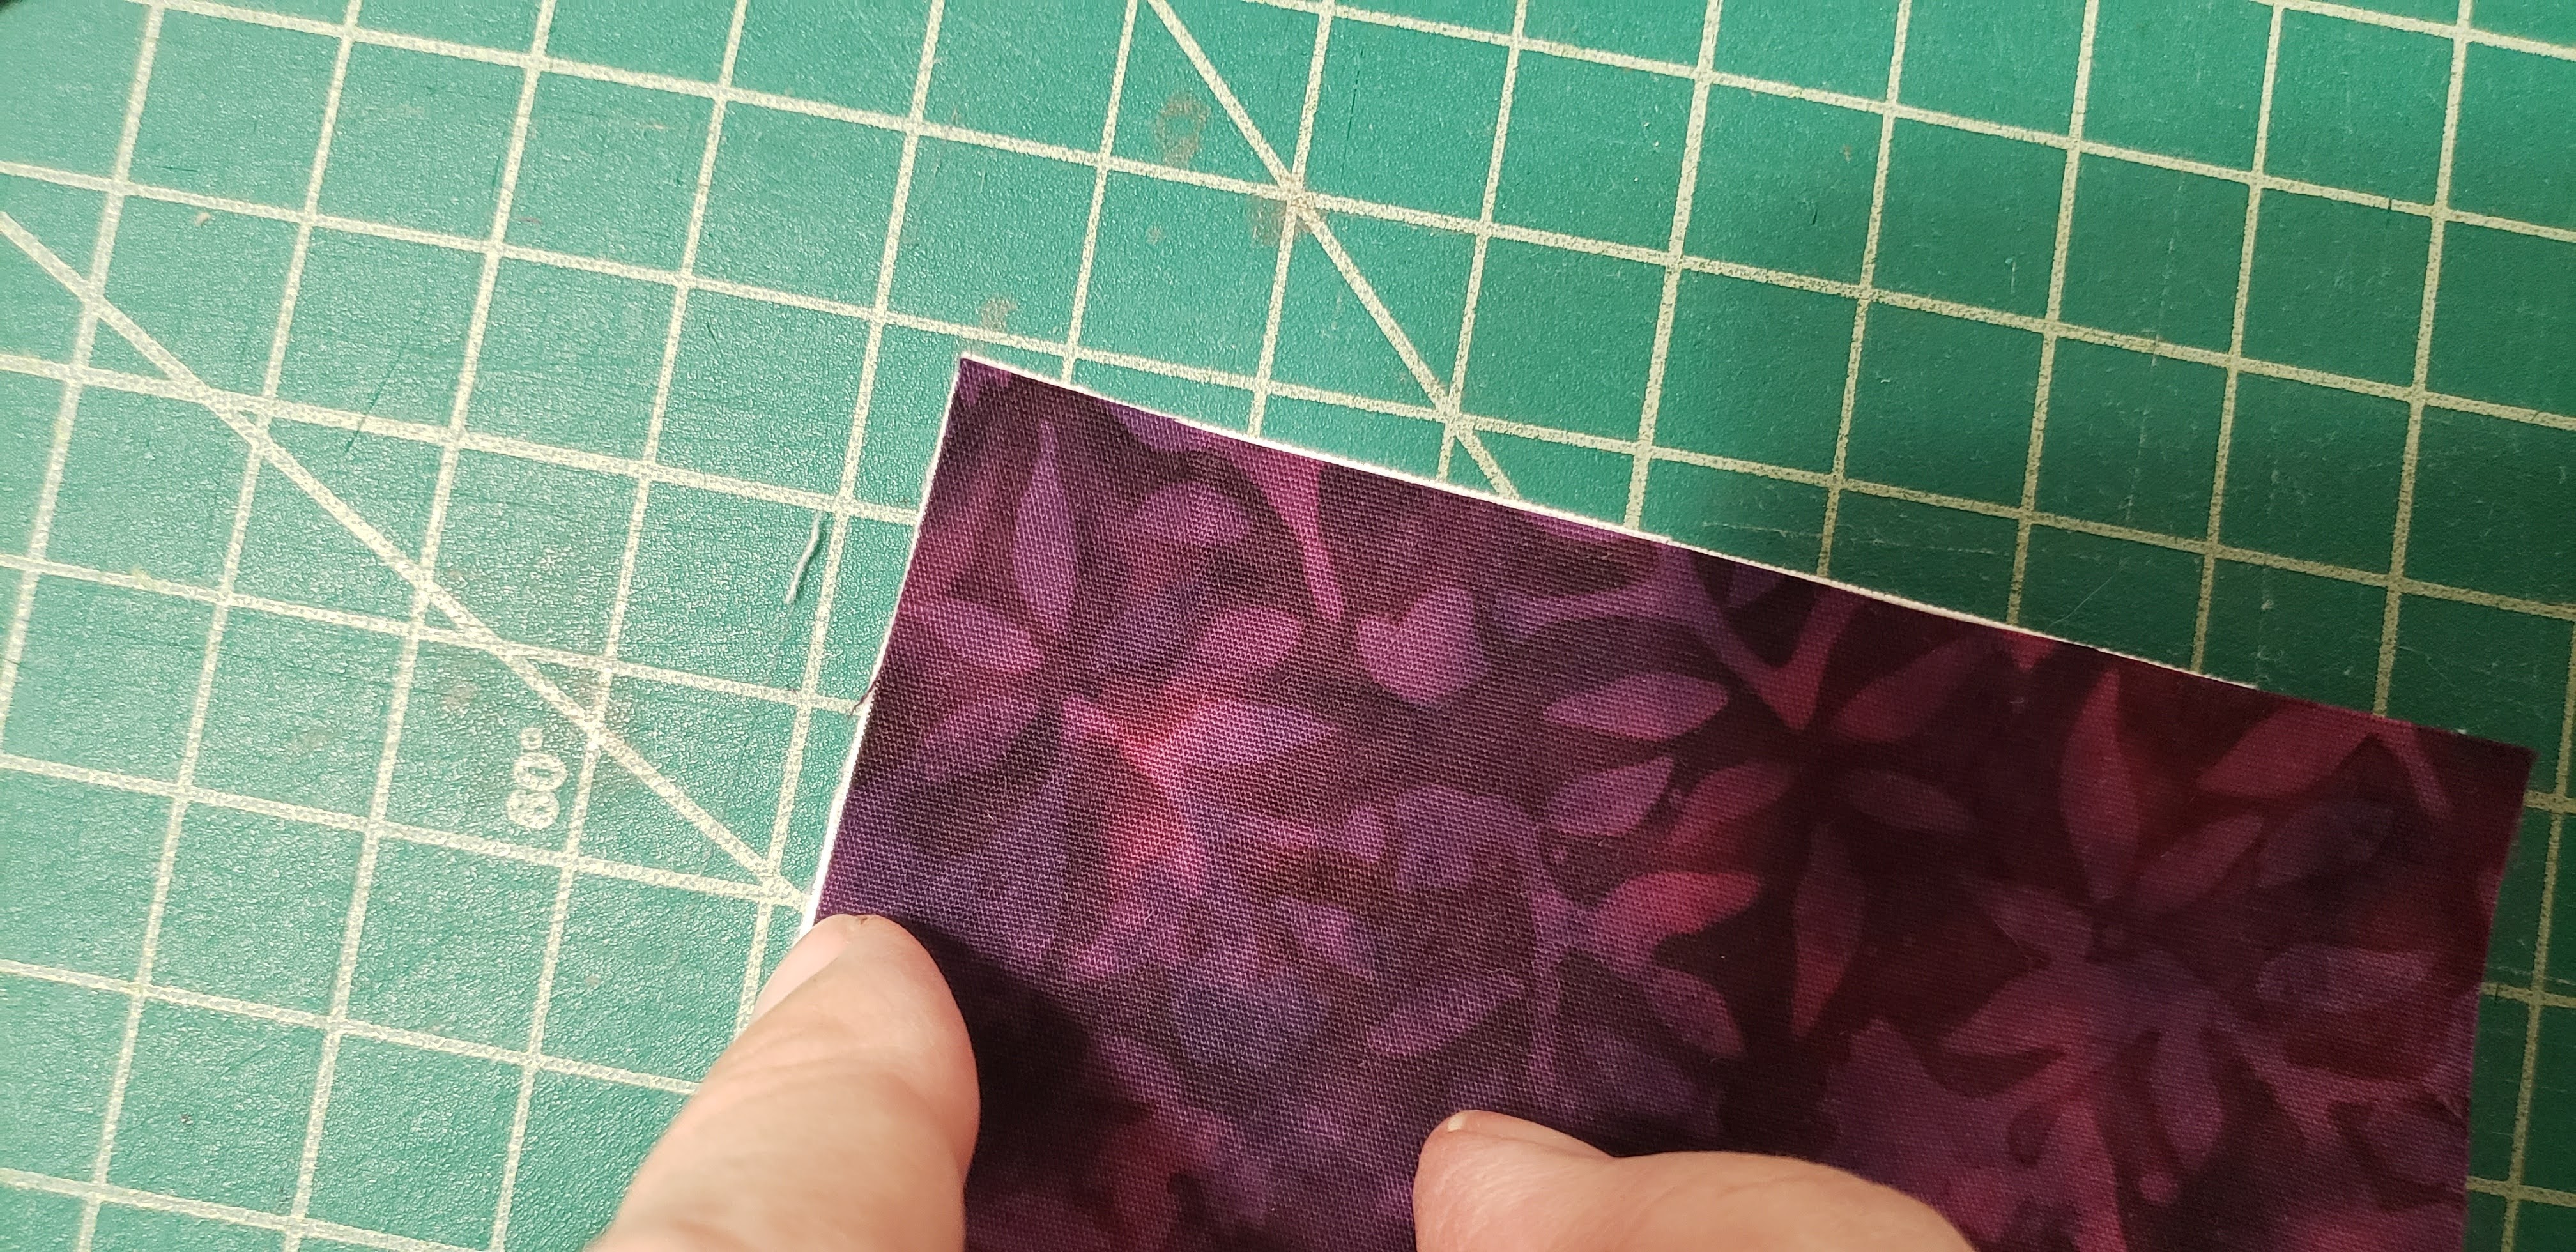
Match all four corners together.

Matching the edge of the squares, pinch the fabric to the center.
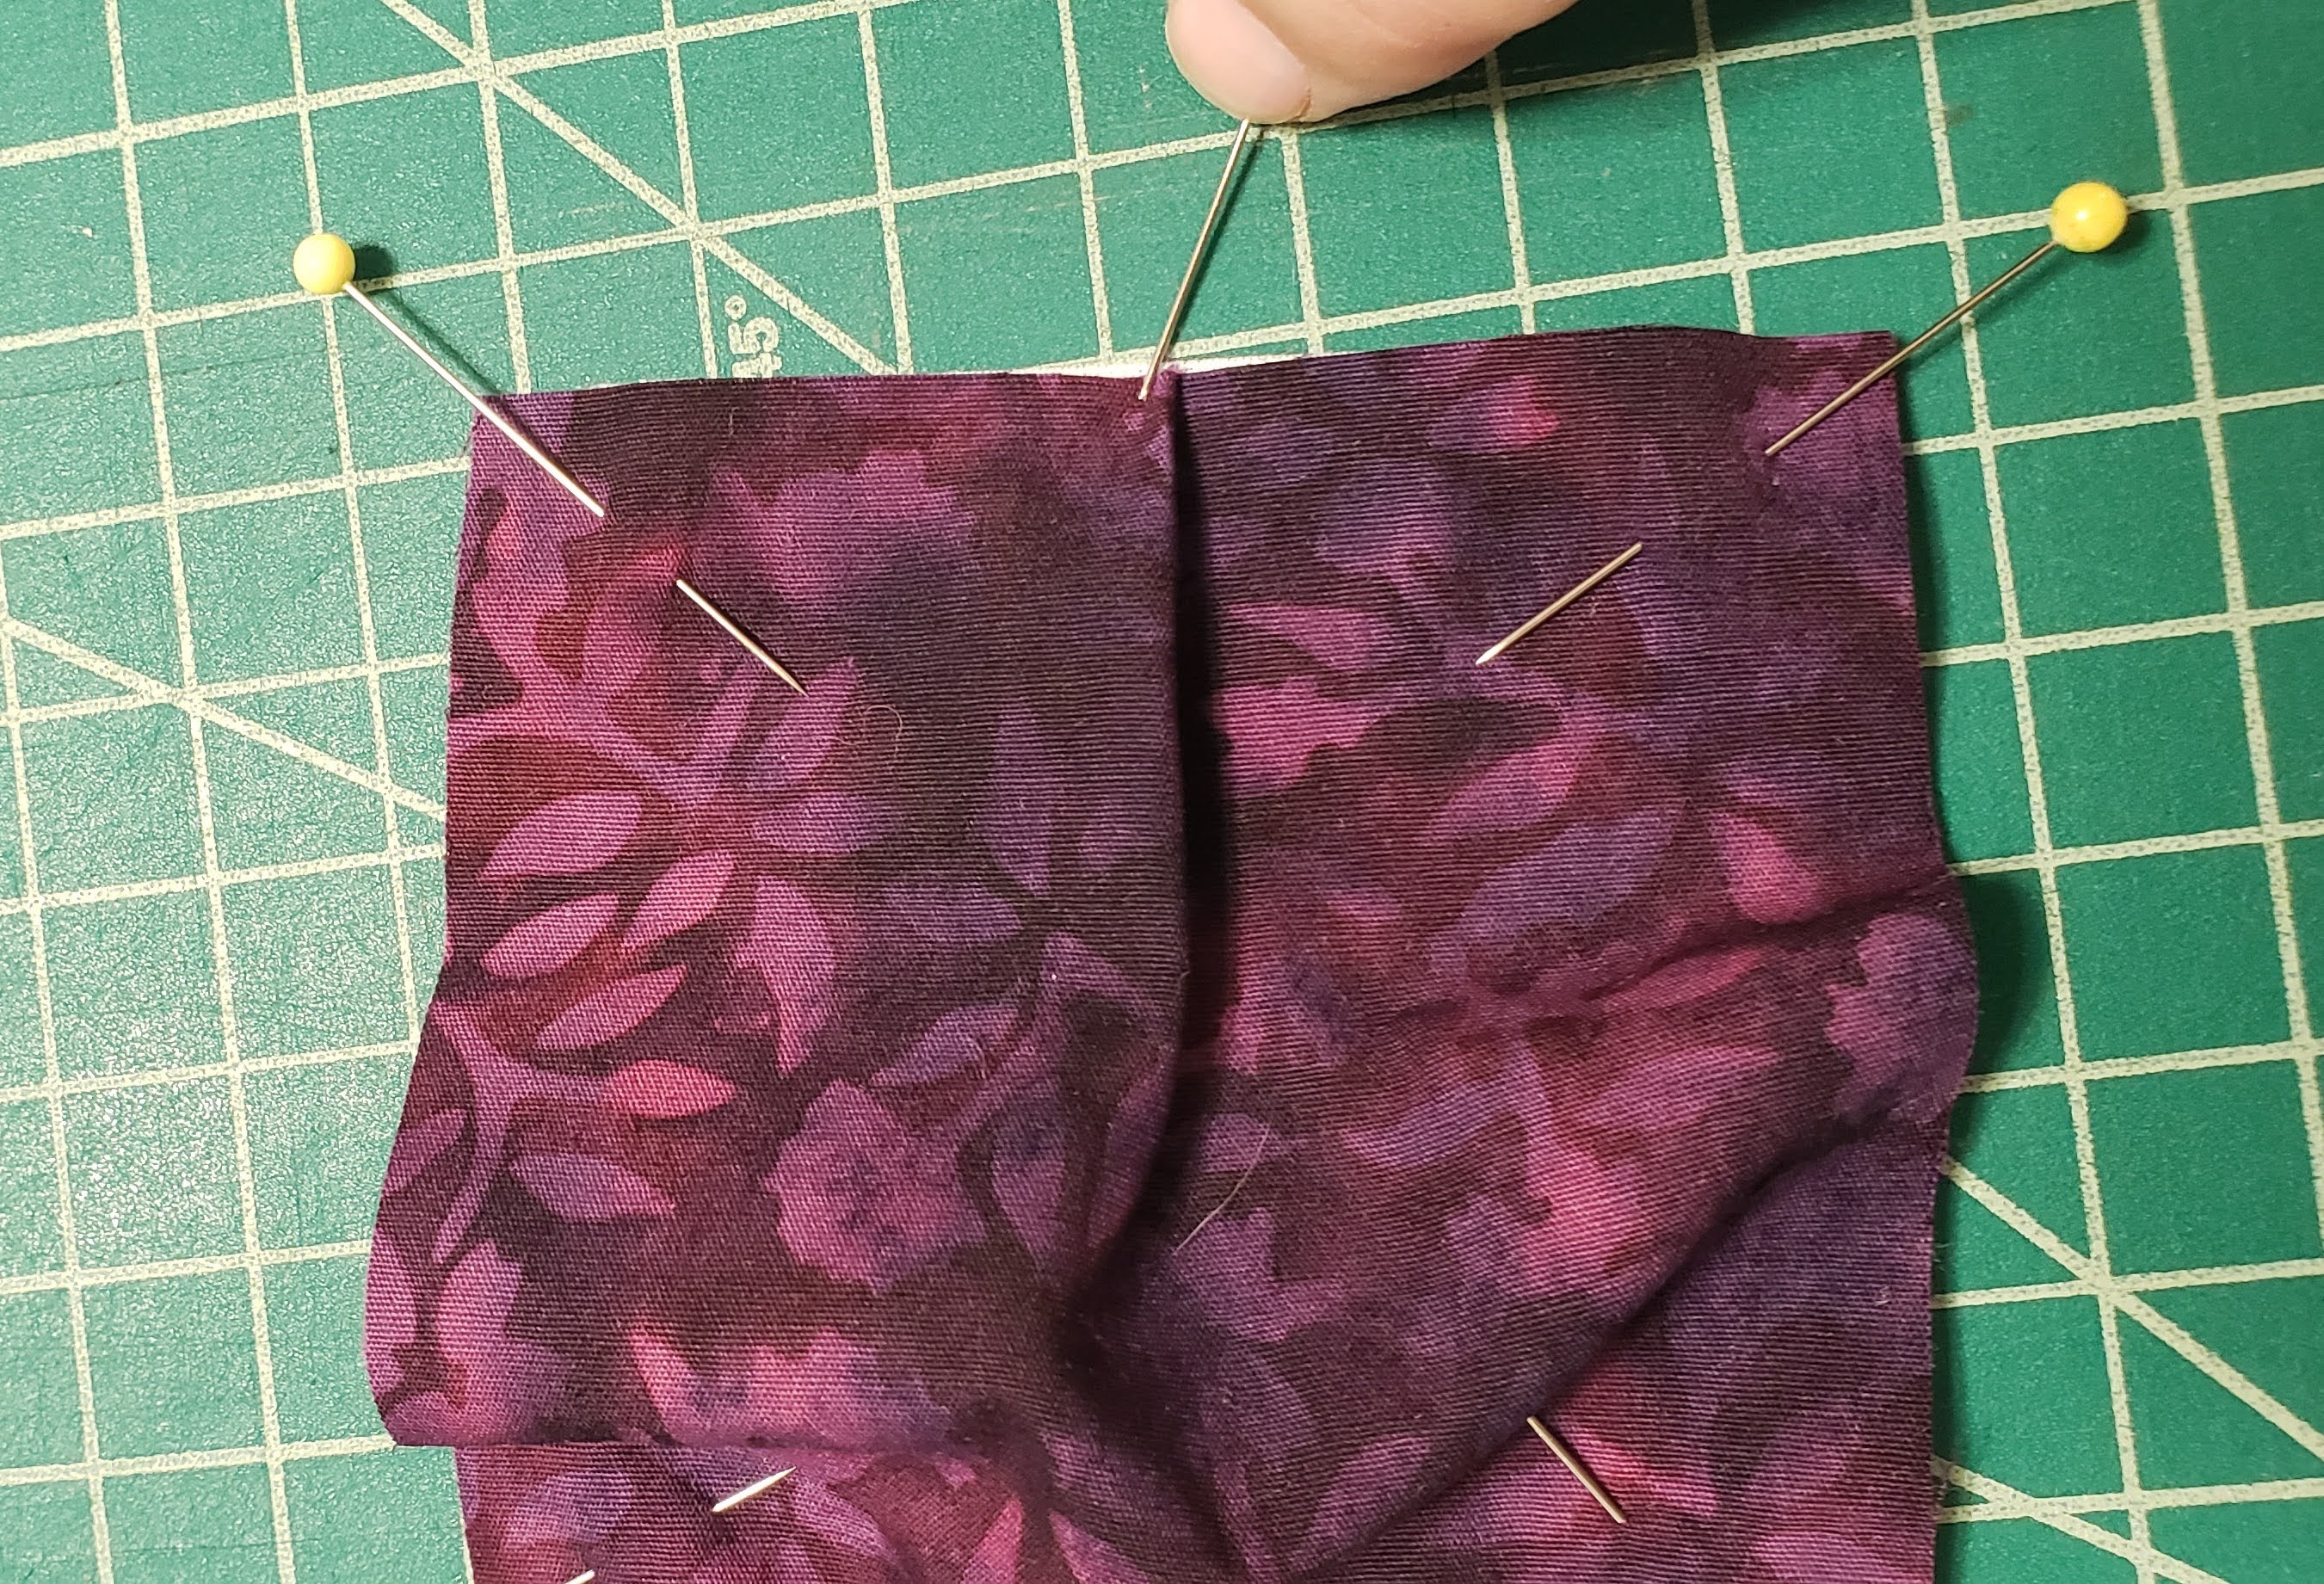
Then fold over and clip in place.

You will do this for Three (3) of the sides, leaving the fourth open.

You will repeat these step for all 180 pieces.
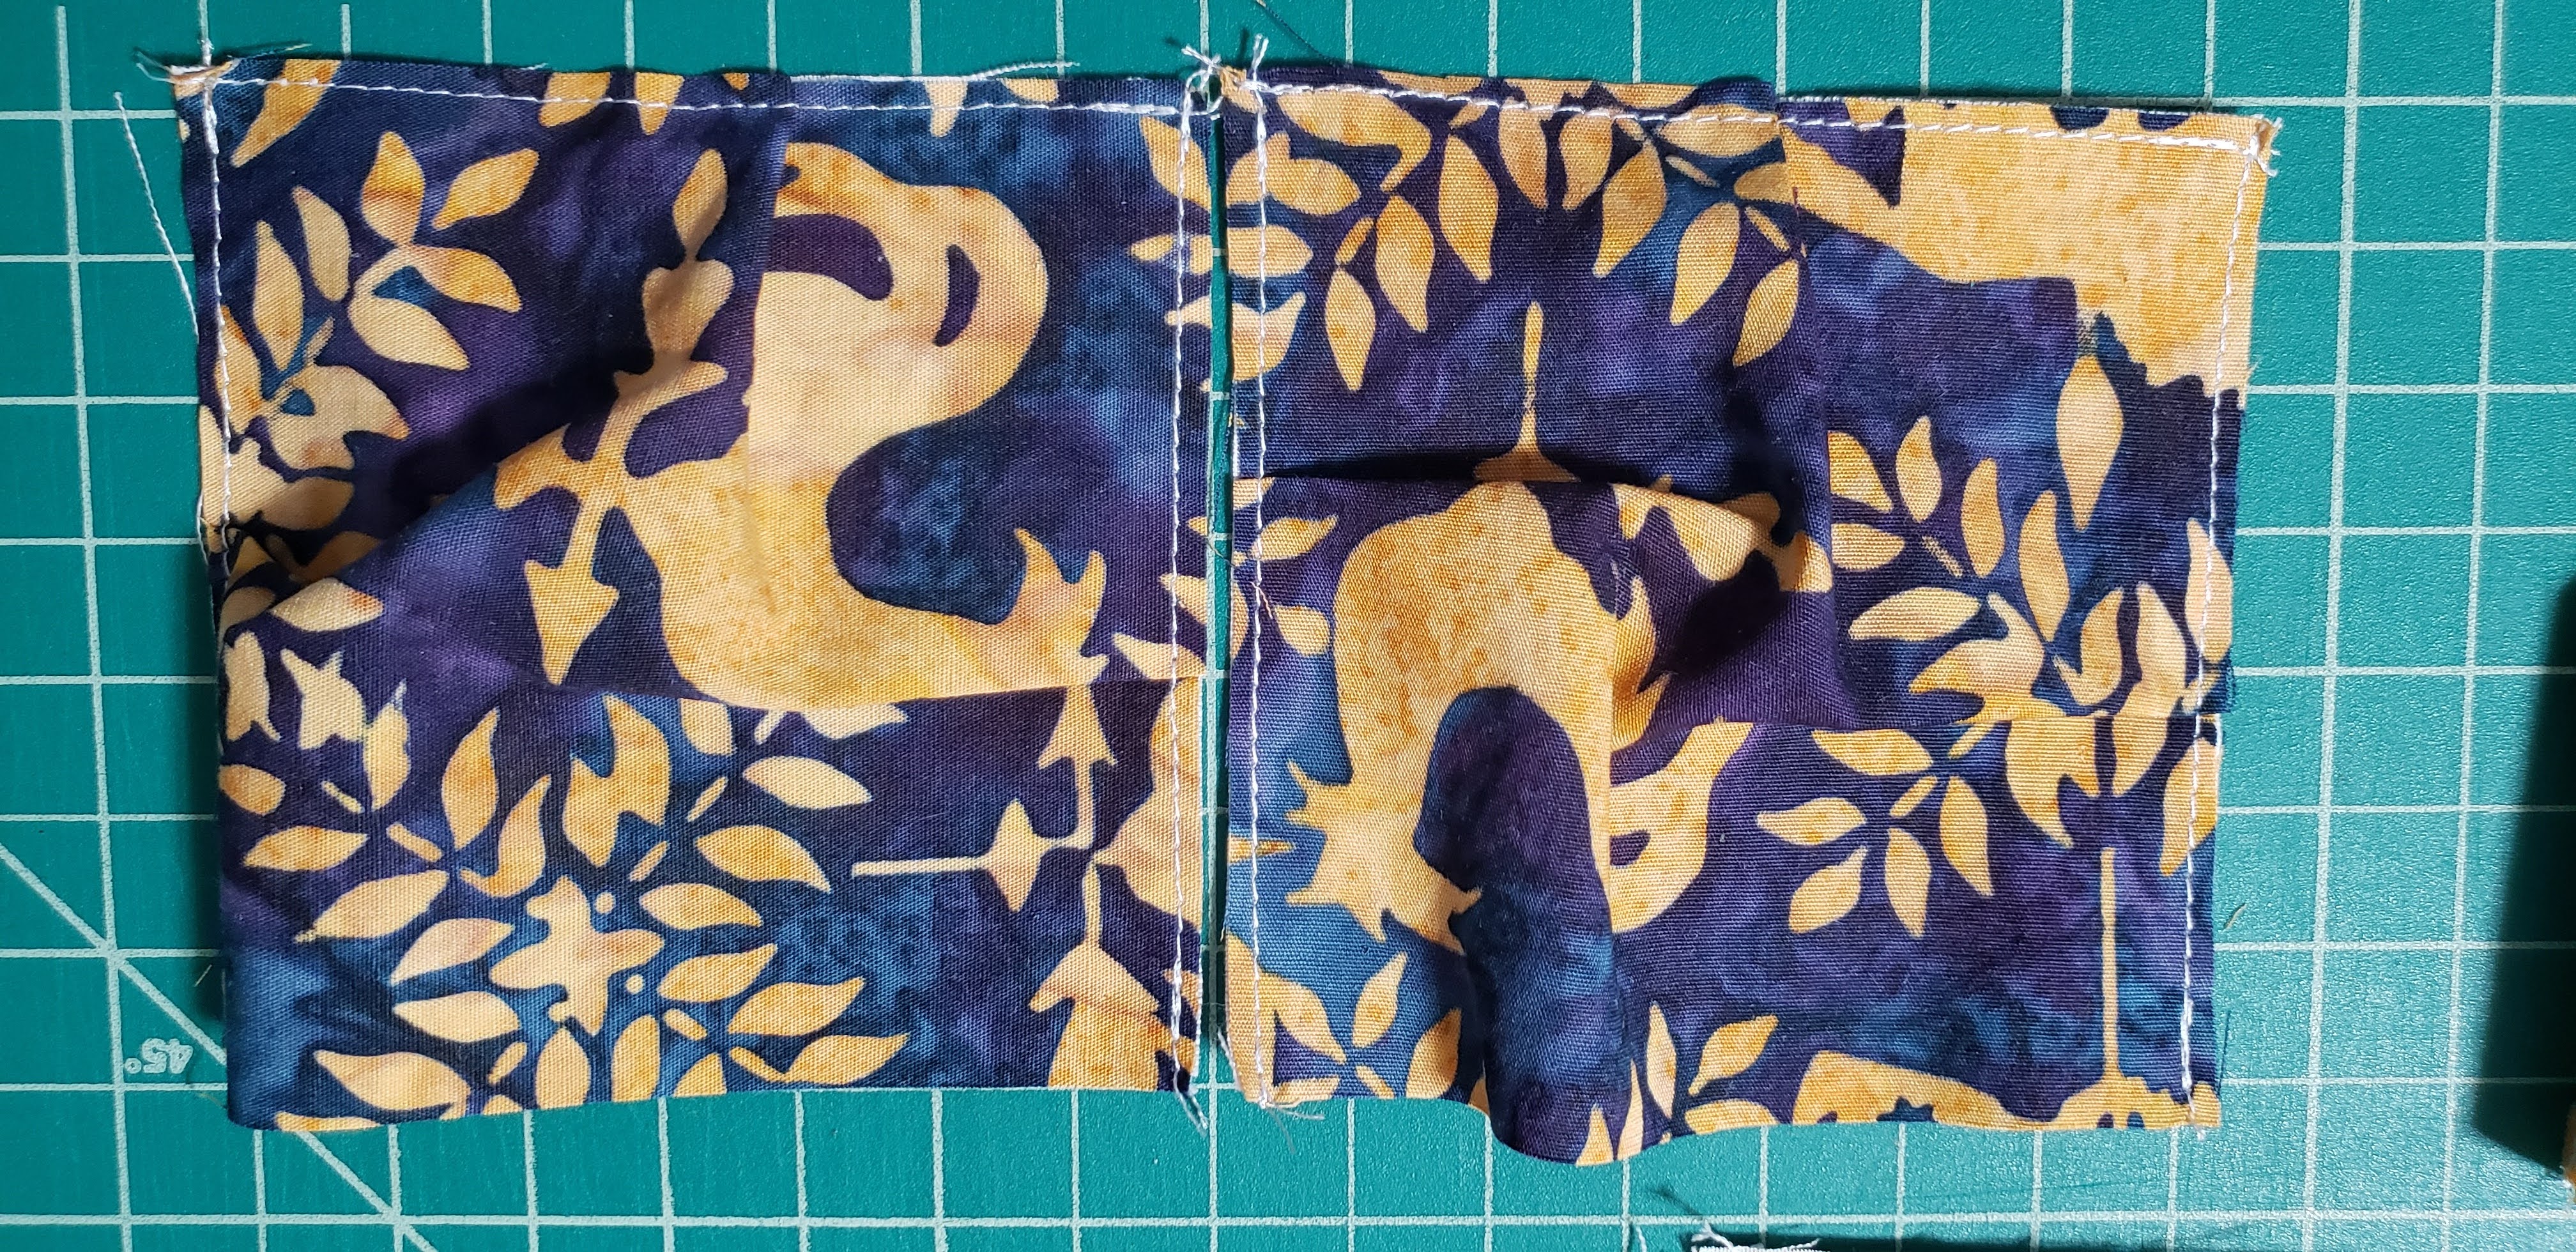
Step 3 – Sew blocks
For each of the 180 blocks, sew closed the three sides, leaving a fourth open. Use only a 1/8″ seam, this way it is hidden when you sew the blocks together.

Step 4 – Layout of quilt design
The layout for the quilt are 20 blocks of 9 squares. Here is one layout (before Step 3), putting one of the coordinating squares in the center of 8 of the same color squares.

With 4 sets of 9 squares across and 5 sets of 9 squares down for a total of 20 blocks. Layout all the squares in the design that you would like. Moving the groups around until you find the layout you like.
Note: My table was too small to lay them all out, but here is three rows of 5, you will want 4 rows of 5.

Once you have decided on your layout, you are ready to sew together.
To help make a decision on the layout, you can take an extra square of each color and lay those out to see how you may like them to look. They may look a little different when you add the center coordinating color, but it at least give you an idea.

You can even take a black/white picture to see how they look as well, then move around until you feel they are balanced, or how you would like.

Note: Some people like to go ahead and stuff each square and stitch closed, and then assemble the quilt, I have found out that that can be very bulky, so I will show you how to stuff as you sew rows together.
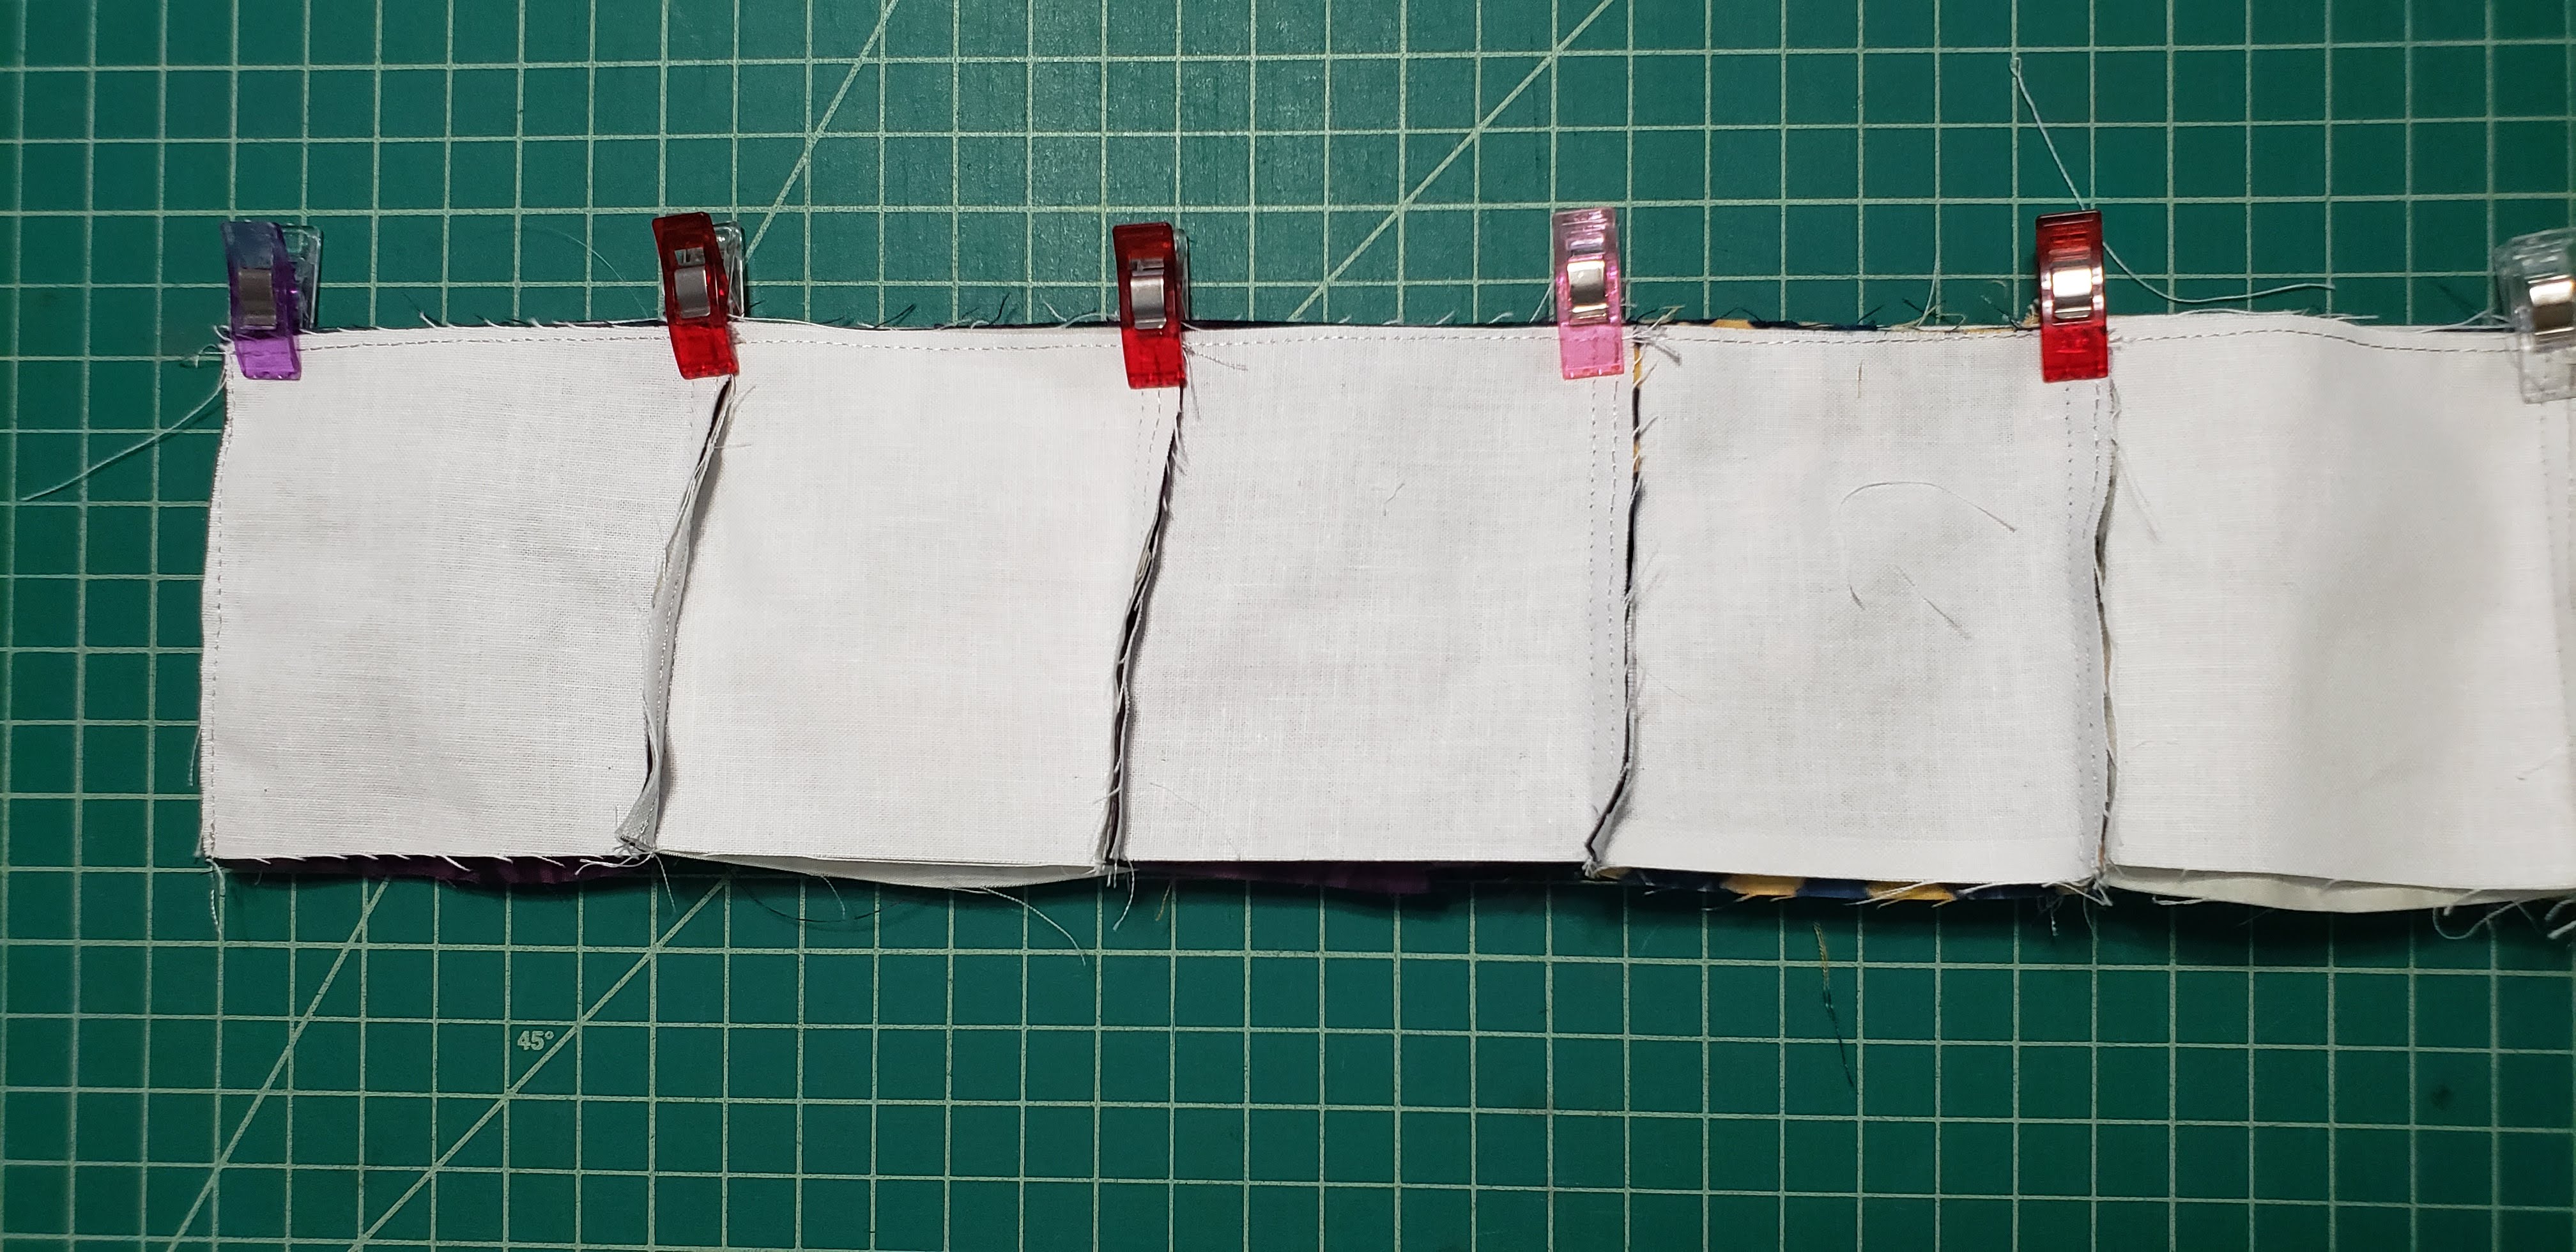
Step 5 – Sew squares into rows of 15 squares
On your first row, make sure that all of your open sides are the same direction.
For the first row, the open side will be the opposite of the rest of the rows. You can stuff and close the first row after attaching the second row.
Have the opening side to the outside of the quilt, then pin the blocks together.
Sew together with 1/4″ seam allowance.

Note: Wait to press seams until Step 6.
Continue attaching the blocks in the row together.

Second row to the 12th row, you will need to have the open side facing towards the next row. So the opening of row 2 should be facing towards row 3 and so on.
Sew the rows together, making sure the open side is on the right side.
Step 6 – Pressing seams
A good idea is to layout all your rows to make sure you have them going the way you want. Checking that the openings for row 1 is facing to the left from and openings for rows 2 to 12 are facing towards the right.

Pressing seams. Now is the time to determine the way to press your seams. If you press towards one side, you will be able to nest your blocks, and match the corners.
I have this neat “Seam Stick”, you can purchase one, or you can use a dowel rod to do the same thing. By pressing on the Seam Stick you can keep from pressing your puffs flat, but get a nice press.

So alternating between the rows, press one towards the top, and the next towards the bottom. Continue for all rows.
Step 7 – Sew Rows/Stuff Rows
The next step you will sew your rows together, and stuff the squares as you go.
Matching first row and second rows together, pin at the seams, to make sure they are matched. (If they are a little off, you can bunch together as needed, as you will not see with the puff that has already been created. (Not something you normally can do with a quilt)
Sew 1/4″ seam down.

You can press the seam open, or to one side, again use the Seam Stick or a dowel rod to keep from pressing your puffs flat.

As you add rows, you will stuff the new row with batting. Fill as full as you want, but try to stay consistent as you go.

After you have added the batting, you will need to pin the side closed, matching the same way as the other three sides, by working from the corners to the middle, and fold over and pin. I would recommend pinning both the edges and the center.

Once the row is filled, you will sew 1/8″ seam allowance to hold in place.
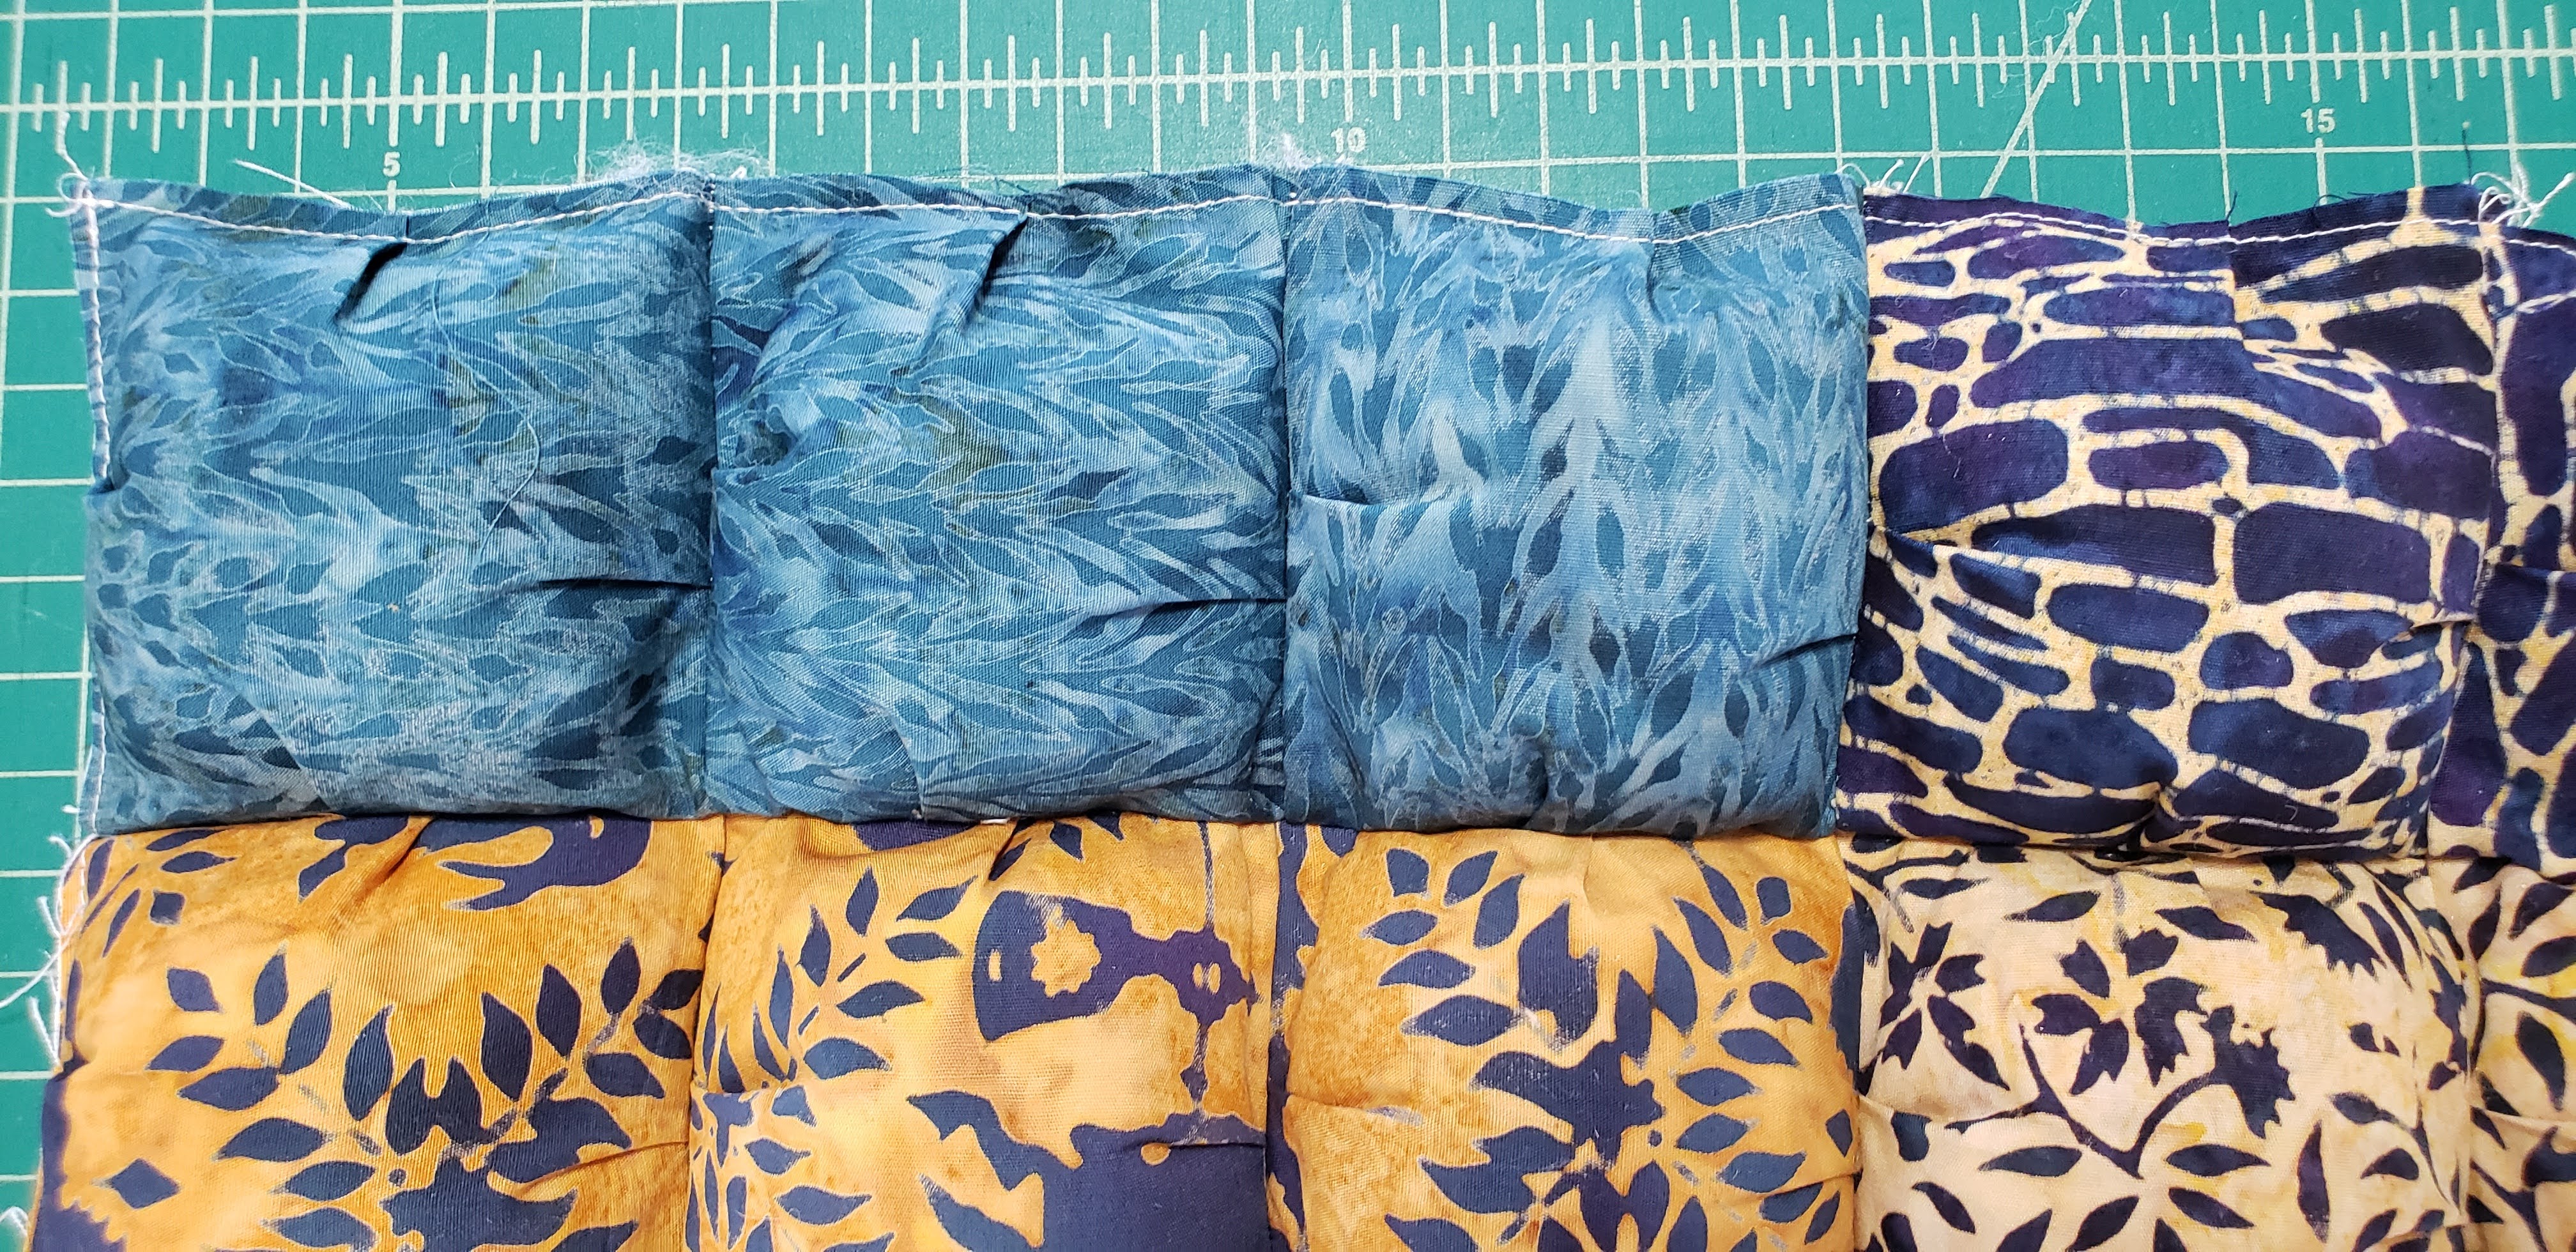
Now you are ready to add the next row.
When you have finished all the rows, make sure to go back and fill the first row and sew closed with 1/8″ seam.
Step 8 – add backing
Next you can finish the quilt by cutting a piece of fabric larger than your front, and sew between some of the rows to attach, or you can do a “pillow case” close, by putting a back same size as the front, right-sides together and stitch around, leaving a small opening to turn and close.
Using some of the coordinating light fabric (same as the middle squares), I added the back and stitched a few rows across (in the ditch) and a few rows vertically to hold the quilt together. My back was larger than the front by 2″ on each side, so I was able to fold over the back to the front to self-bind.
You can choose to add the back, and then tie the quilt together at different points, a good place would be in the coordinating middle squares.
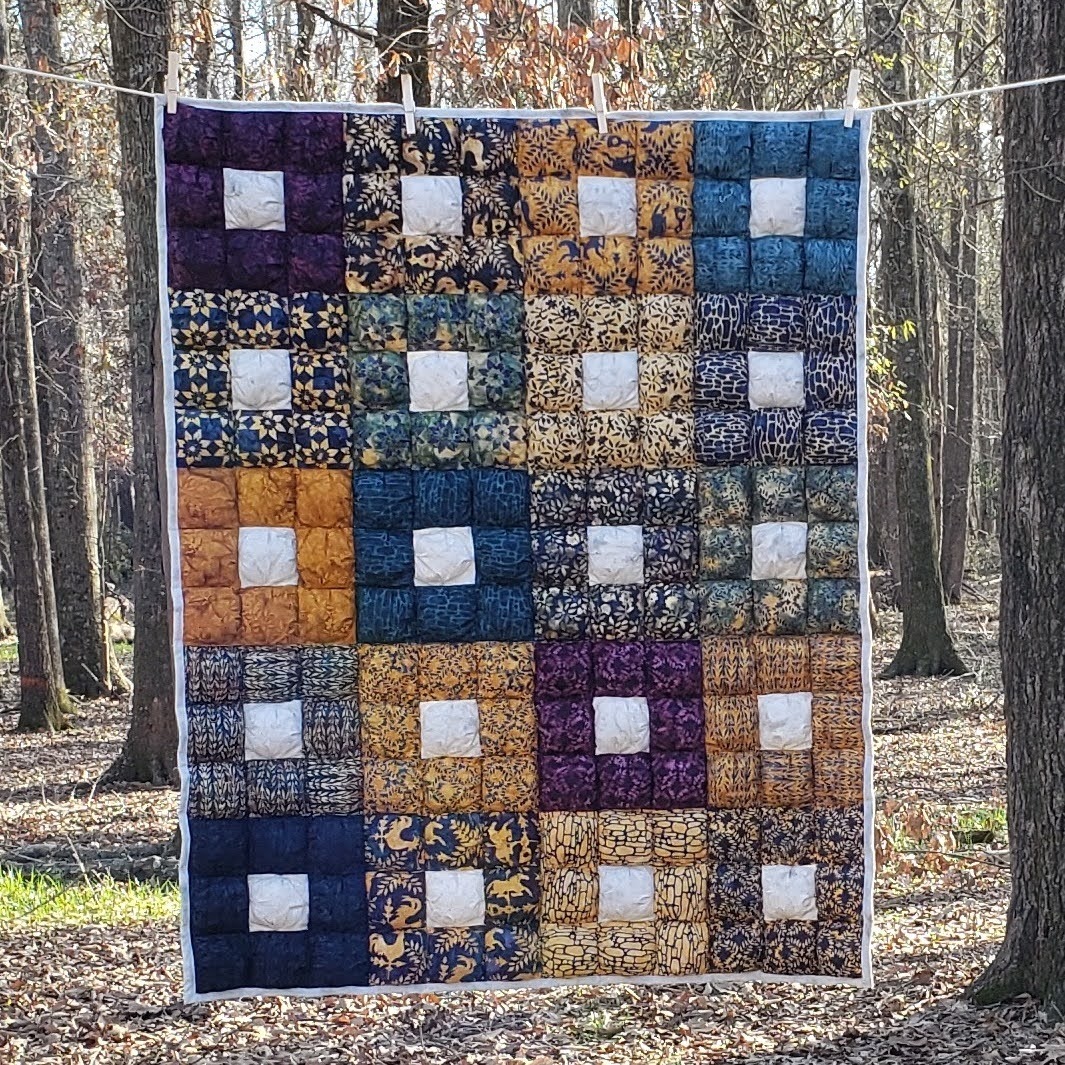
Here is my finished quilt, finishing at 36″ x 45″
Puff quilts can be heavy, so I didn’t add any extra batting to the quilt. You can add a layer if you want it to be thicker or a heaver. I prefer to just leave it out, it is warm enough.
Puff Quilts do not fold up as neatly as a regular quilt, so I folded then rolled the quilt, and used the ties from the Prairie Dreams bundle to tie it closed.

This quilt makes a great baby blanket, or a weighted blanket. It also is great for a dog bed.
Here is Junior, my son’s Beagle, enjoying the nice winter day on the quilt. It hides all those small sticks and rocks on the ground. Great for sunning on a nice day.

When making a Puff quilt, you need a good quality needle, and I used Schmetz Needles , they have needles for about every sewing project you have. You also need a good quality thread for stitching, and holding all the pieces together. I used Aurifil thread to sew the pieces together. I love working with Aurifil Thread, it doesn’t break as often as some thread do. My go-to color is 2600 Light Gray. It blends in with a lot of colors, and looks great.
If your local Quilt store does carry the Prairie Dreams fabric, you can find it in stock at Creekside Quilts, OR or Jellyrollfabric.net.
Have you made a Puff quilt? If so, please share your project. If you haven’t made one yet, now is as good of a time as any other to make one, and share your quilt with us.
If you enjoyed seeing my Puff Quilt, check out the other Ambassador’s Puff Quilts.
Brenda Alburl ~ Songbird Designs
Renee Atkinson ~ Pink Tulip Quilting
Pamela Boatright ~ PamelaQuilts
Susan Deshensky ~ Lady Blue Quilts
Brittany Fisher ~ Bobbin with Brittany
Preeti Harris ~ Sew Preeti Quilts
Mania Hatziioannidi ~ Mania for quilts
Reed Johnson ~ Blue Bear Quilts
Victoria Johnson ~ Forever Quilting for You
Randi Jones ~ Randi’s Roost
Connie Kauffman ~ Kauffman Designs
Emily Leachman ~ The Darling Dogwood
Denise Looney ~ Quiltery – For The Love Of Geese
Leah Malasky ~ Quilted Delights
Maryellen McAuliffe ~ Mary Mack Made Mine
Anorina Morris ~ sameliasmum.com
Lisa Pickering ~ Lisa’s Quilting Passion
Sarah Pitcher ~ Pitcher’s Boutique
Claudia Porter ~ Create with Claudia
Lana Russel ~ Lana Quilts
Elita Sharpe ~ Busy Needle
Gail Sheppard ~ Quilting Gail
Sandra Starley ~ Textile Time Travels
Jennifer Thomas ~ Curlicue Creations
Suzy Webster ~ Websterquilt
#islandbatikambassador, #islandbatik, #iloveislandbatik, #allpuffedupbloghop, #aurifil, #aurifilthread, #schmetzneedles, #juki,

Thank you for the step by step tutorial! I’d love to make a few pet beds with scraps for my senior dogs. You’ve given me the confidence to do it!
LikeLike
Join my Facebook group, and if you have questions as you go, we can help.
LikeLike
It seems like you are one of the few on this blog hop who has made puff quilts before and tried various methods. Thanks for sharing your favorite way to make one and for showcasing your beautiful design!
LikeLiked by 1 person
Great tip to roll and tie! Love the way you showcased your fabrics.
LikeLike
oh but your quilt is lovely. thanks for sharing and inspiring. no I have not made a puff quilt yet. It is now on my to do list
LikeLike
Nice puff quilt! The most interesting thing about this hop has been how many different ways there are to make a puff quilt. Have a lovely day.
LikeLike
Wow very nice job and so love the fabric ty for sharing
LikeLiked by 1 person
Love how you explained every step in detail with lots of pictures. Neatly finished too 😎
LikeLike
I love it, Lisa. I really like this line, especially that fabric with the chickens on it!!
LikeLiked by 1 person
I really love your quilt. I love scrappy quilts and love to make them. Your quilt looks really scrappy so it is definitely one I would enjoy making.
LikeLiked by 1 person
Nice quilt. Thank you for describing your way of making the quilt and rolling for storage.
LikeLiked by 1 person