
This month our Island Batik Challenge is to use a Studio 180 Designs ruler that we received. My ruler is the “V Block” ruler.
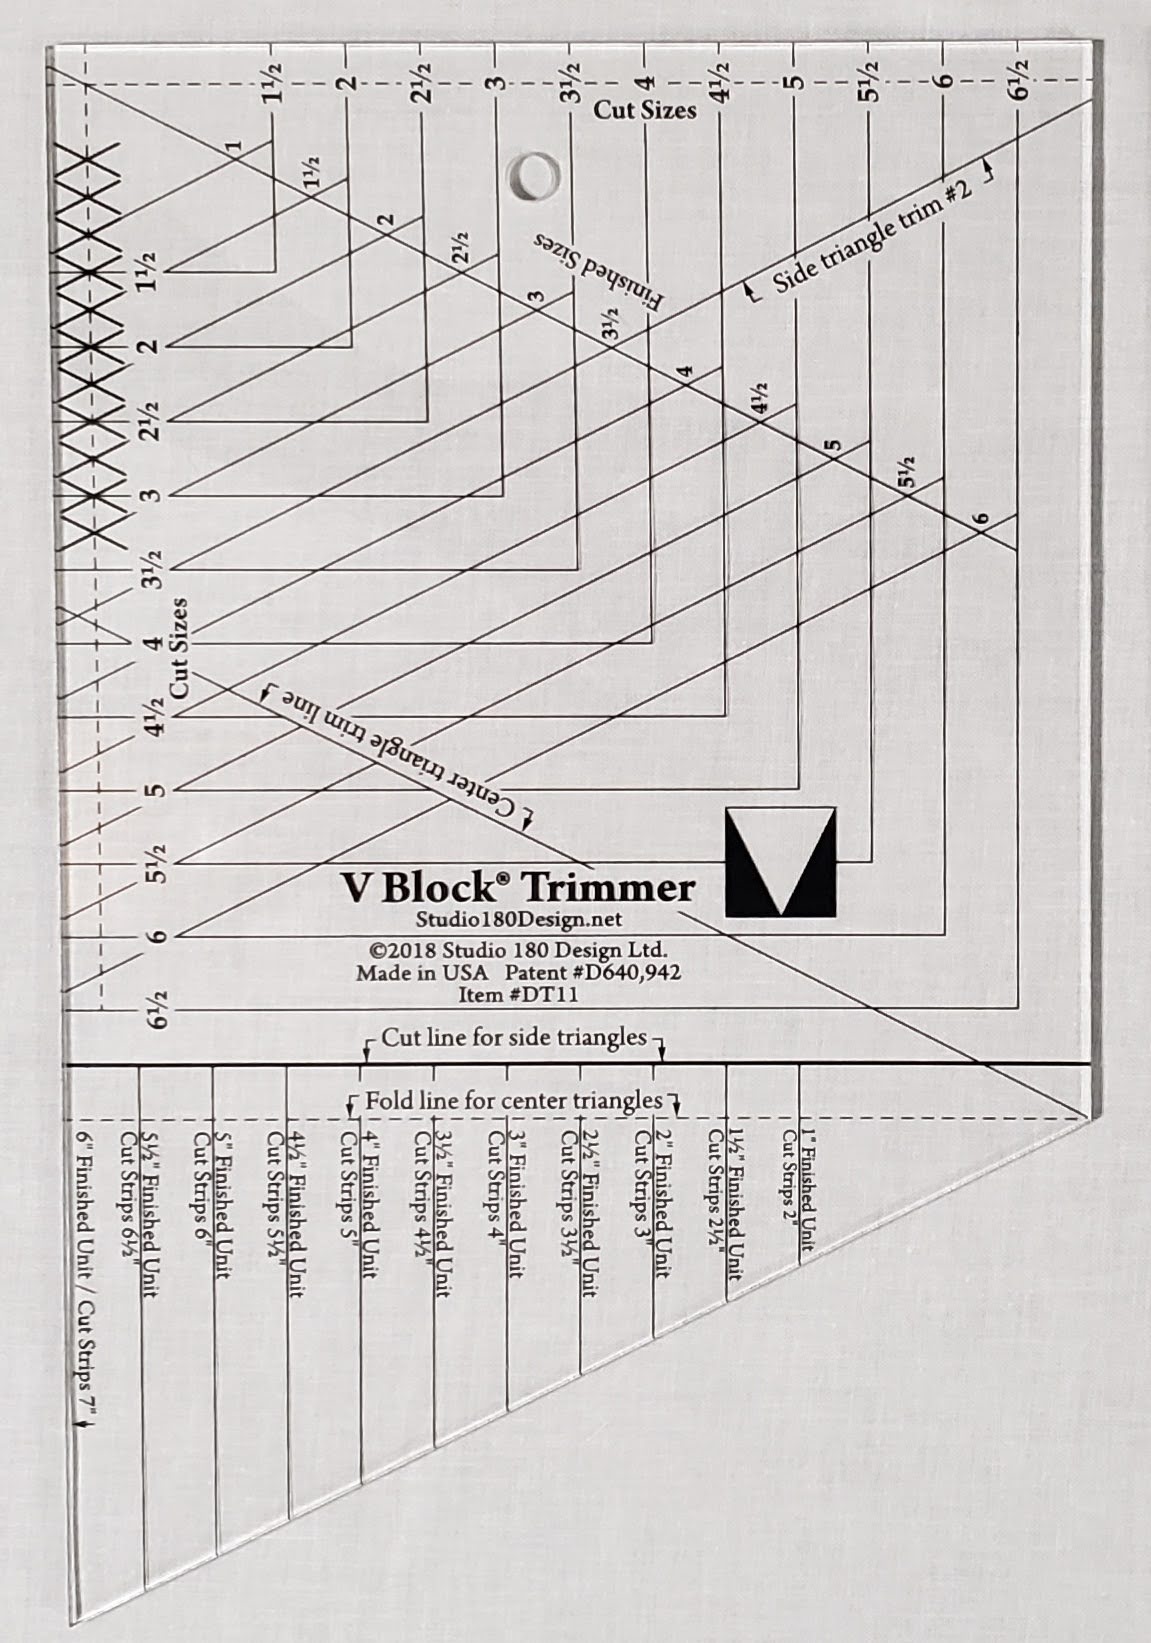
The block has different names, including “Peaky & Spike” called by Doreen Speckman in her book Pattern Play. It is commonly called the “Triangle in a Square”, or “Big Flying Geese”. Studio 180 Designs calls the block “V Block” because when you place the block pointing down, it looks like a “V”.
The block is similar to the Flying Geese block, just square instead of a rectangle. There are different ways to make this block, foundation piecing, templates, or using several square pieces assembled together. I have used templates in the past to get the blocks consistent in size.
The “V Block” ruler makes creating these blocks so easy, and the correct size. You do create the block a little larger than needed, and then trim down with the ruler to the size you need. This really helps to keep the block consistent in size, and if your 1/4″ seam is a little fat, you don’t have to worry so much.
We were challenged to use at least two different sizes of the blocks in our project. The “V Block” ruler has 11 sizes that you can make from finished at 1″ to finished at 6″, and each 1/2 size between.
The materials used in the making of this quilt were provided to me free by Island Batik and their industry partners Studio 180 Designs, Aurifil Thread, and Schmetz Needles, Hobbs Batting, as part of my role as an Island Batik Ambassador.
The fabric that was sent is “Wild Blooms” by designer Kathy Engle. This fabric line will be shipping to local quilt shops in May! Check out your local quilt store for this line.
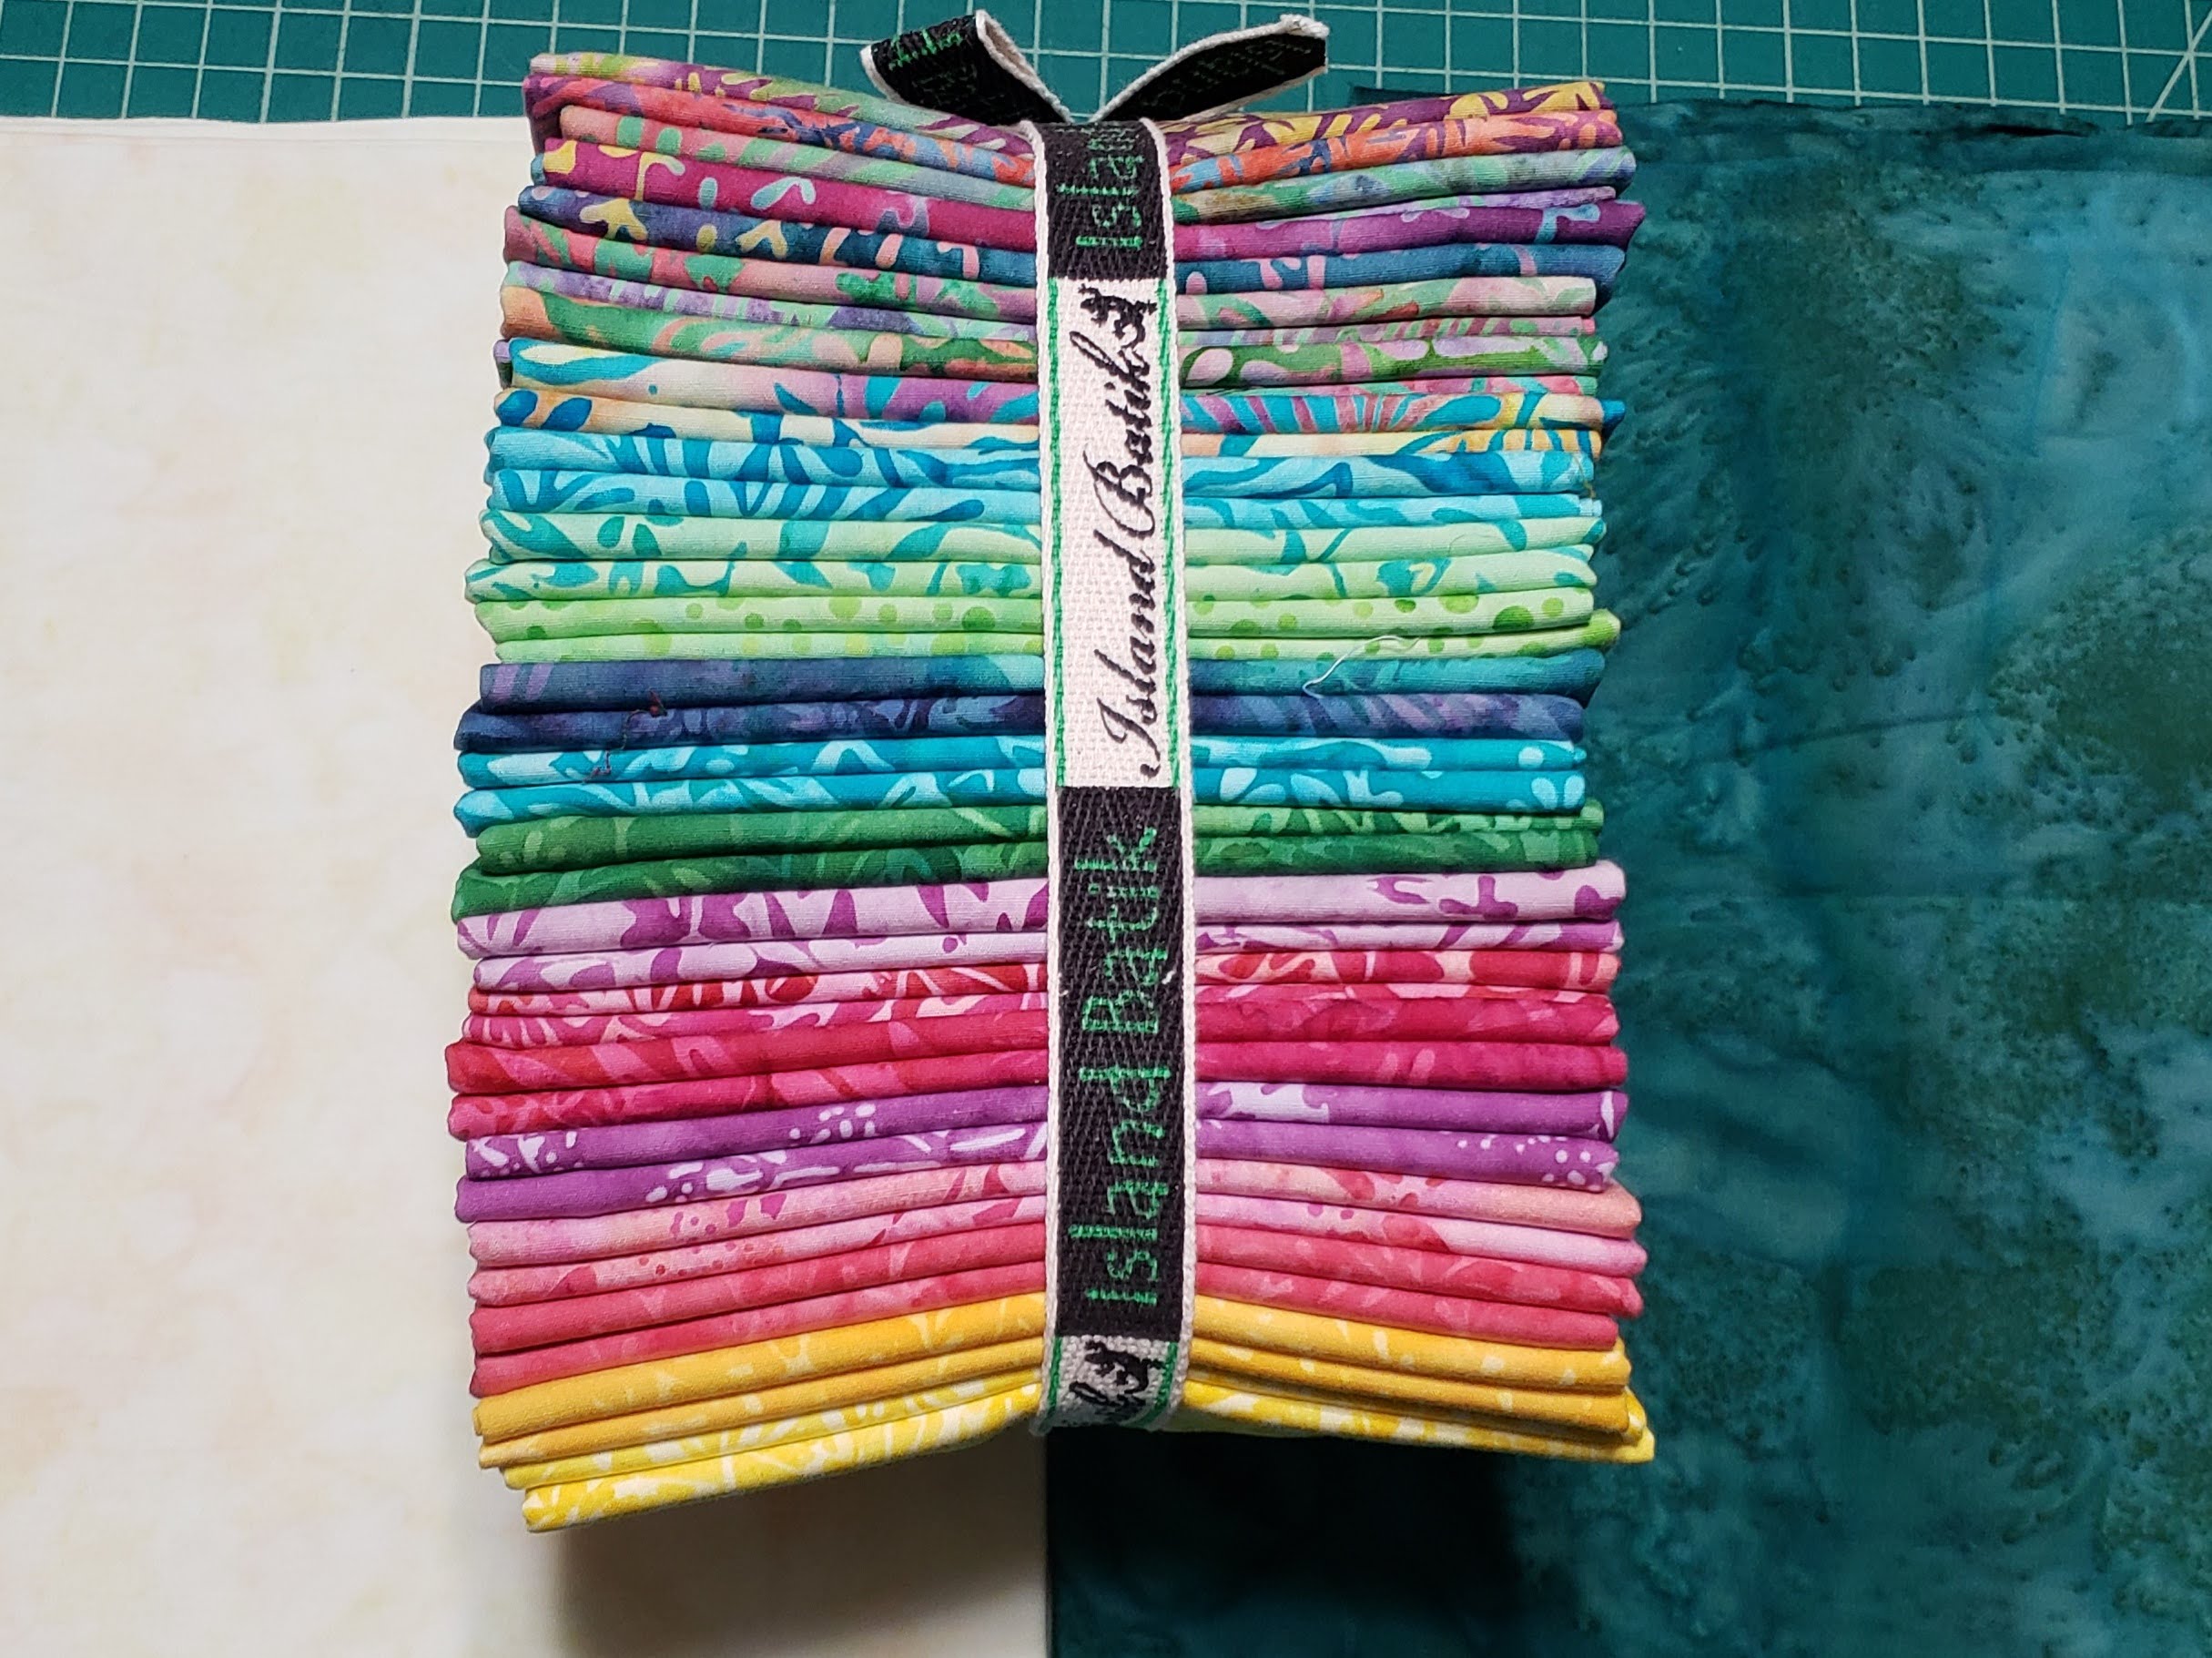
The fabric is very bright and cheerful. The fabric has different flower designs, and some have dragonfly’s. I love working with Island Batik fabric, as it is so easy to use and with such vibrant colors the quilts looks great, even if while assemble you add a few “creative oops” to the top.
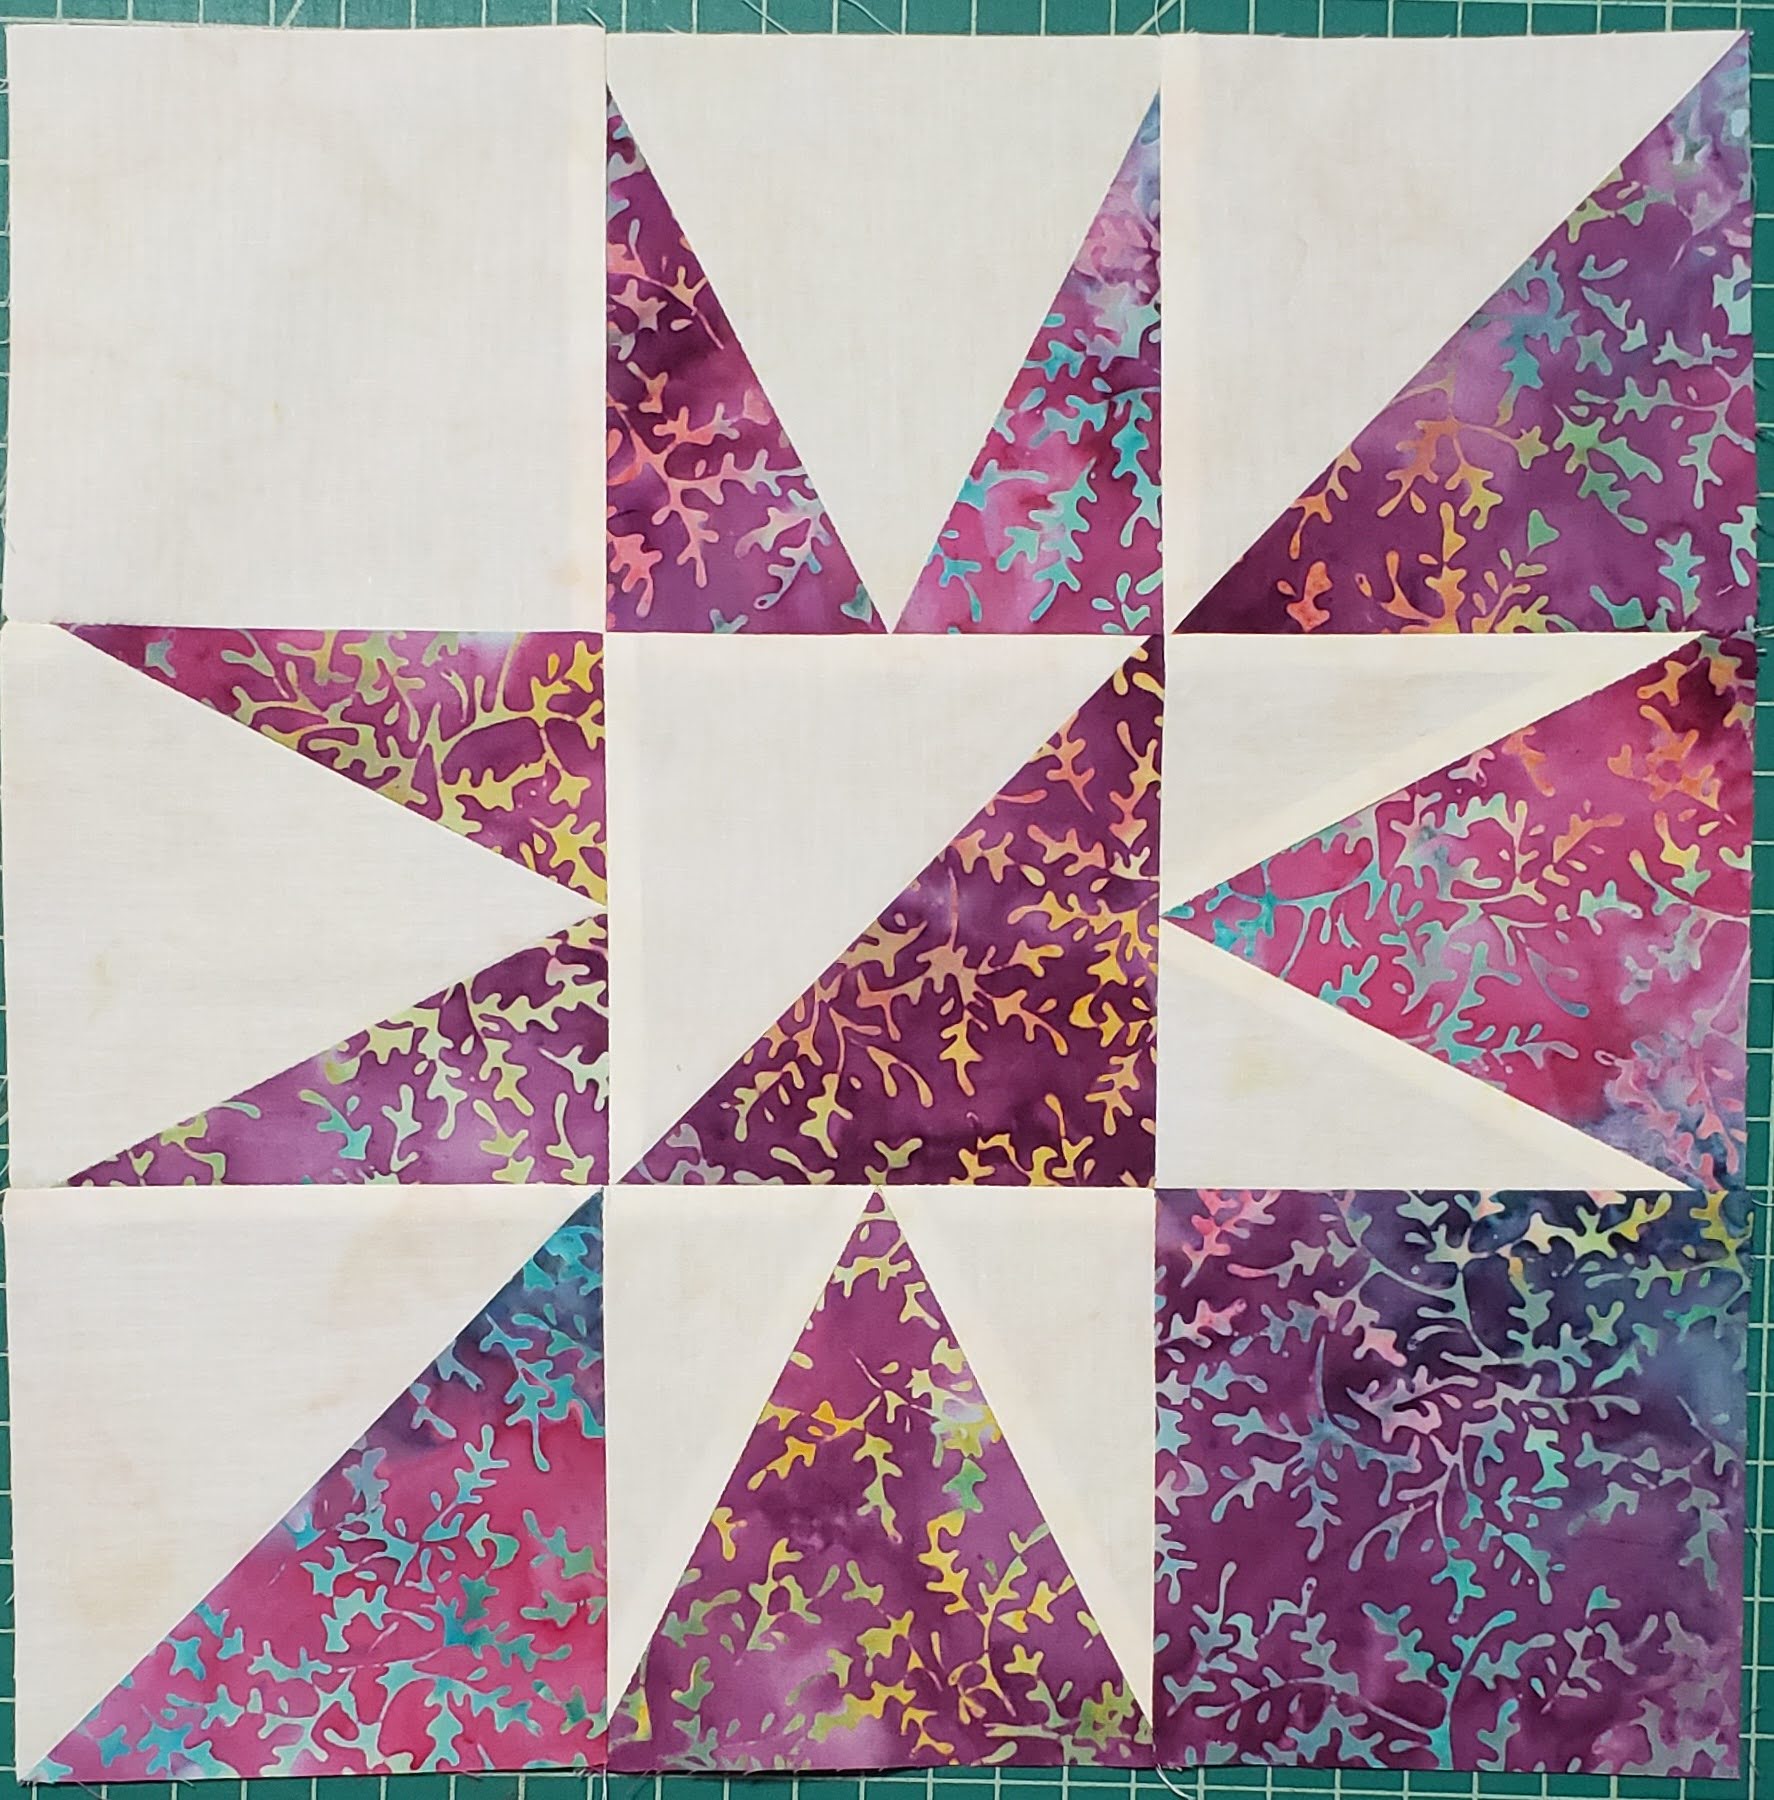
I decided to go with a simple block for the quilt. Each block is 12″ finished, and is made with some 4″ squares, 4″ Half Square Triangles (HST) and 4″ V Blocks.
Cutting Fabric for Blocks
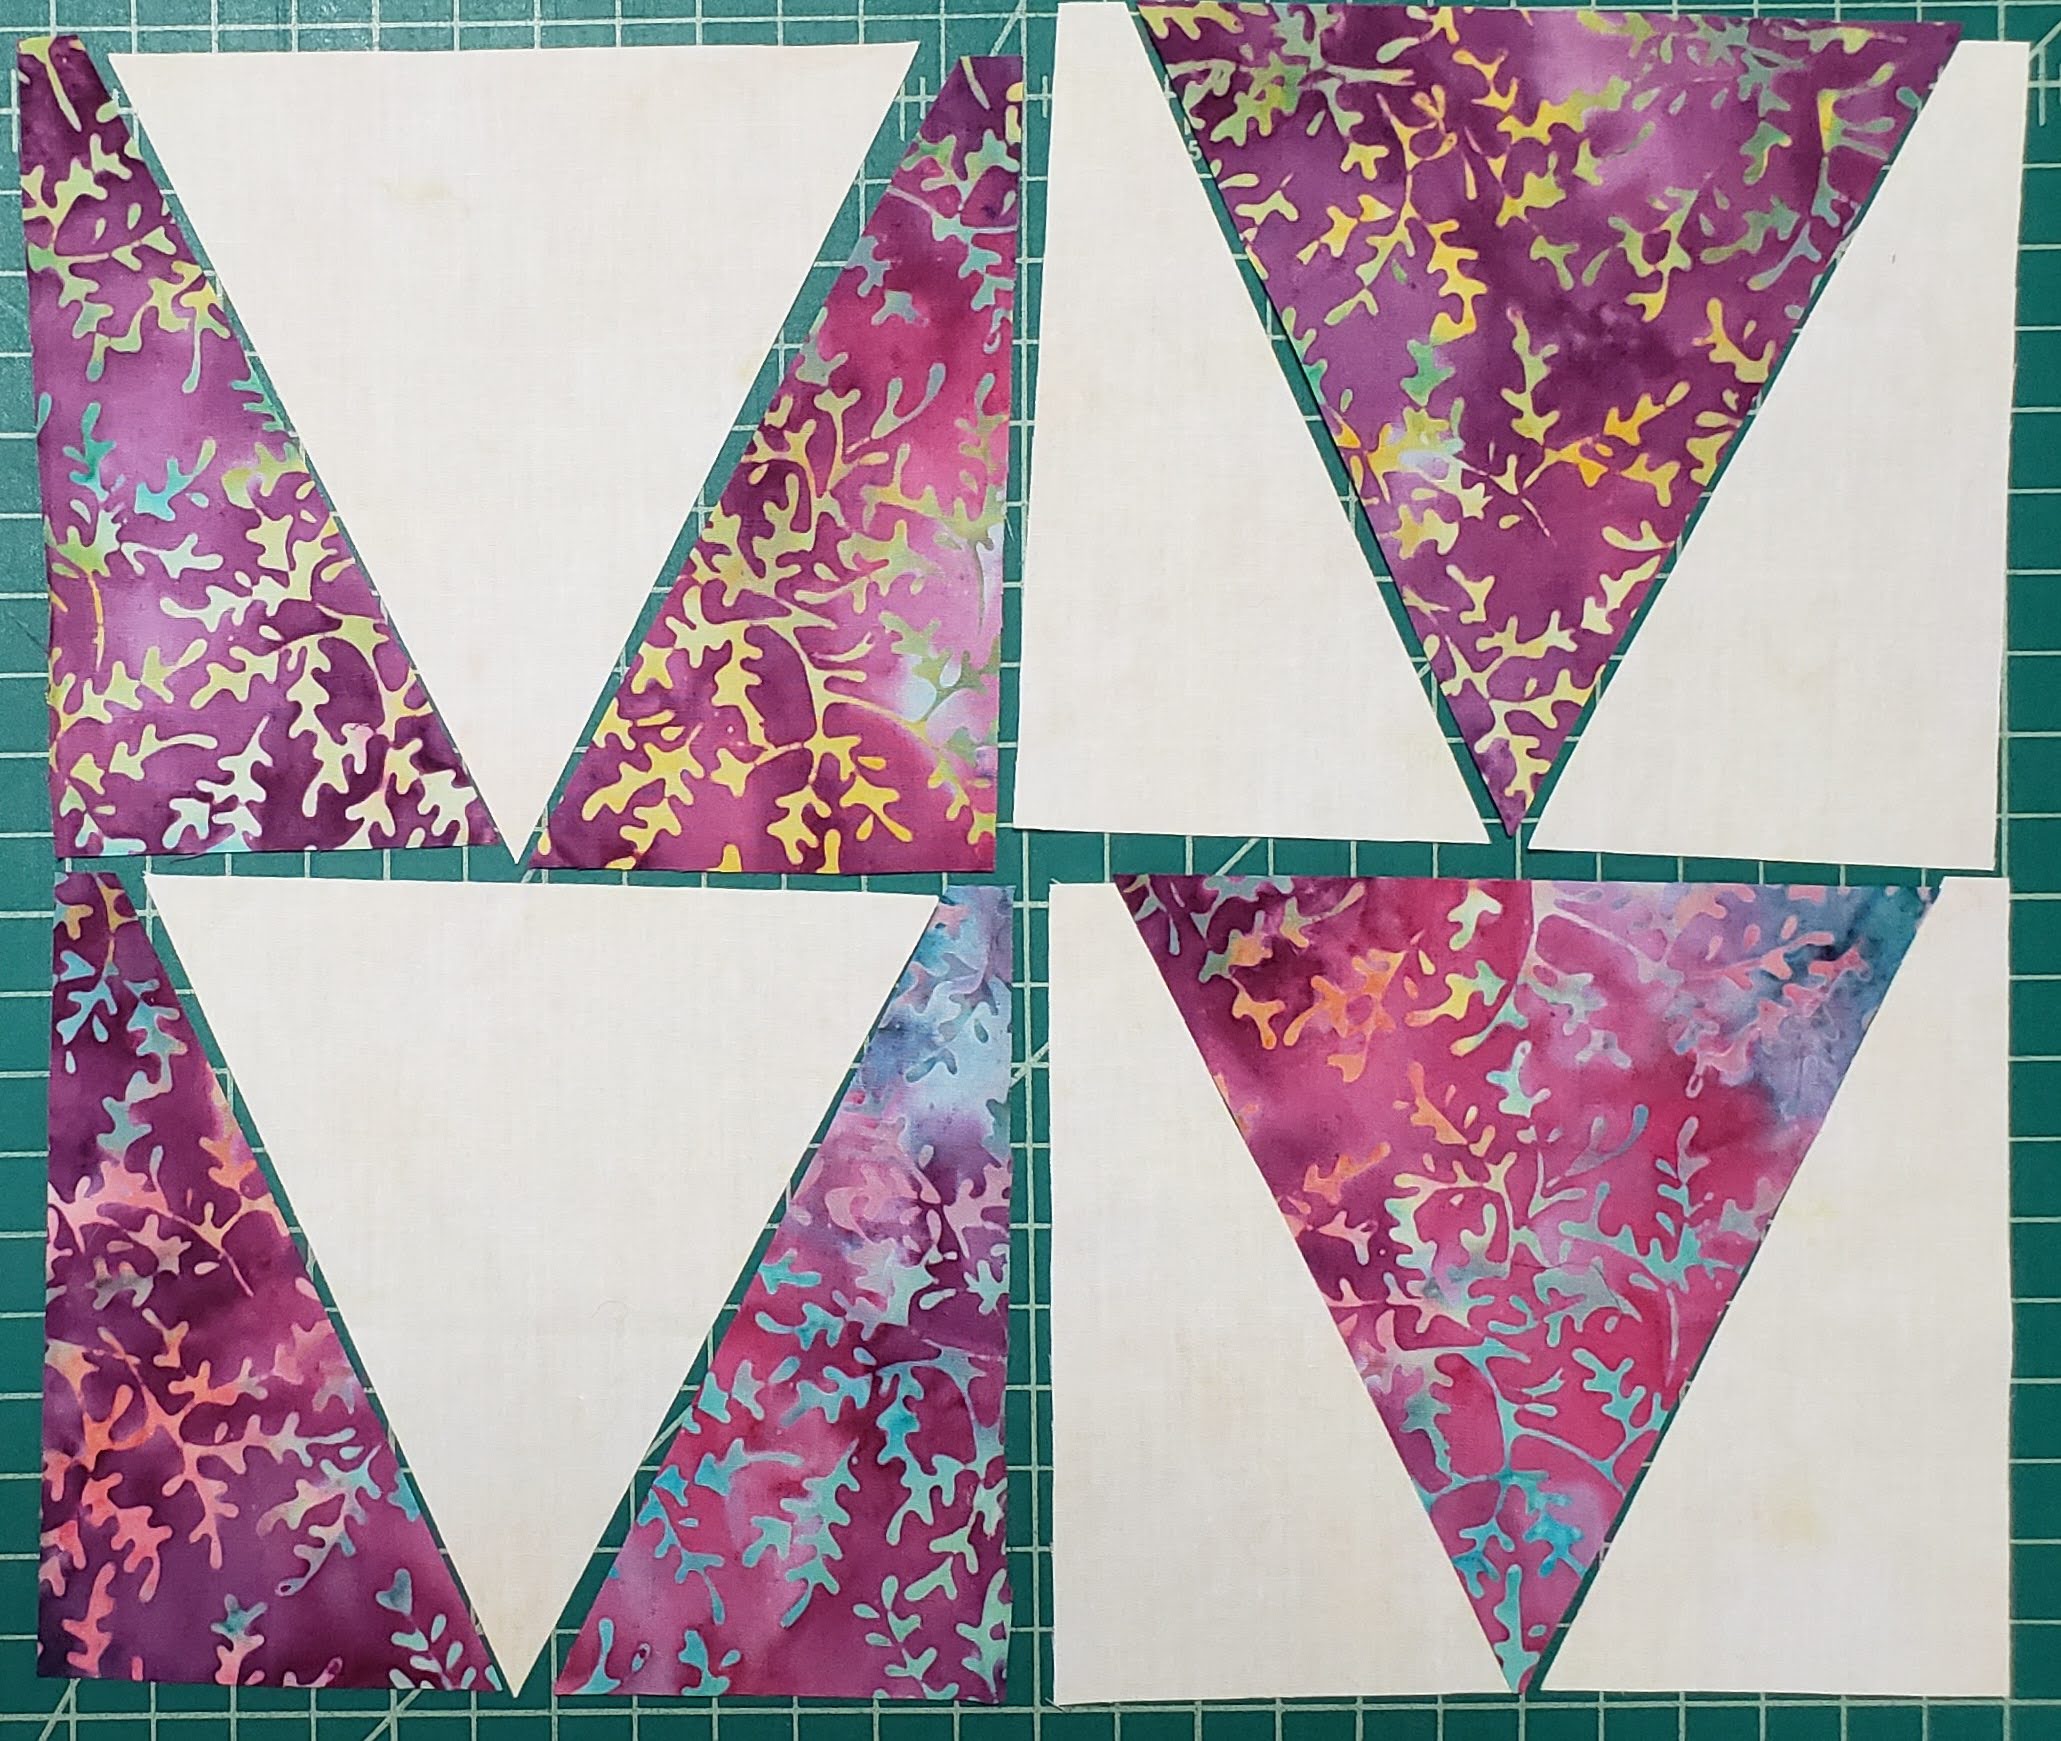
The first part is create the V Block. Each 12″ finished block will consist of four V Blocks, however, two with light center triangle, and two with a colored center triangle.
The V Block ruler has instructions for how to use, as well as multiple videos with the basic use of the ruler, and some extra ideas to create new patterns and designs.
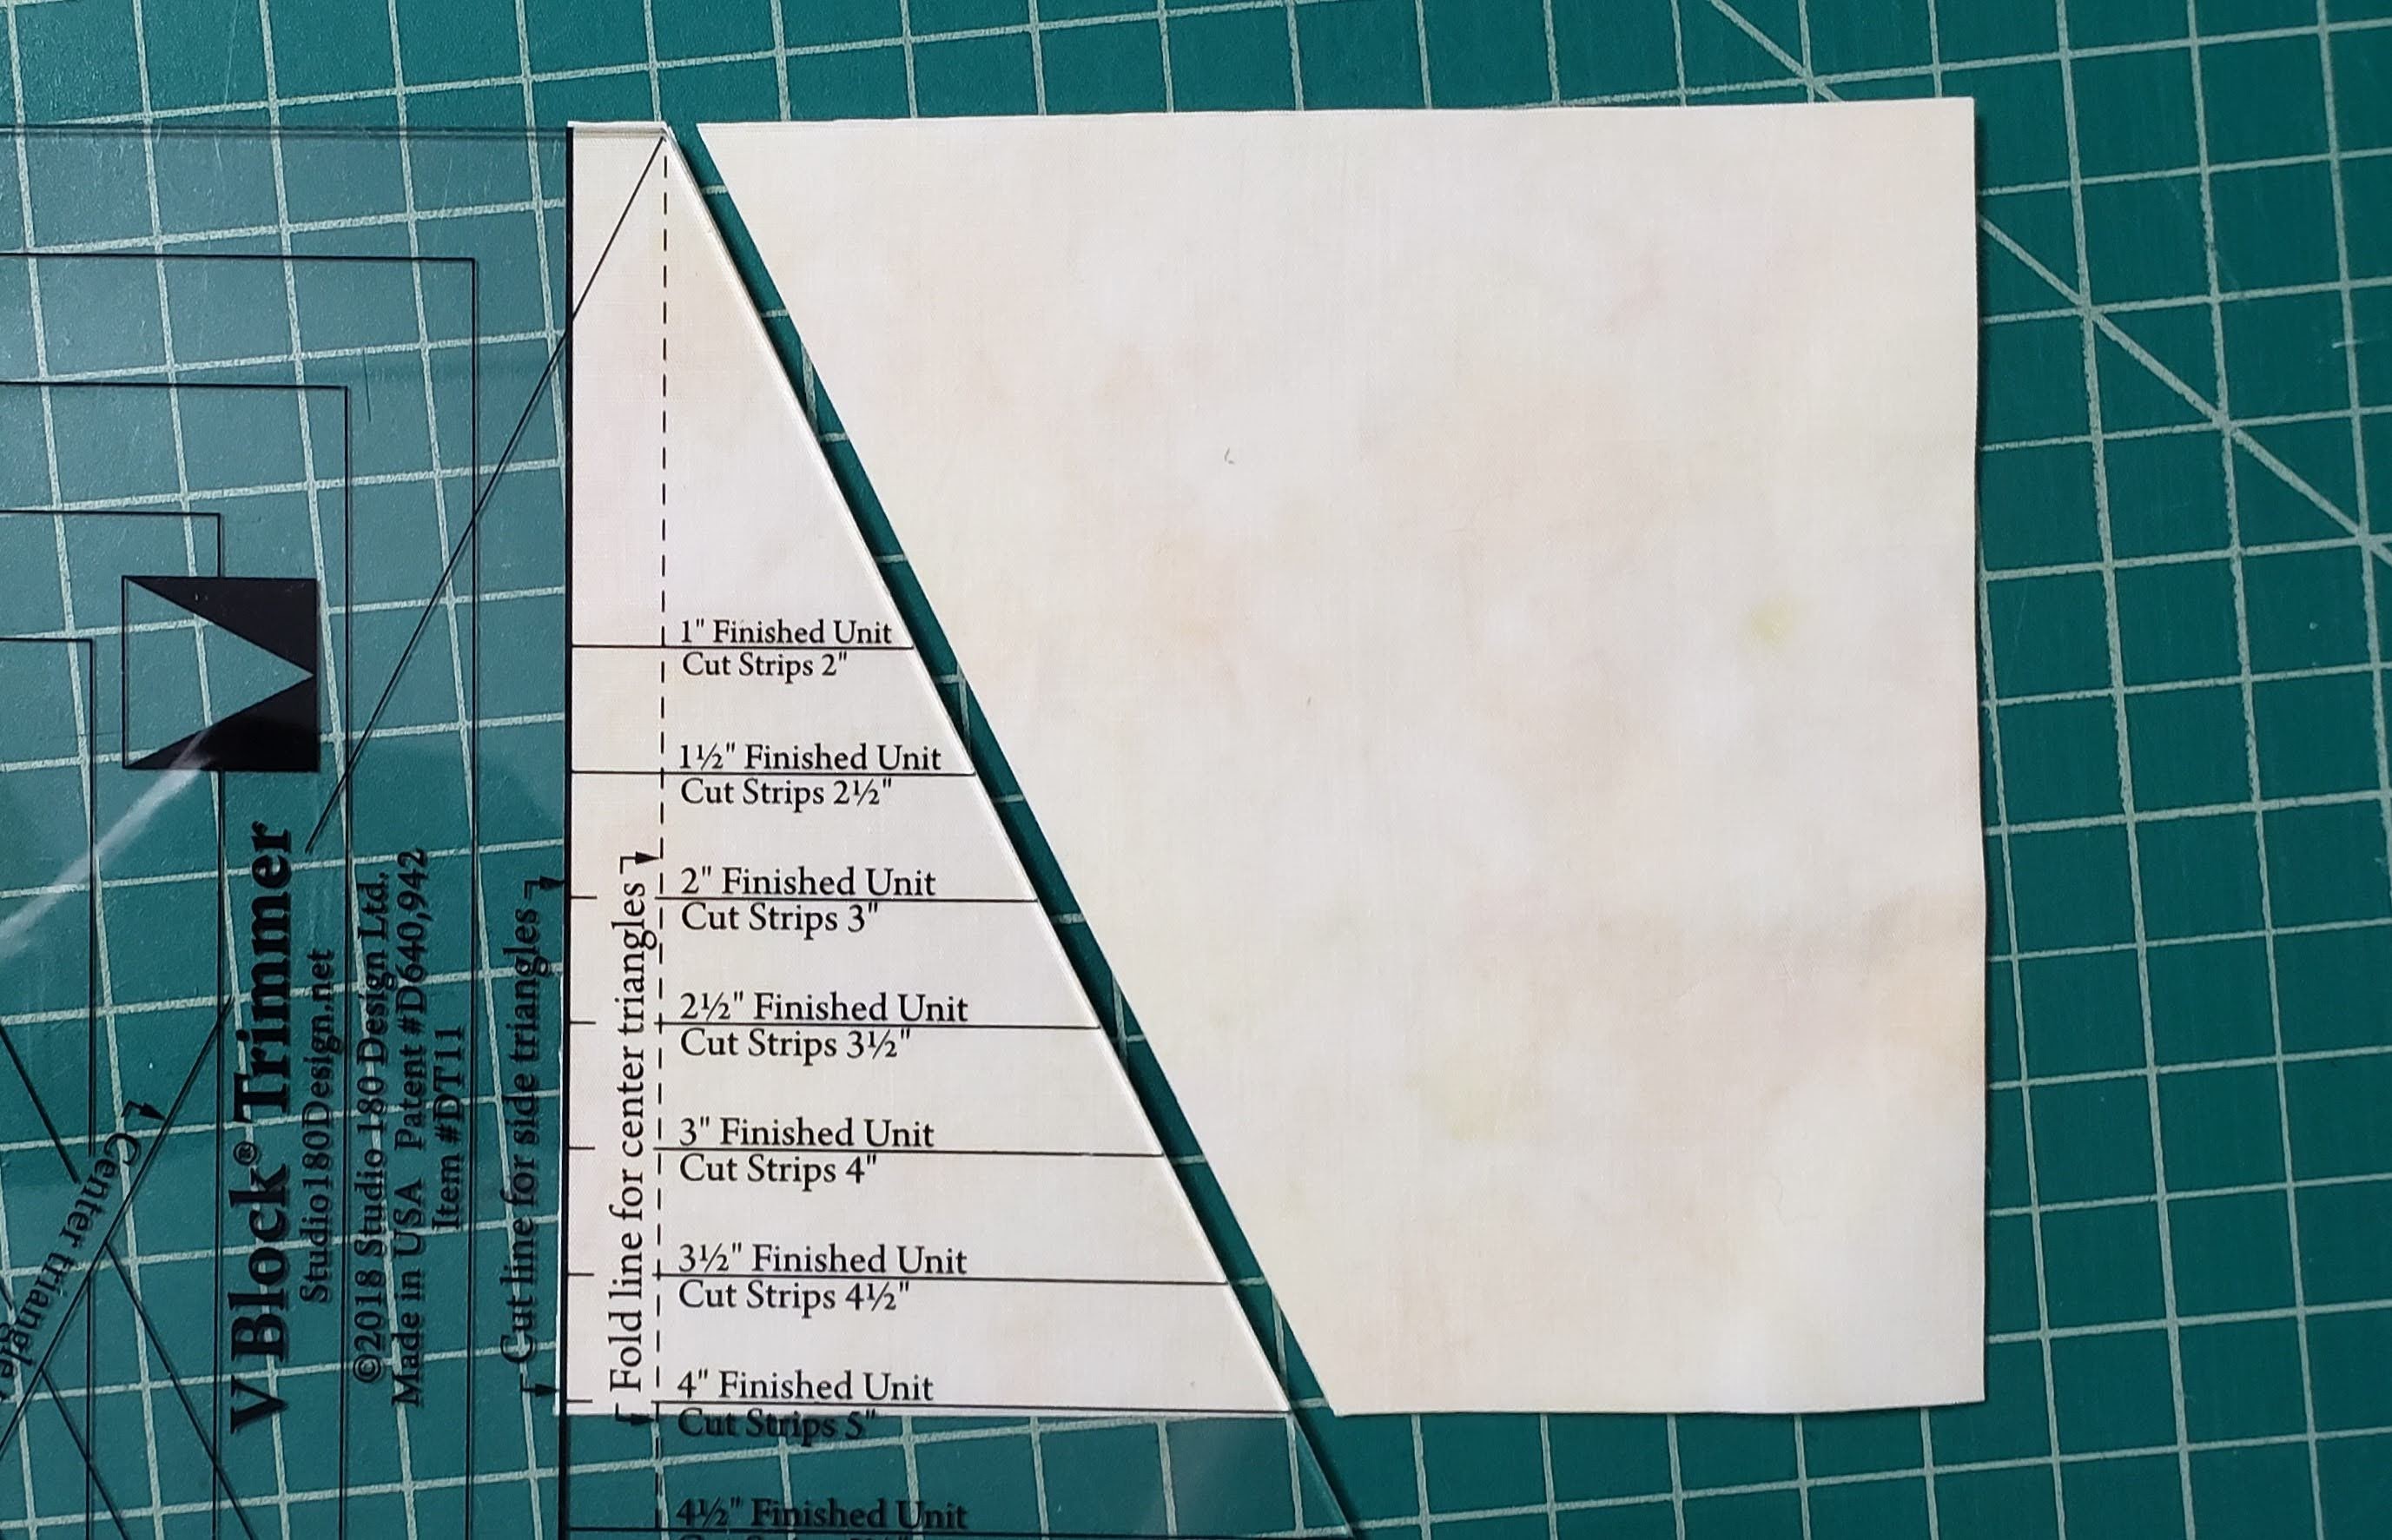
First you need to cut a strip of fabric based on the size your V block will finish at. I need mine to finish at 4″, so the ruler tells you to cut the fabric strip to 5″ strips.
Coordinating Fabric
All of my blocks use the “Ceramic” coordinating fabric, so when I cut the pieces for the blocks, I will need a total of 40 Center Triangles, and 40 sets of each side triangles. So I went ahead and cut these to start. When cutting the side triangles, make sure that you have the two layers opposite directions, wrong sides together, or right sides together. So as you cut pieces, you get a right and left piece.
You need 20 – 4 1/2″ x 4 1/2″ squares cut from the Ceramic fabric as well.
You need 30 – 5″ x 5″ squares for the Half Square triangles. (You will only need 3 Half Square triangles for each block, you can create 4 for each, or I will show you later how to create only 3 for each, and have an extra triangle left over. (if you make 4 of each, you will need an 48 squares cut).
Color Fabric
Select the 20 fabric that you would like to use for your top. You can use how many fabrics you want between 1 and 20 pieces of fabric. (You will need about 5″ x 25″ strip for each 12″ block)
My fabric bundle came with 20 different fabrics, Initially I was going to use 12 of the for the main part of the quilt, but once I laid them out, I decided to use all 20 fabrics and make a larger quilt.
For this quilt, you need to cut 5″ strips of each fabric per block.
You will need
- Cut two sets of the side triangles
- Cut two center triangles.
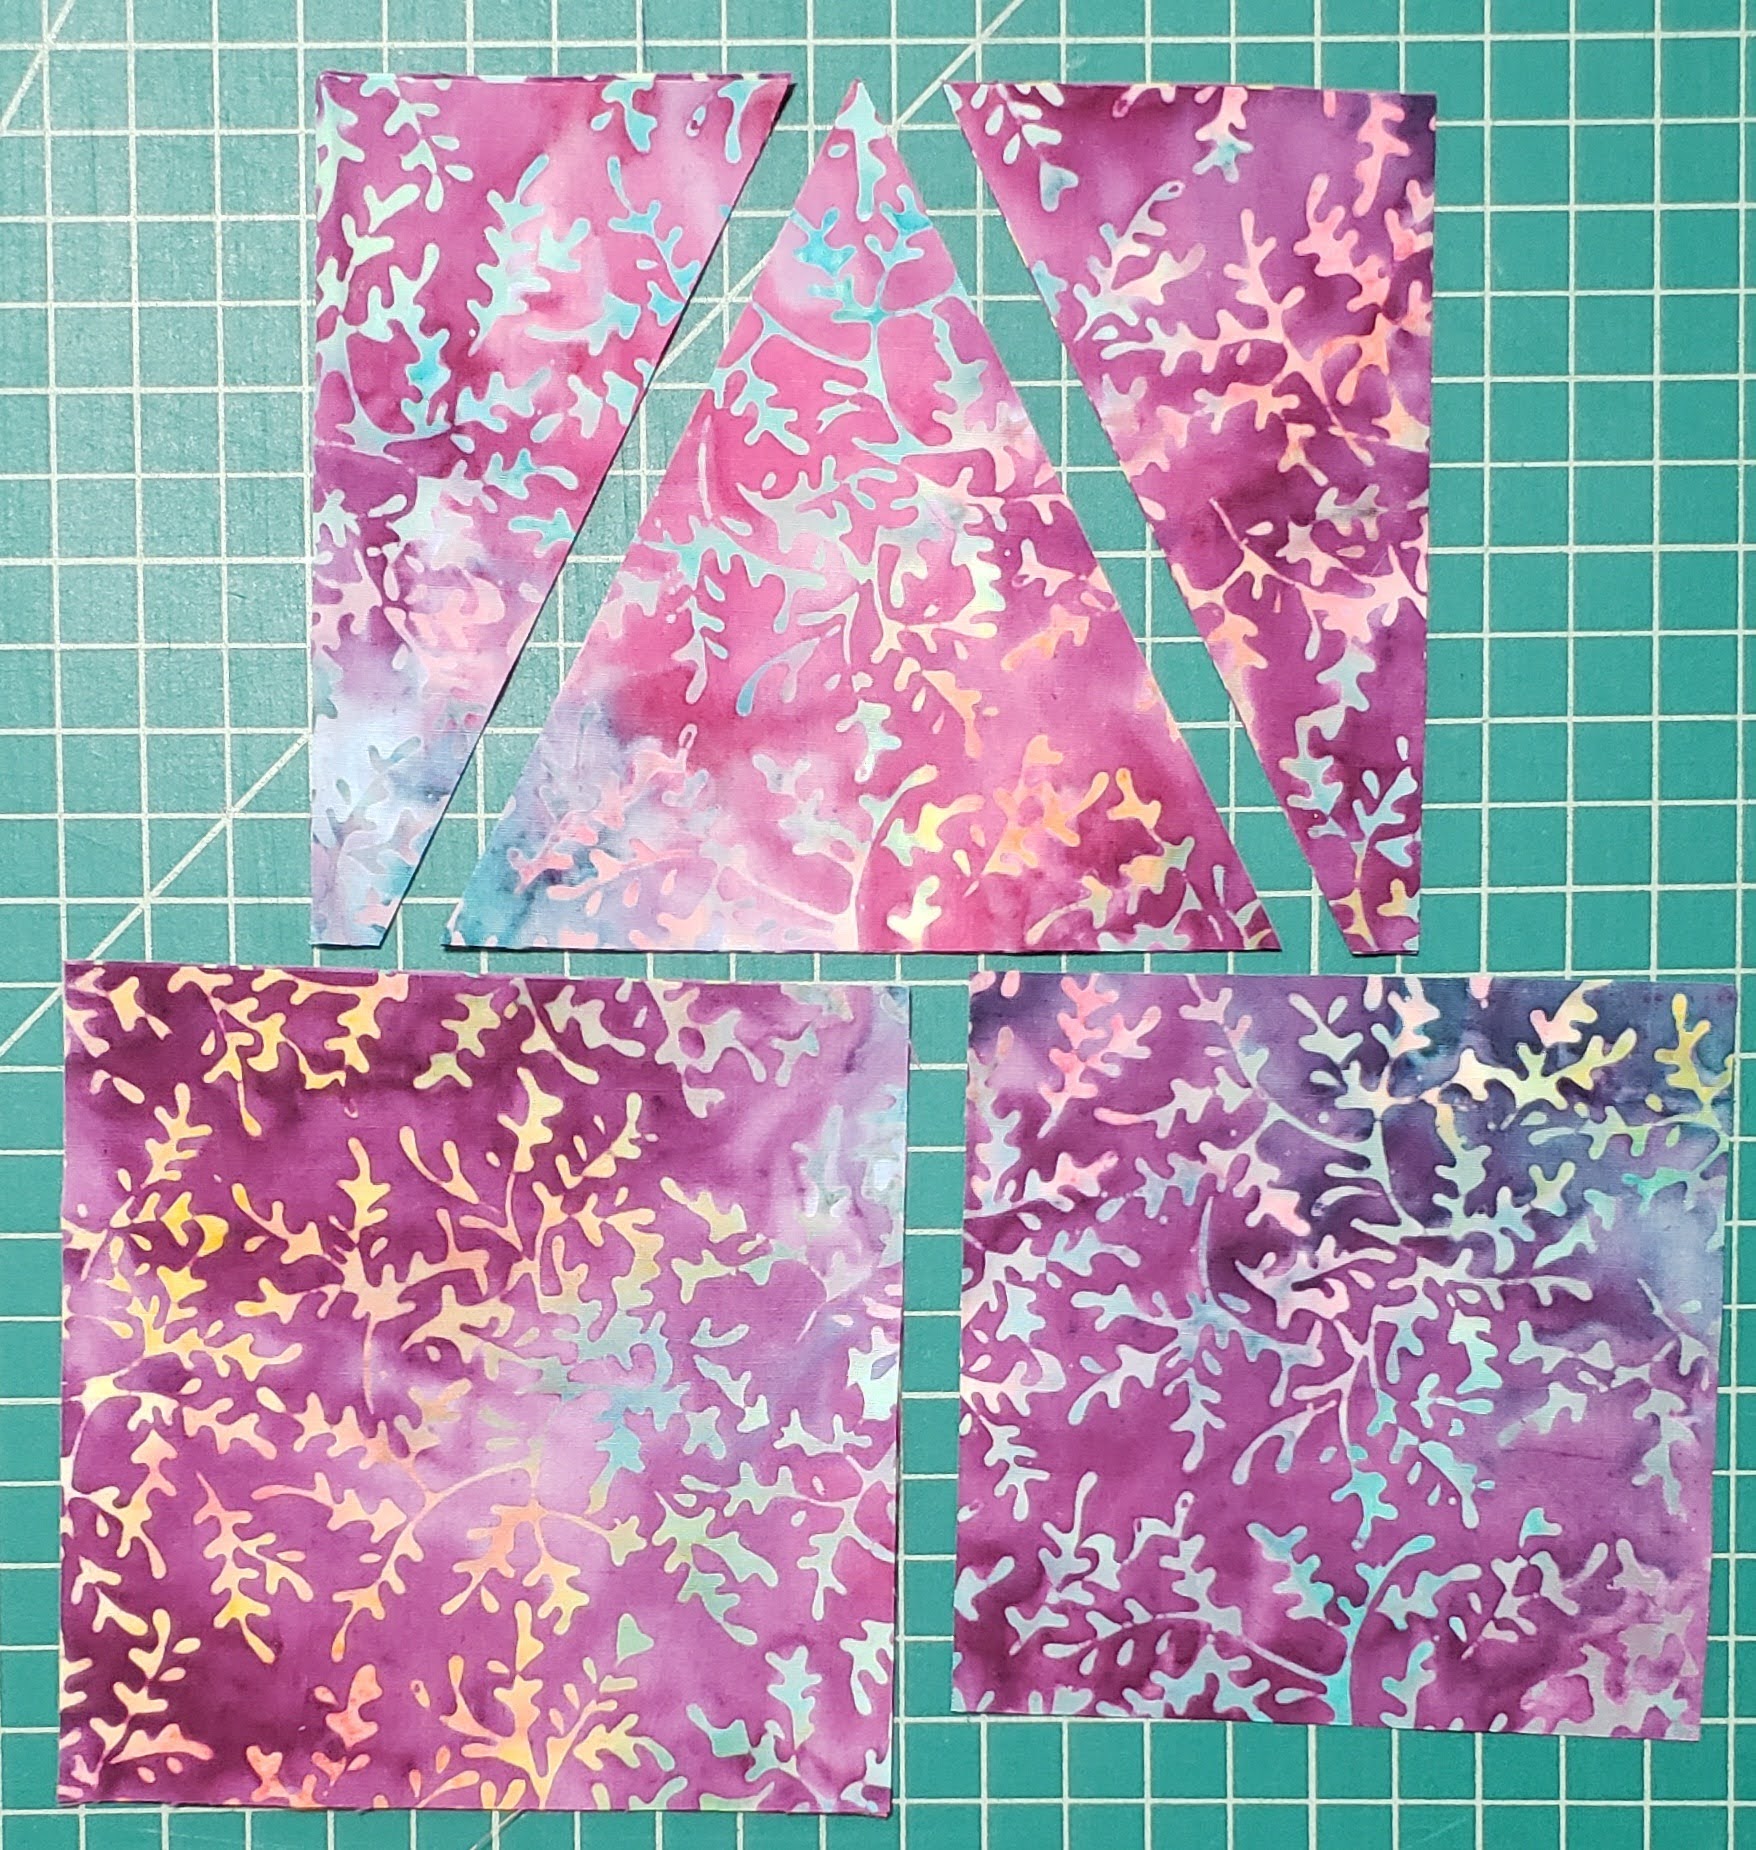
Note: The best way to cut the triangle pieces, would be to cut one set of the side triangles, then the center triangles, then the other set of side triangles. This way you do not waste any fabric. Or cut each set as you go a side triangle, center, and the other side triangle (see picture).

To cut the triangle pieces, lay down your strip (two Layers, wrong sides together), then cut your first side triangle pieces.
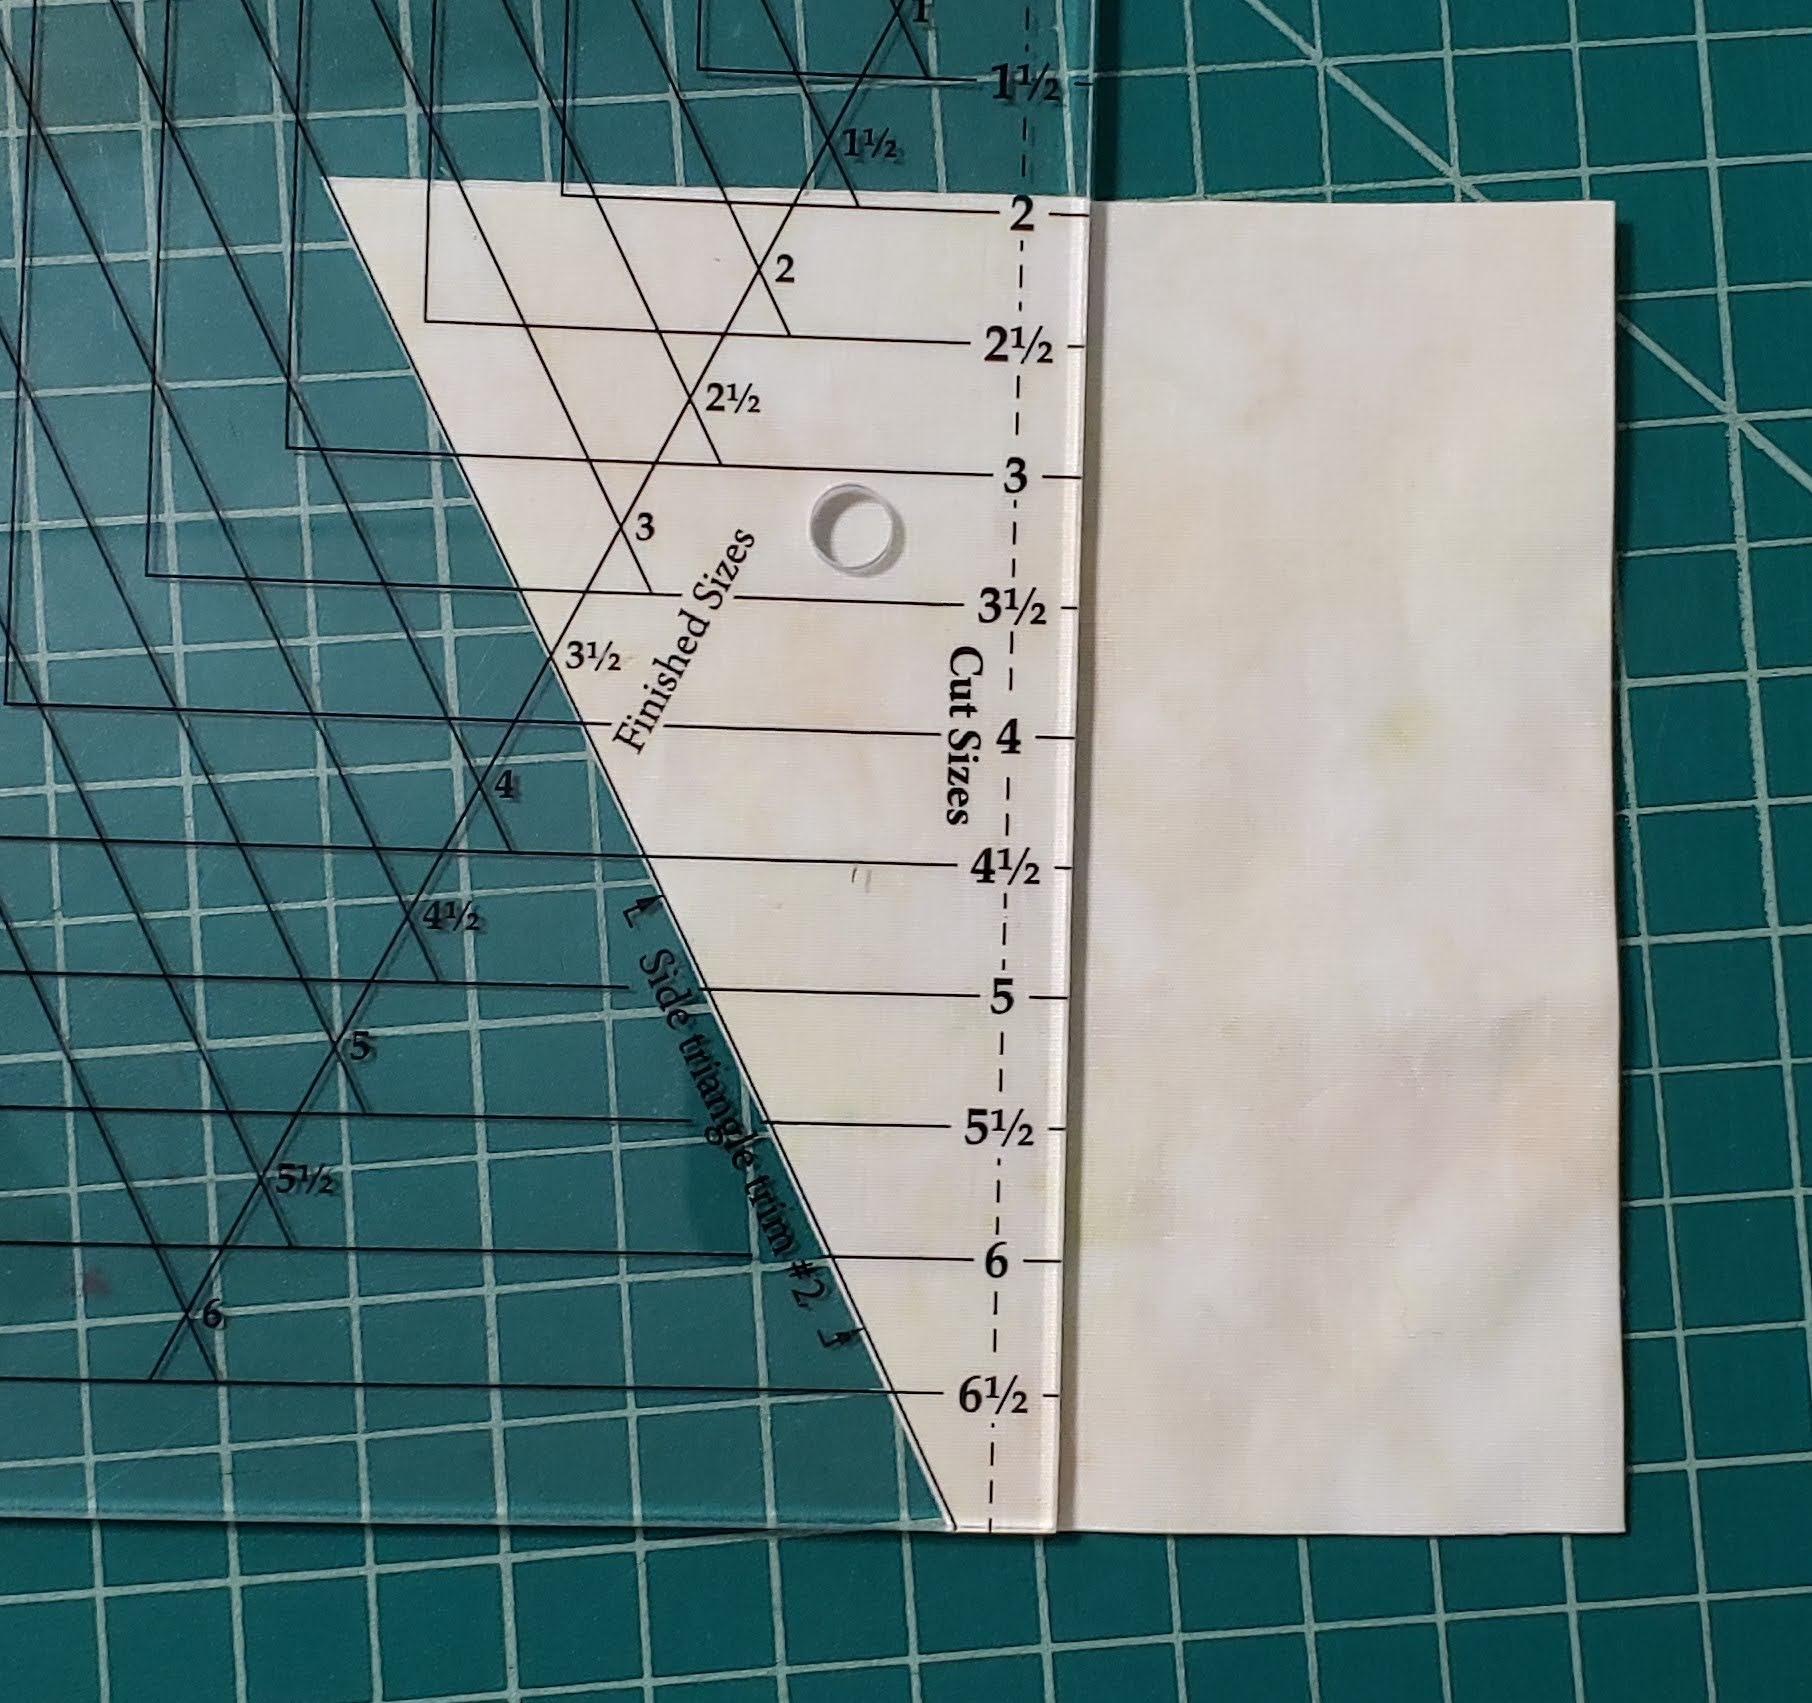
Flip the fabric over, top to bottom, and cut out the Center triangle. (two layers thick)

Rotate the ruler around, and cut the other set of side triangles (two layers thick).
Repeat this until you have two sets for each block in your quilt.
After you have the triangle pieces you will need to also cut the following for each colored fabric (for each block).
- Cut two 5″ squares (for the Half Square Triangles).
- Cut one 4 1/2″ square (trim down from 5″ to 4 1/2″) – open up fabric to only cut one.
You should have the following pieces cut for each fabric (or block).
Cut the remaining fabric pieces needed or the size of your quilt.
Assemble the V Blocks
Using the Side triangles and the Center Triangles, you will assemble the V Blocks.
The best way to assemble is to do chain piecing of the blocks.
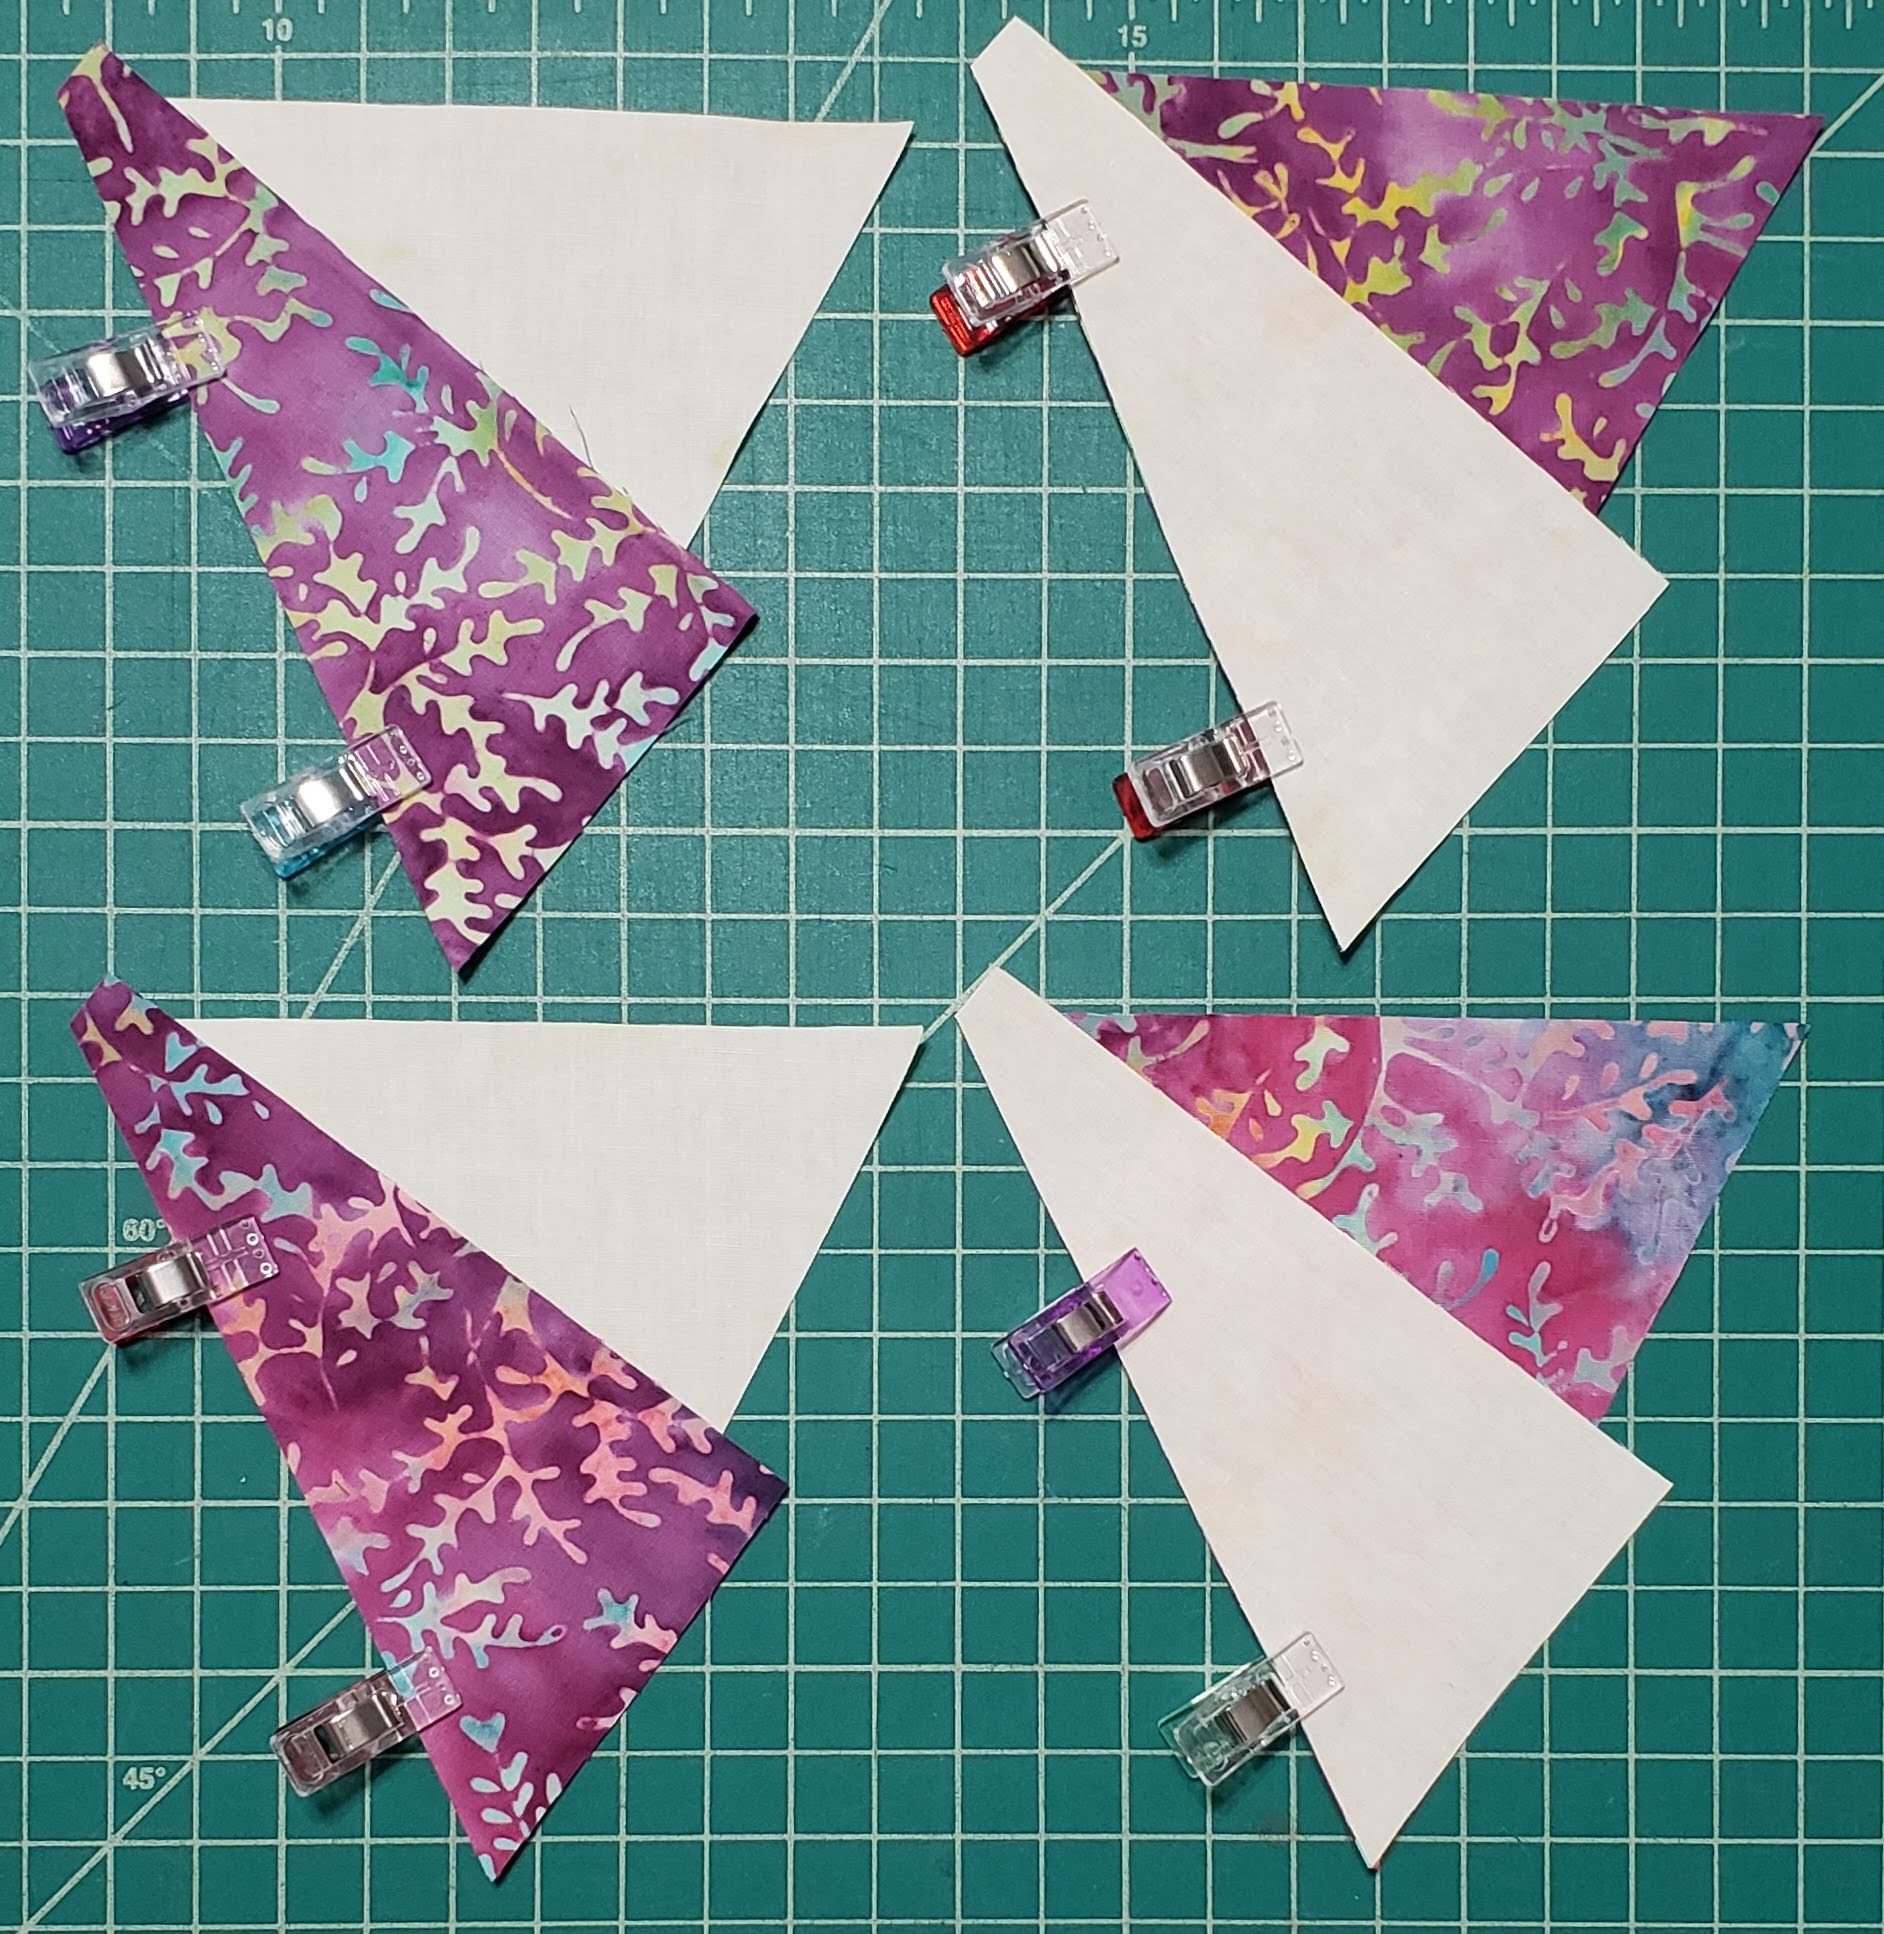
Create two stacks (or rows), with the Coordinating Center triangle in a stack, and the color side triangles, making sure that you keep the color pieces matching on the side stacks.
The other stack will be the color center triangles with the coordinating side triangles on the sides
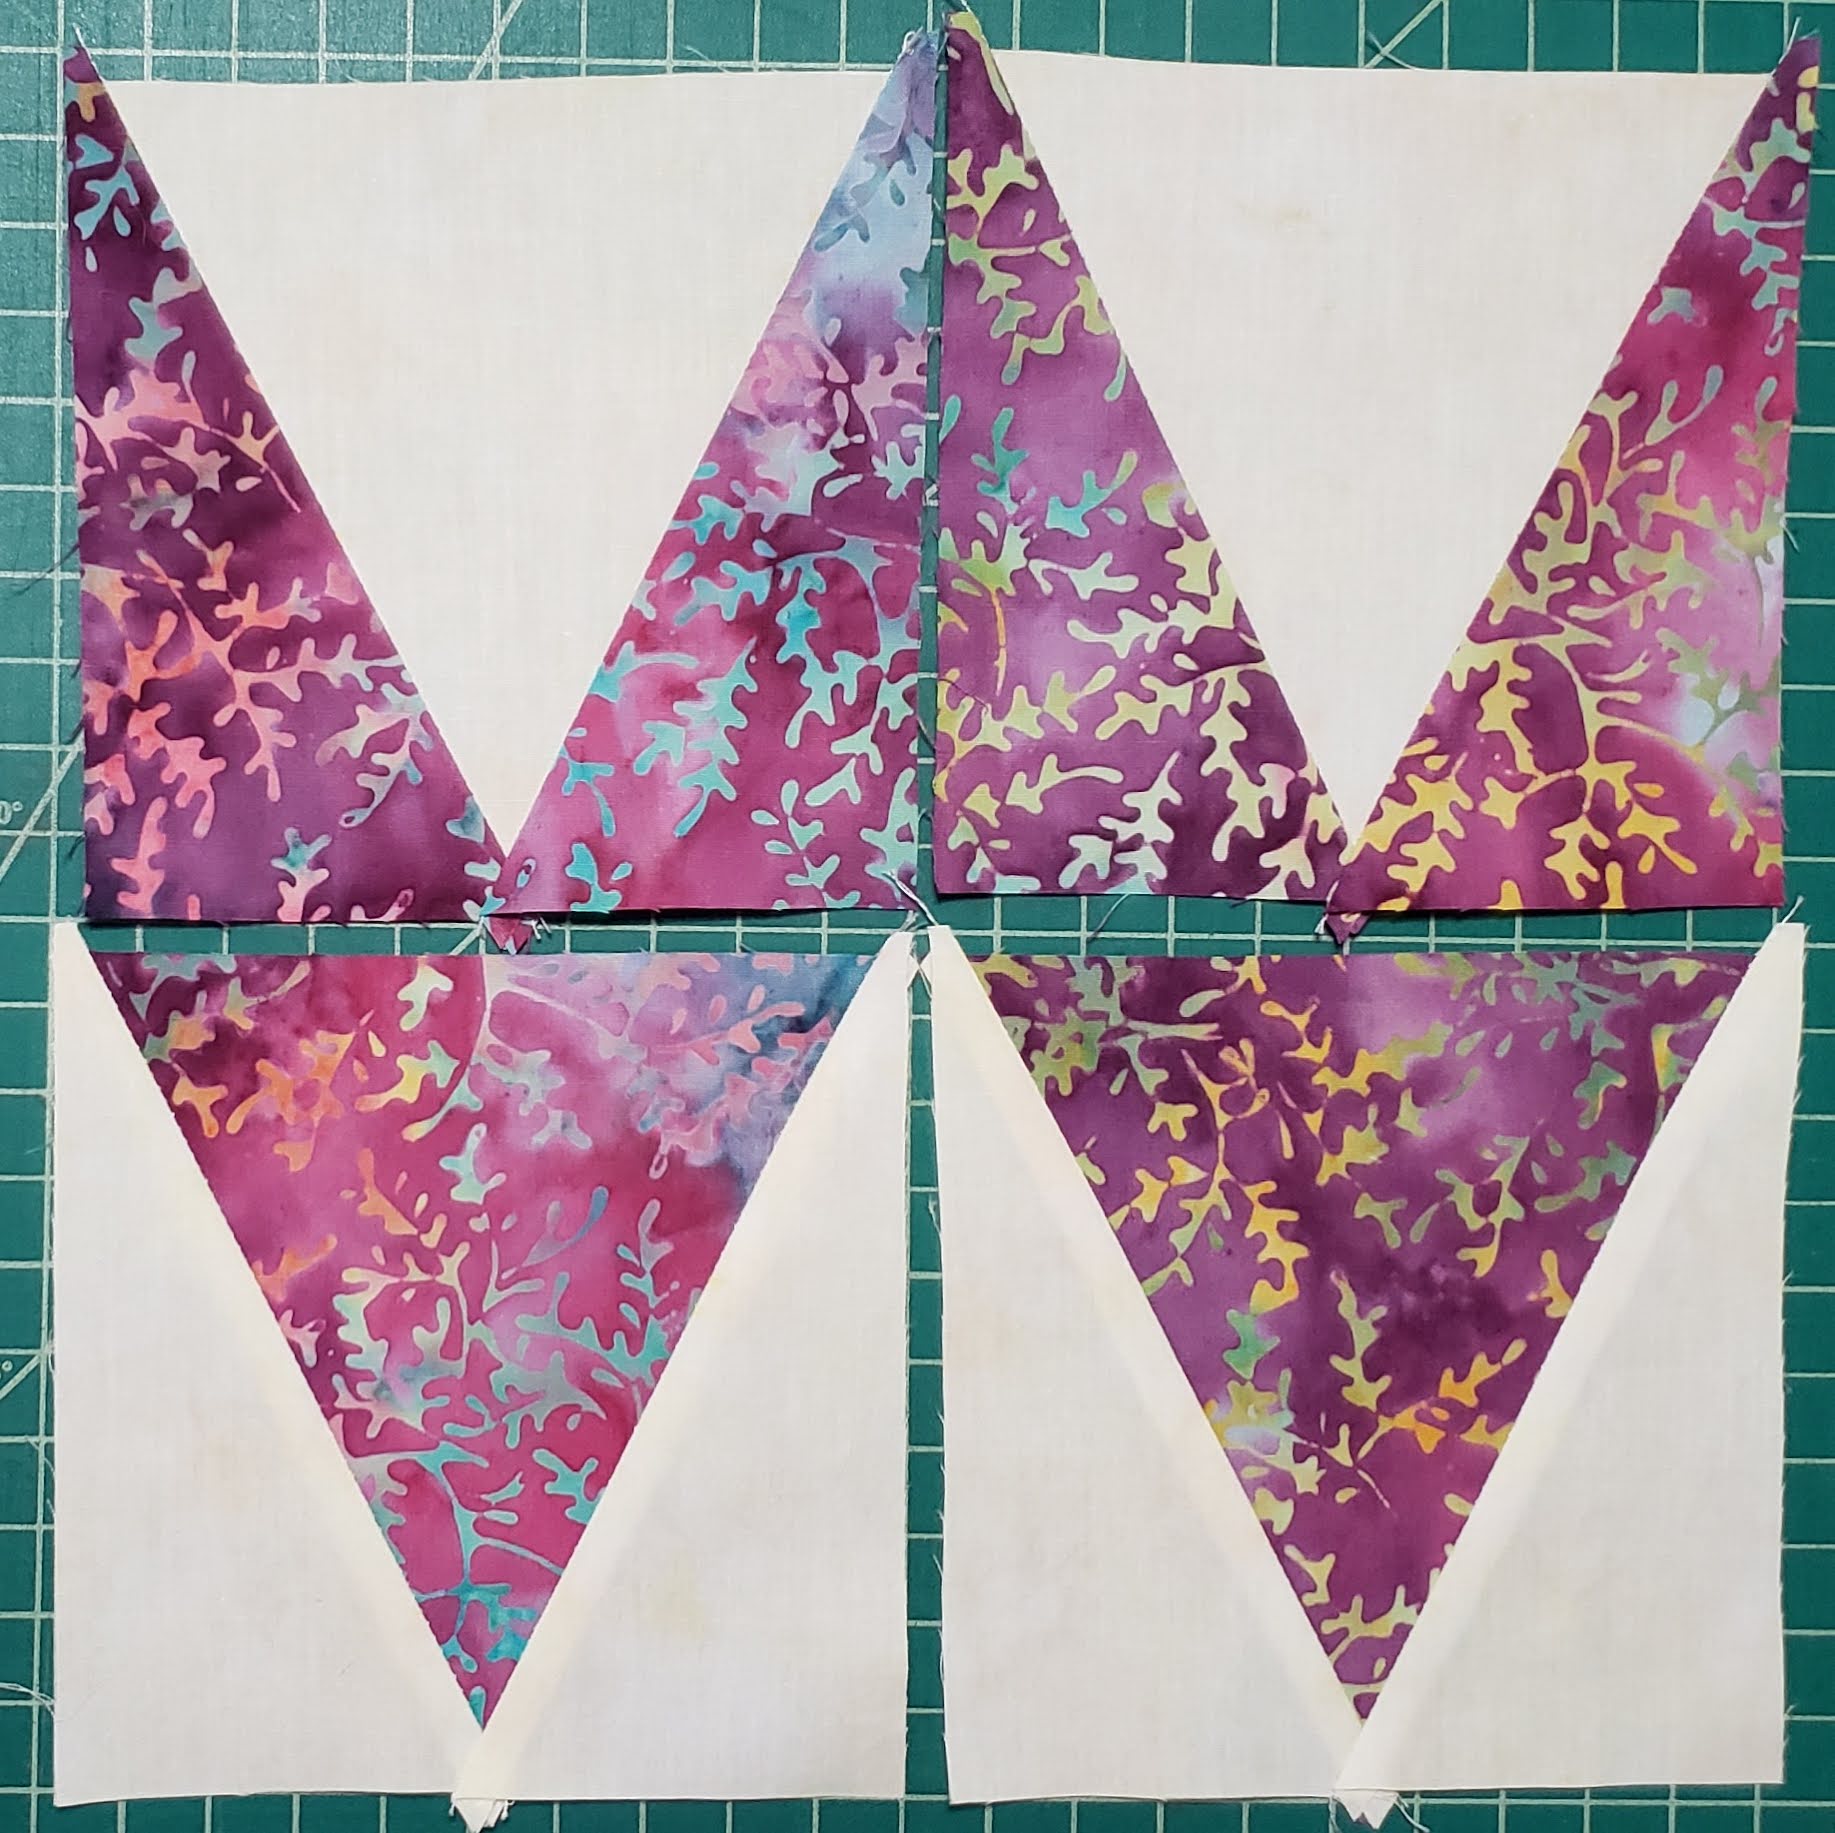
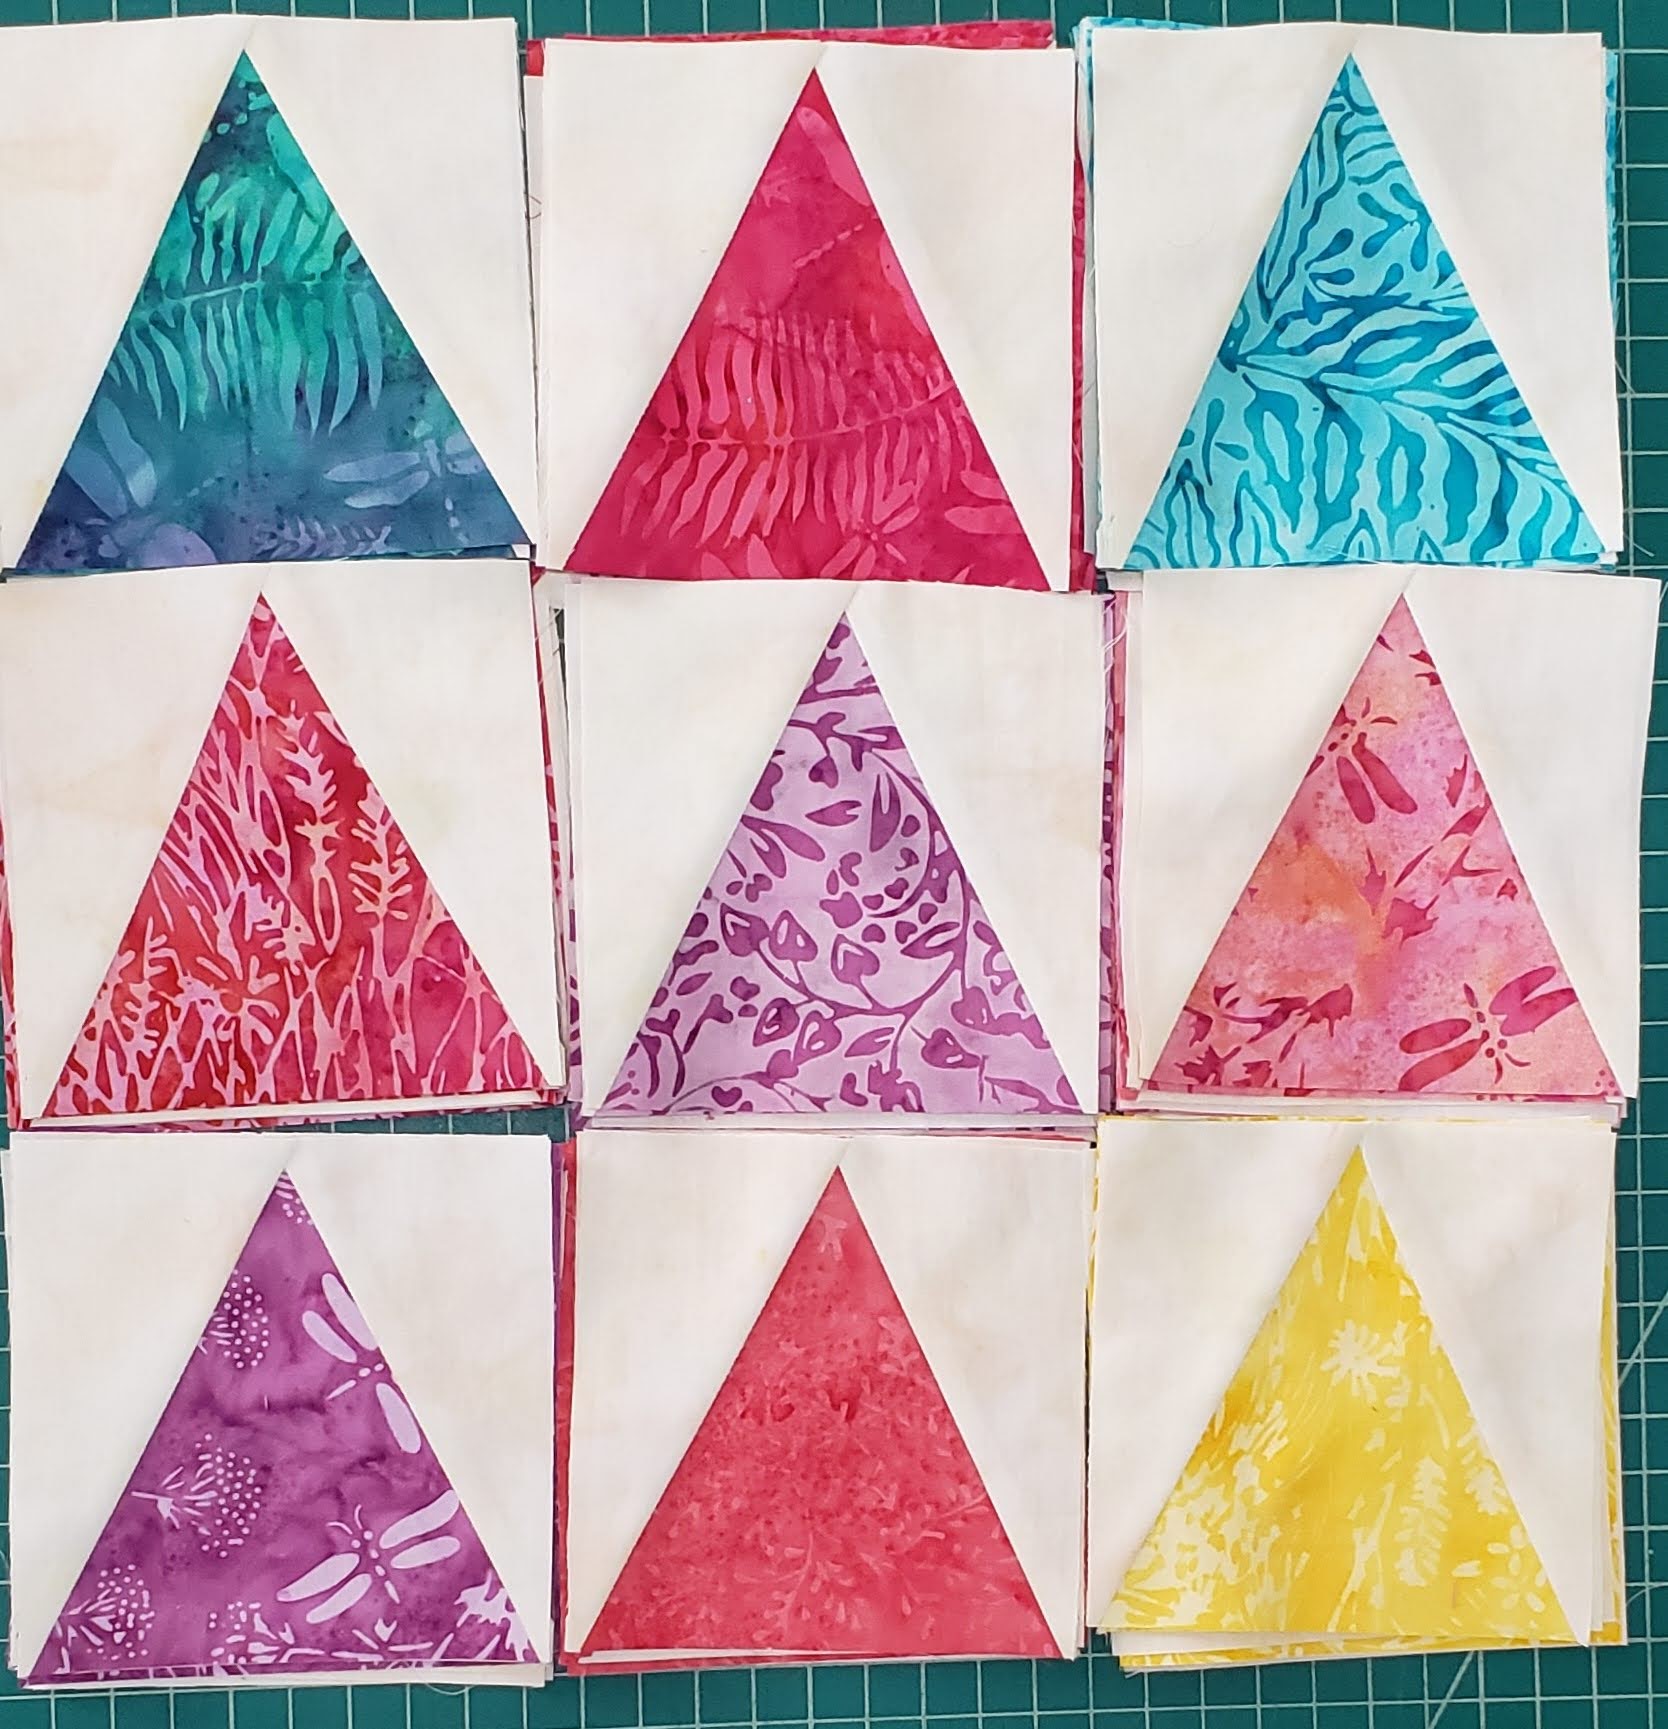
Here are several of my V-blocks laid out to sew.

Start with the right side triangles, and match to the center triangles, and then sew 1/4″ seam allowance.
Press the seams towards to smaller piece, to reduce the bulk at the center piece.
Separate the pieces, and then place in a stack, making sure that the color side pieces are in the same order, and sew the left side 1/4″ seam.
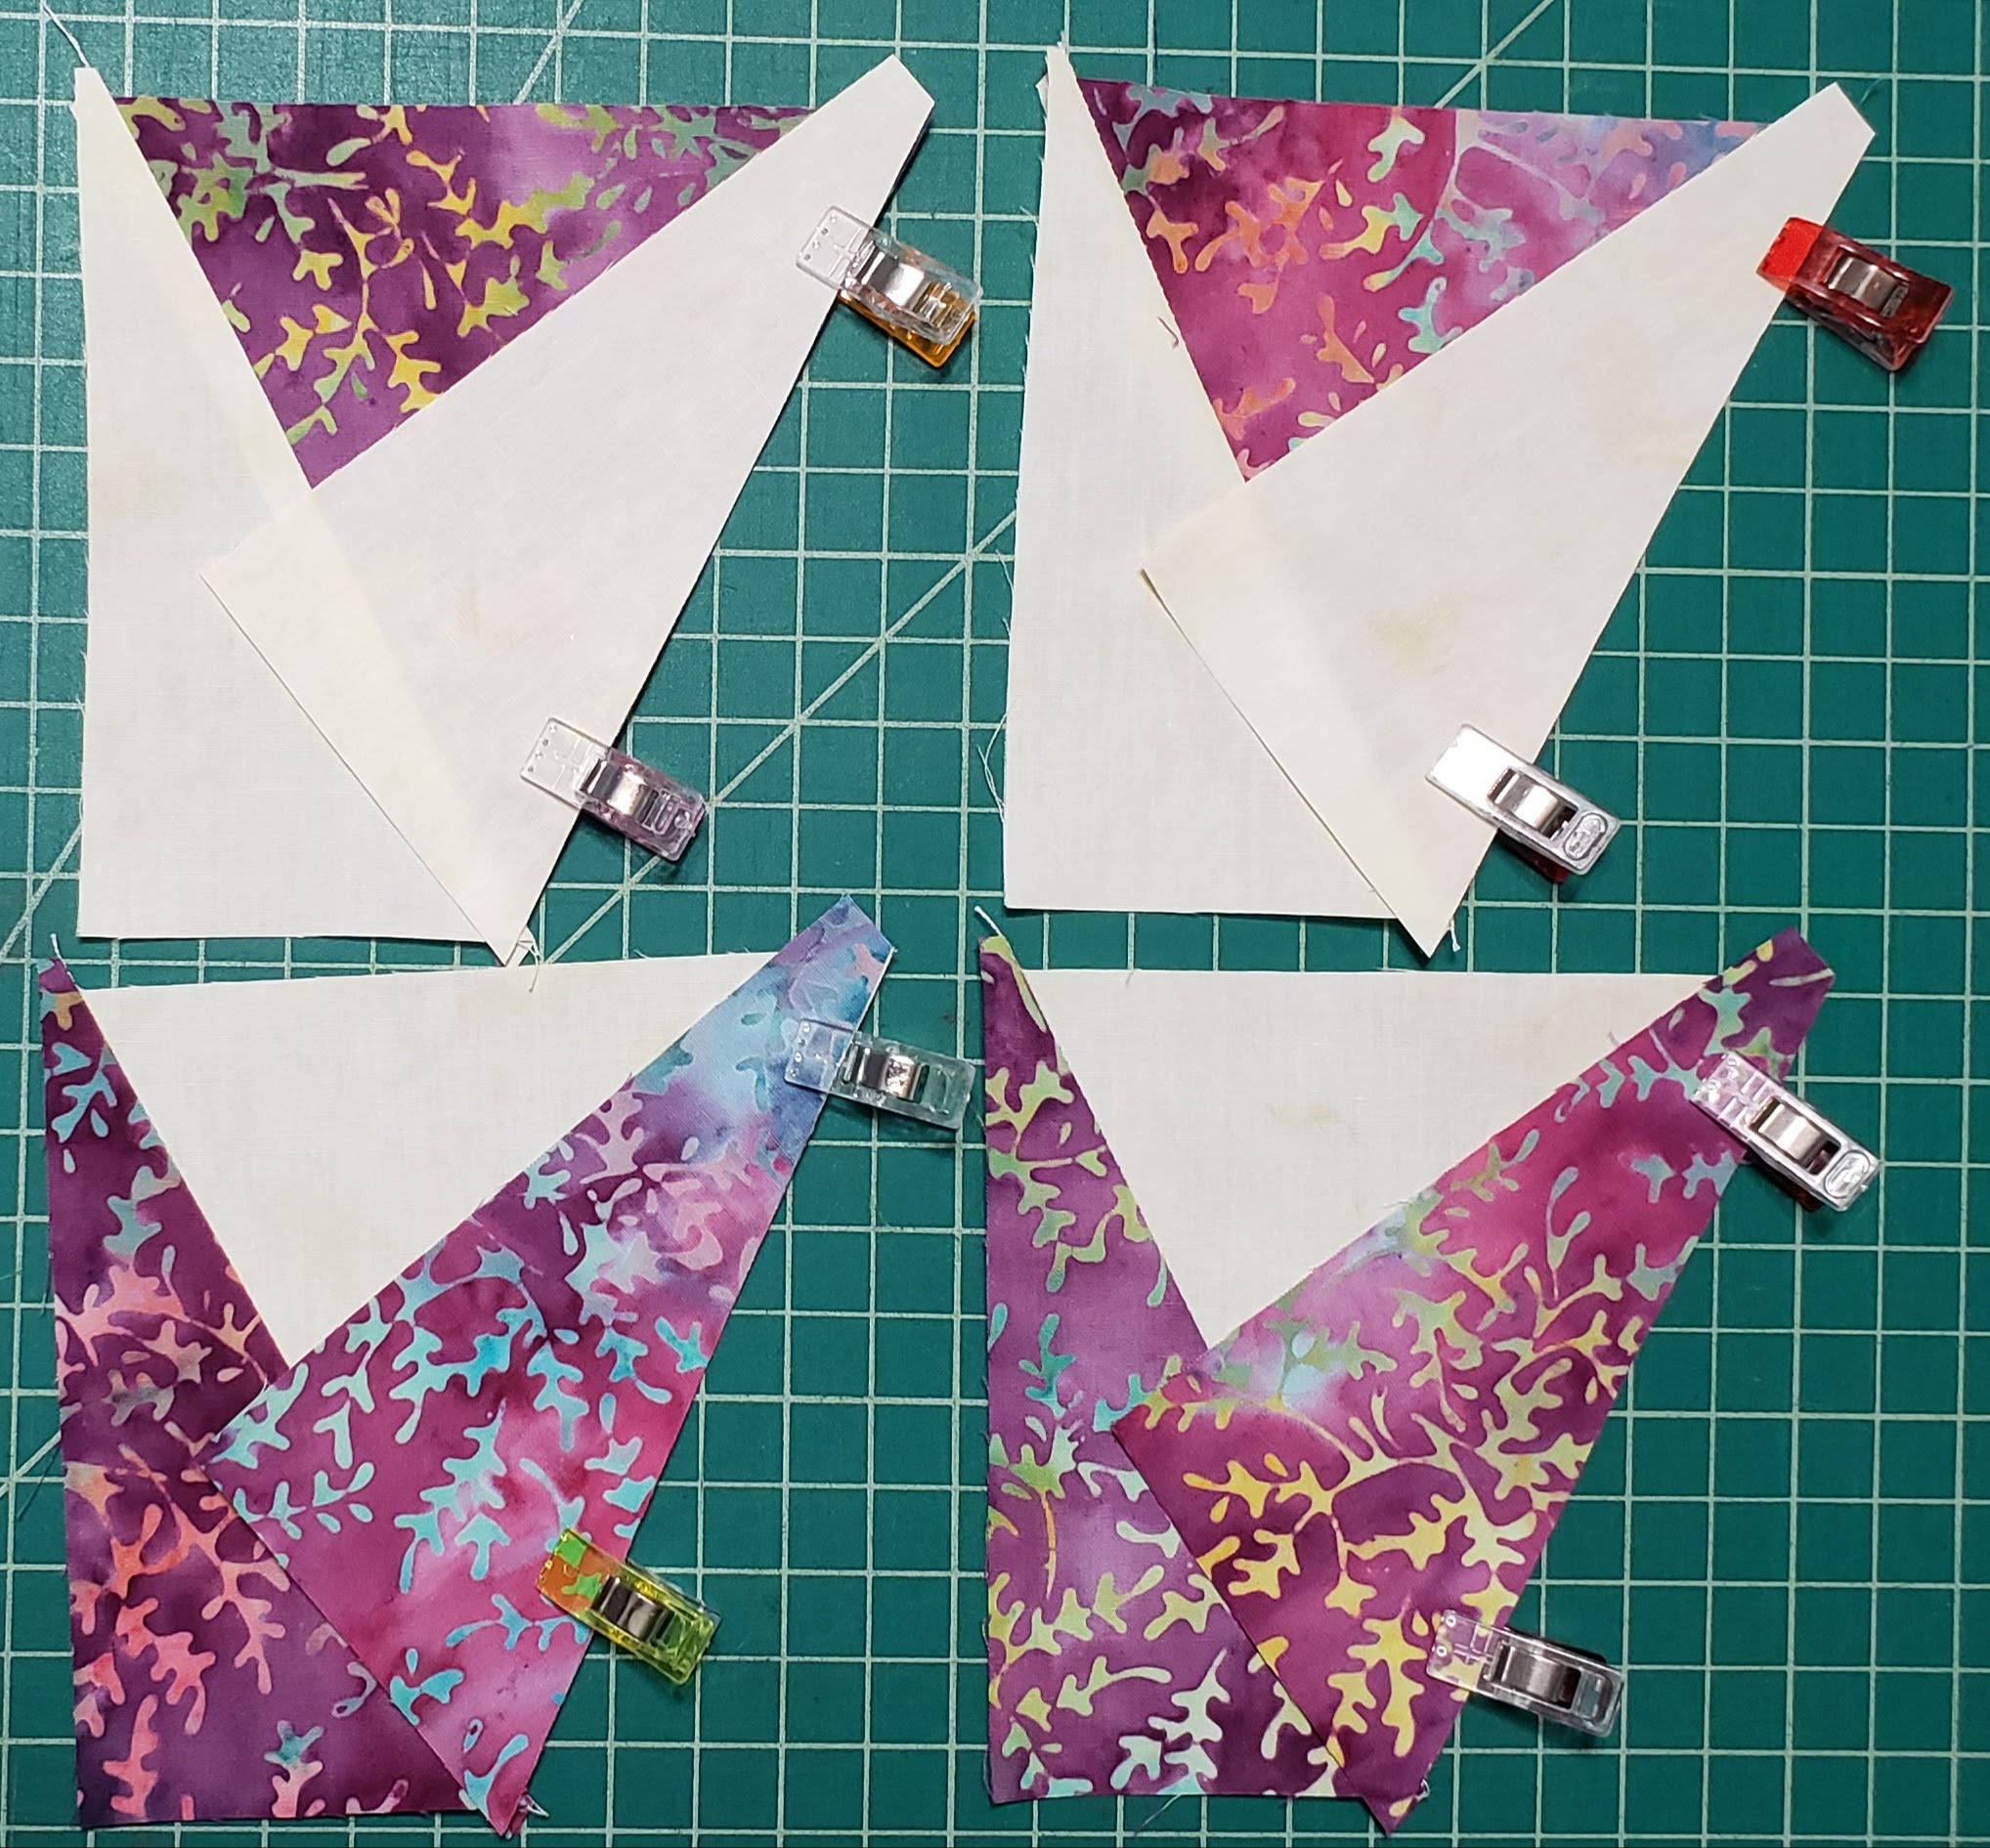
Press the seams again towards the smaller piece.

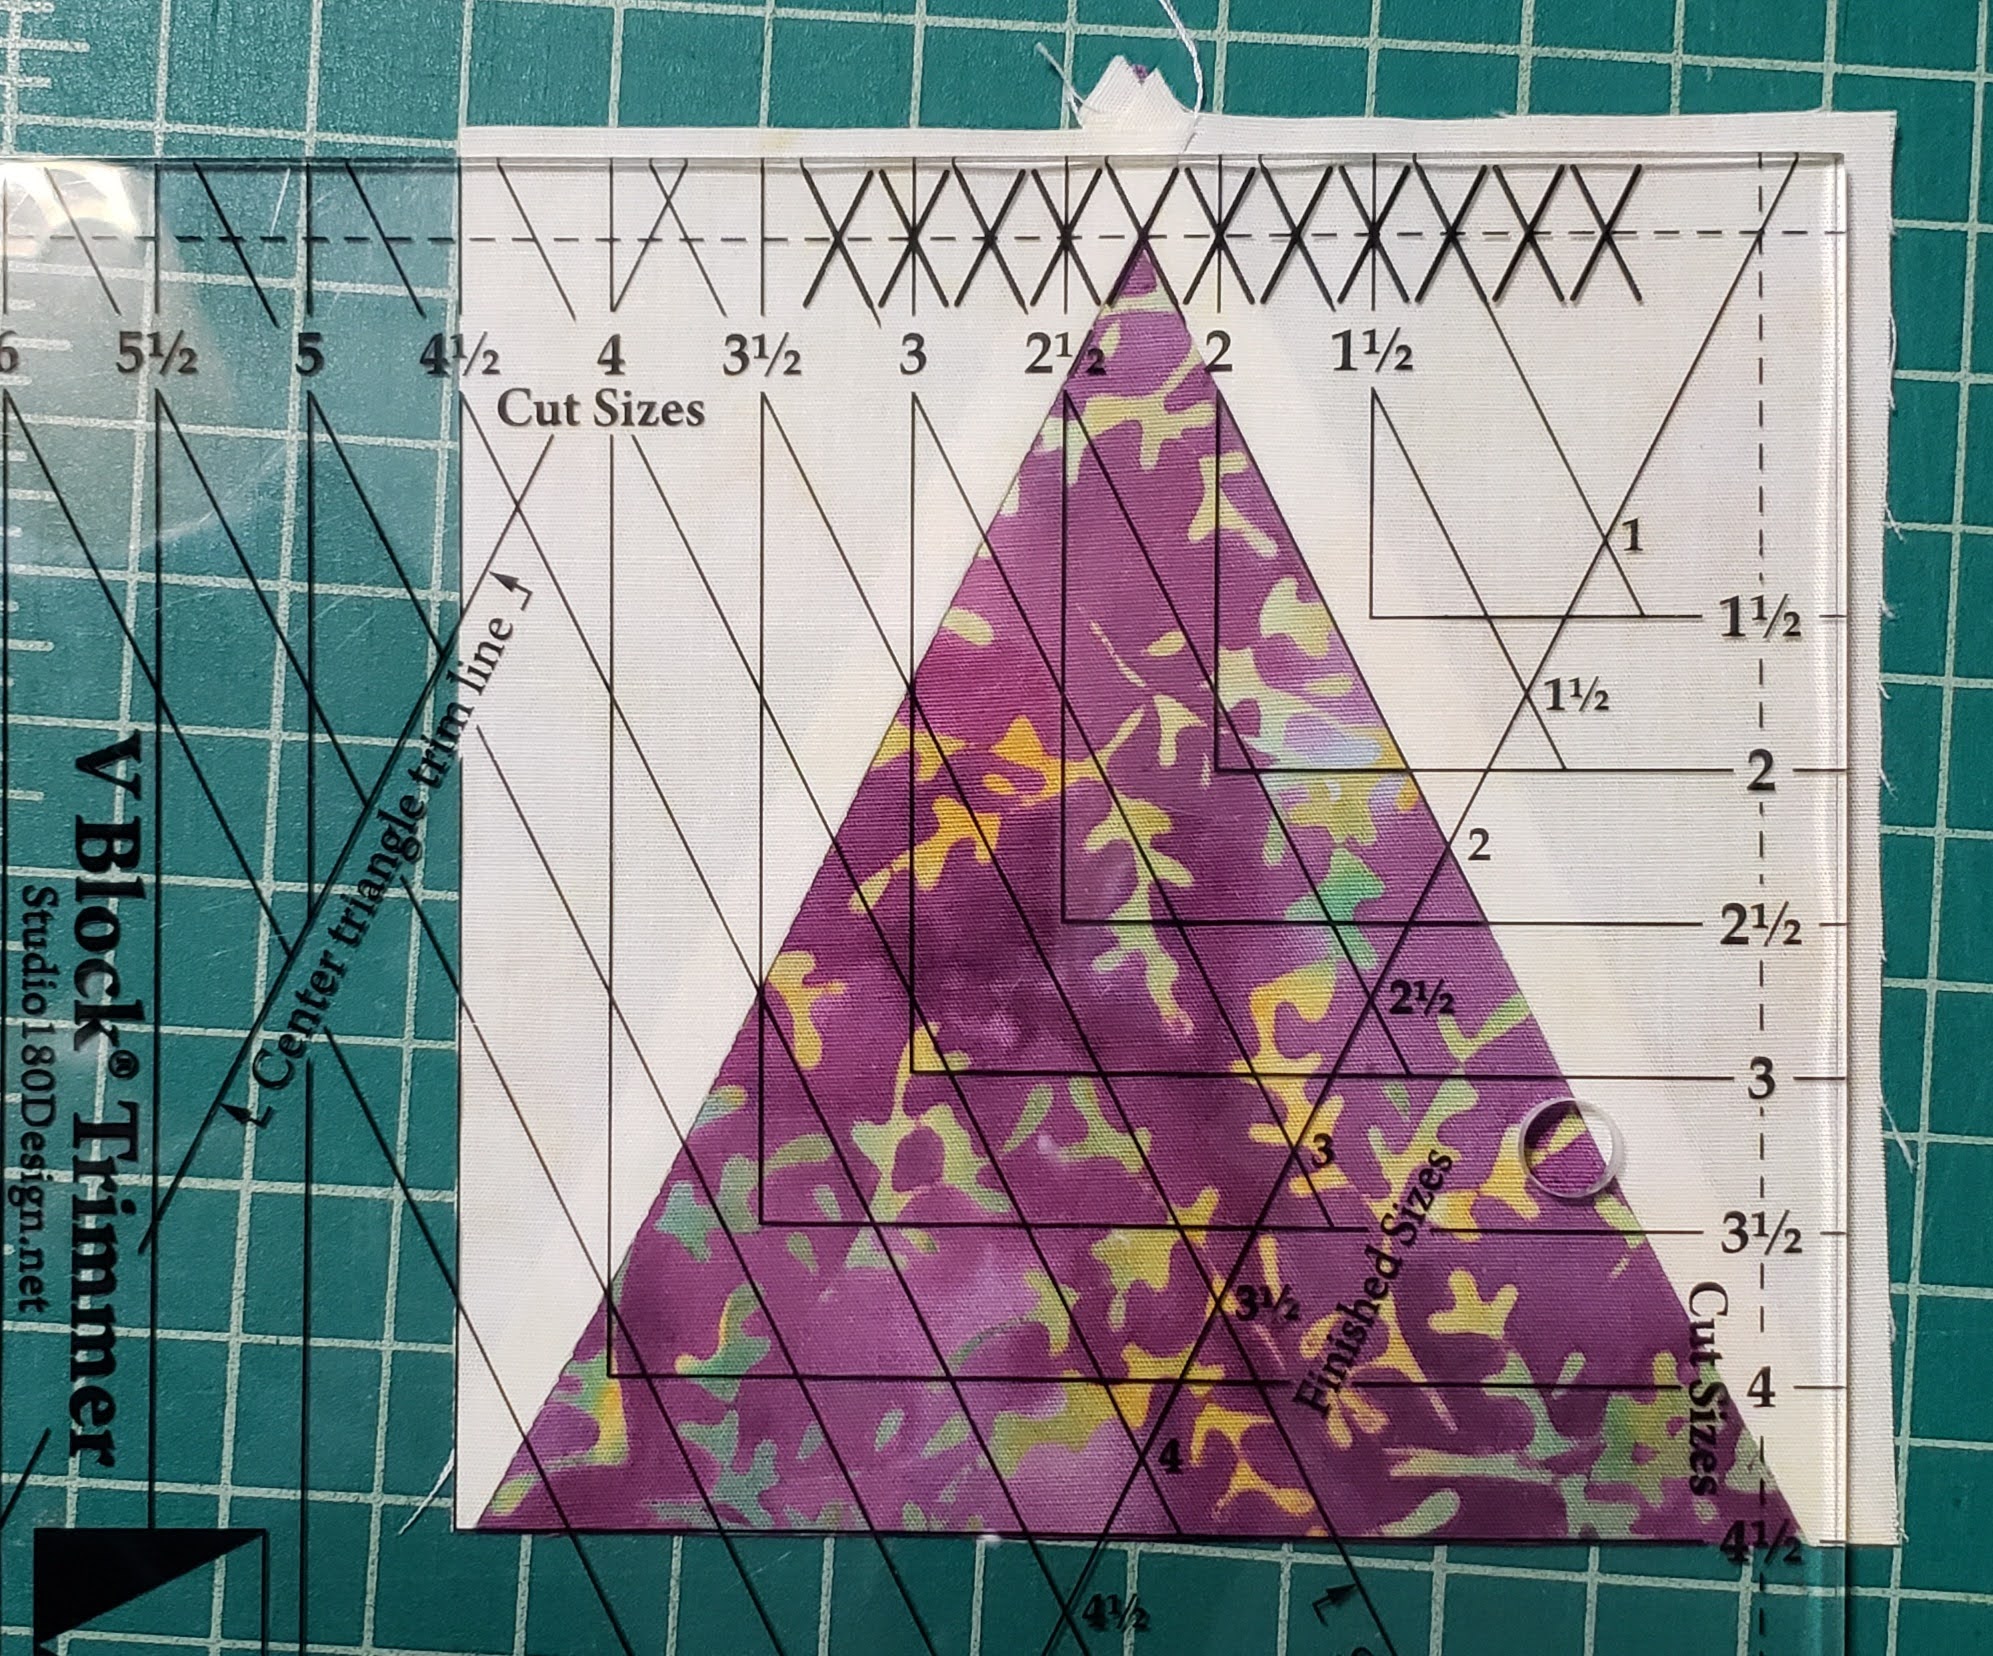
Trim the V-Blocks
The V Blocks are a little larger than needed, this is done on purpose, so you can trim the blocks to make sure they are all the correct size. No more worrying about your 1/4″ seams being exact.
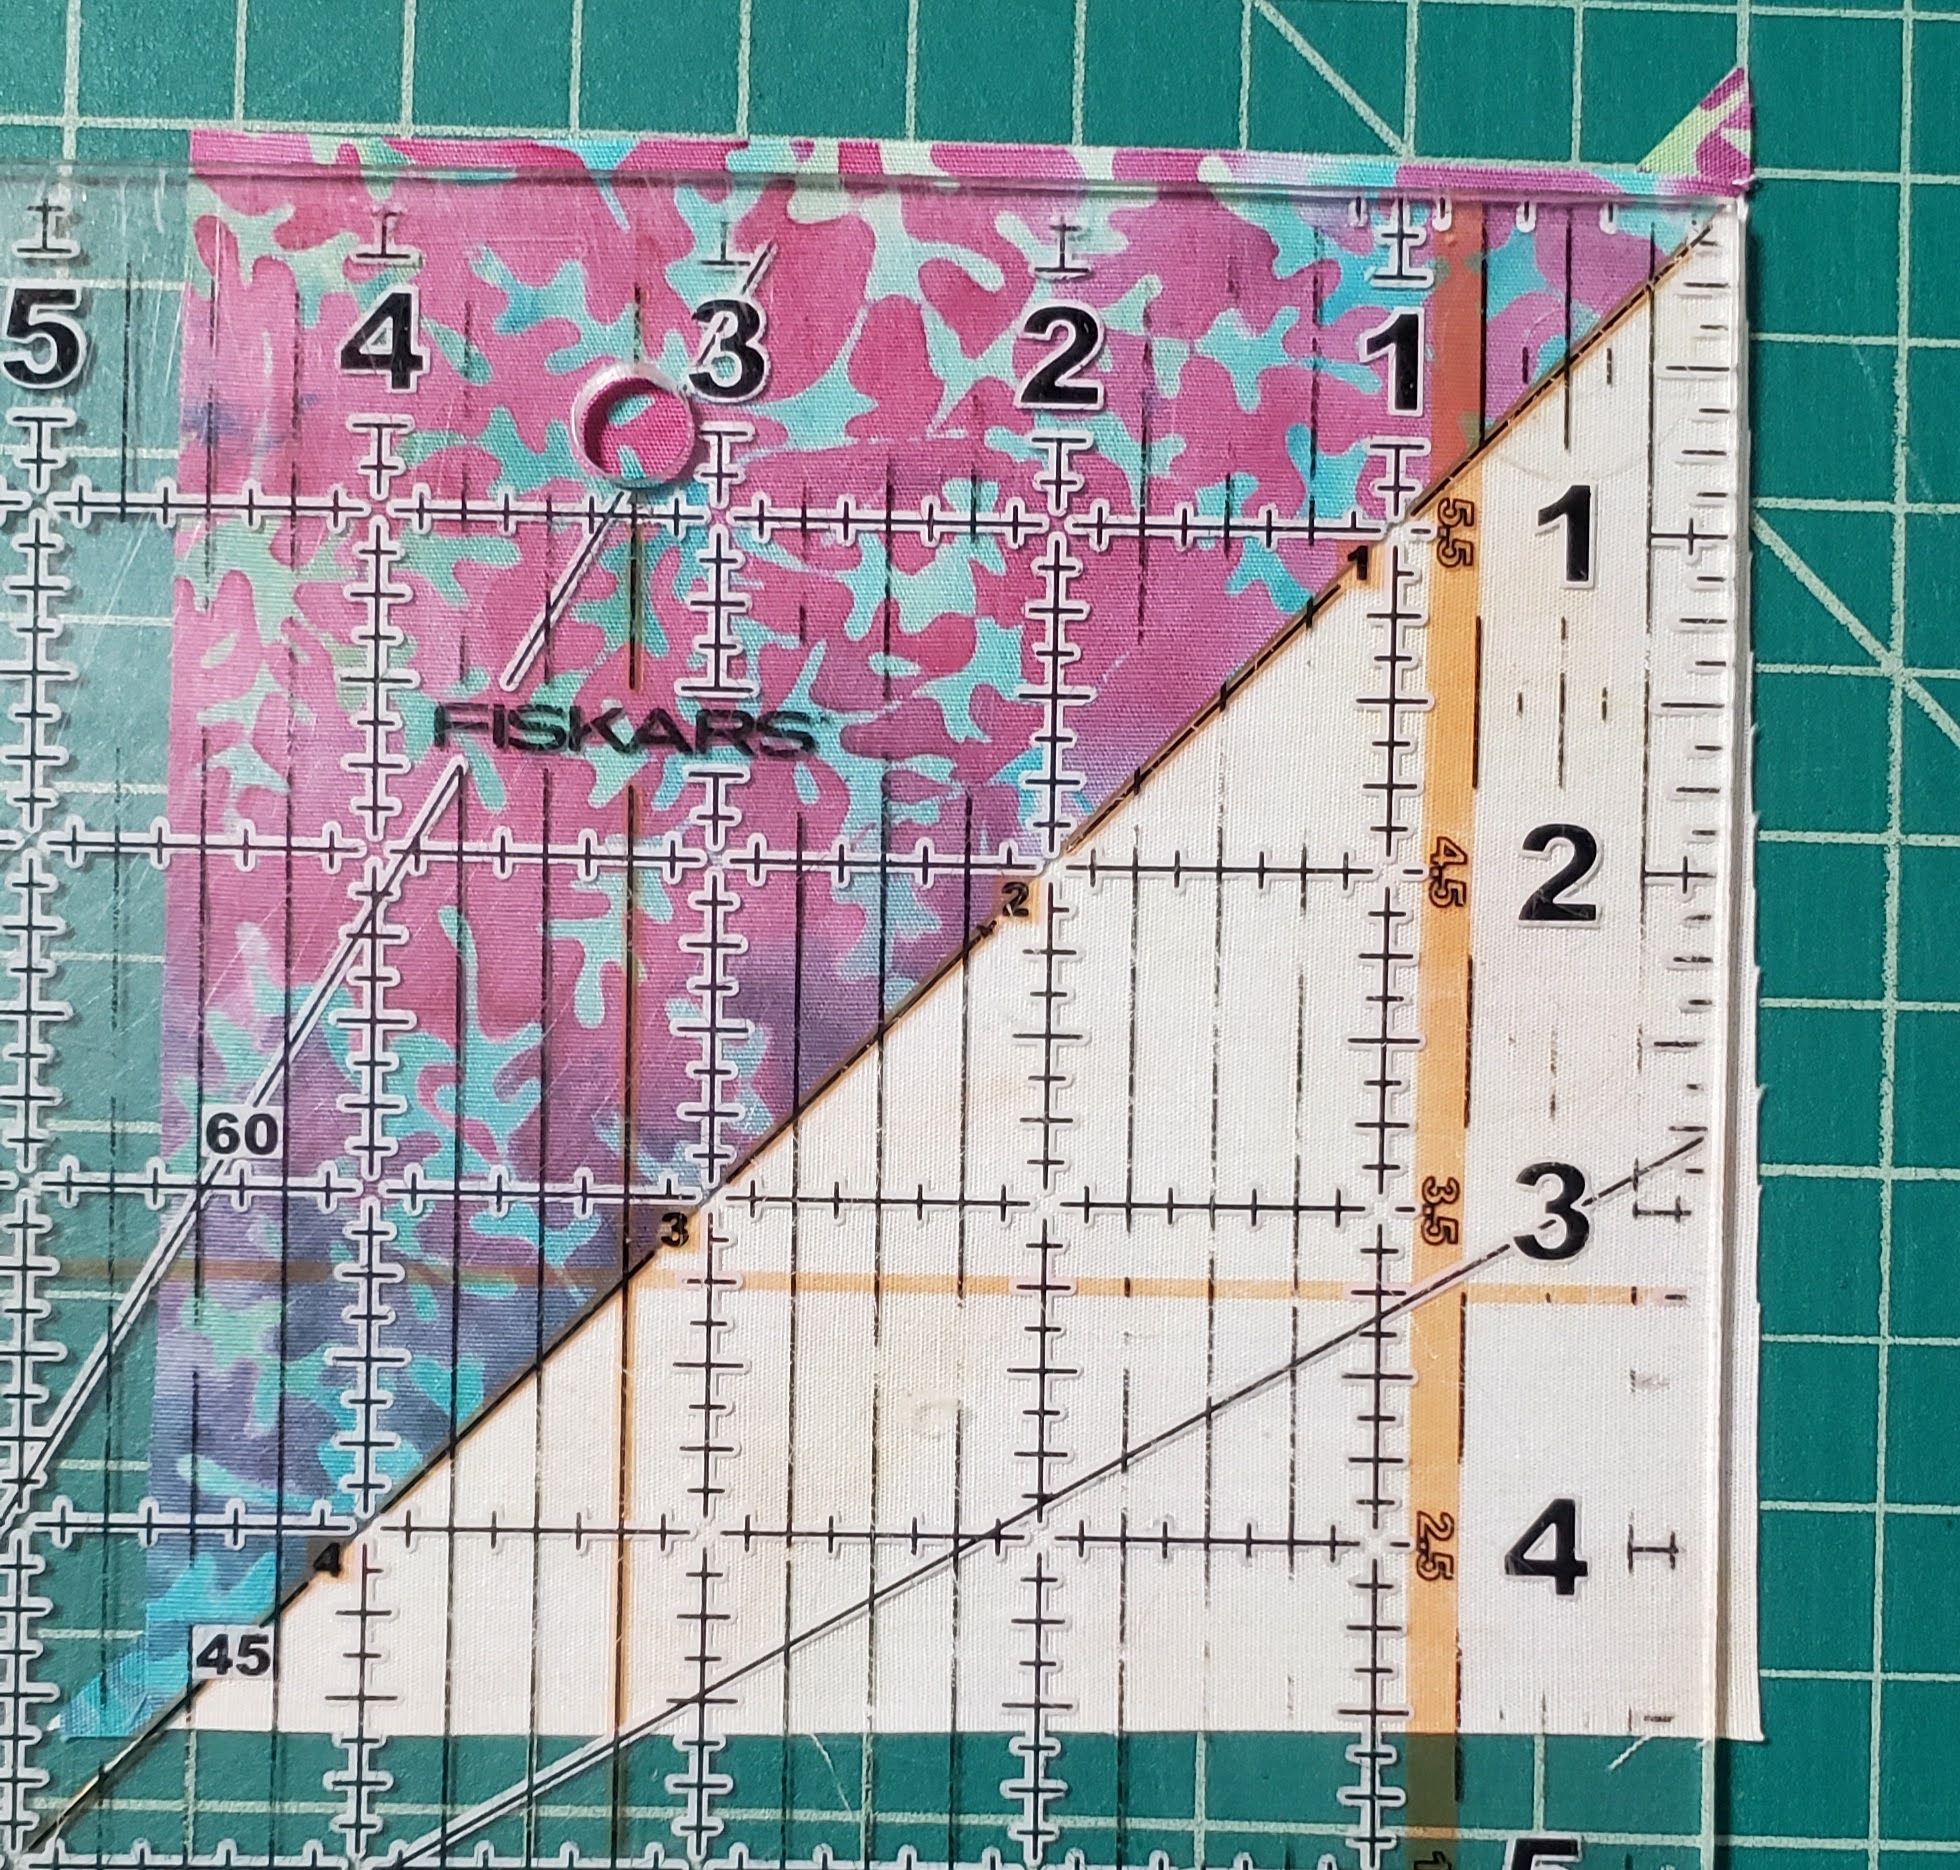
Lay the V-Block ruler over the first block. You will match the “X” at the top between the 2 1/2″ and 2″. Make sure the top point matches, and the line coming down the right side, lines up with your seam. This will help make sure that you are centering your V-block, ad that you do not lose your points.
Then trim down the top and side, making sure to not move the ruler as you cut.
Next rotate the block, and line up the bottom and left sides on your “unfinished sides, and trim the other two sides, making sure that the “X” at the top, matching the center point of your block.
Then Trim carefully the top and right side, making sure to not move your block.
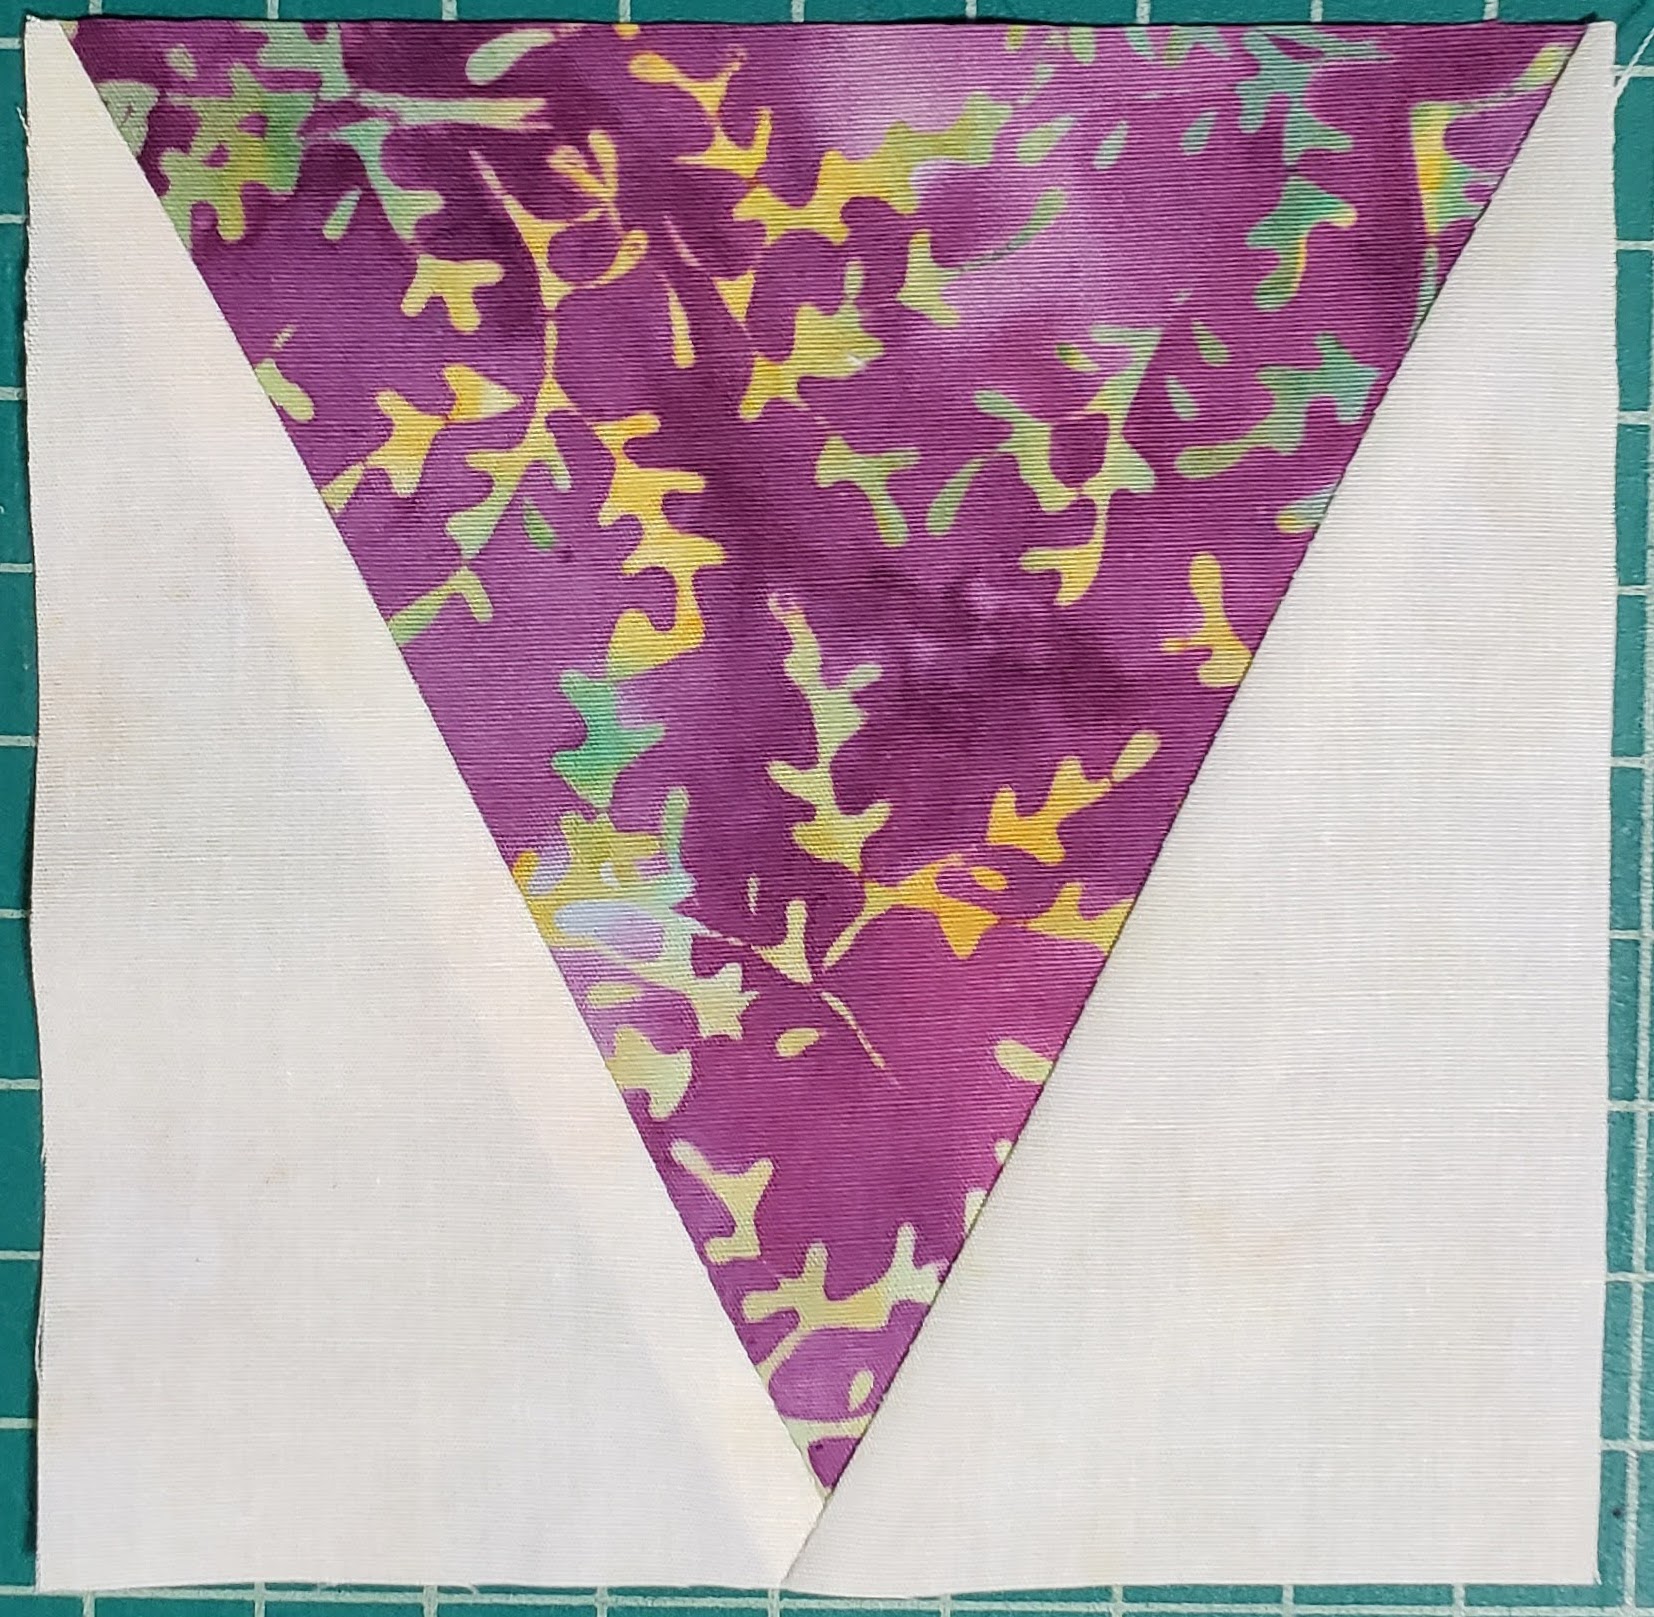
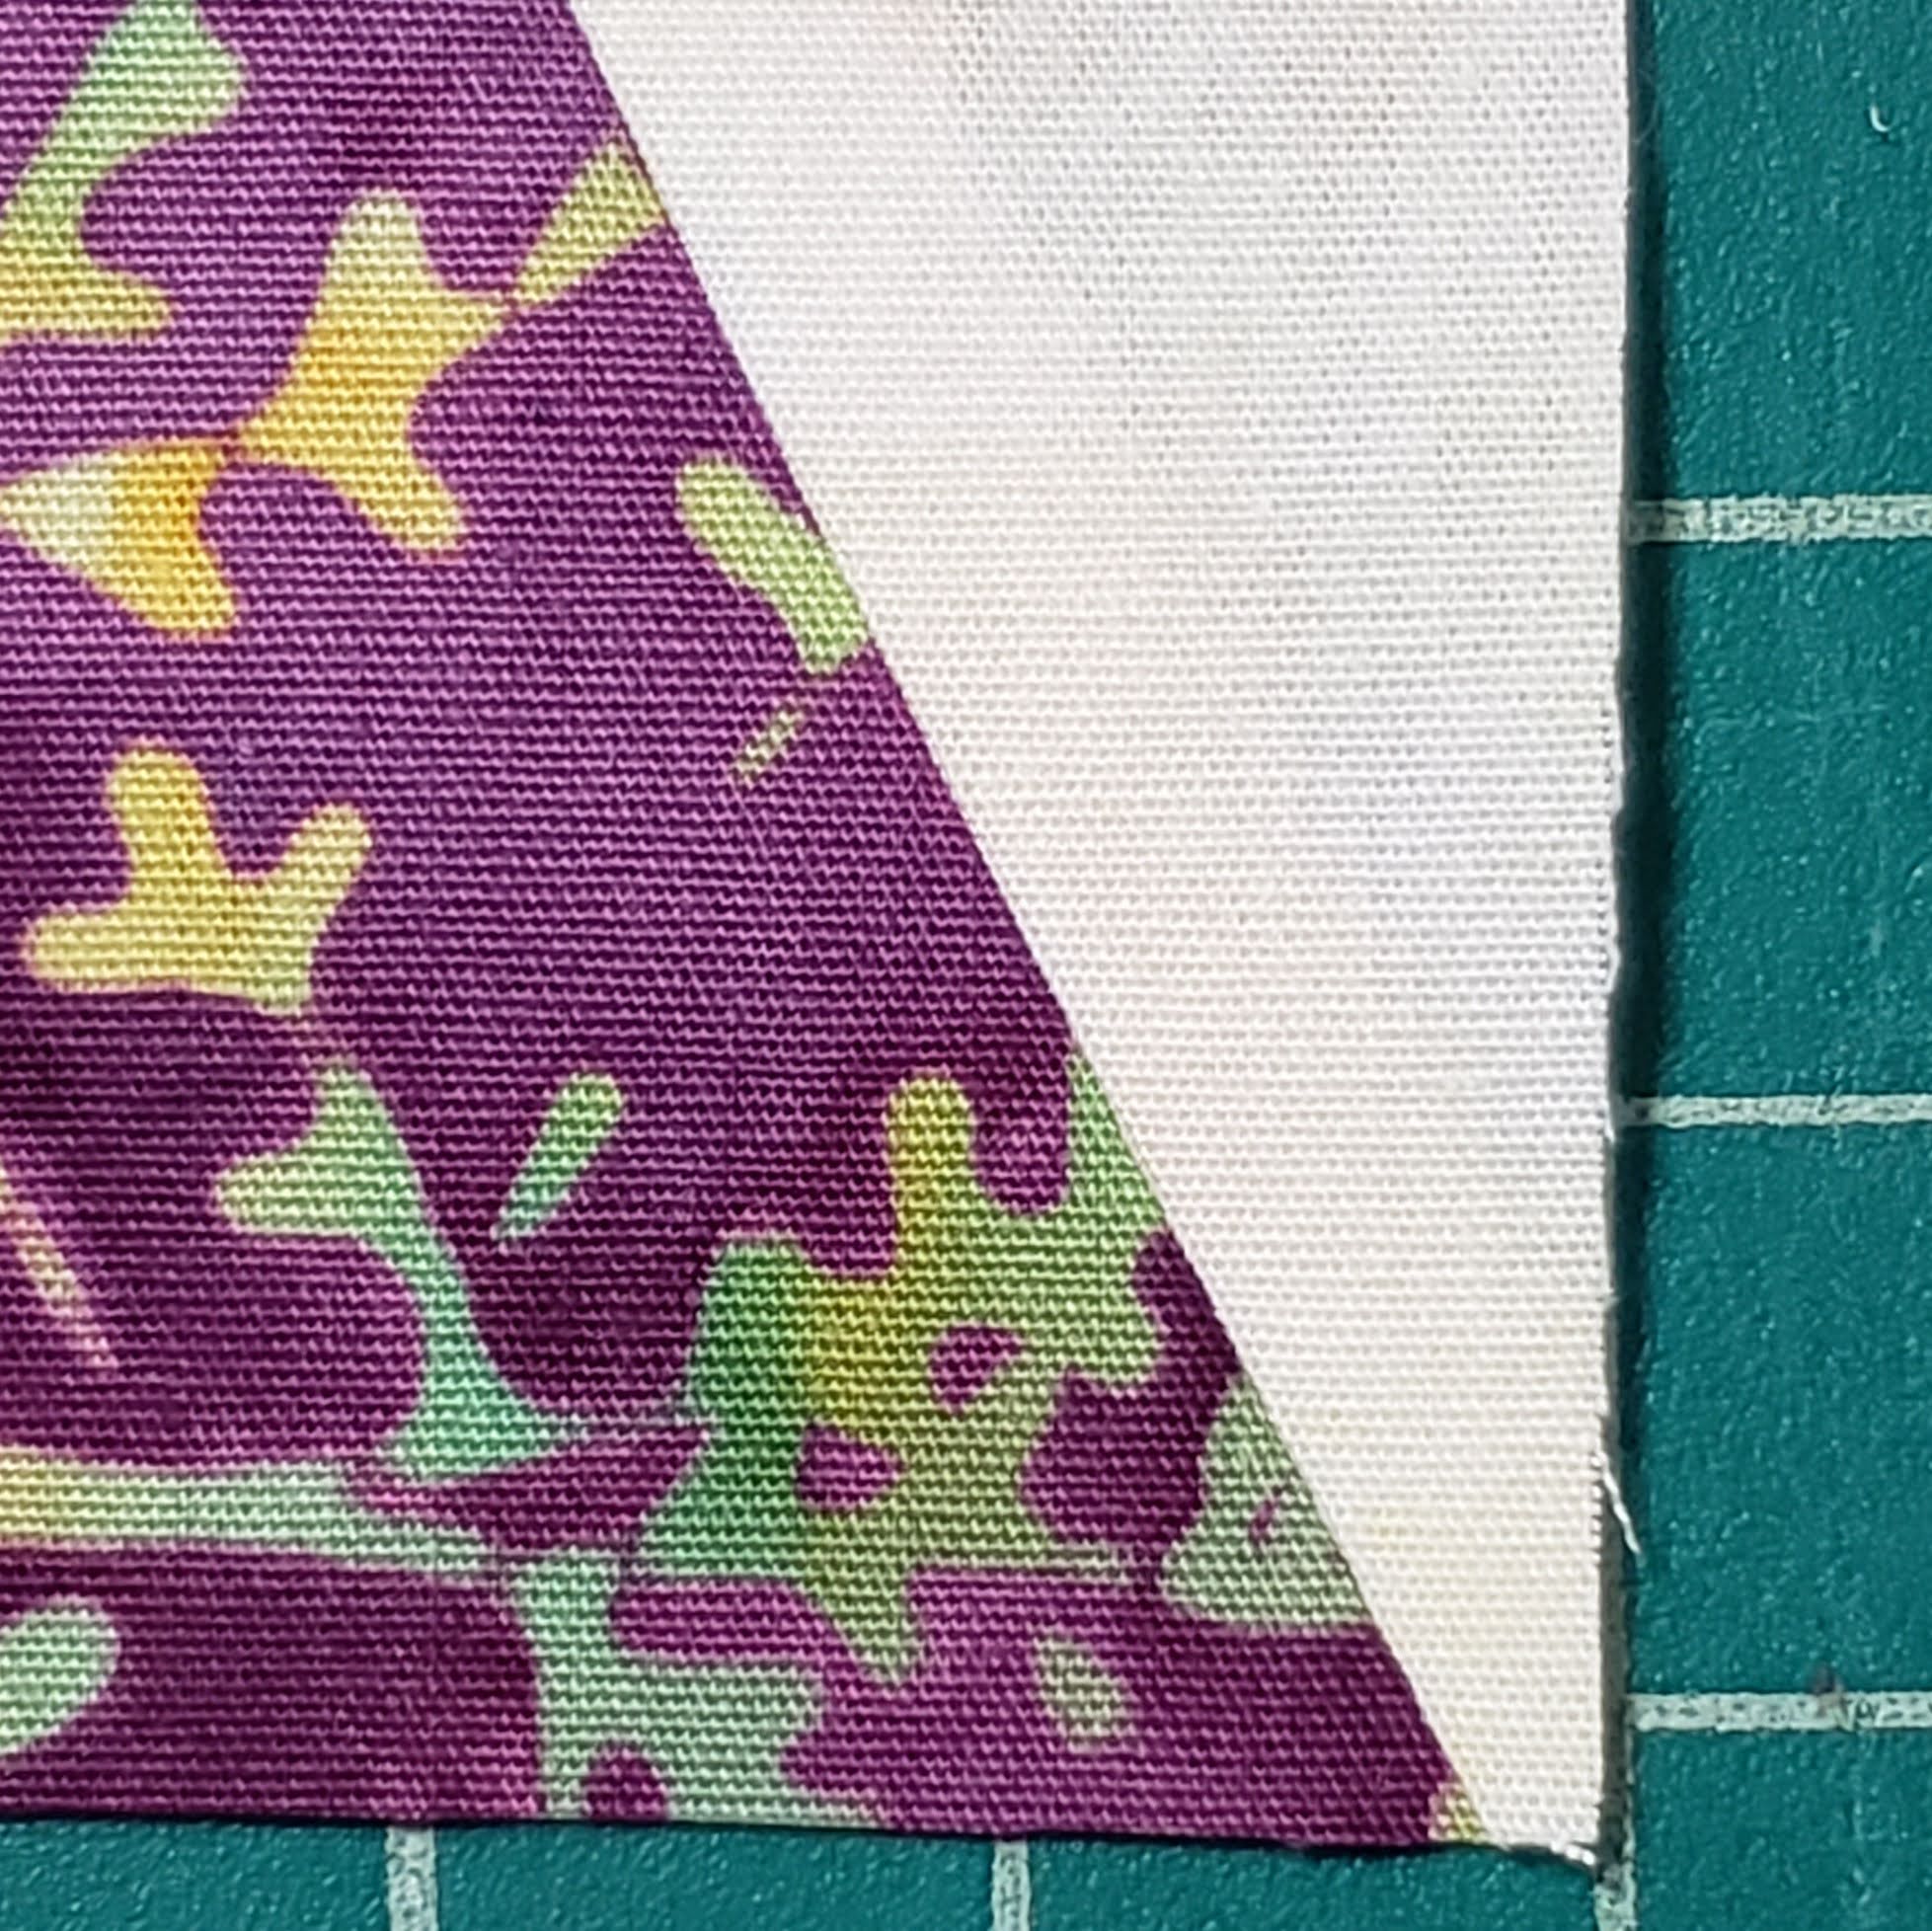
Please note, that after you trim the blocks, the two side corners, the fabric will not be centered to the corner. This is normal, and the way you want the fabric to be.
When you are done, you should have sets of four, two light centers, and two color centers. For each 12″ block.
Creating Half Square Triangles
Collect all of the 5″ squares of coordinating fabric, and the colored fabric.
Since each block only needs three HST, and the easiest way is to create two sets of 2. However, there is a way to create three of each set, and you will have 20 triangles left over from the color fabric. They can be used for other projects, or as an accent on the back of the quilt.
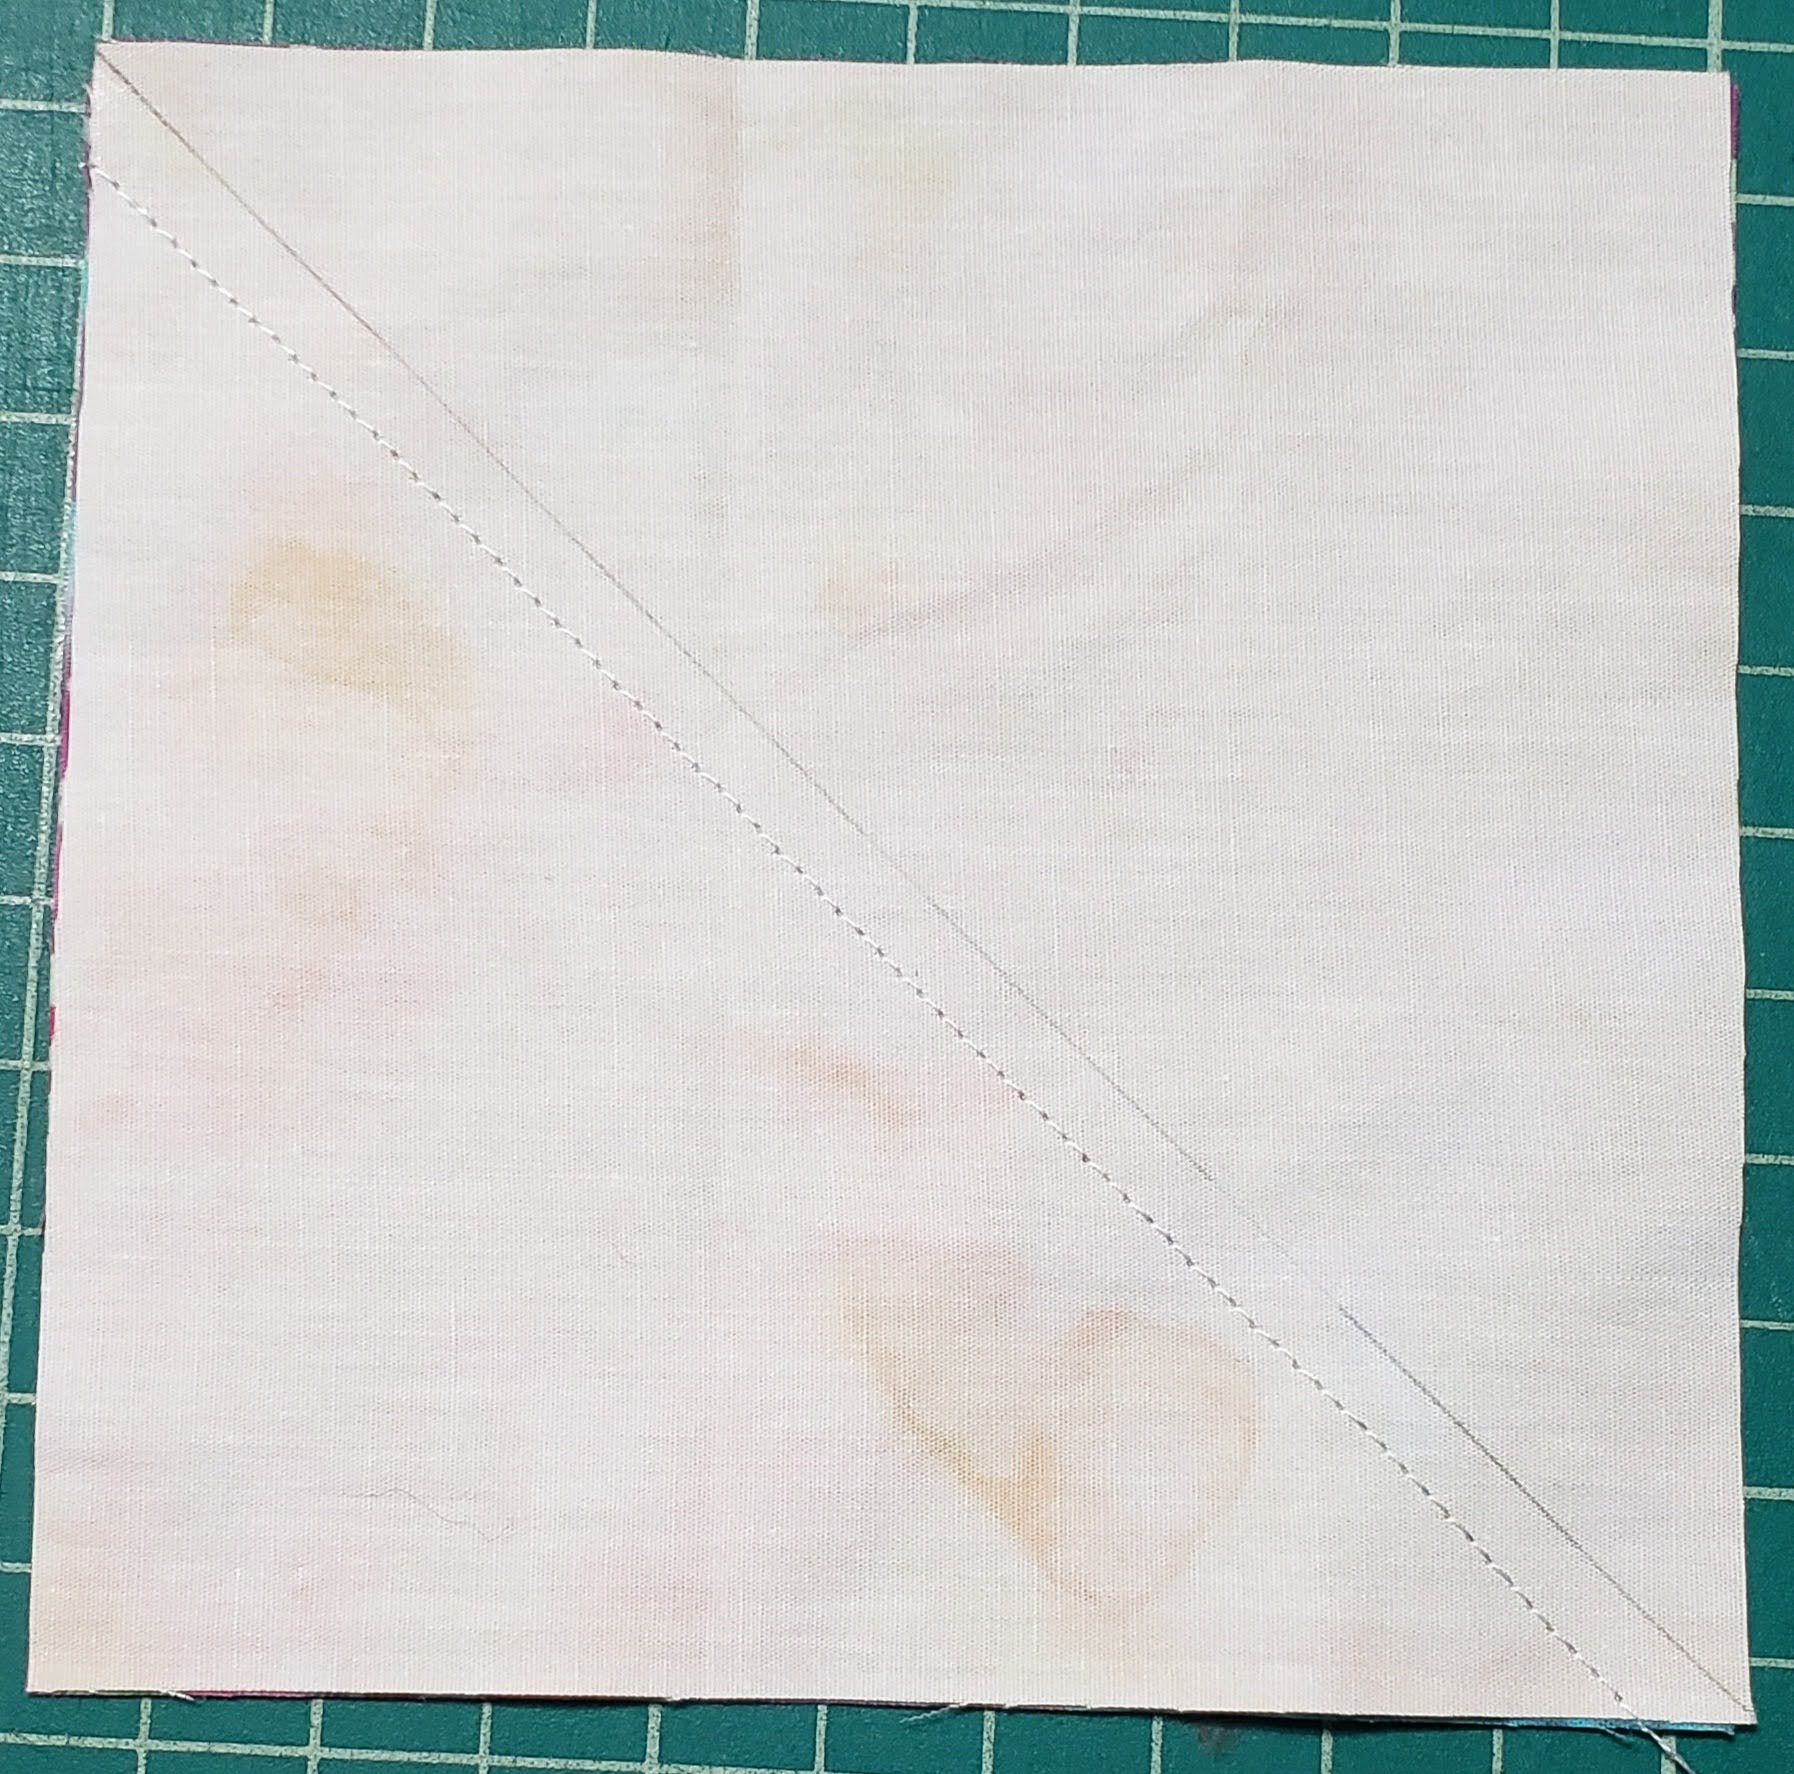
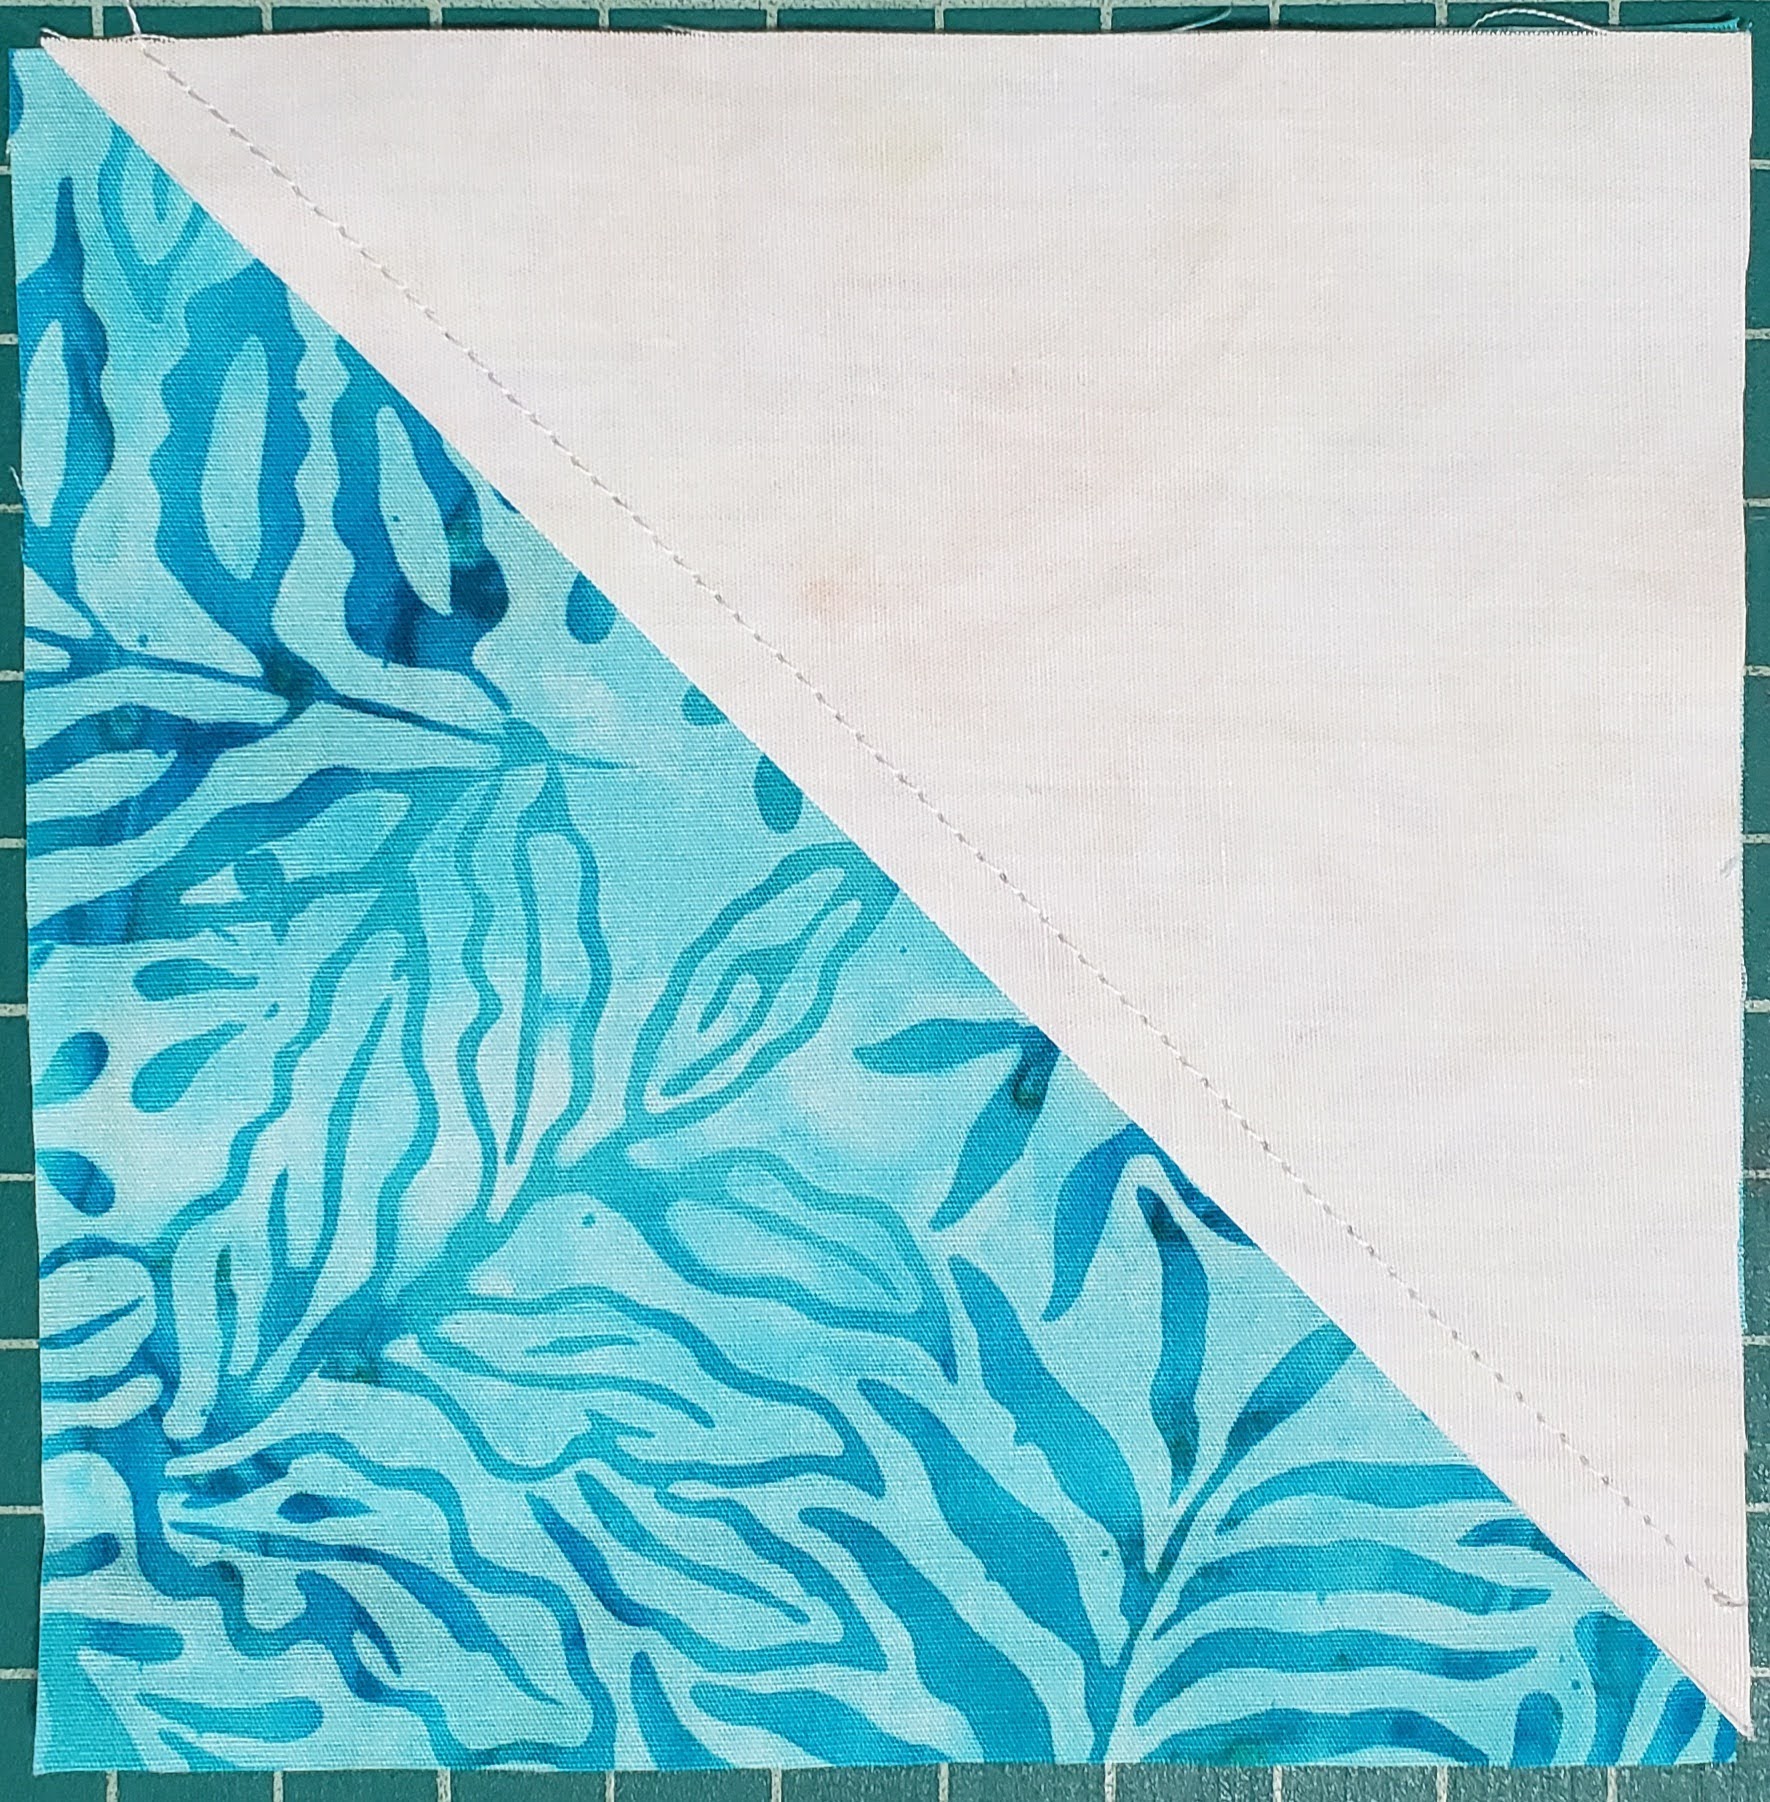
First you will mark a diagonal line down the back of all coordinating fabric.

To create the single HST, you will need 10 pieces of coordinating and the 20 color pieces. Match the right sides together of the first color/coordinating fabric, and sew down 1/4″ of the center line you drew (only sew down on side).
Carefully cut down the drawn line.
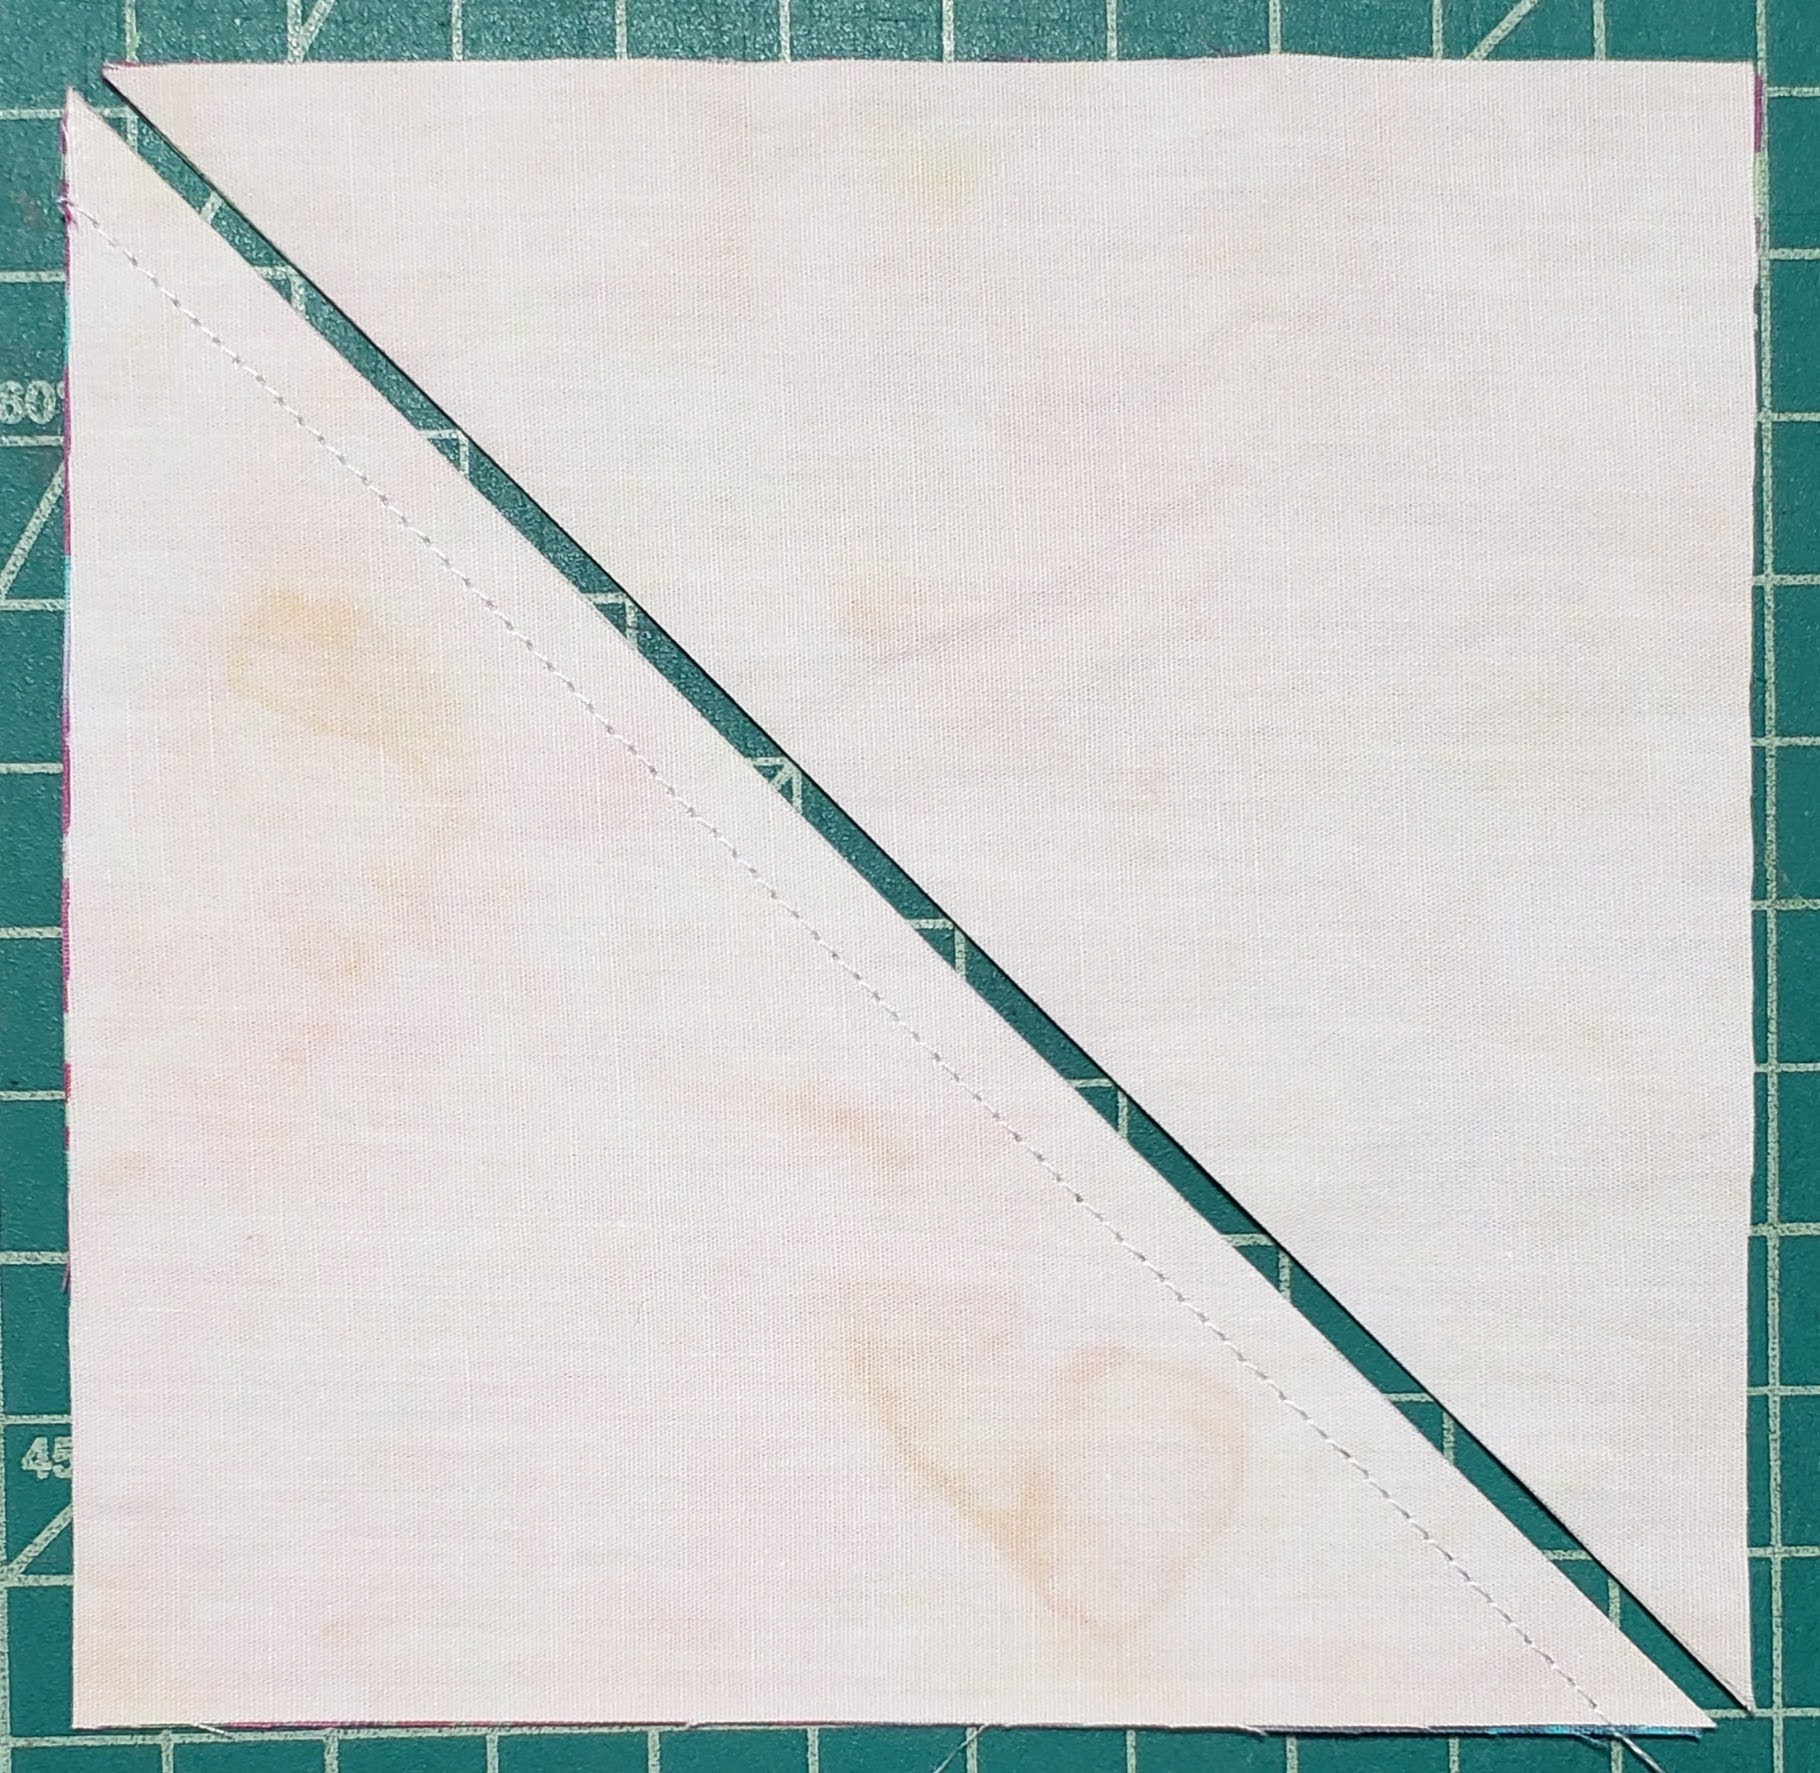
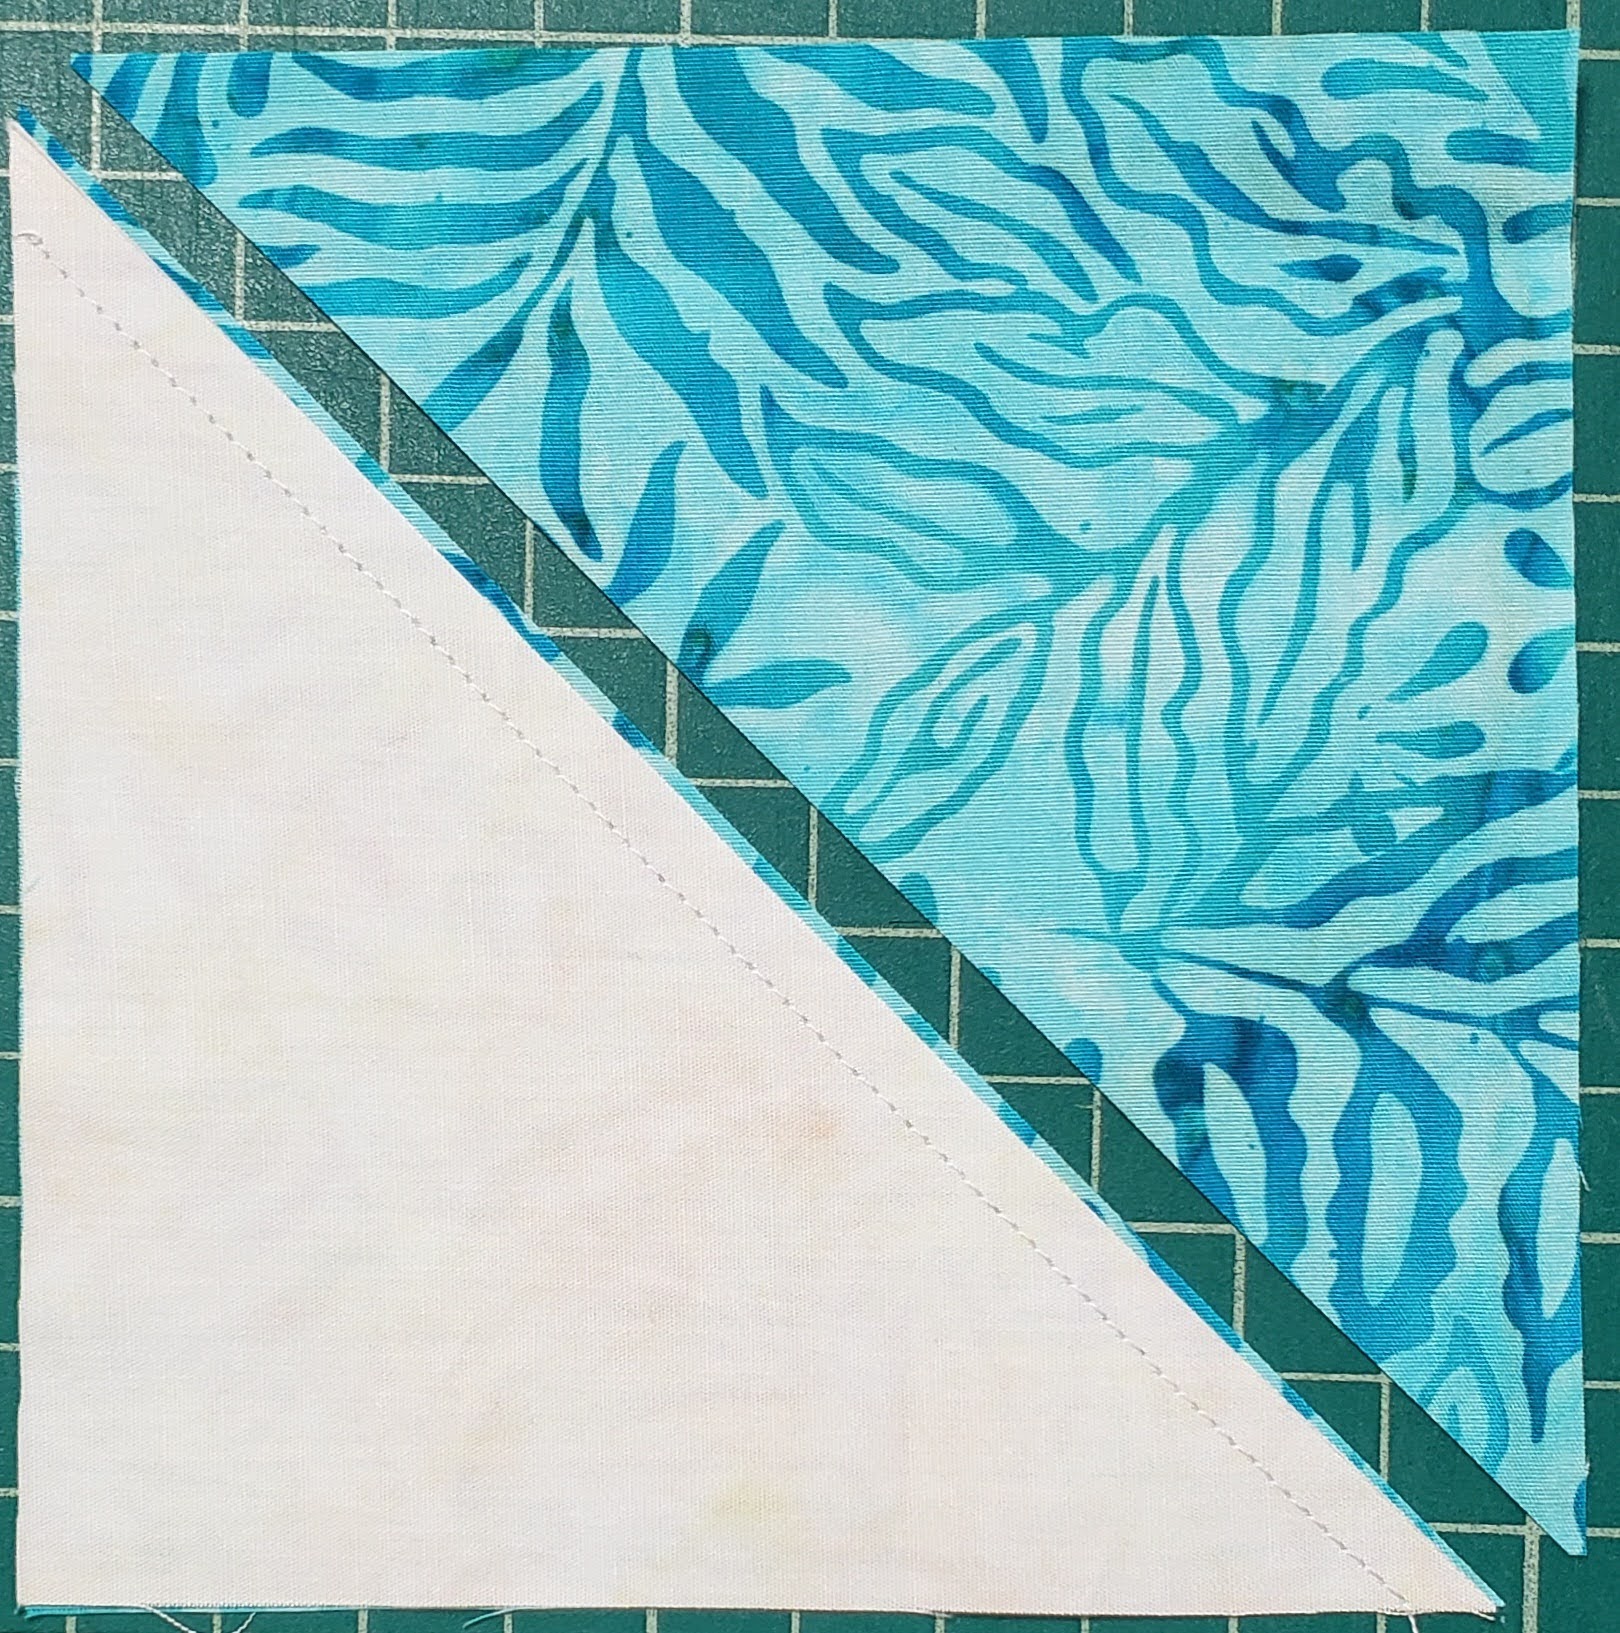
Set the color triangle aside, you do not need it. Next using another piece of color fabric and match the coordinating fabric triangle (cut in the previous step) to the color fabric.
Then sew 1/4″ seam from the cut edge on the coordinating fabric.
Carefully, cut the color piece along the edge of the coordinating fabric, creating a color triangle and a HST.
Continue this process for all the color fabrics. You will have 20 different HST and 20 color triangles left over.
More HST
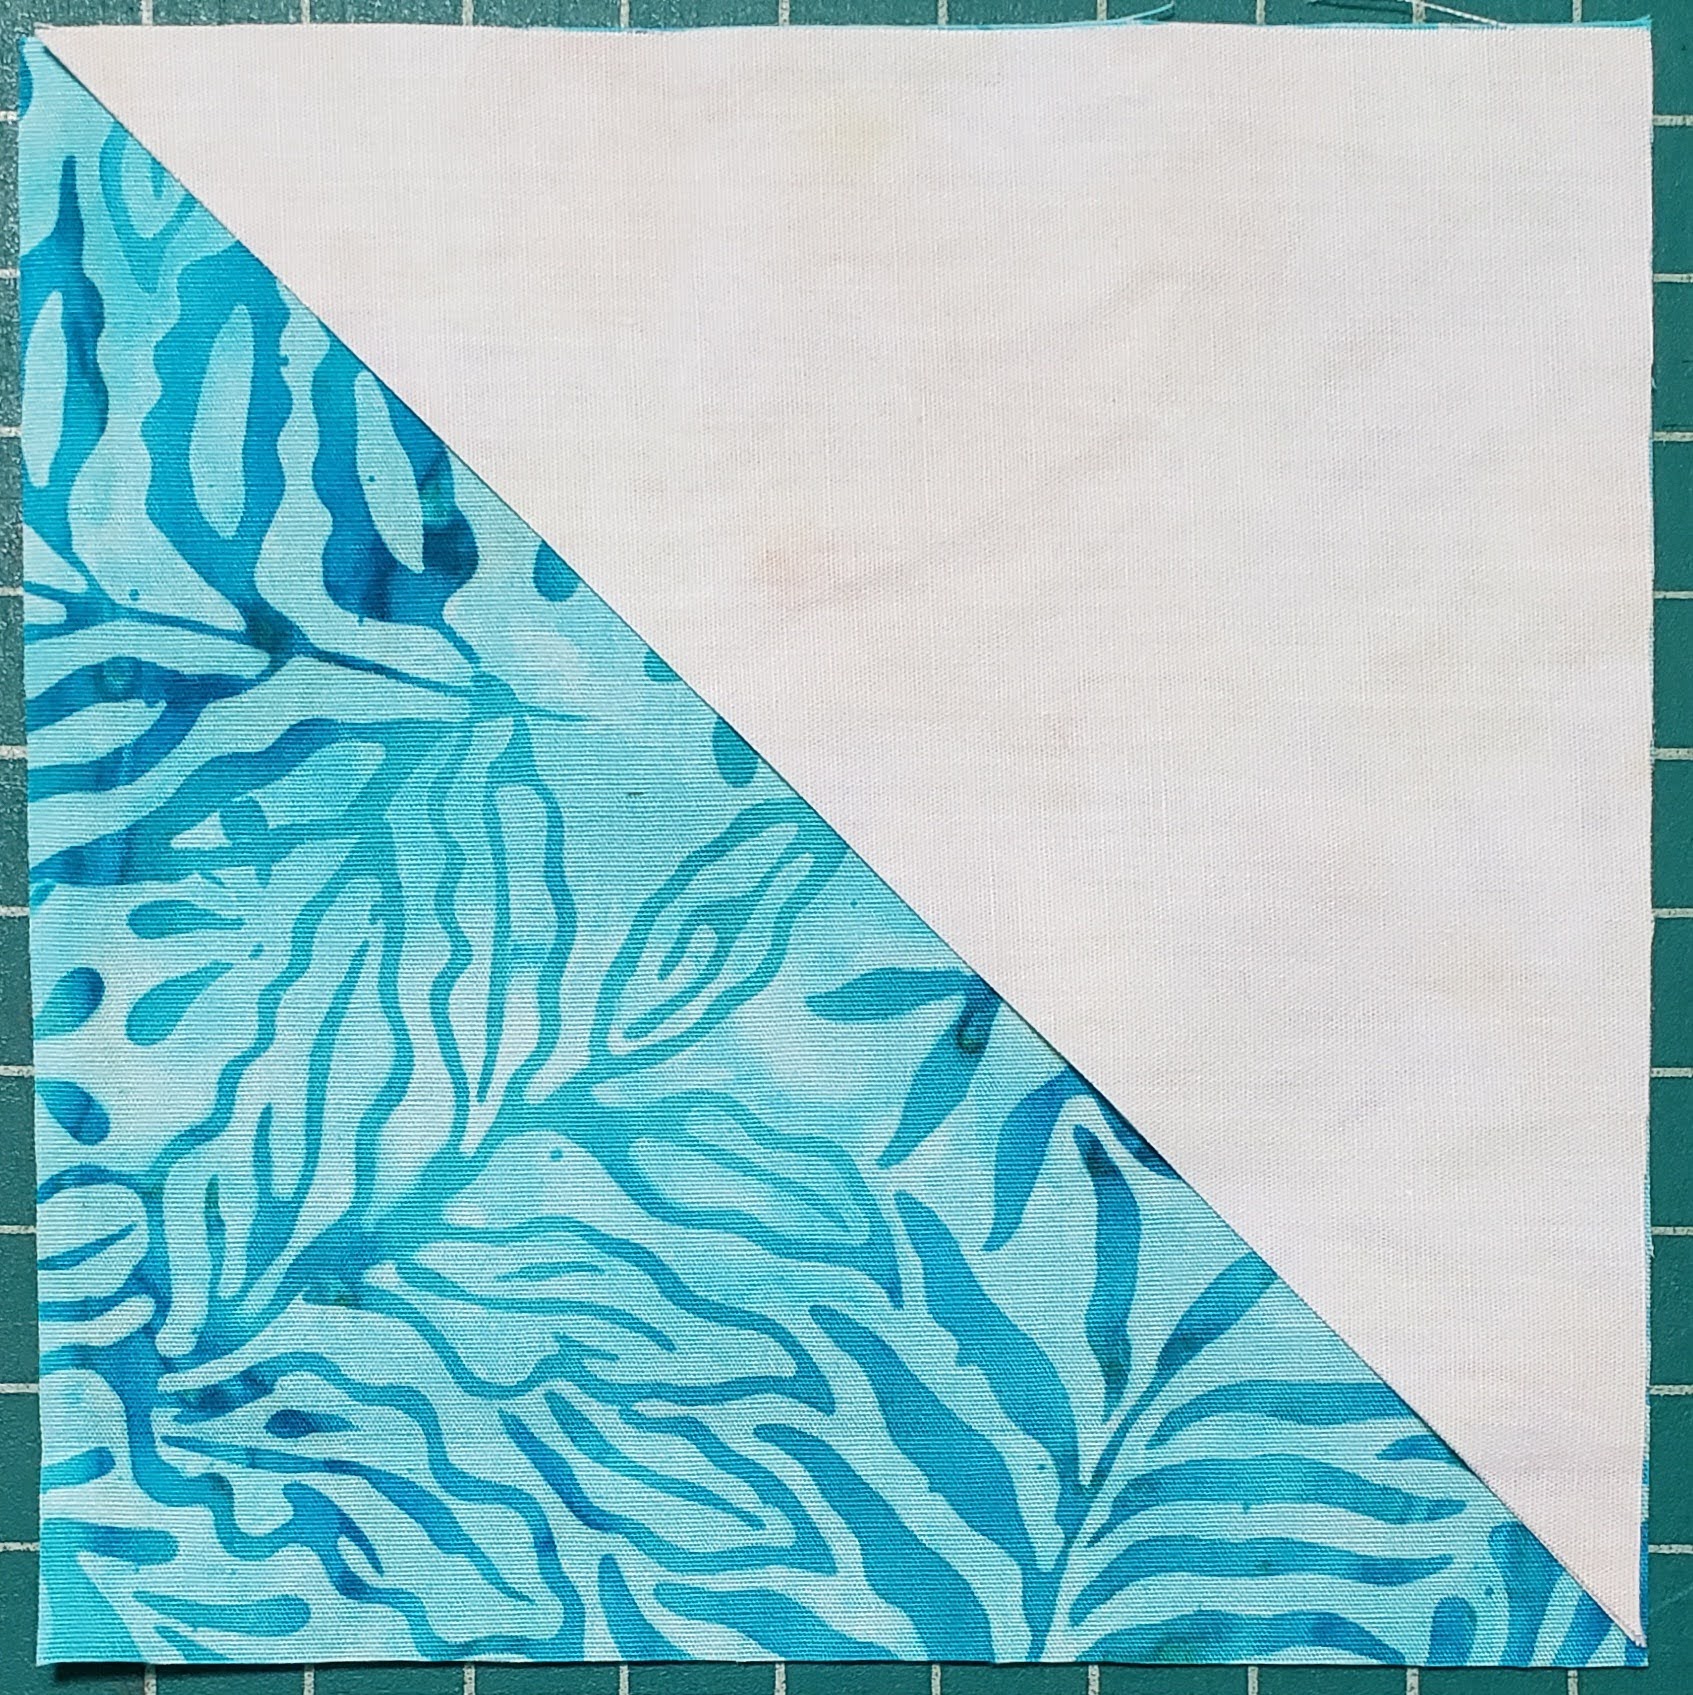
Next using the other 20 pieces of coordinating fabric 5″ squares, and the 202 pieces of colored fabric, create 40 traditional HST, sewing down both sides of the drawn line,
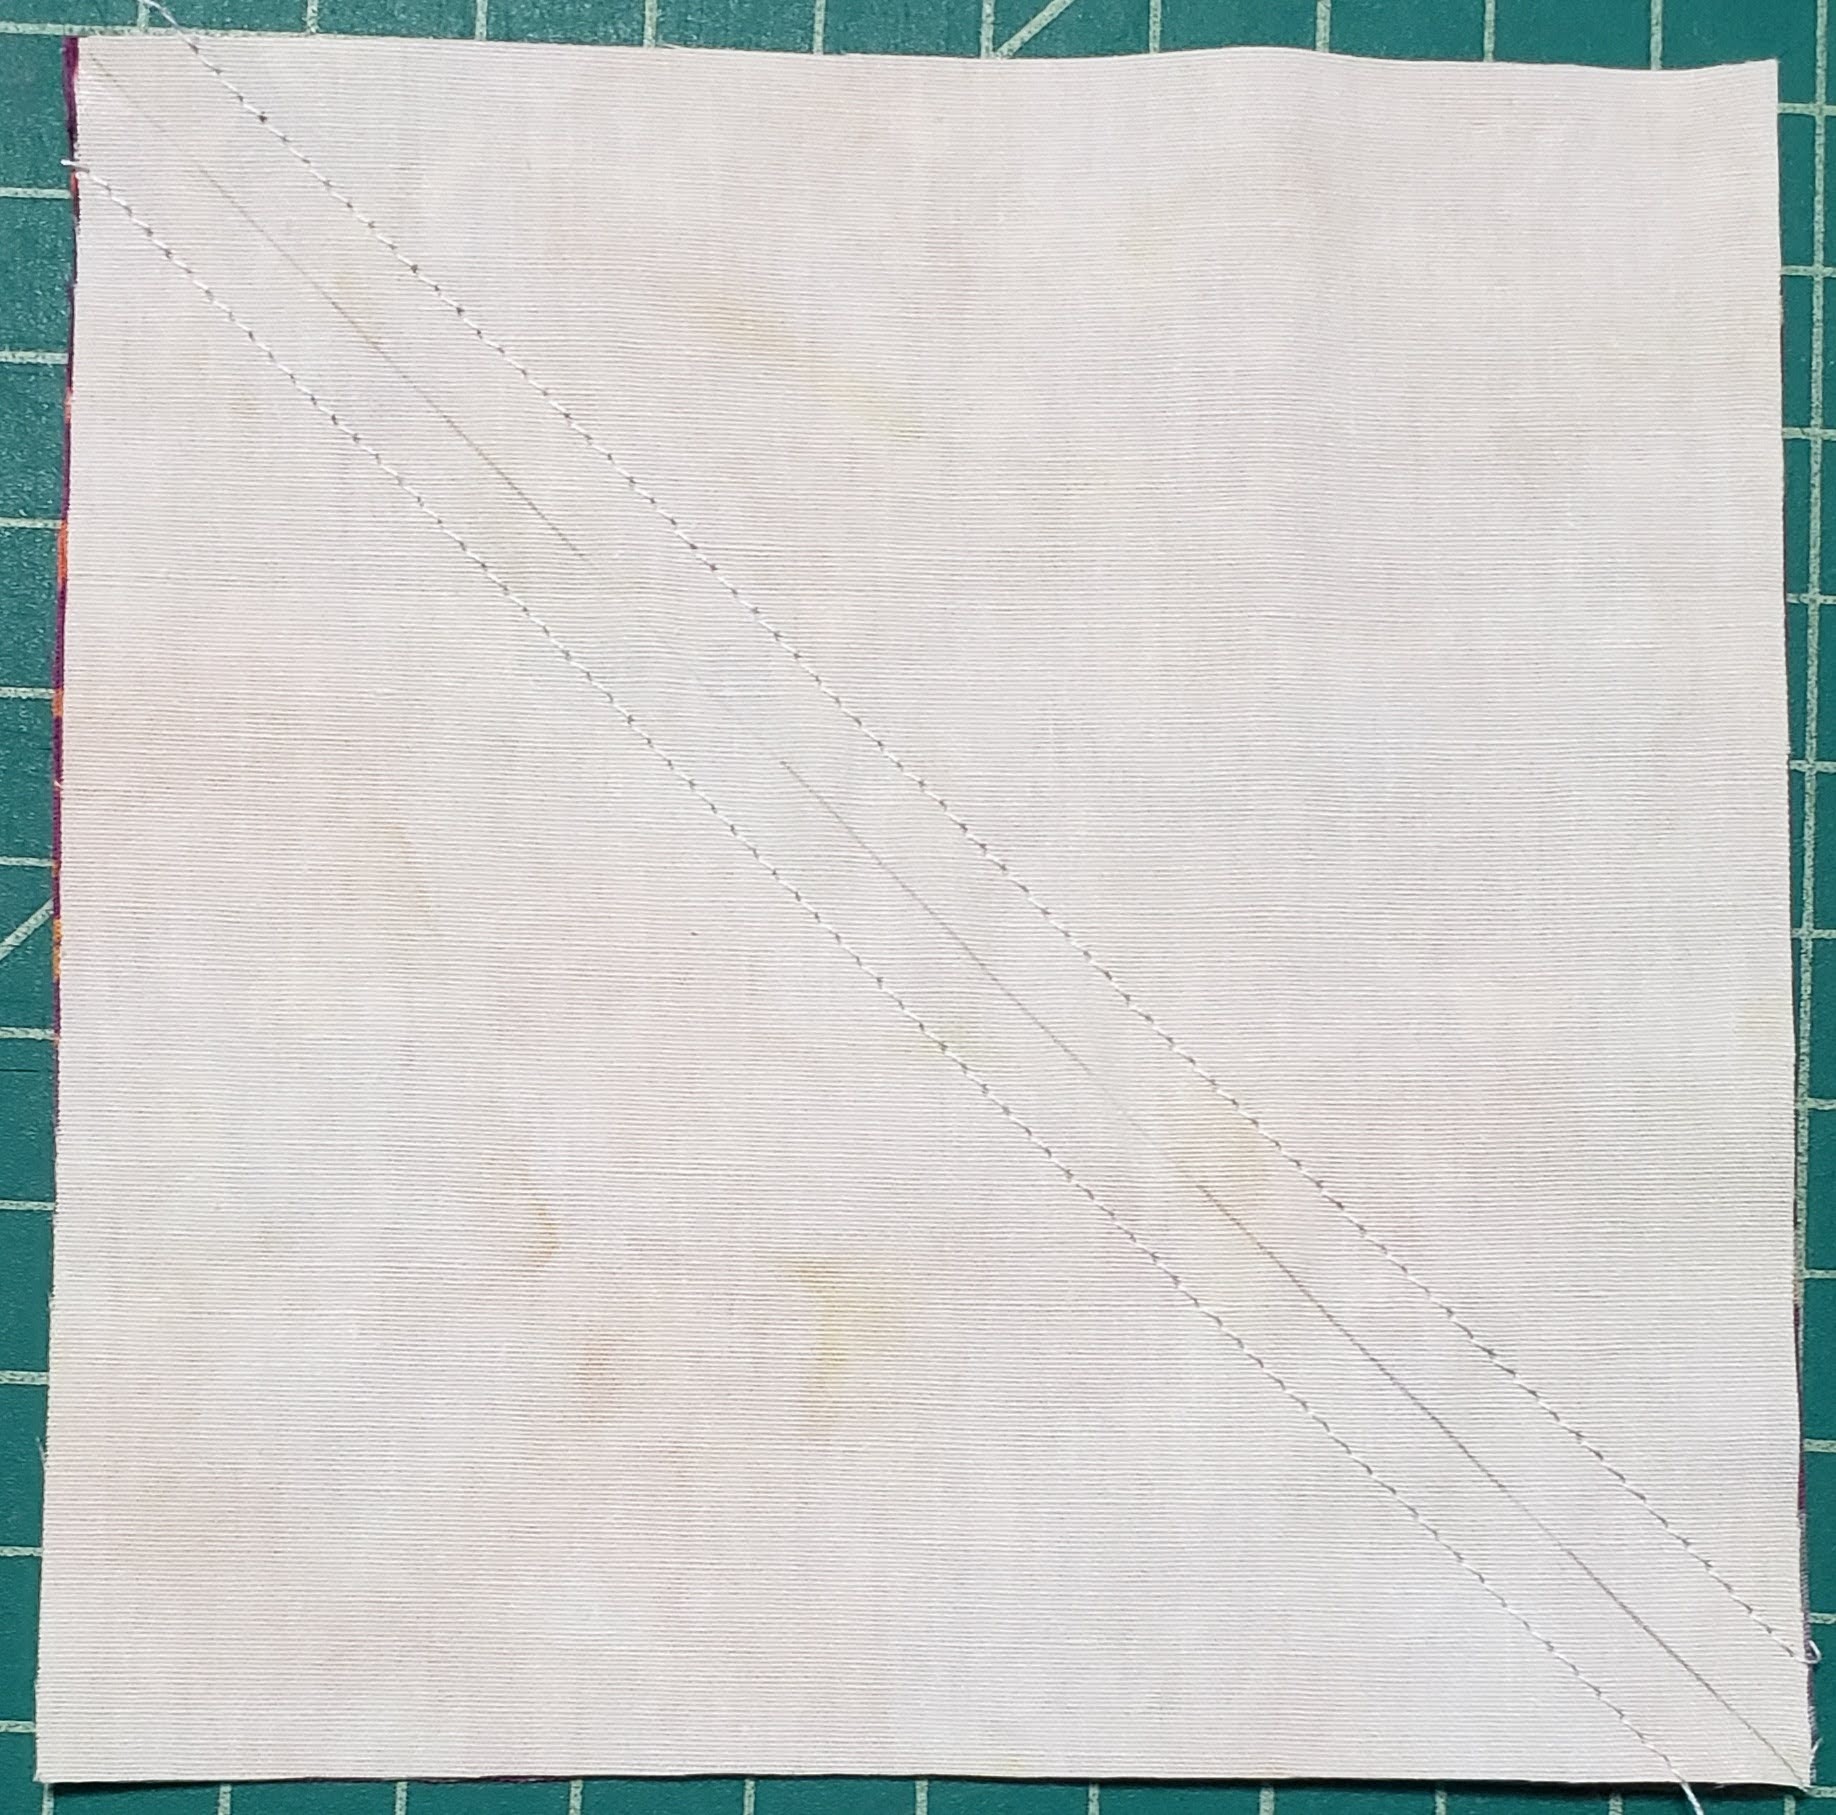
Then cut on the drawn line.

When done, you should have 20 HST, sets of 3, for a total of 60.
Press the HST open, trim the tails.
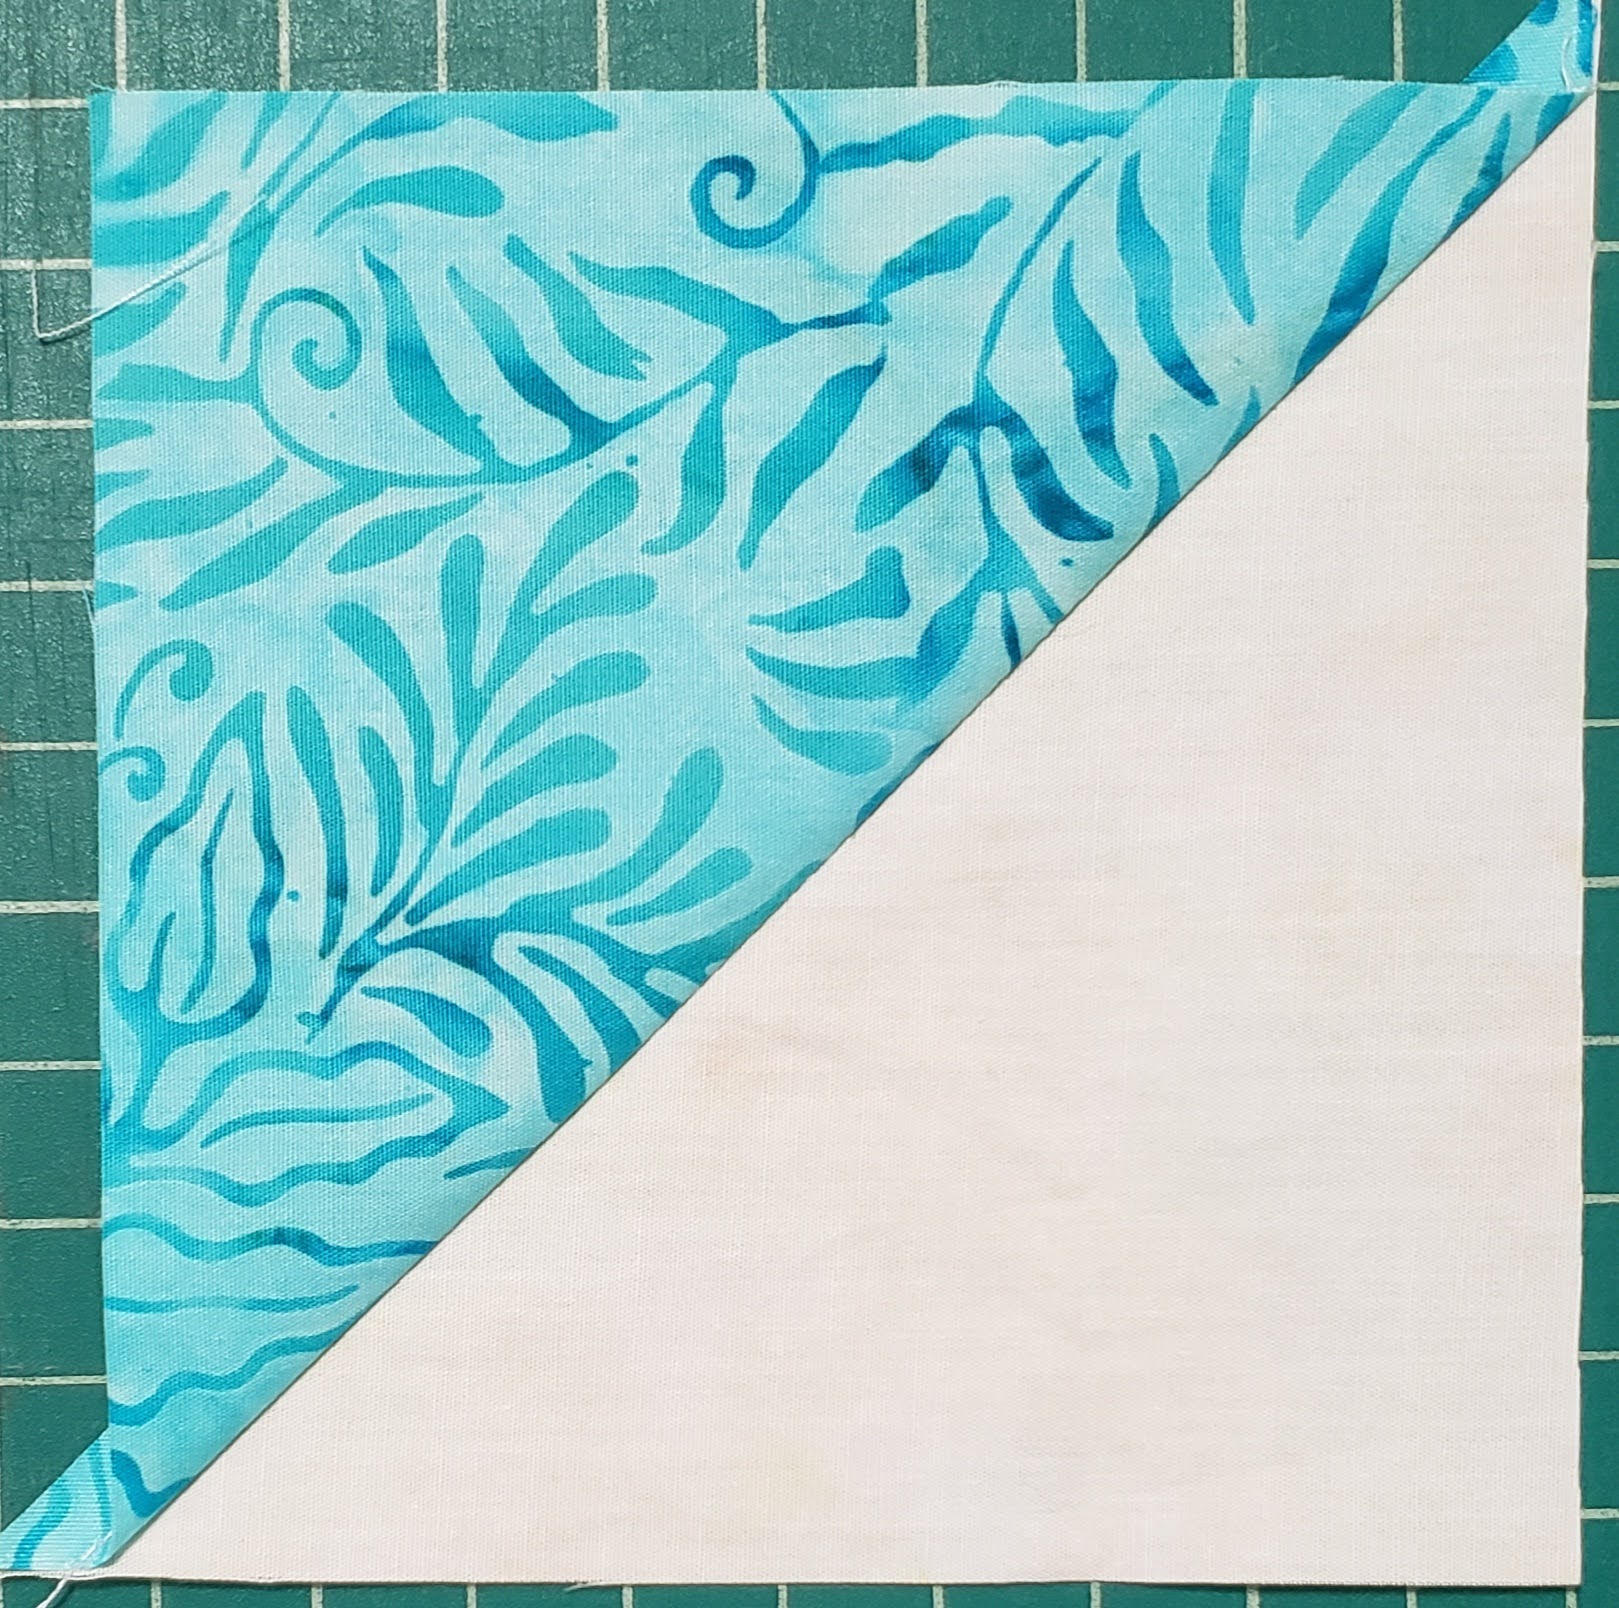
You will need to trim these to 4 1/2″ x 4 1/2″ squares. You can use the V-Block ruler to trim or any ruler with a diagonal line.
Block Assembly.
Layout the blocks in the following layout, using the three HST and the two 4 1/2″ squares, and the four V Blocks.
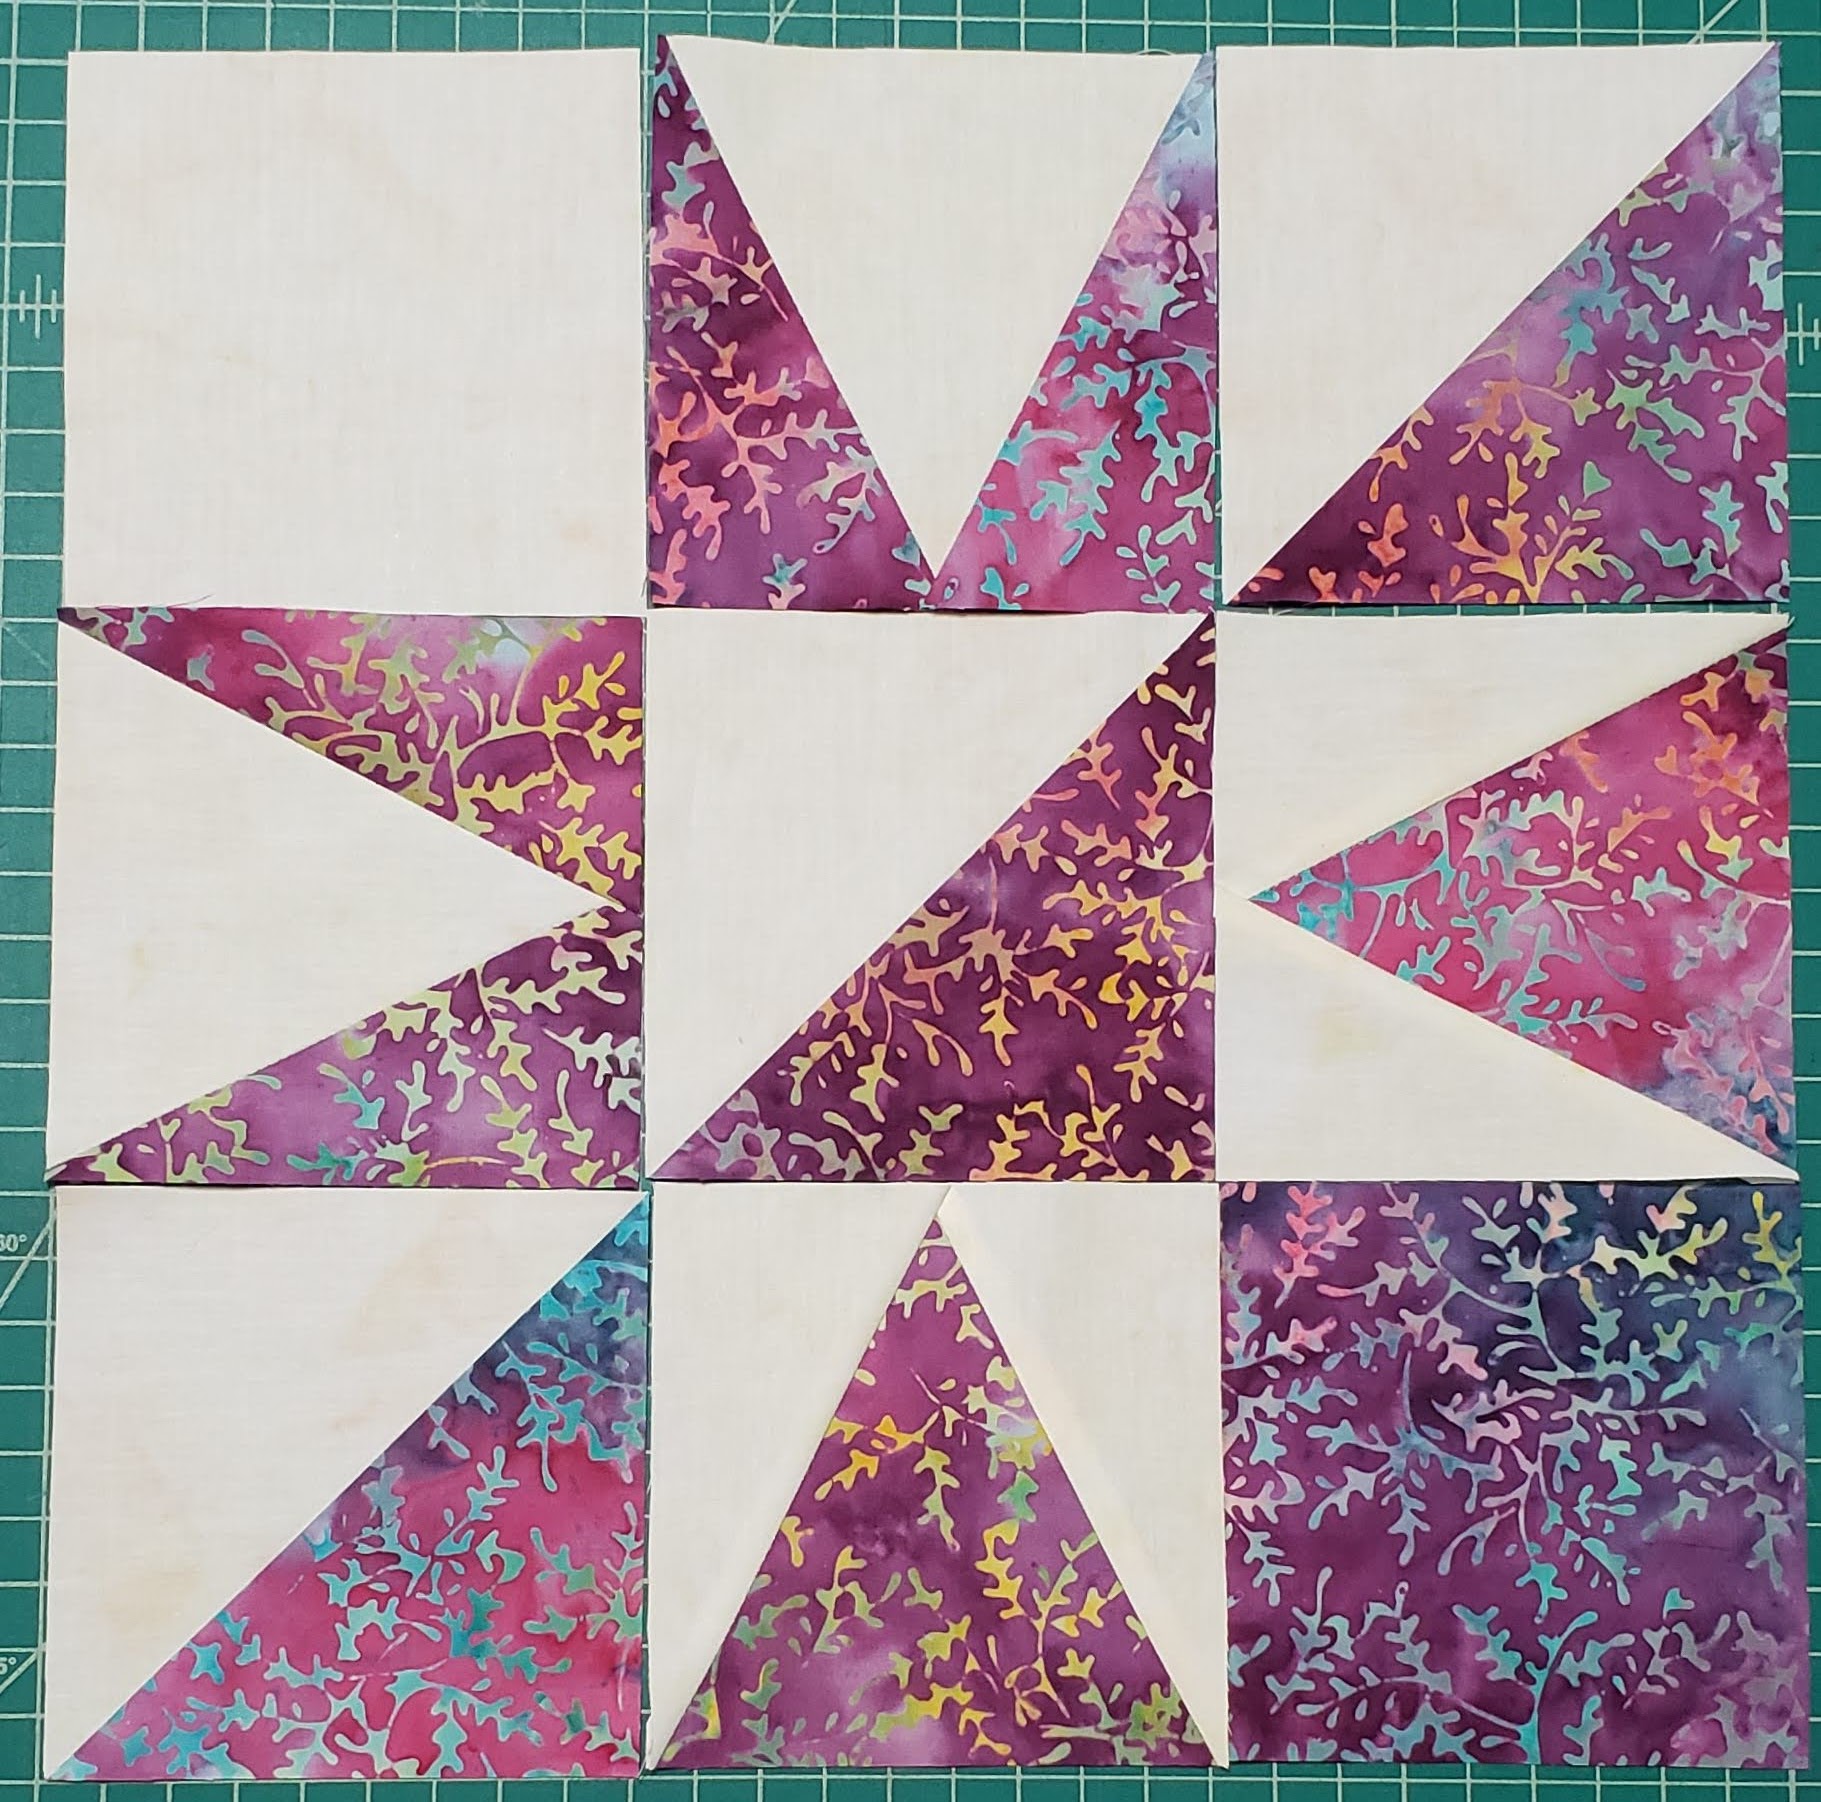
Sew the blocks together (9 patch). Press the seams.

Note: See how each point along the outside edges, has 1/4″ seam allowance. This is because the V-block ruler creates this when you trim. No more lost points.
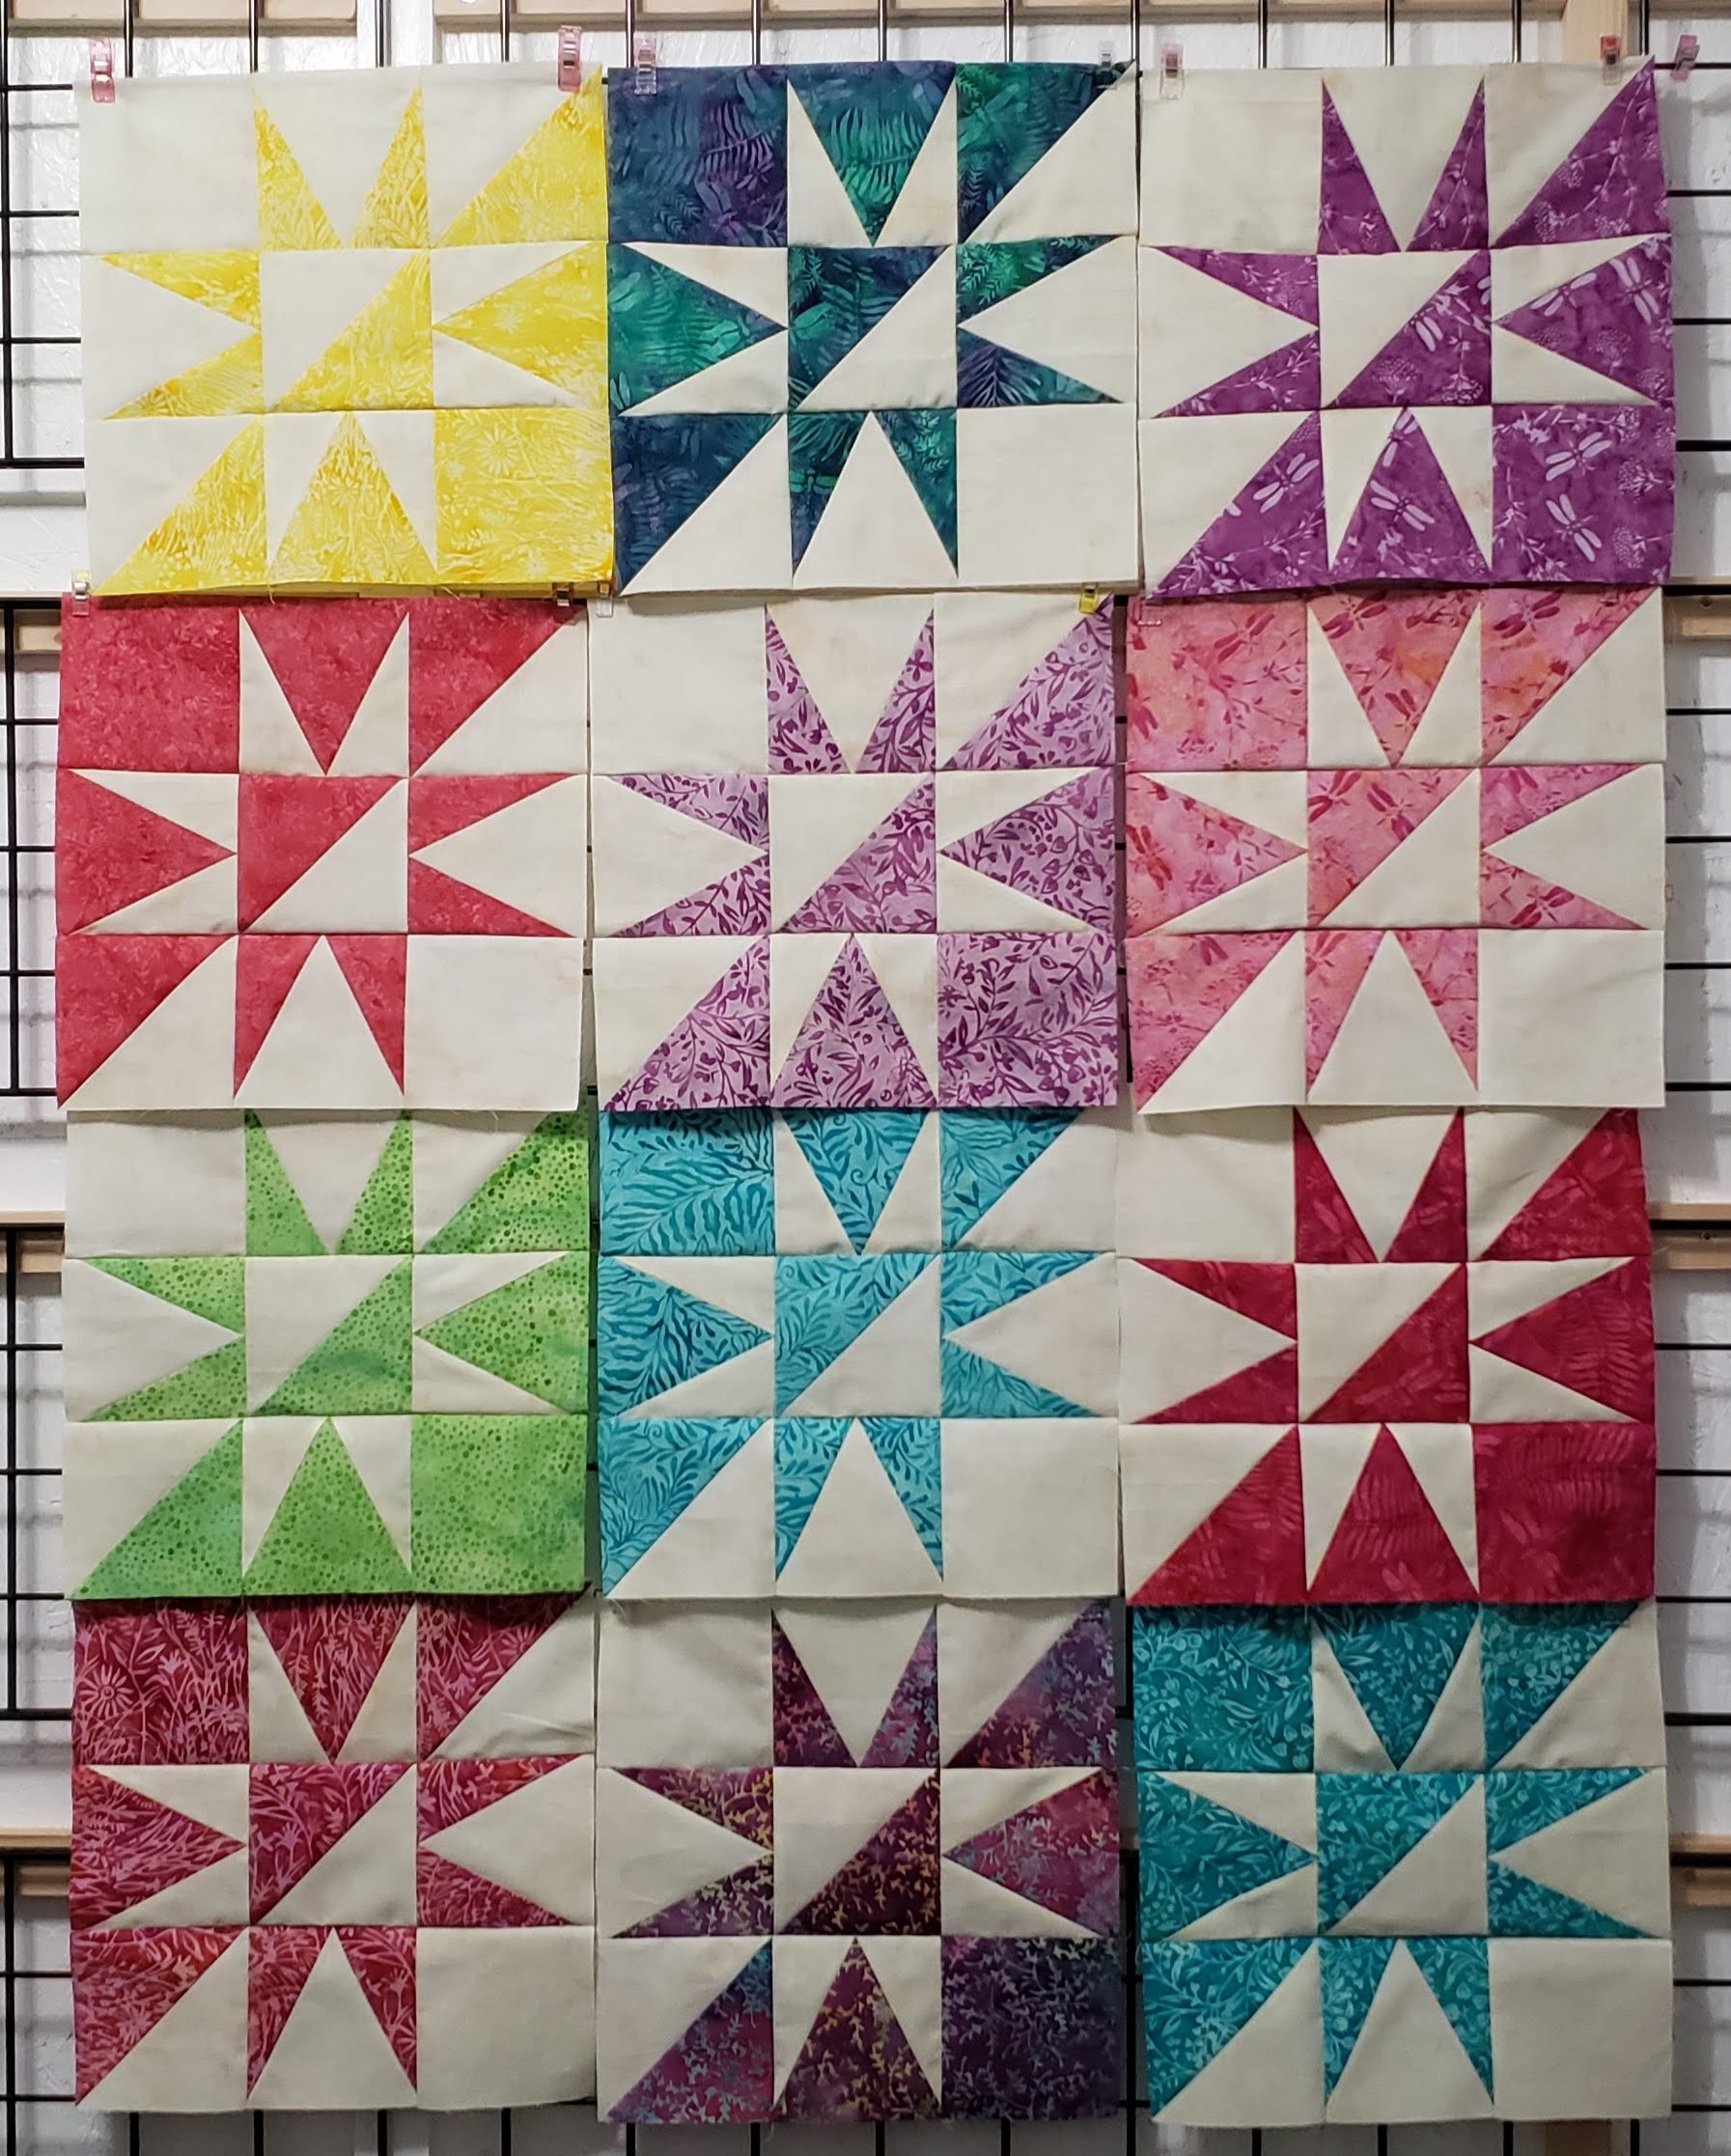
Repeat for all 20 blocks.
Quilt Assembly.
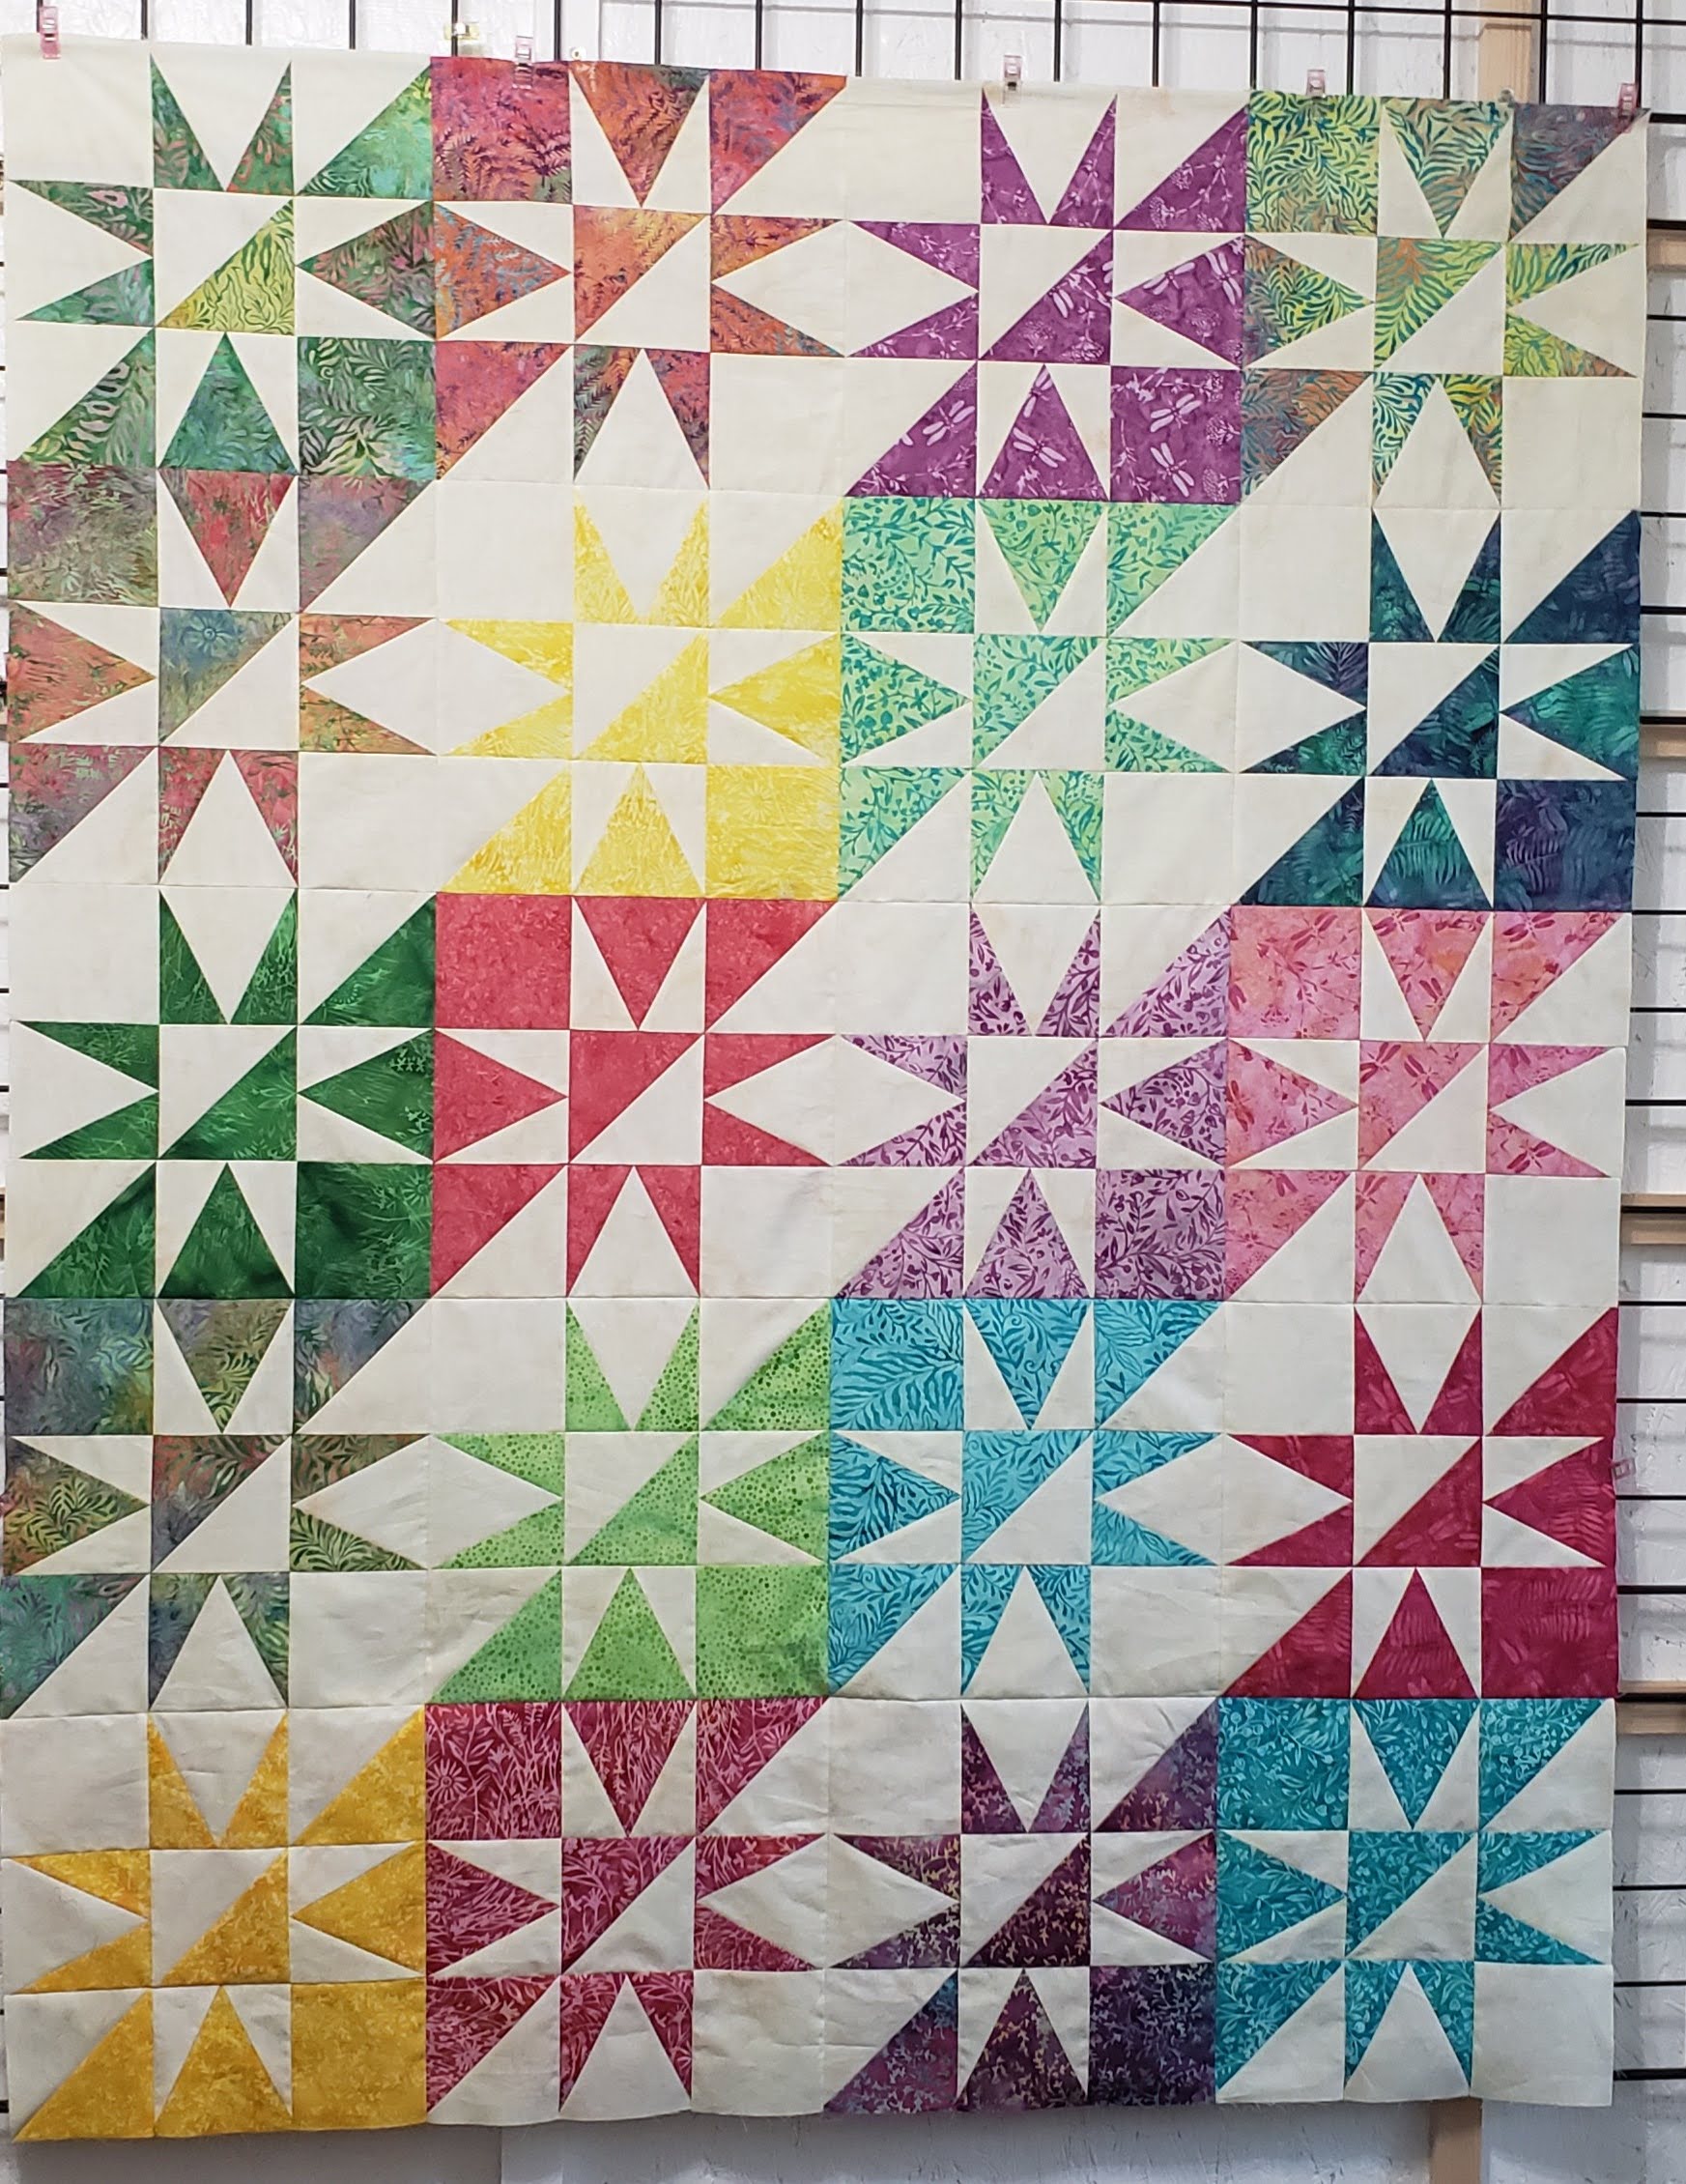
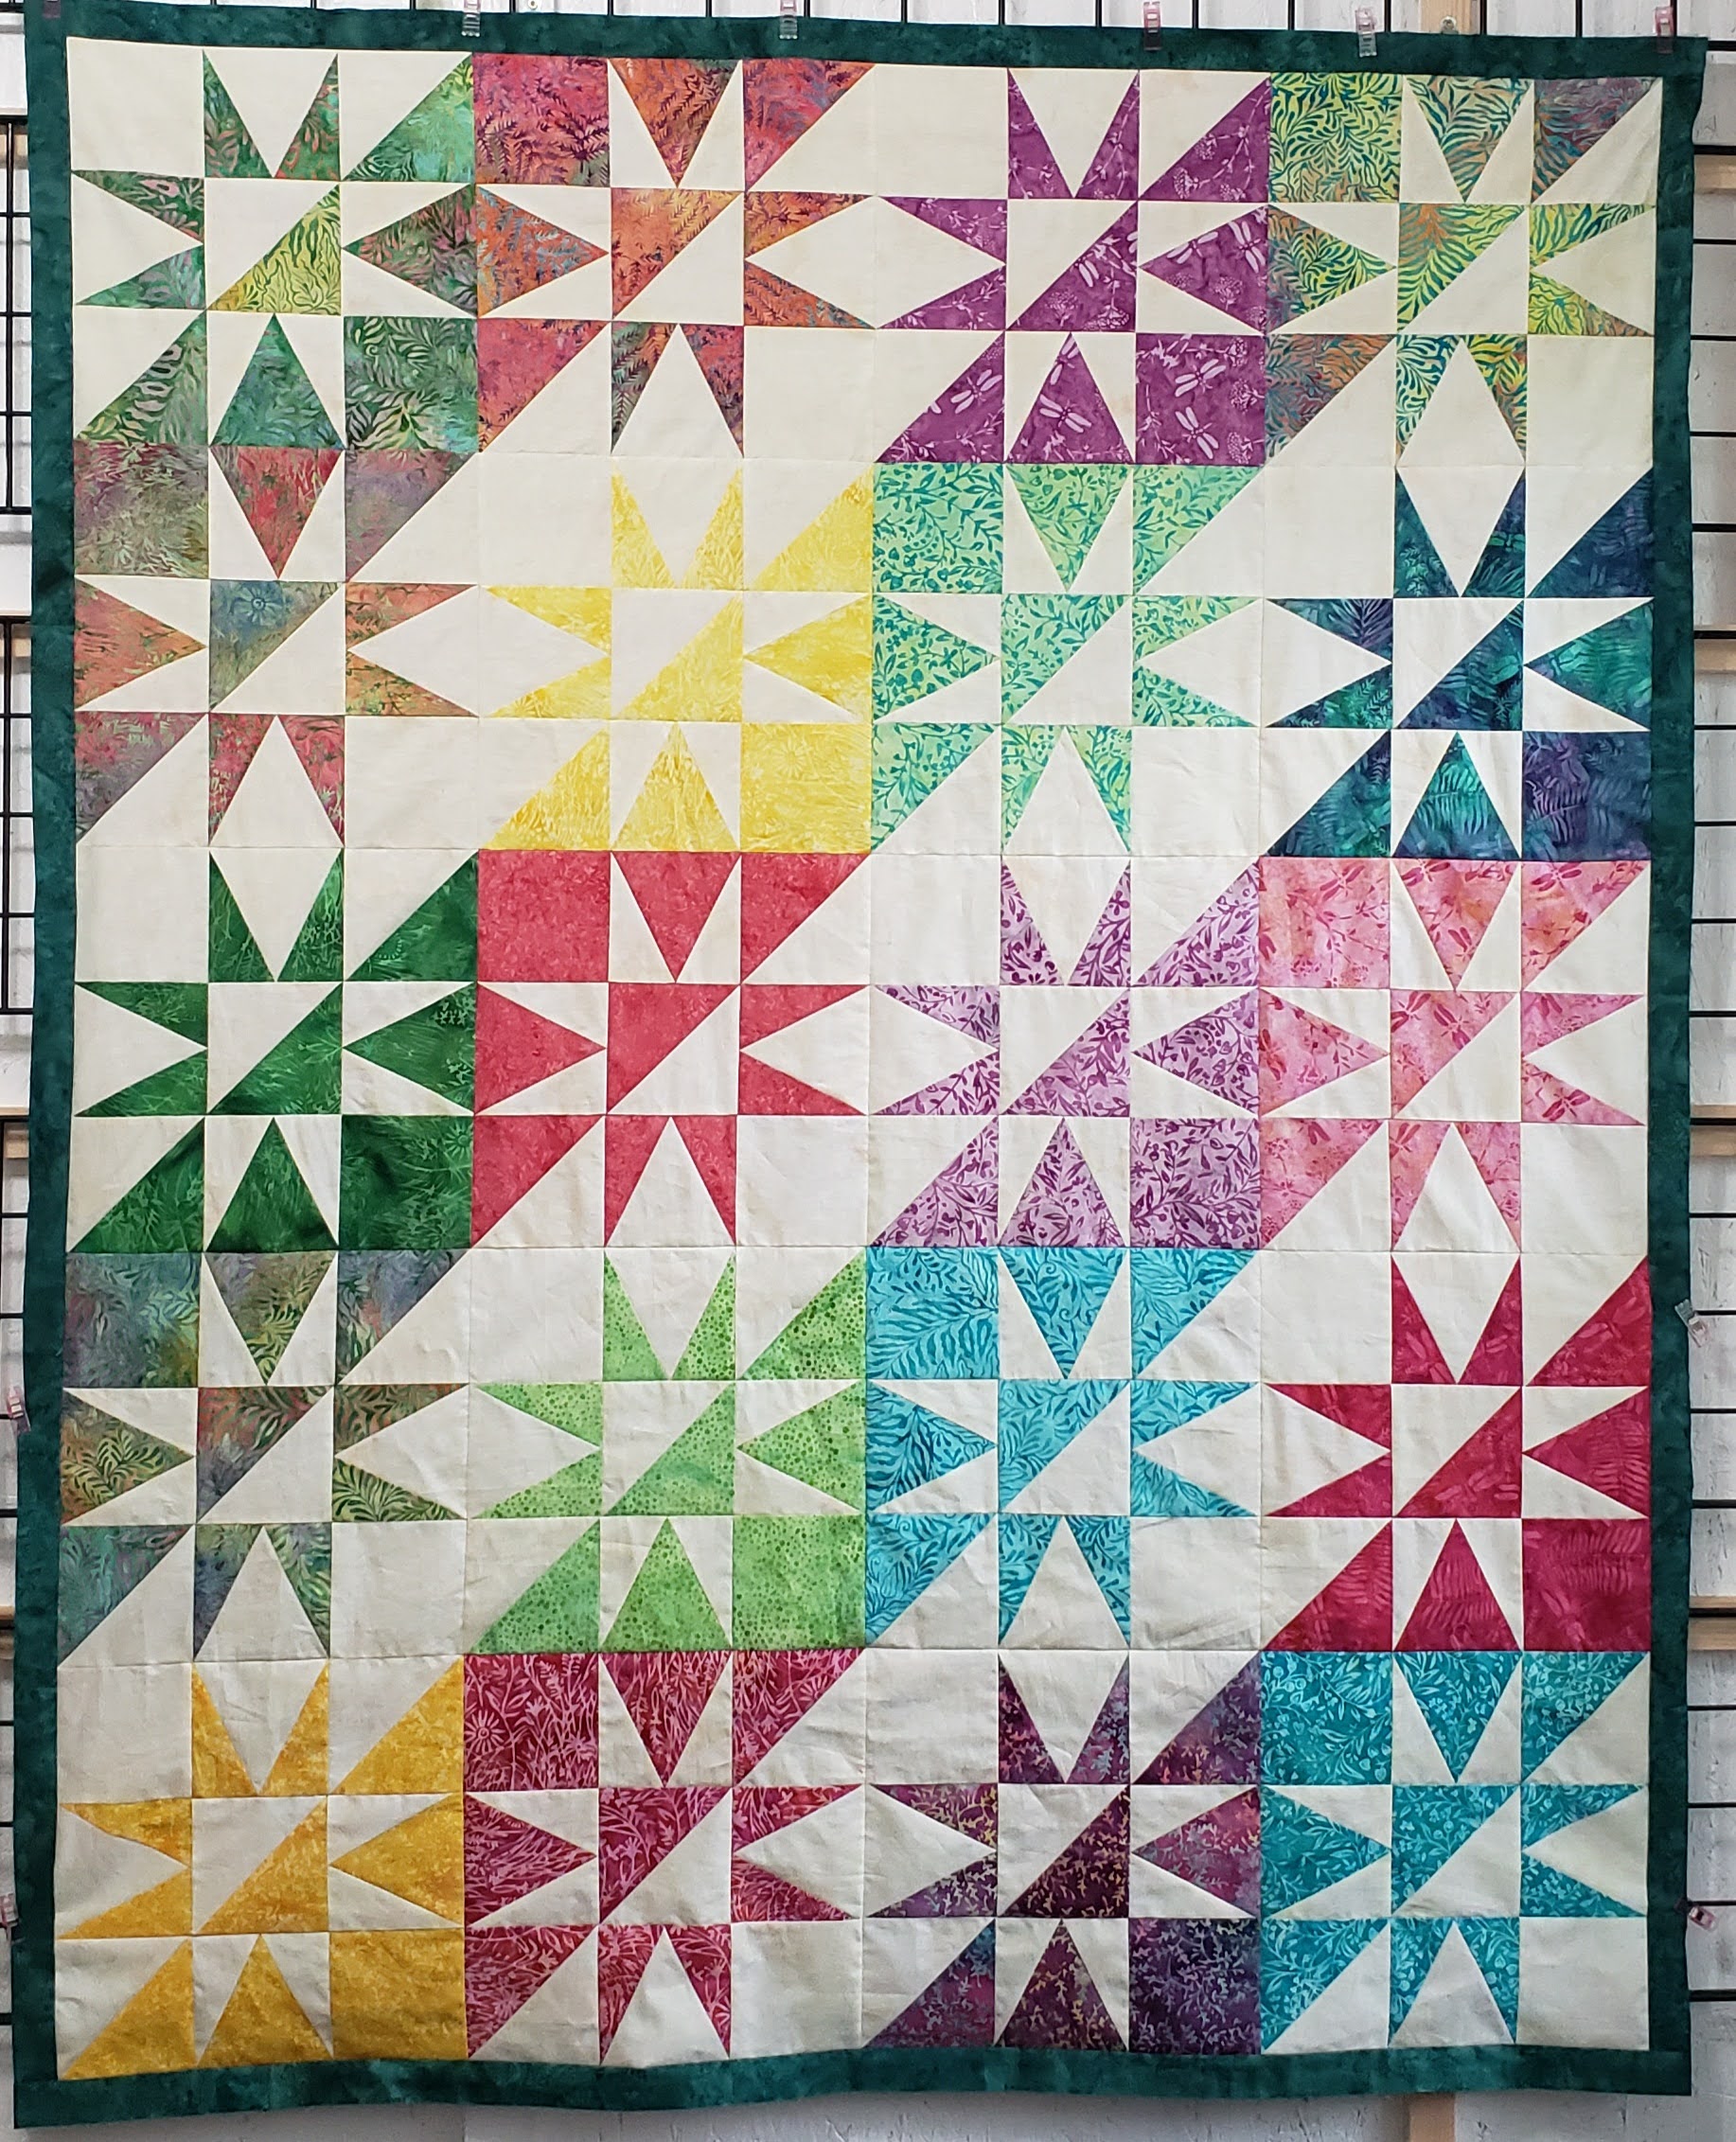
Lay out your blocks, and make sure you like where they are at, you can move them around to make them look the way you want.
I twisted some of the blocks so that they would have the appearance of a stripe, color then coordinating. You can lay them this way, or you can keep them all the same.
Sew together with a 1/4″ seam allowance. Press seams.
Border.
First Border is a 1″ finished strip of coordinating Jade (part of the Tantalizing Teals), cut 1 1/2″ strips, you will need 6 strips. Sew these to the Quilt top, and press towards the strips. Set the quilt top aside to create the next border.
Second Border
I decided to add a coordinating border of V Blocks with all the fabrics in the collection, to the top and bottom of the quilt, with the coordinating Ceramic fabric on the sides.
Cut three 3″ strips of the coordinating Ceramic fabric. Sew to each side of the quilt top (not the top or bottom). Press the seams towards the Jade fabric (1″ strip)
You will need to make 58 – 3″ (2 1/2″ finished”) V Blocks. Follow the same process above, however, all of the V Blocks will have coordinating Ceramic side fabric, with color center triangles.
After creating the 58 V blocks, split into two sets, and sew into two strips. Make sure to rotate the blocks to get the diamond look.
Press the seams.
Cut six 1 1/2″ strips of Coordiating fabric, and sew on the top and bottom of the V-block strips. Press the seams towards the Coordinating fabric to reduce bulk.
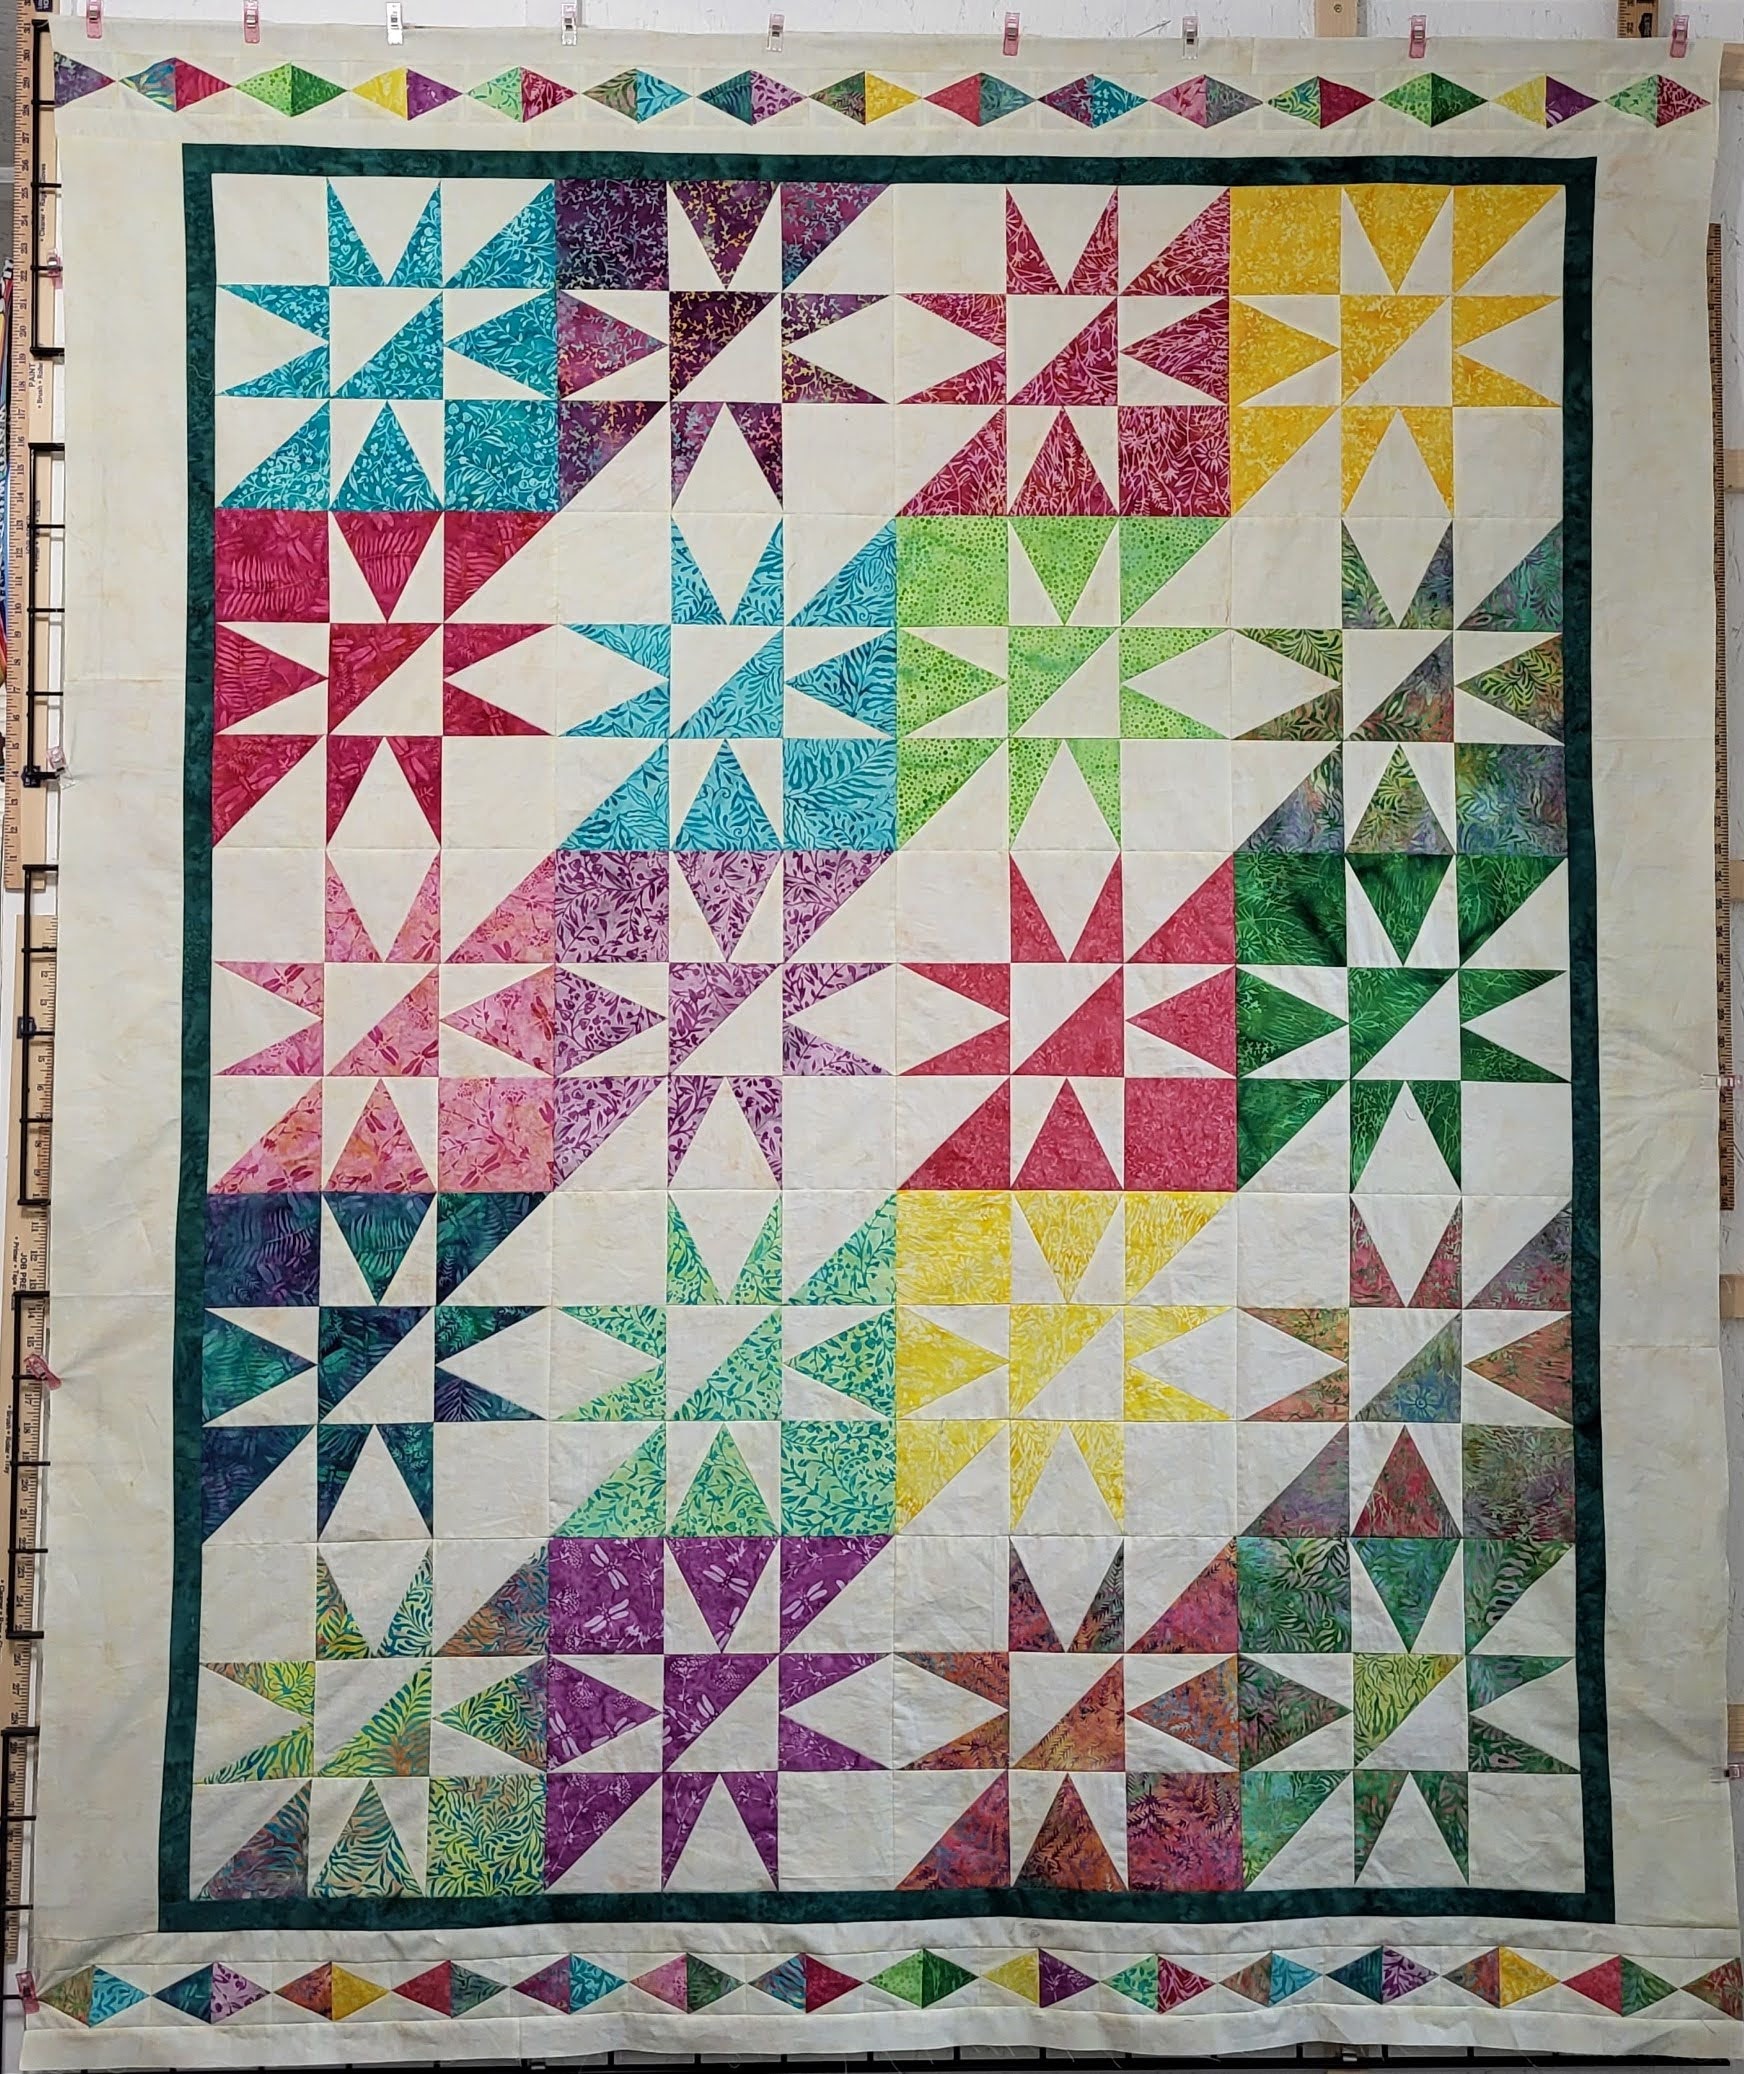
Sew one strip of V Blocks to the top of the quilt, and one to the bottom of the quilt. Press the seams towards the Jade fabric.
Here is my completed top.
Quilting
I used Hobbs 80/20 Cotton Batting. I love the way the batting works with the fabrics, and makes the quilt so soft, but warm, but light to carry.
I used Schmetz needles to piece my quilt. They make sewing the quilt so easy, and help keep the tread from breaking. I used Aurifil Thread to piece the quilt. This is my favorite thread now, it does not break as often as other cheaper brands, so you don’t have to keep threading the machine.
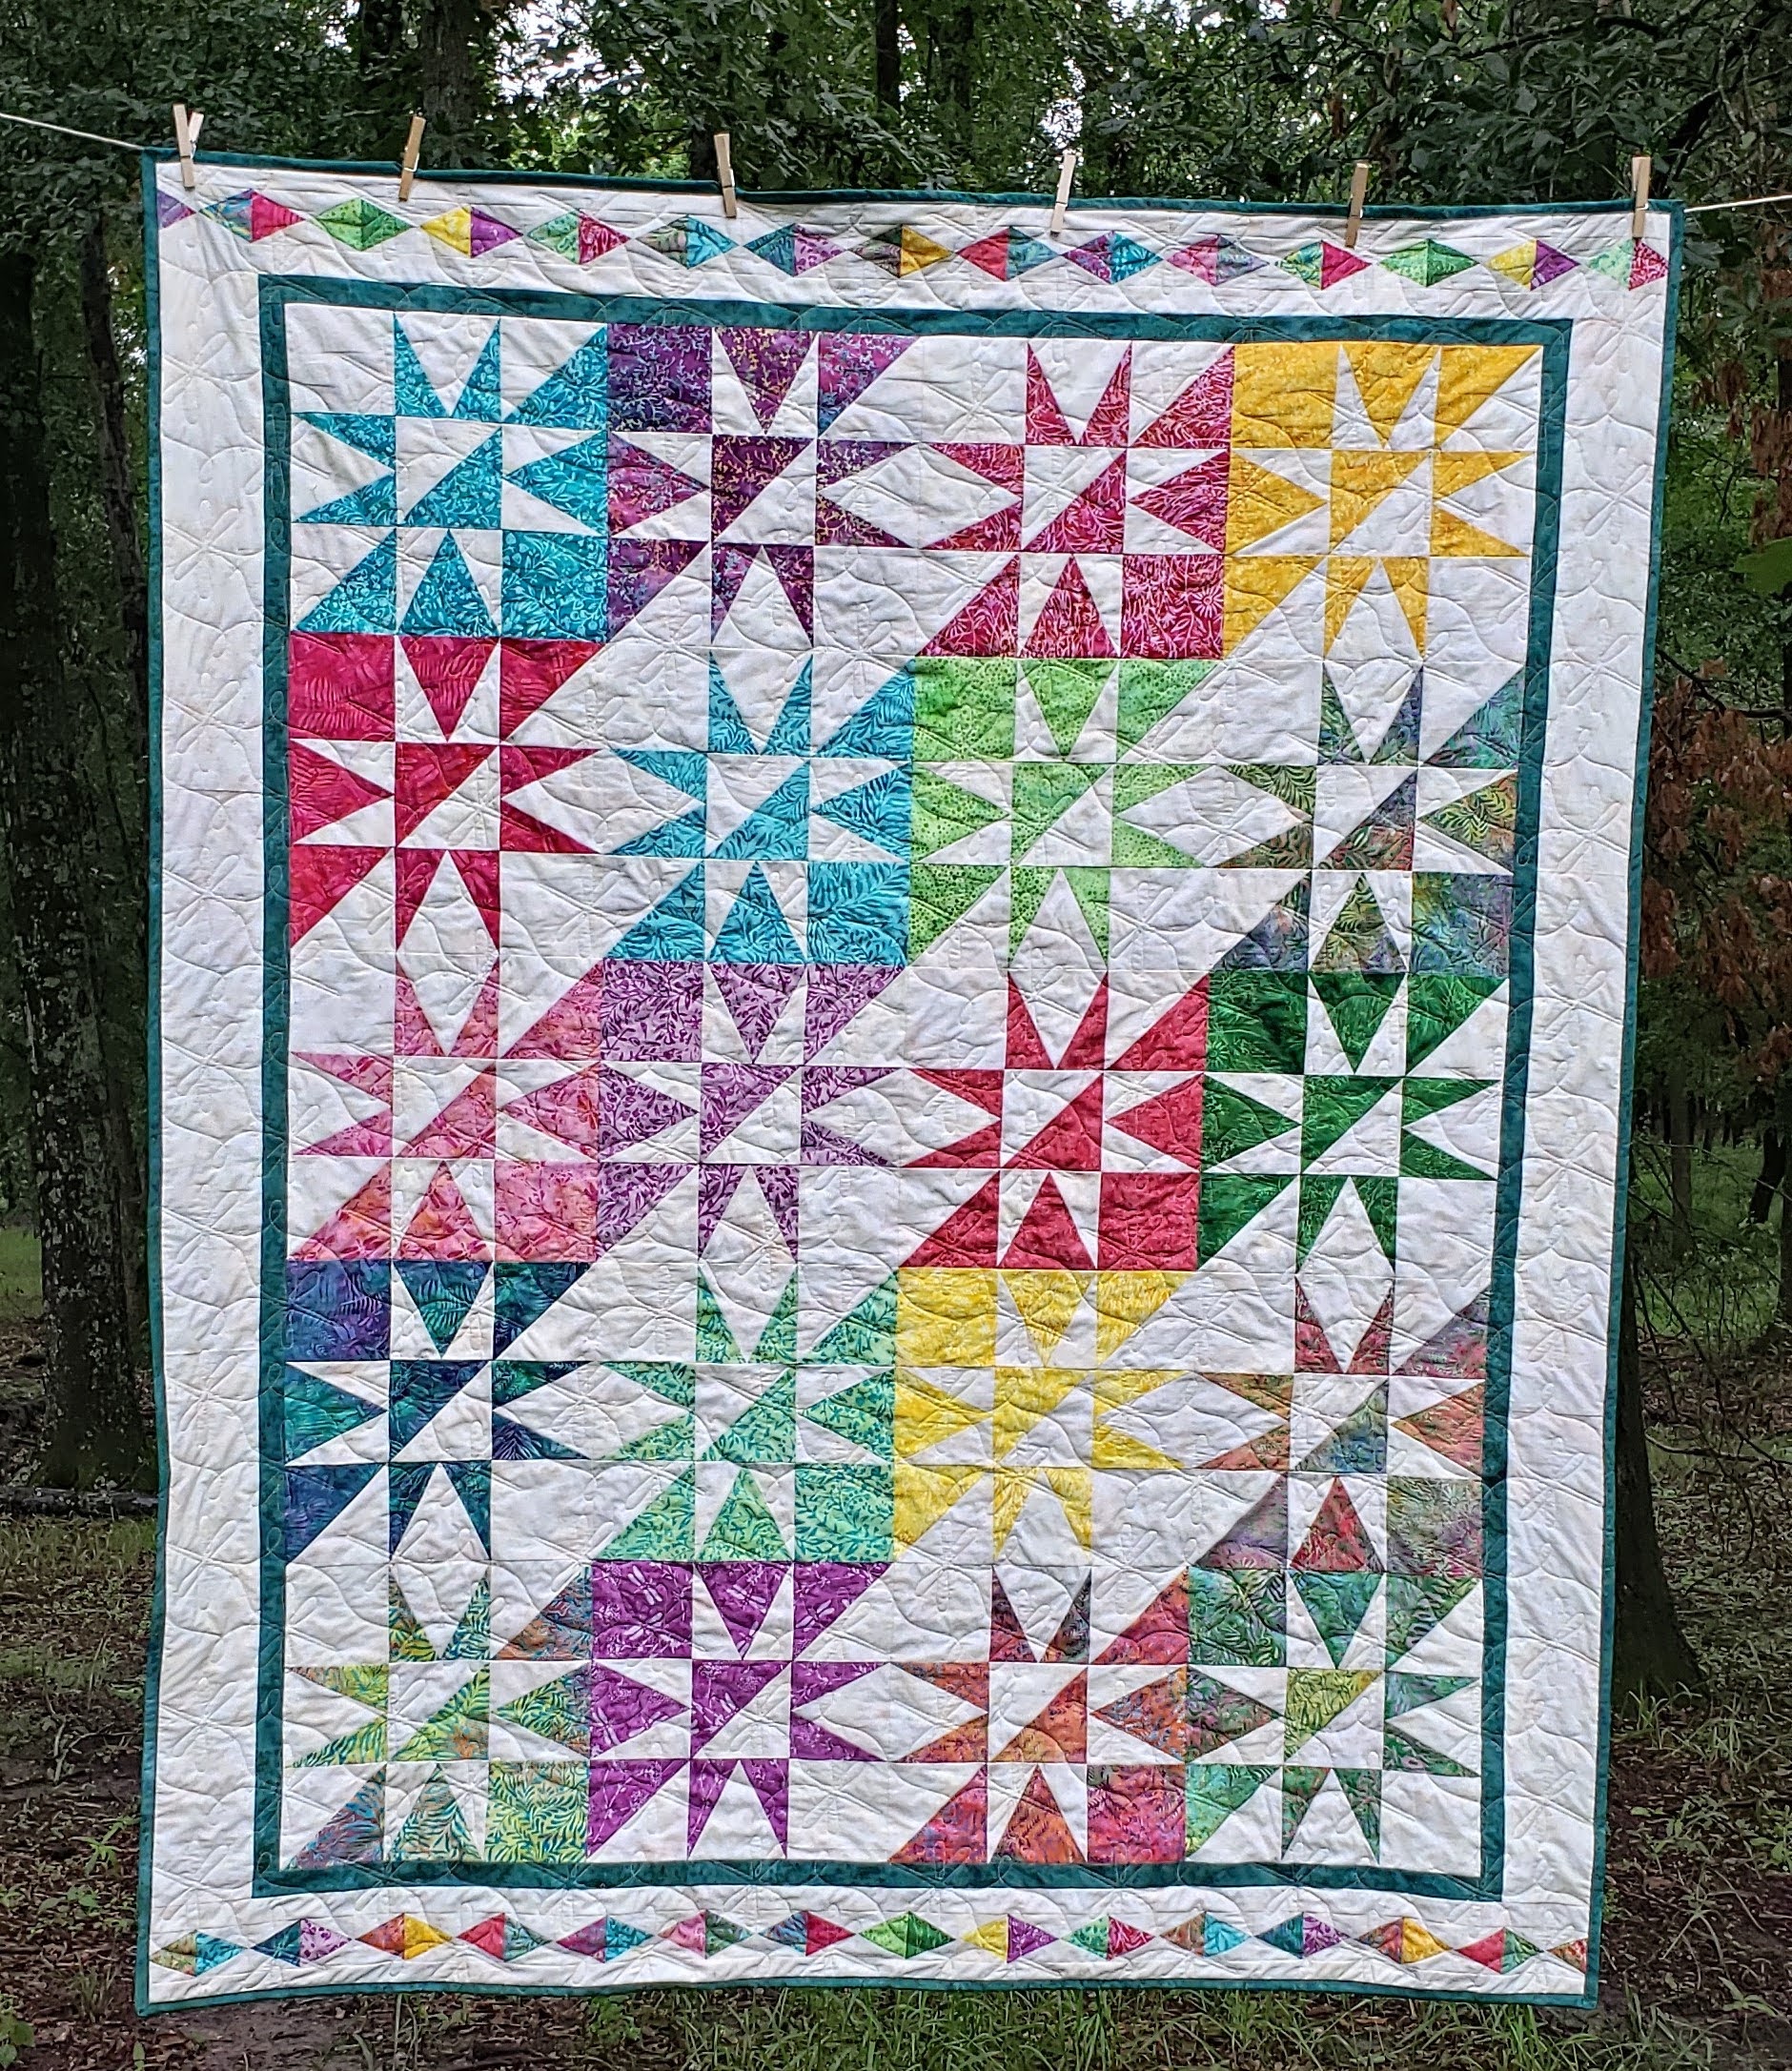
I used my Longarm to finish the quilt, using a Pantograph I purchased from “Quilting Pantographs” called “Jared’s Dragonflies“, using Aurifil Thread 2000 from Aurifil “Sandy Beaches” set that I purchased from Missouri Star Quilt Company. It matches the Ceramic fabric, and blends in with the rest of the fabric as well.

I used some of the coordinating Jade to bind the quilt.
Here is my completed Quilt.


While my quilt was on the long-arm, I continued to make more of the 2 1/2″ V-blocks with the rest of the strip of fabric I had cut to make the quilt. I am not sure what I will do with all the V-blocks, but I am sure at some point, I will finish, and show you the top.
I had so much fun making this quilt, and the V Block ruler, defiantly made it more fun, and so much easier than using templates, and trying to square up the block. If you haven’t tried a Studio 180 designs ruler, you should try this one, it was fun to use and make. There are lots of options to use with the ruler to create a lot more fun designs.
If you enjoyed my quilt and my new Ruler, check out the other Island Batik Ambassador’s fabrics and rulers. This is the last day of the Blog Hop, so they have all posted their projects to view.
Brenda Alburl ~ Songbird Designs
Renee Atkinson ~ Pink Tulip Quilting
Pamela Boatright ~ PamelaQuilts
Susan Deshensky ~ Lady Blue Quilts
Brittany Fisher ~ Bobbin with Brittany
Preeti Harris ~ Sew Preeti Quilts
Mania Hatziioannidi ~ Mania for quilts
Reed Johnson ~ Blue Bear Quilts
Victoria Johnson ~ Forever Quilting for You
Randi Jones ~ Randi’s Roost
Connie Kauffman ~ Kauffman Designs
Emily Leachman ~ The Darling Dogwood
Denise Looney ~ Quiltery – For The Love Of Geese
Leah Malasky ~ Quilted Delights
Maryellen McAuliffe ~ Mary Mack Made Mine
Anorina Morris ~ sameliasmum.com
Lisa Pickering ~ Lisa’s Quilting Passion
Sarah Pitcher ~ Pitcher’s Boutique
Claudia Porter ~ Create with Claudia
Lana Russel ~ Lana Quilts
Elita Sharpe ~ Busy Needle
Gail Sheppard ~ Quilting Gail
Sandra Starley ~ Textile Time Travels
Jennifer Thomas ~ Curlicue Creations
Suzy Webster ~ Websterquilt
#hobbsbatting, #aurifil, #aurifilthread, #schmetzneedles, #janome, #juki, #studio180designs, #Vblock, #islandbatikAmbassador, #iloveislandbatik, #islandbatik

Great tutorial and I love how this fabric collection looks in your quilt. Have a fabulous day!
LikeLike
I love this quilt!
LikeLike
Love your design and this collection, Lisa!! Beautiful finish!
LikeLike
Pretty quilt, I like the layout.
LikeLike
You choose a great block pattern to make with the V block ruler!
LikeLiked by 1 person
wow this is gorgeous. thanks for sharing how this came together. I will have to look for this ruler. I really love the top and bottom borders. perfect. thanks for sharing and inspiring. quilting dash lady at comcast dot net
LikeLiked by 1 person
It is a beautiful quilt. I really love your design and the fabrics are so gorgeous.
LikeLiked by 1 person
It is a beautiful finish. I can see you put so much effort into it!
LikeLiked by 1 person