This month’s Island Batik challenge is the Threaded Chaos Blog Hop, a creative adventure in partnership with Aurifil thread. My children like to call me the crazy quilt lady. Sometimes, they call me the crazy chicken lady. They declared this the perfect quilt for me.
What is a Crazy Quilt?
A crazy quilt is a unique form of patchwork. It is defined by its irregular shapes and bold angles. The quilt includes a lively mix of fabrics joined together with decorative embroidery. Unlike the uniformity of traditional quilting, crazy quilts embrace improvisation. They transform various scraps such as silk, velvet, cotton, and more into a vibrant mosaic. The style was influenced by the late nineteenth-century Aesthetic Movement and Japanese art, which celebrated asymmetry and elaborate embellishments. However, origins may also trace back to Victorian thrift. During lean times, resourceful makers repurposed remnants of clothing, ribbons, and home textiles. Folk traditions globally have also contributed, using patchwork and decoration to tell stories or signify status. Early crazy quilts showed off embroidery skills. They served as a canvas for creative expression. Each piece was a reflection of its maker’s ingenuity.
Materials and Preparation
I received the new Island Batik Spring 2025 Colorburst Collection. It is a signature line designed by Jerry Khiev for Heidi Pridemore of the Whimsical Workshop.

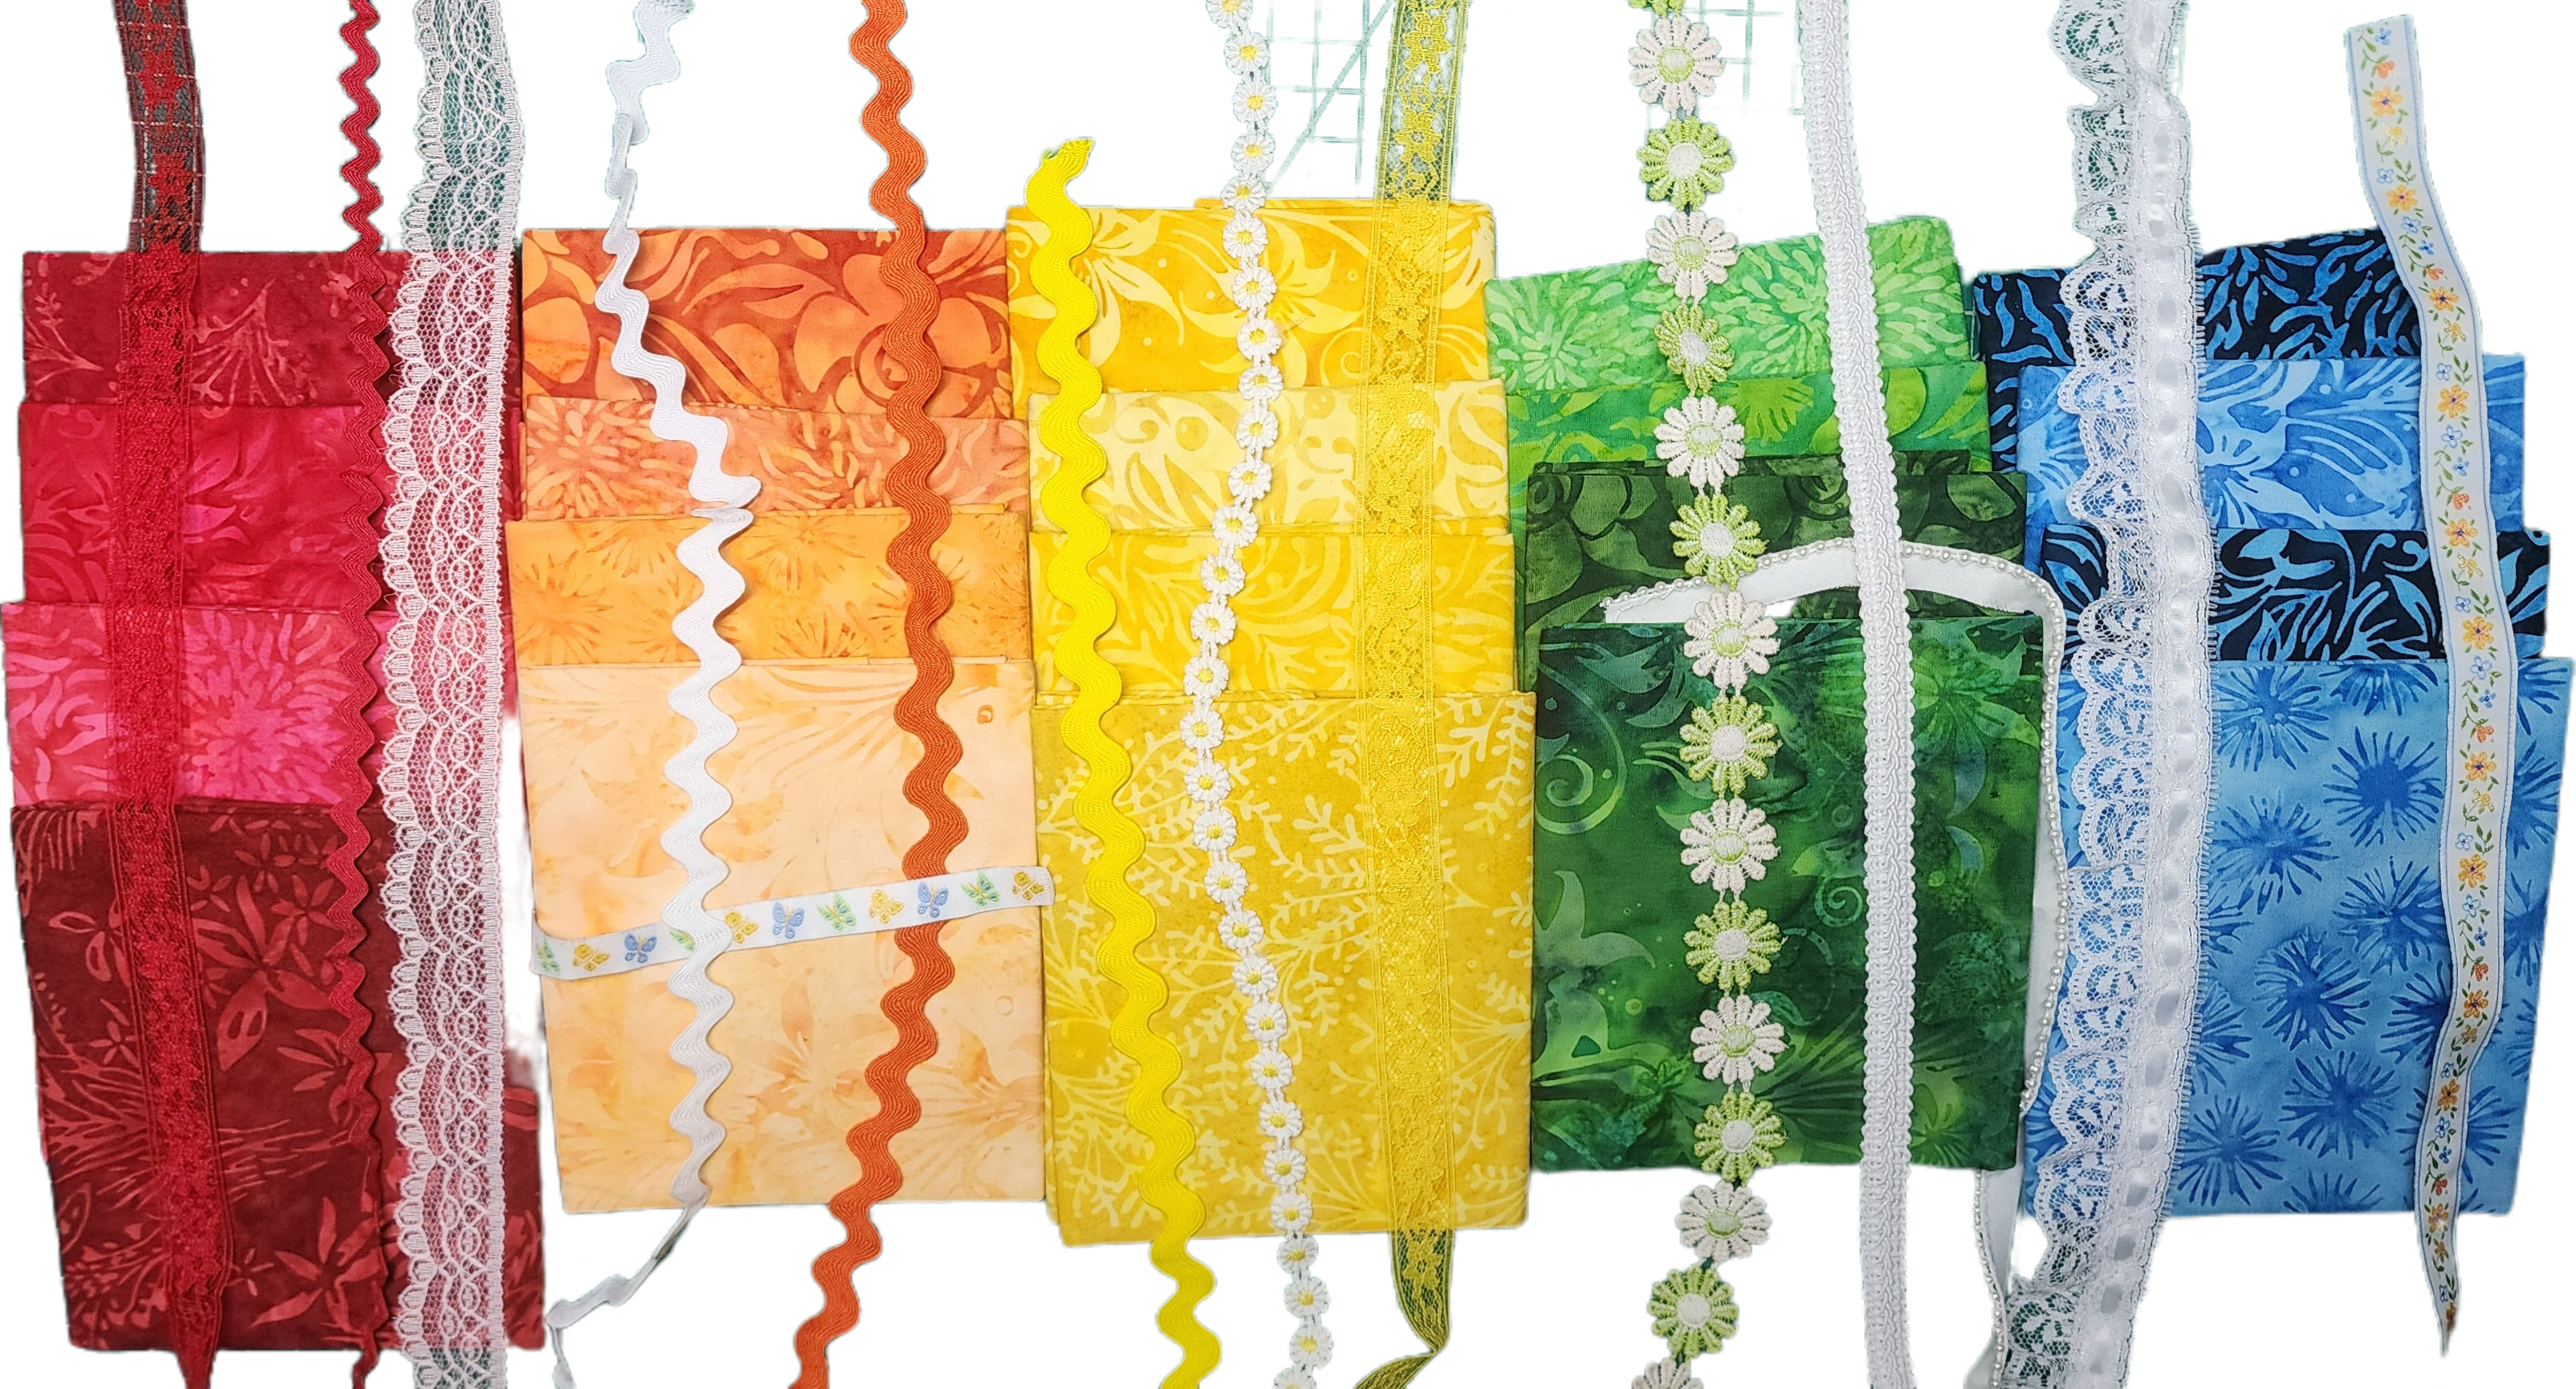
Four coordinating spools of Aurifil thread were also provided to feature in my quilt. Here are the threads I picked out to use. I chose four from what Aurifil sent me this time. Additionally, I selected three from previous projects.

Island Batik and its partners supplied all fabric and materials at no cost. Partners include Hobbs Batting, Aurifil Thread, Oliso Iron, and Schmetz Needles. This was part of my role as an Island Batik Ambassador.
Choosing Ribbons and Lace
I sifted through my stash of ribbons and lace to find pieces that would complement the crazy quilt blocks. Some made their way into the project, while others were set aside. Having plenty of options provided creative freedom during construction. I could choose embellishments in the moment. I didn’t have to search for inspiration later.
The Creative Process
While seeking inspiration, I discovered Monica Poole’s videos on quilt-as-you-go crazy quilting. These videos offered a streamlined method for assembling blocks. They also provided a fun approach to edging the quilt.
Block Construction
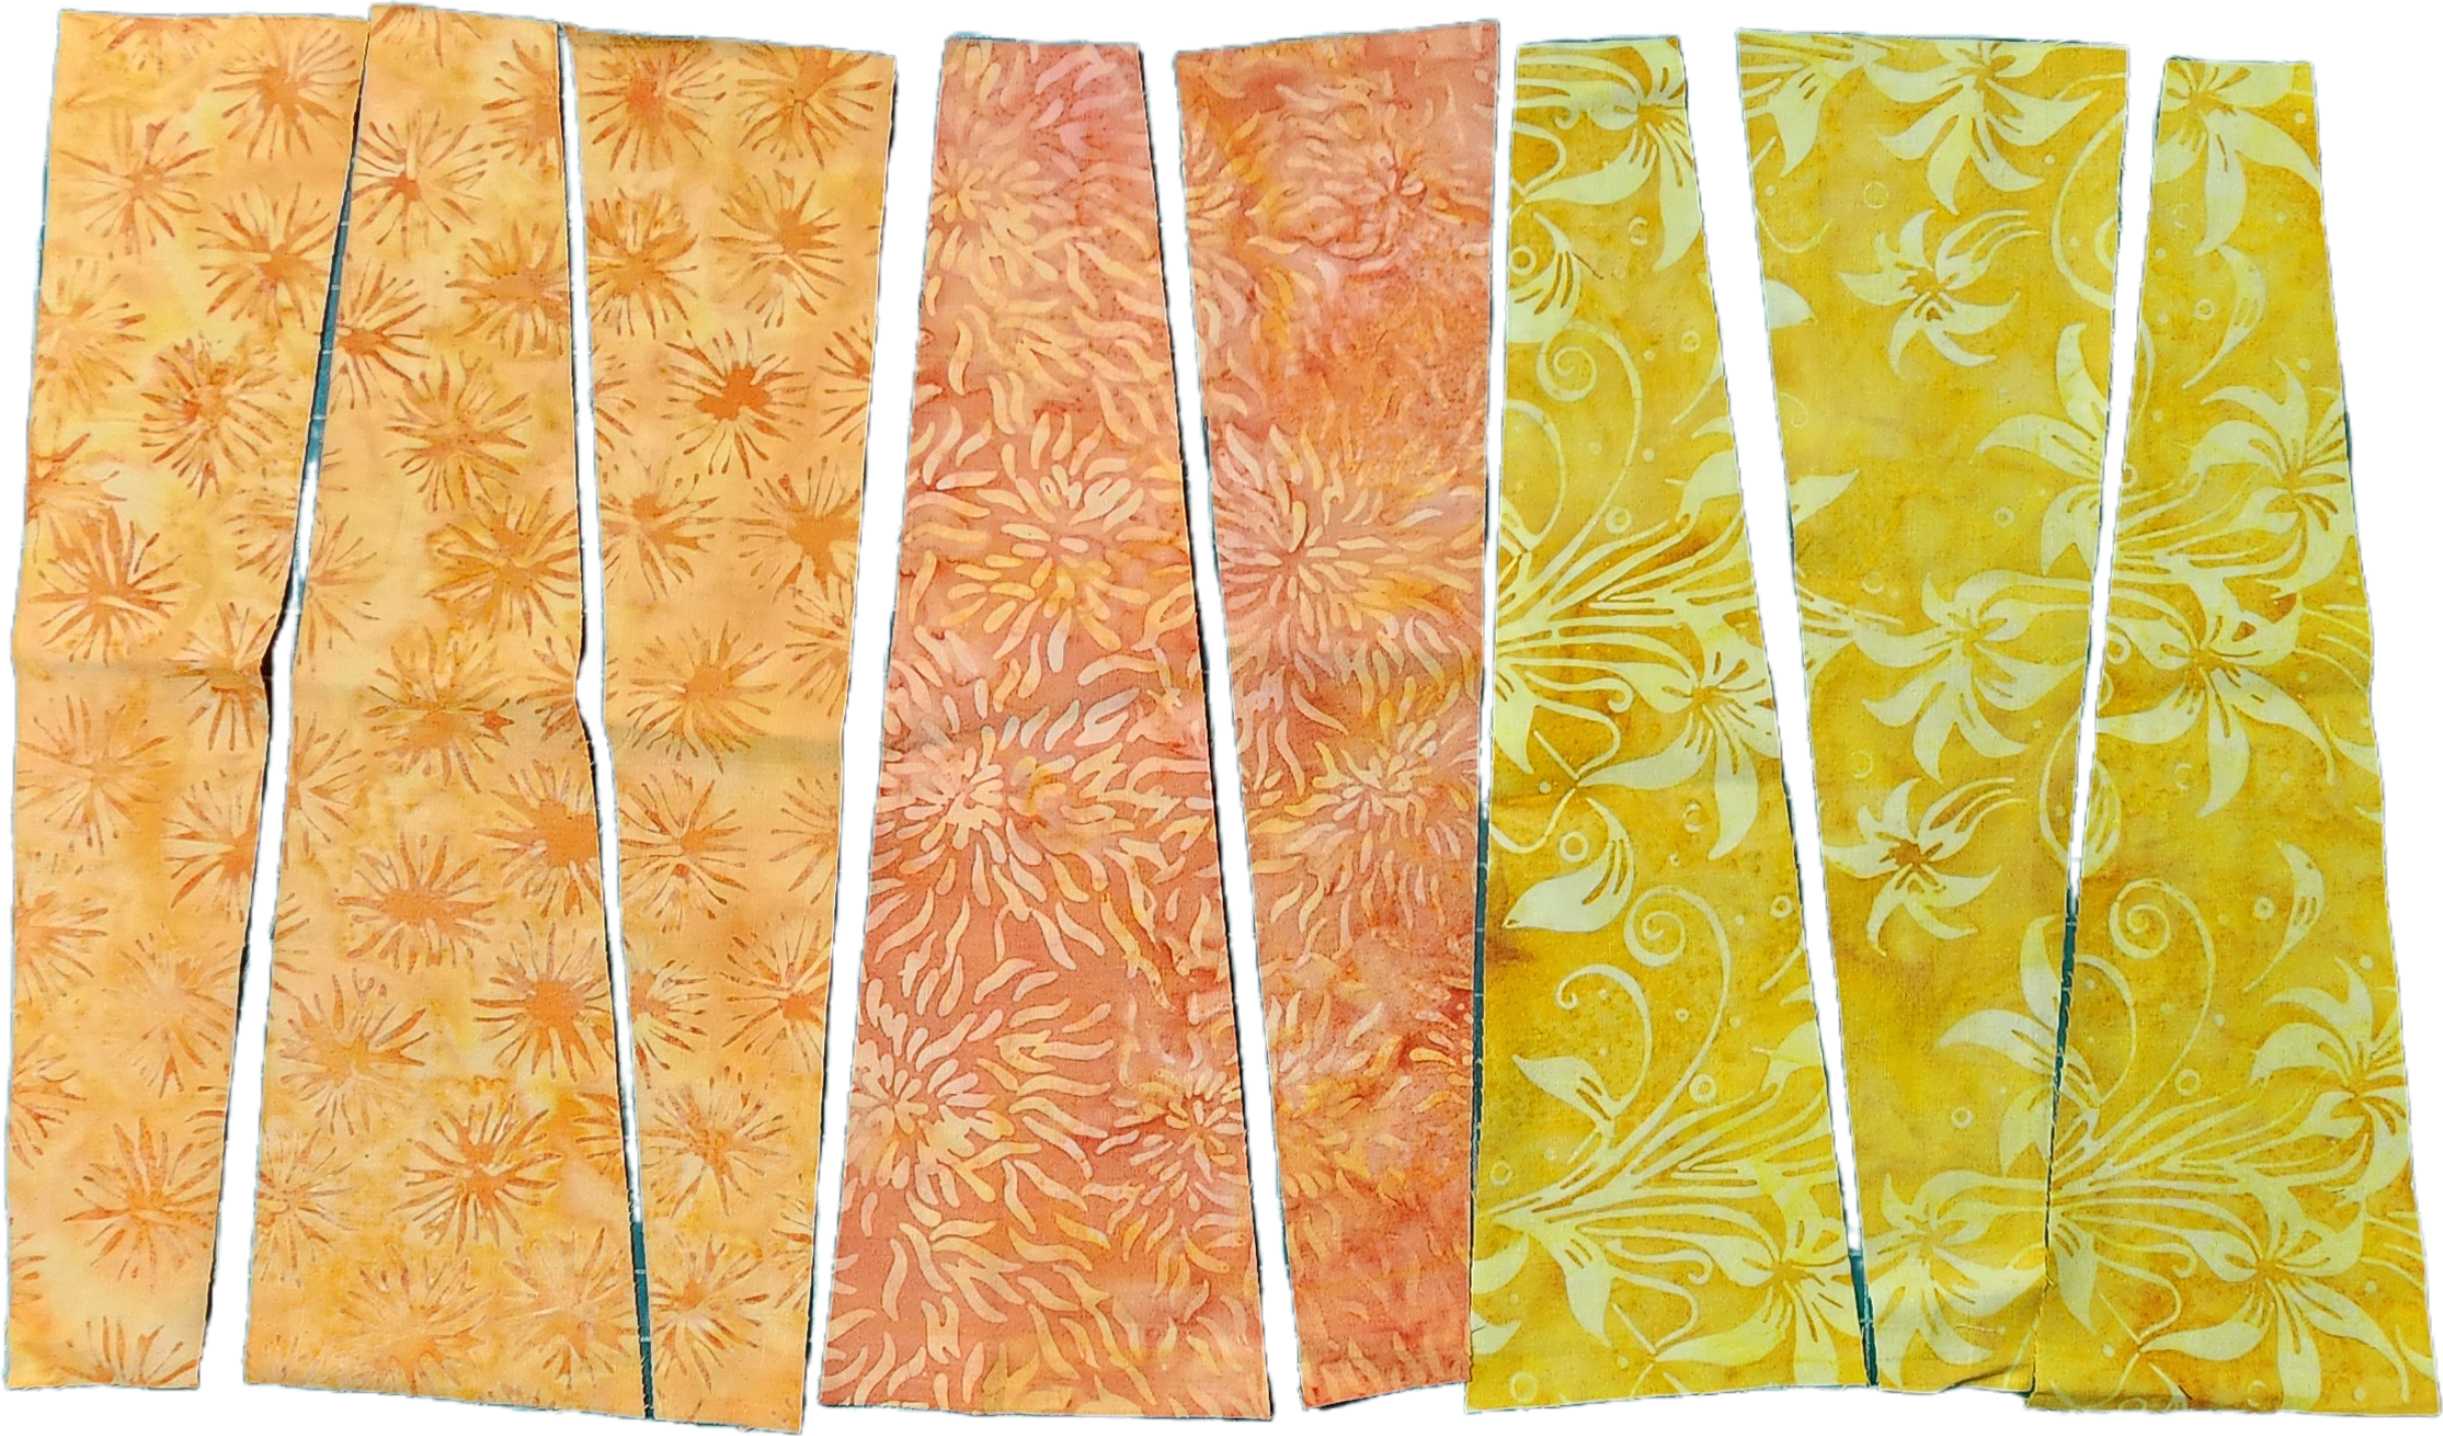
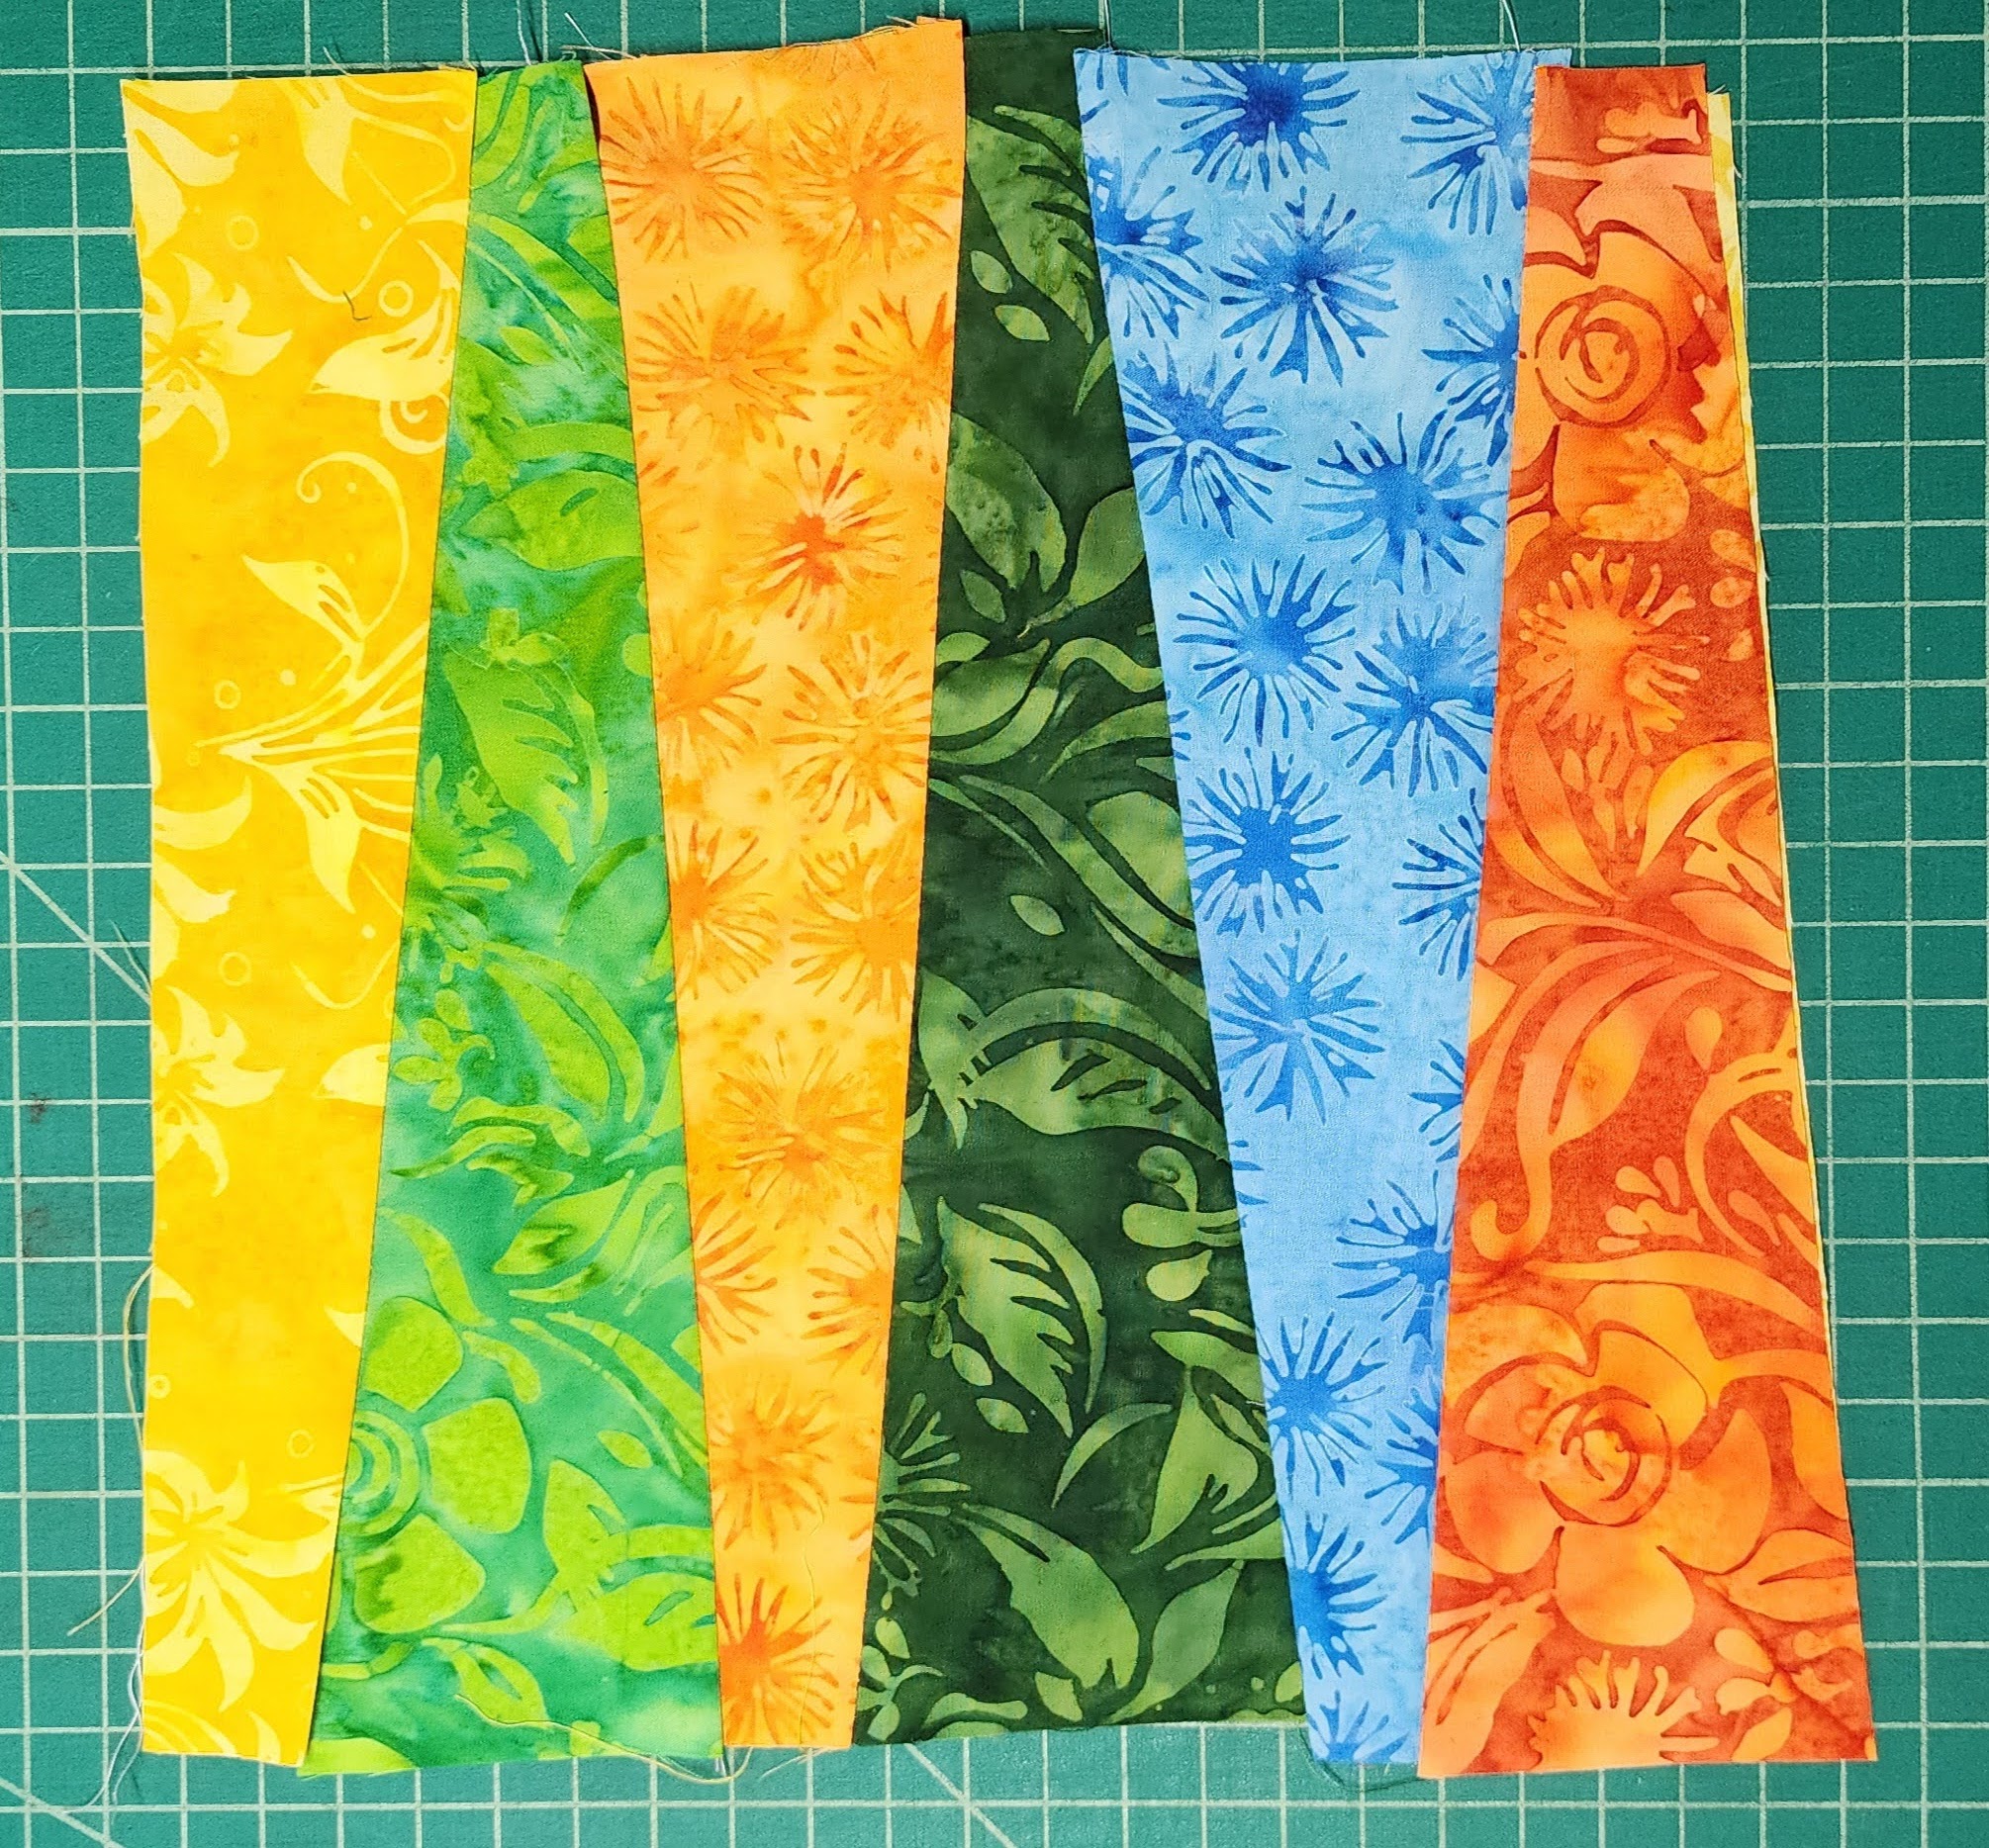
To start, I cut fabric strips slightly larger than the intended block size, then sliced them into random, angled pieces. I prepared pieces from all the fabrics I wanted in my quilt. I also set aside some larger cuts for diagonal blocks.
Backing pieces were cut about one inch larger than the finished block. The batting matched the finished size. This ensures there will be no batting in the seam allowances.
I sandwiched each backing with a square of Hobbs fusible batting, which proved ideal for this purpose.

Once fused, I layered various fabrics onto the background until fully covered. Stitching right-sides together, then pressing out. (Watch the batting if you use an Iron it is fusible batting).
After covering the background, I flipped each block over to trim to the backing’s edge.

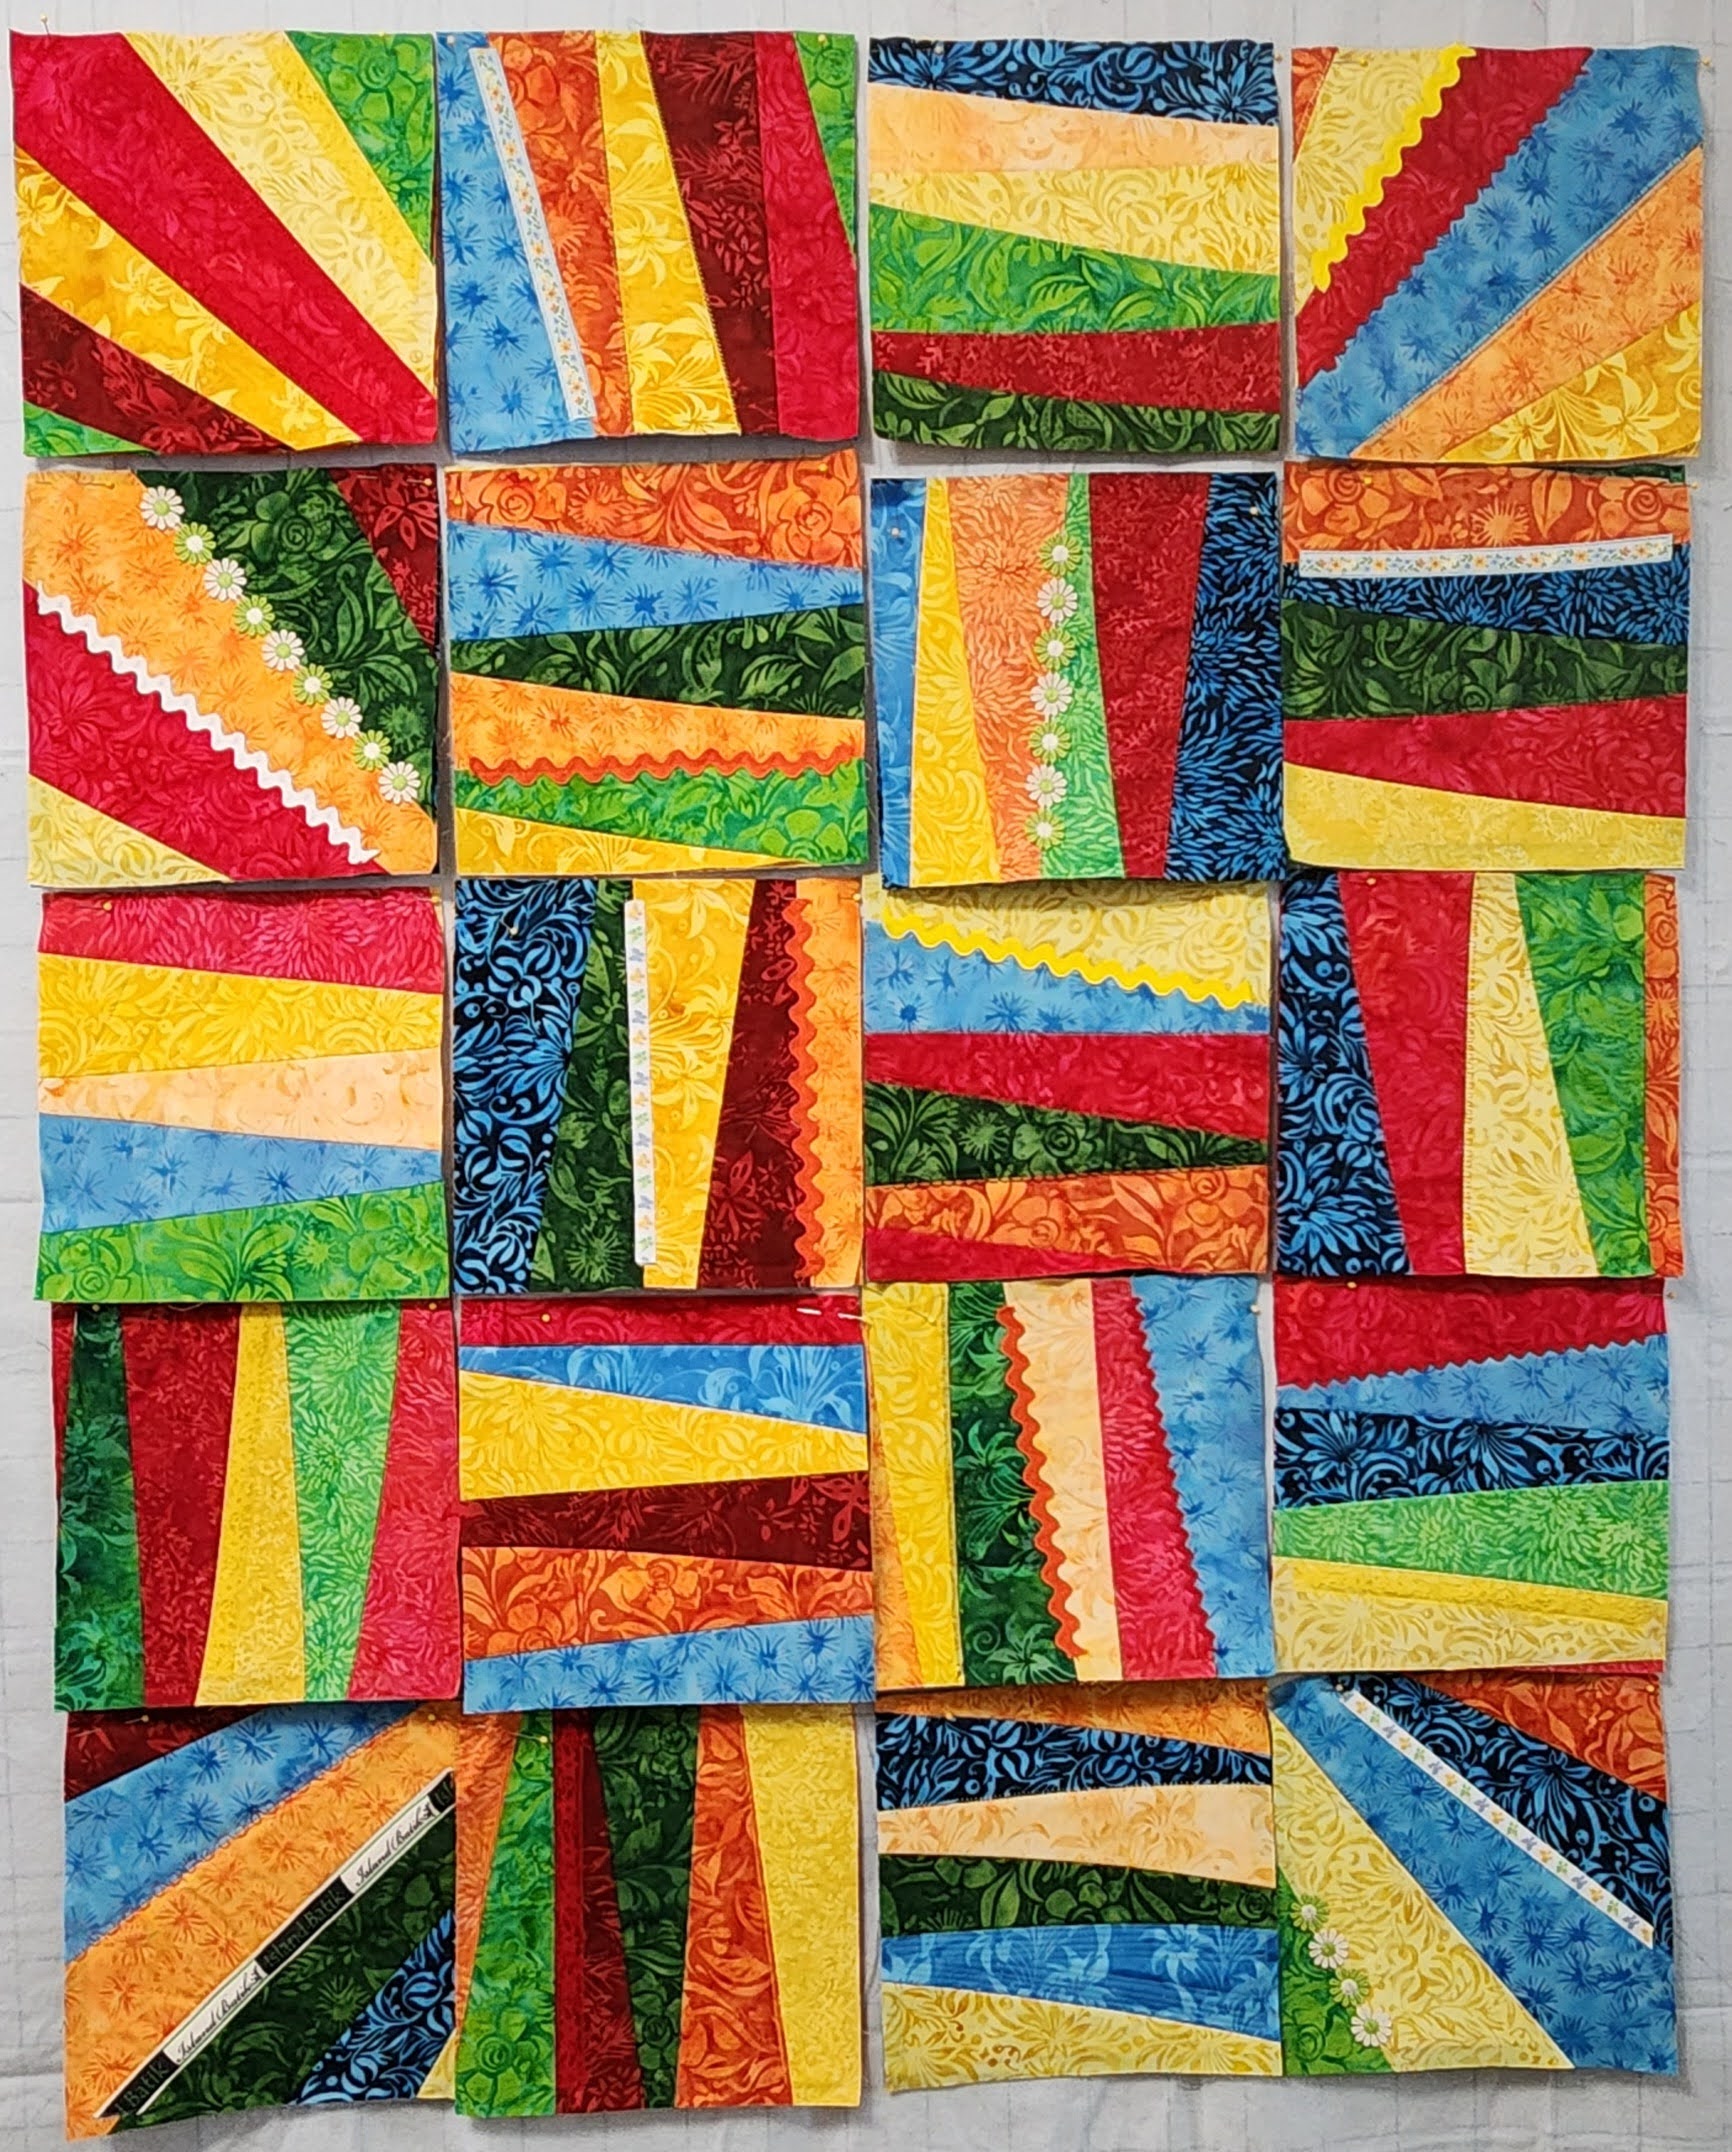
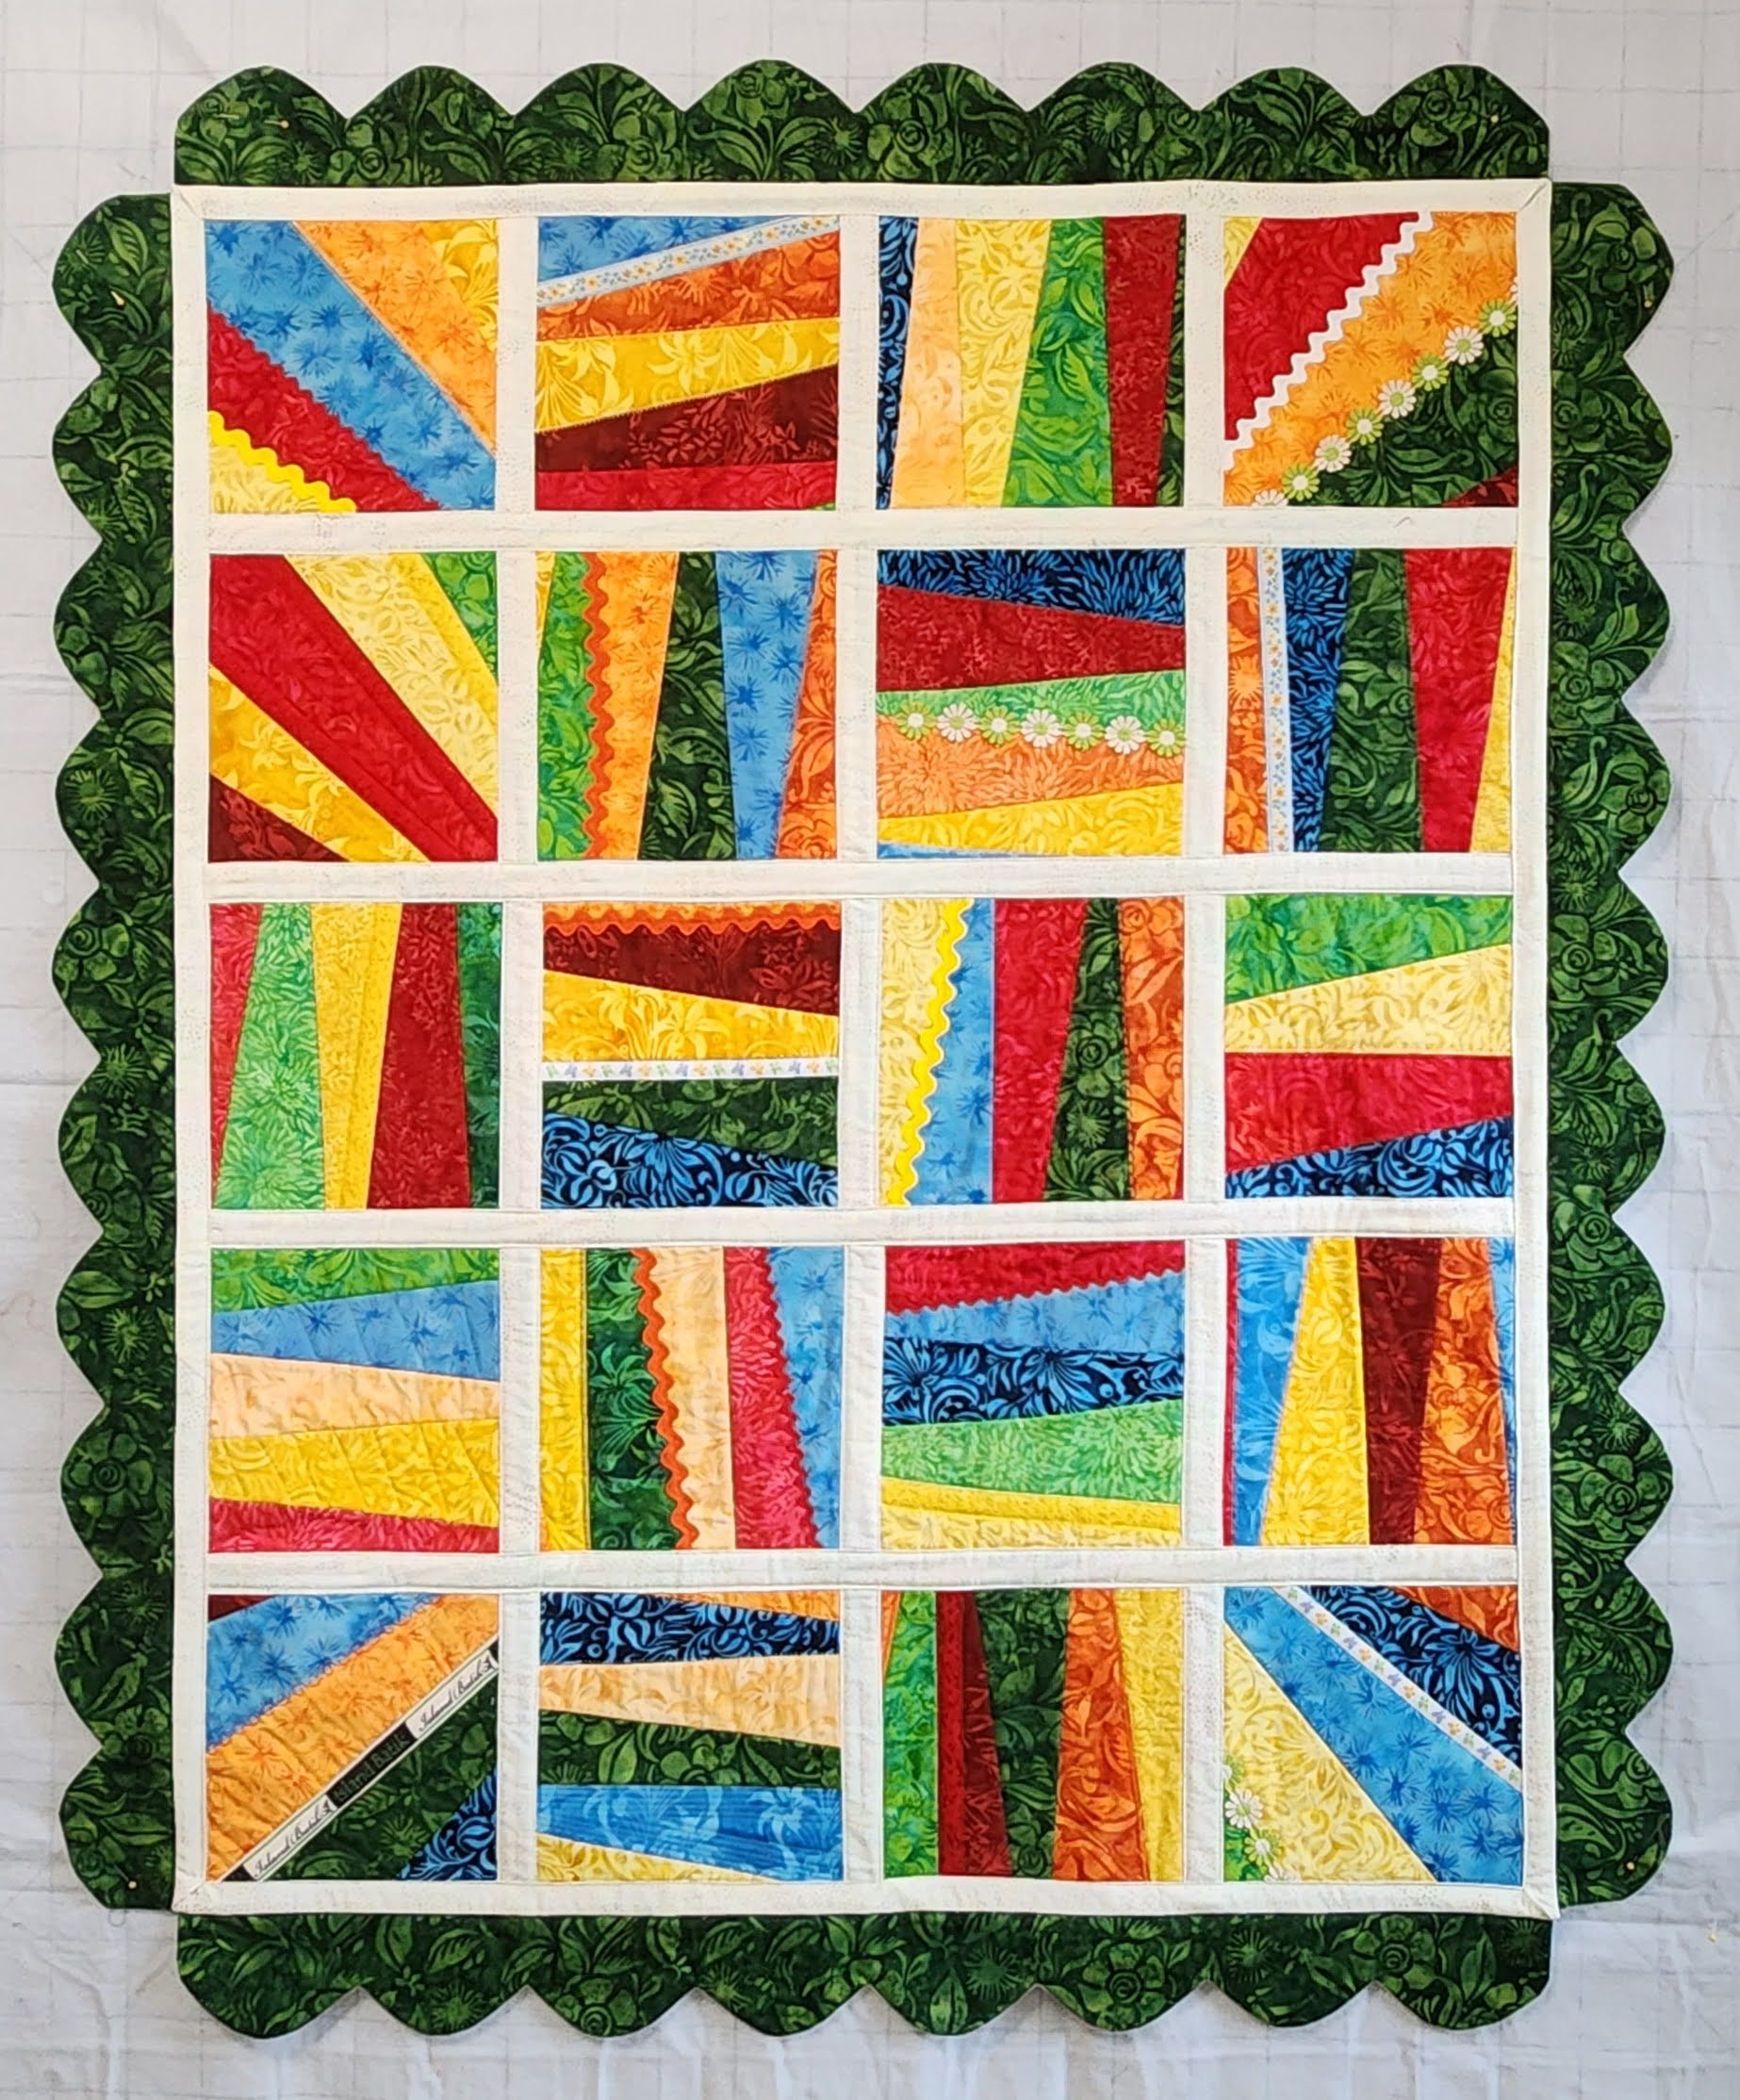
In total, I made twenty blocks, each featuring a different color on the back.

Embellishment
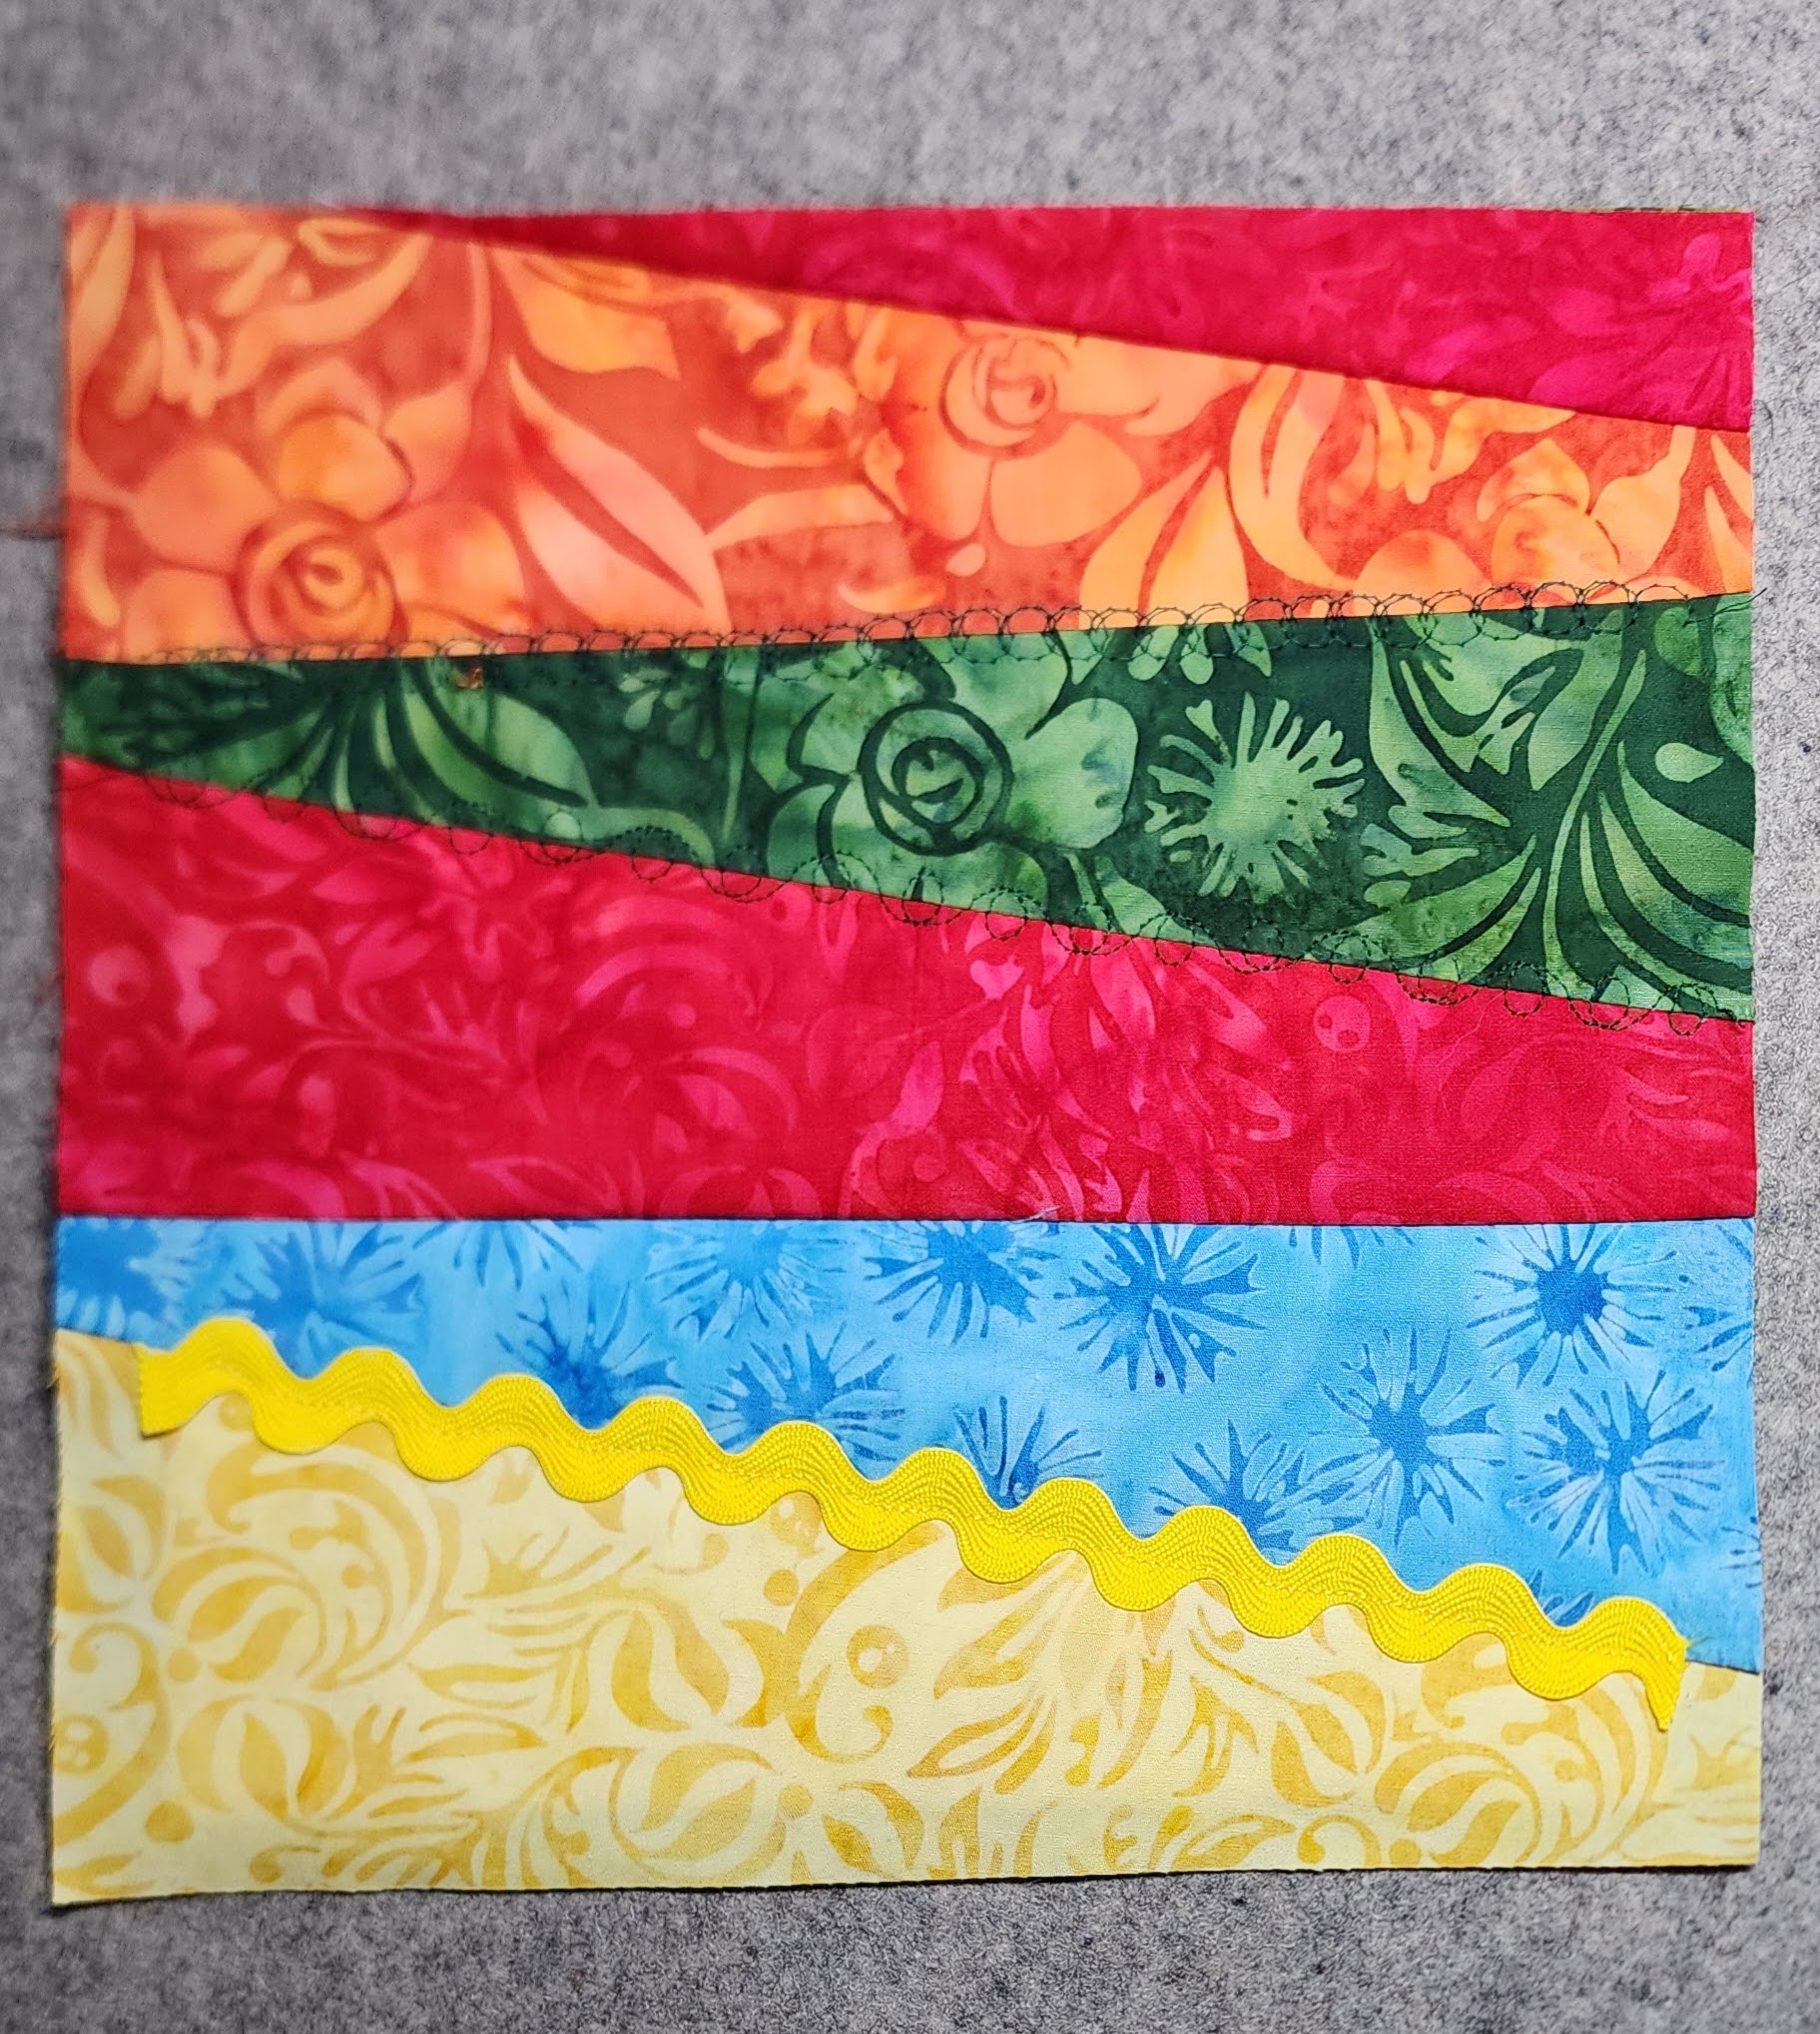
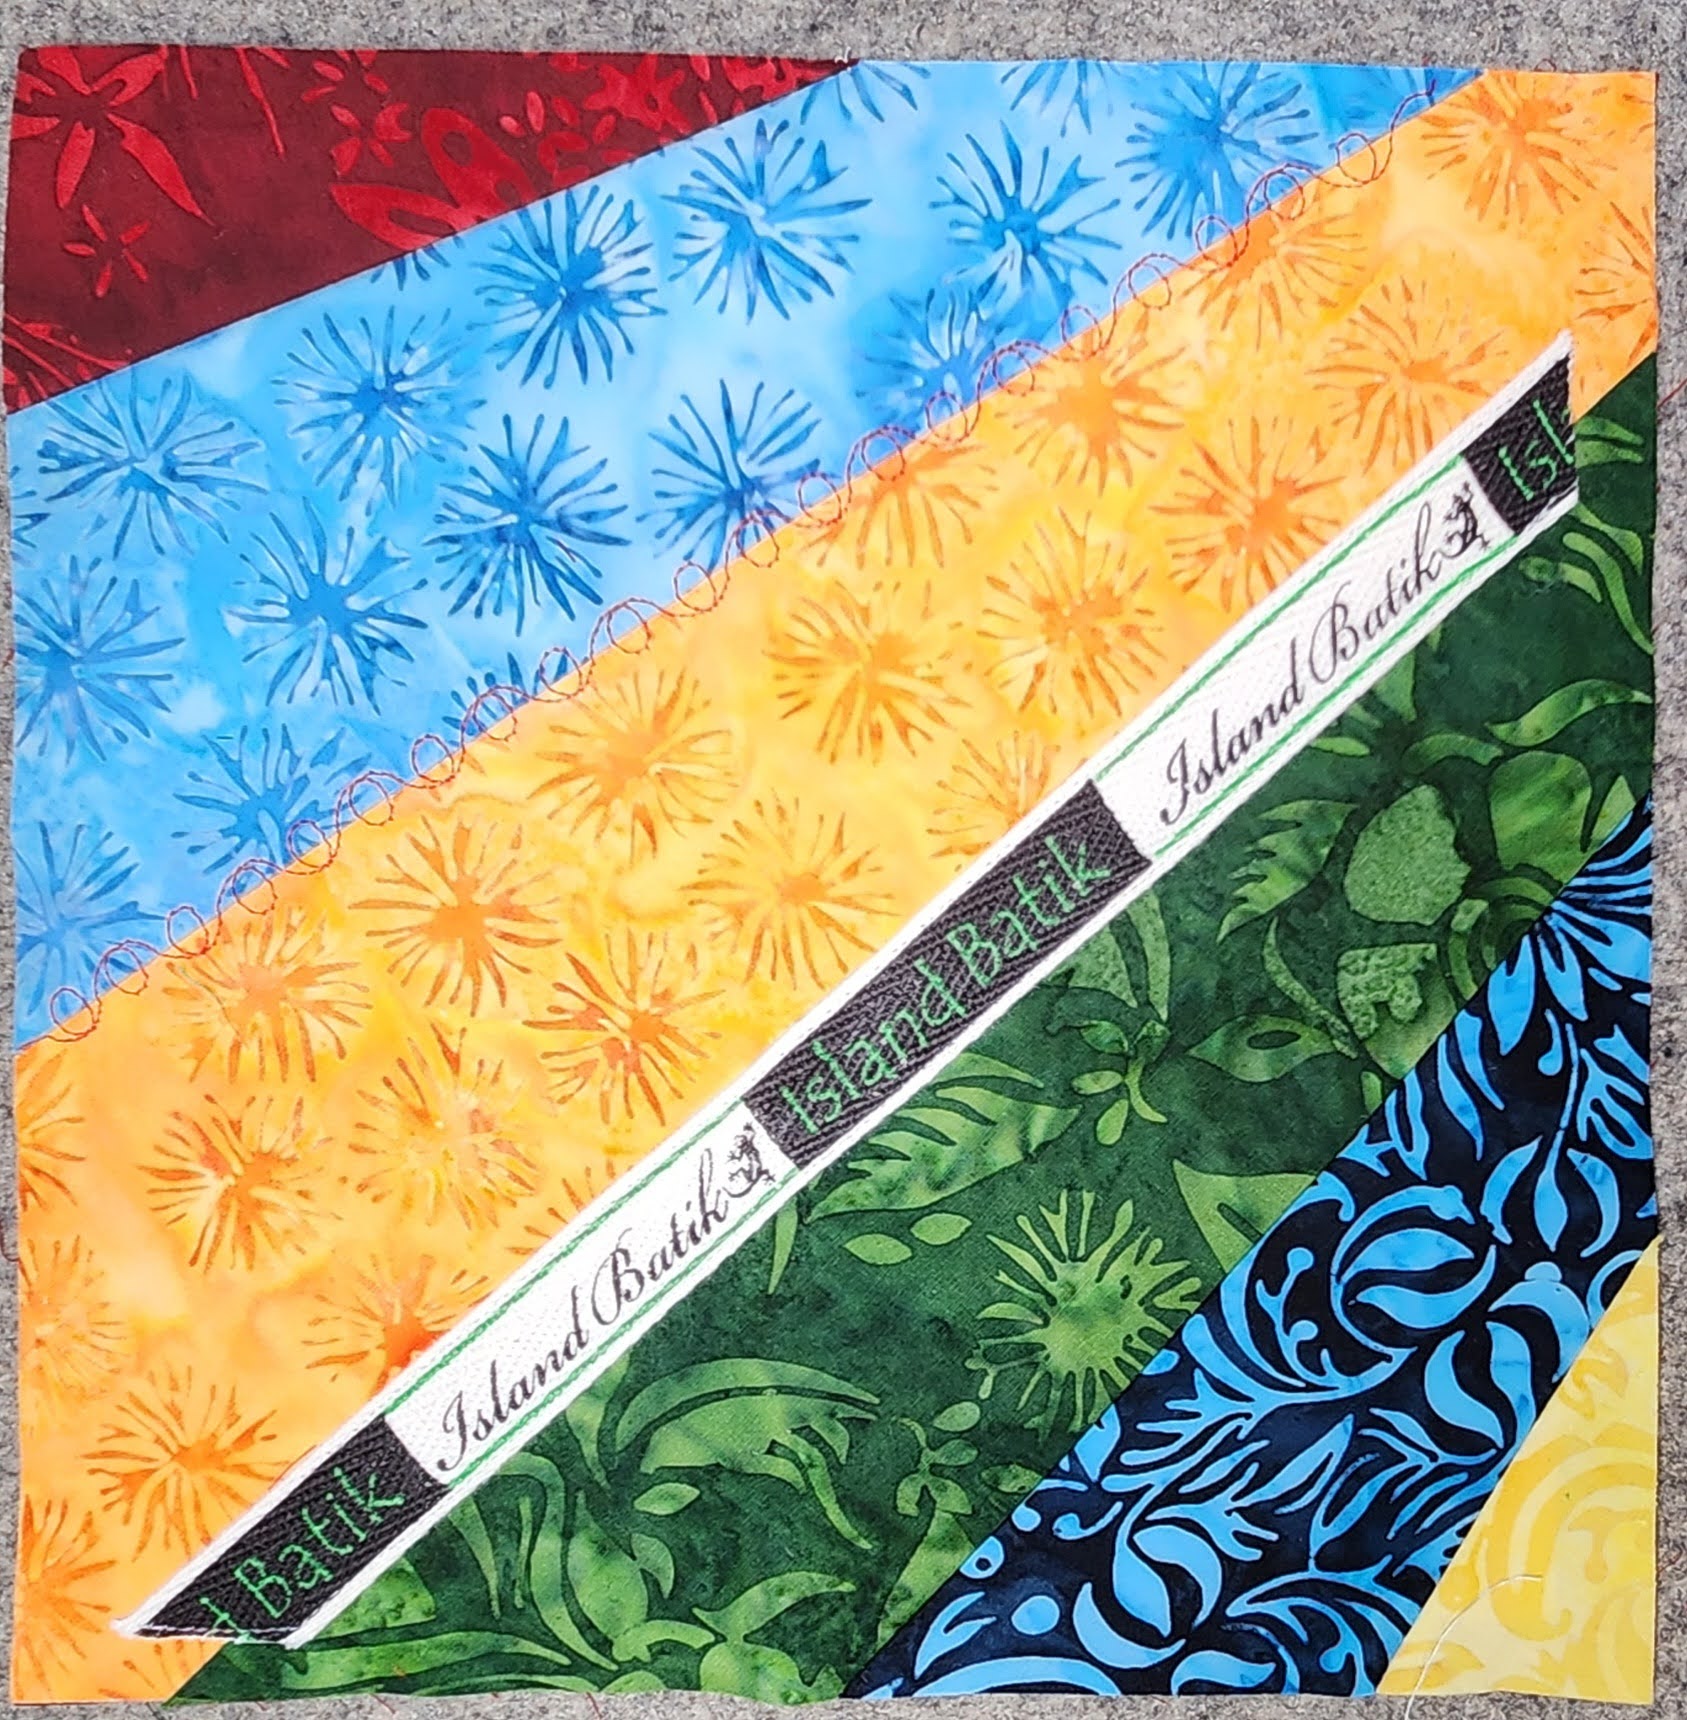
The basic blocks were complete. I added ribbons and lace. I chose which to include based on each block’s colors and layout.

My Juki 4000 sewing machine’s decorative stitches provided additional flair, and sometimes I used only stitch detailing for certain blocks. Because the backs would be visible, I frequently changed the bobbin thread to coordinate.

Here are a couple of the blocks embellished.
Here are the 20 blocks done.
Assembly and Layout
I arranged the blocks on my design wall, experimenting until I was pleased with the layout.
I sewed the blocks into rows. I followed Monica’s method. The ½” seams are pressed open toward the front. There is no batting in the seam allowance to reduce bulk.

For sashing, I used Island Batik’s Egg White fabric, cut into strips and shaped with a binding tool.

After cutting sashing into segments for each square, I sewed them down. To minimize bulk, I did not take the sashing to the edge of the block. I took it only to the batting edge.

My mini Oliso iron was perfect for pressing seams open.

Rows were joined two at a time, sashing between the rows until all 5 rows were connected.

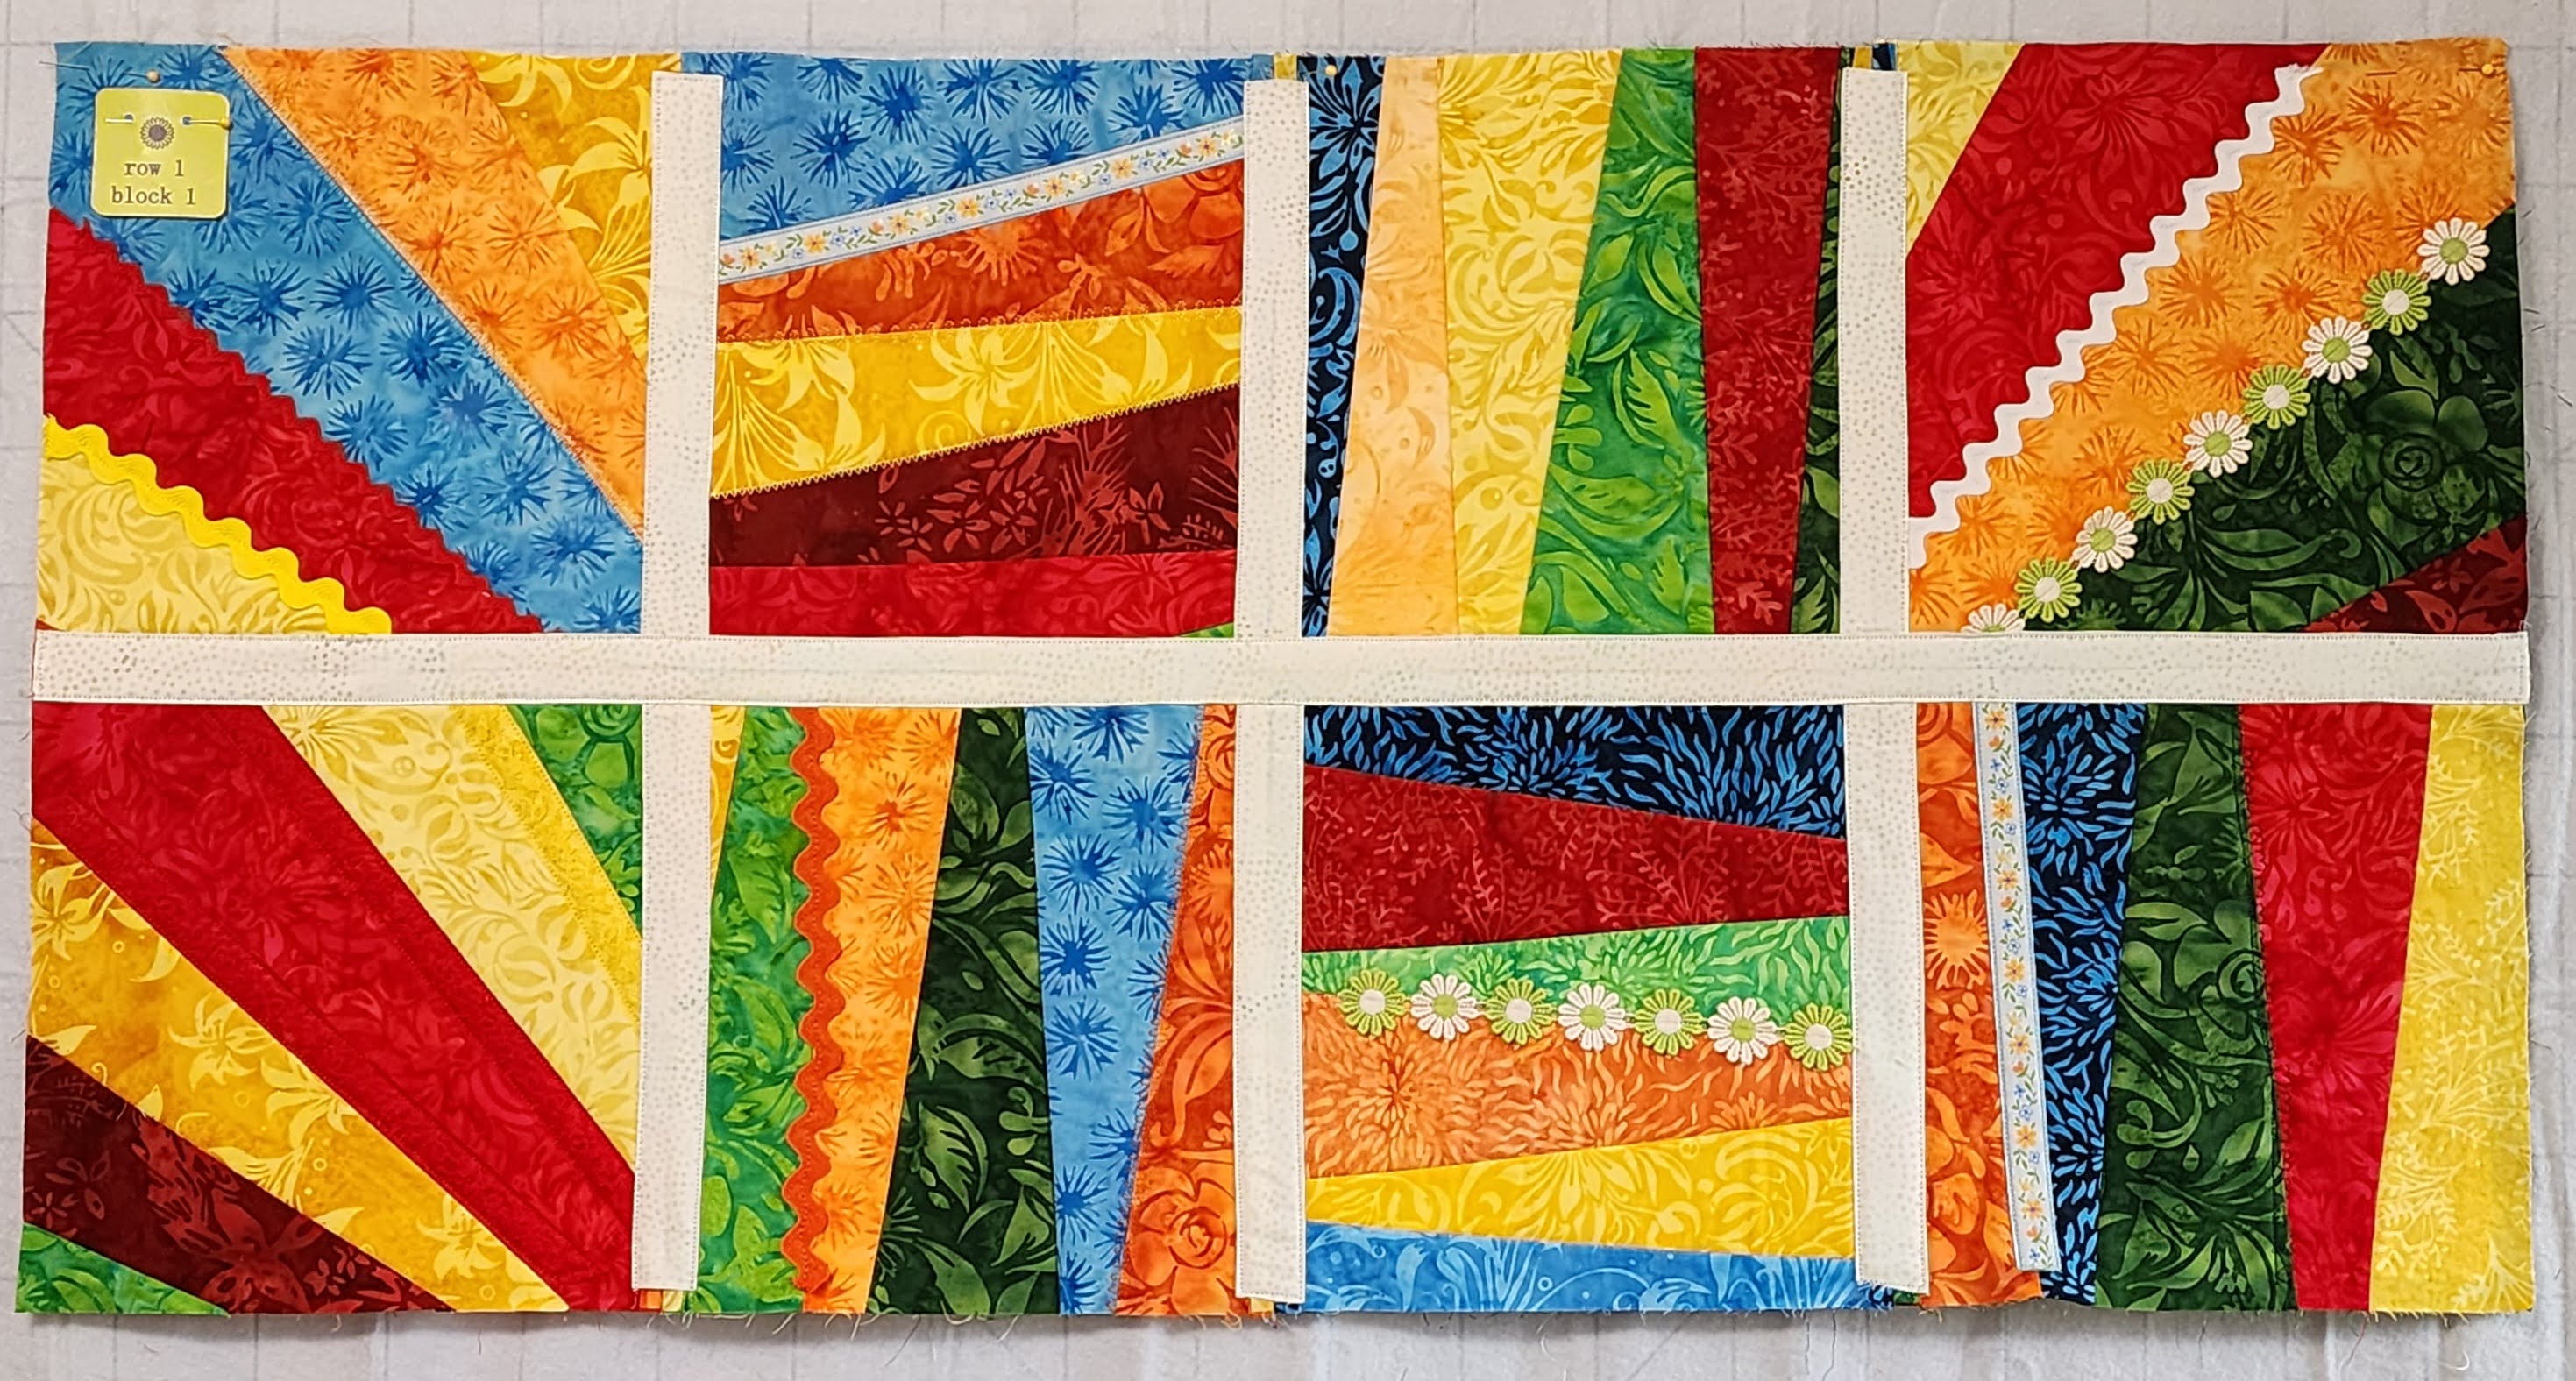
Here are the rows all sewn together.

Finishing Touches
Creating the binding and border was a new technique for me, inspired by Monica’s video. I used Floral Spun – Green fabric of the Colorburst fabric and Island Batik Egg White. I created the borders and matched them to the quilt top’s sides. The borders were attached in the same way as the blocks, with seam allowances toward the front.
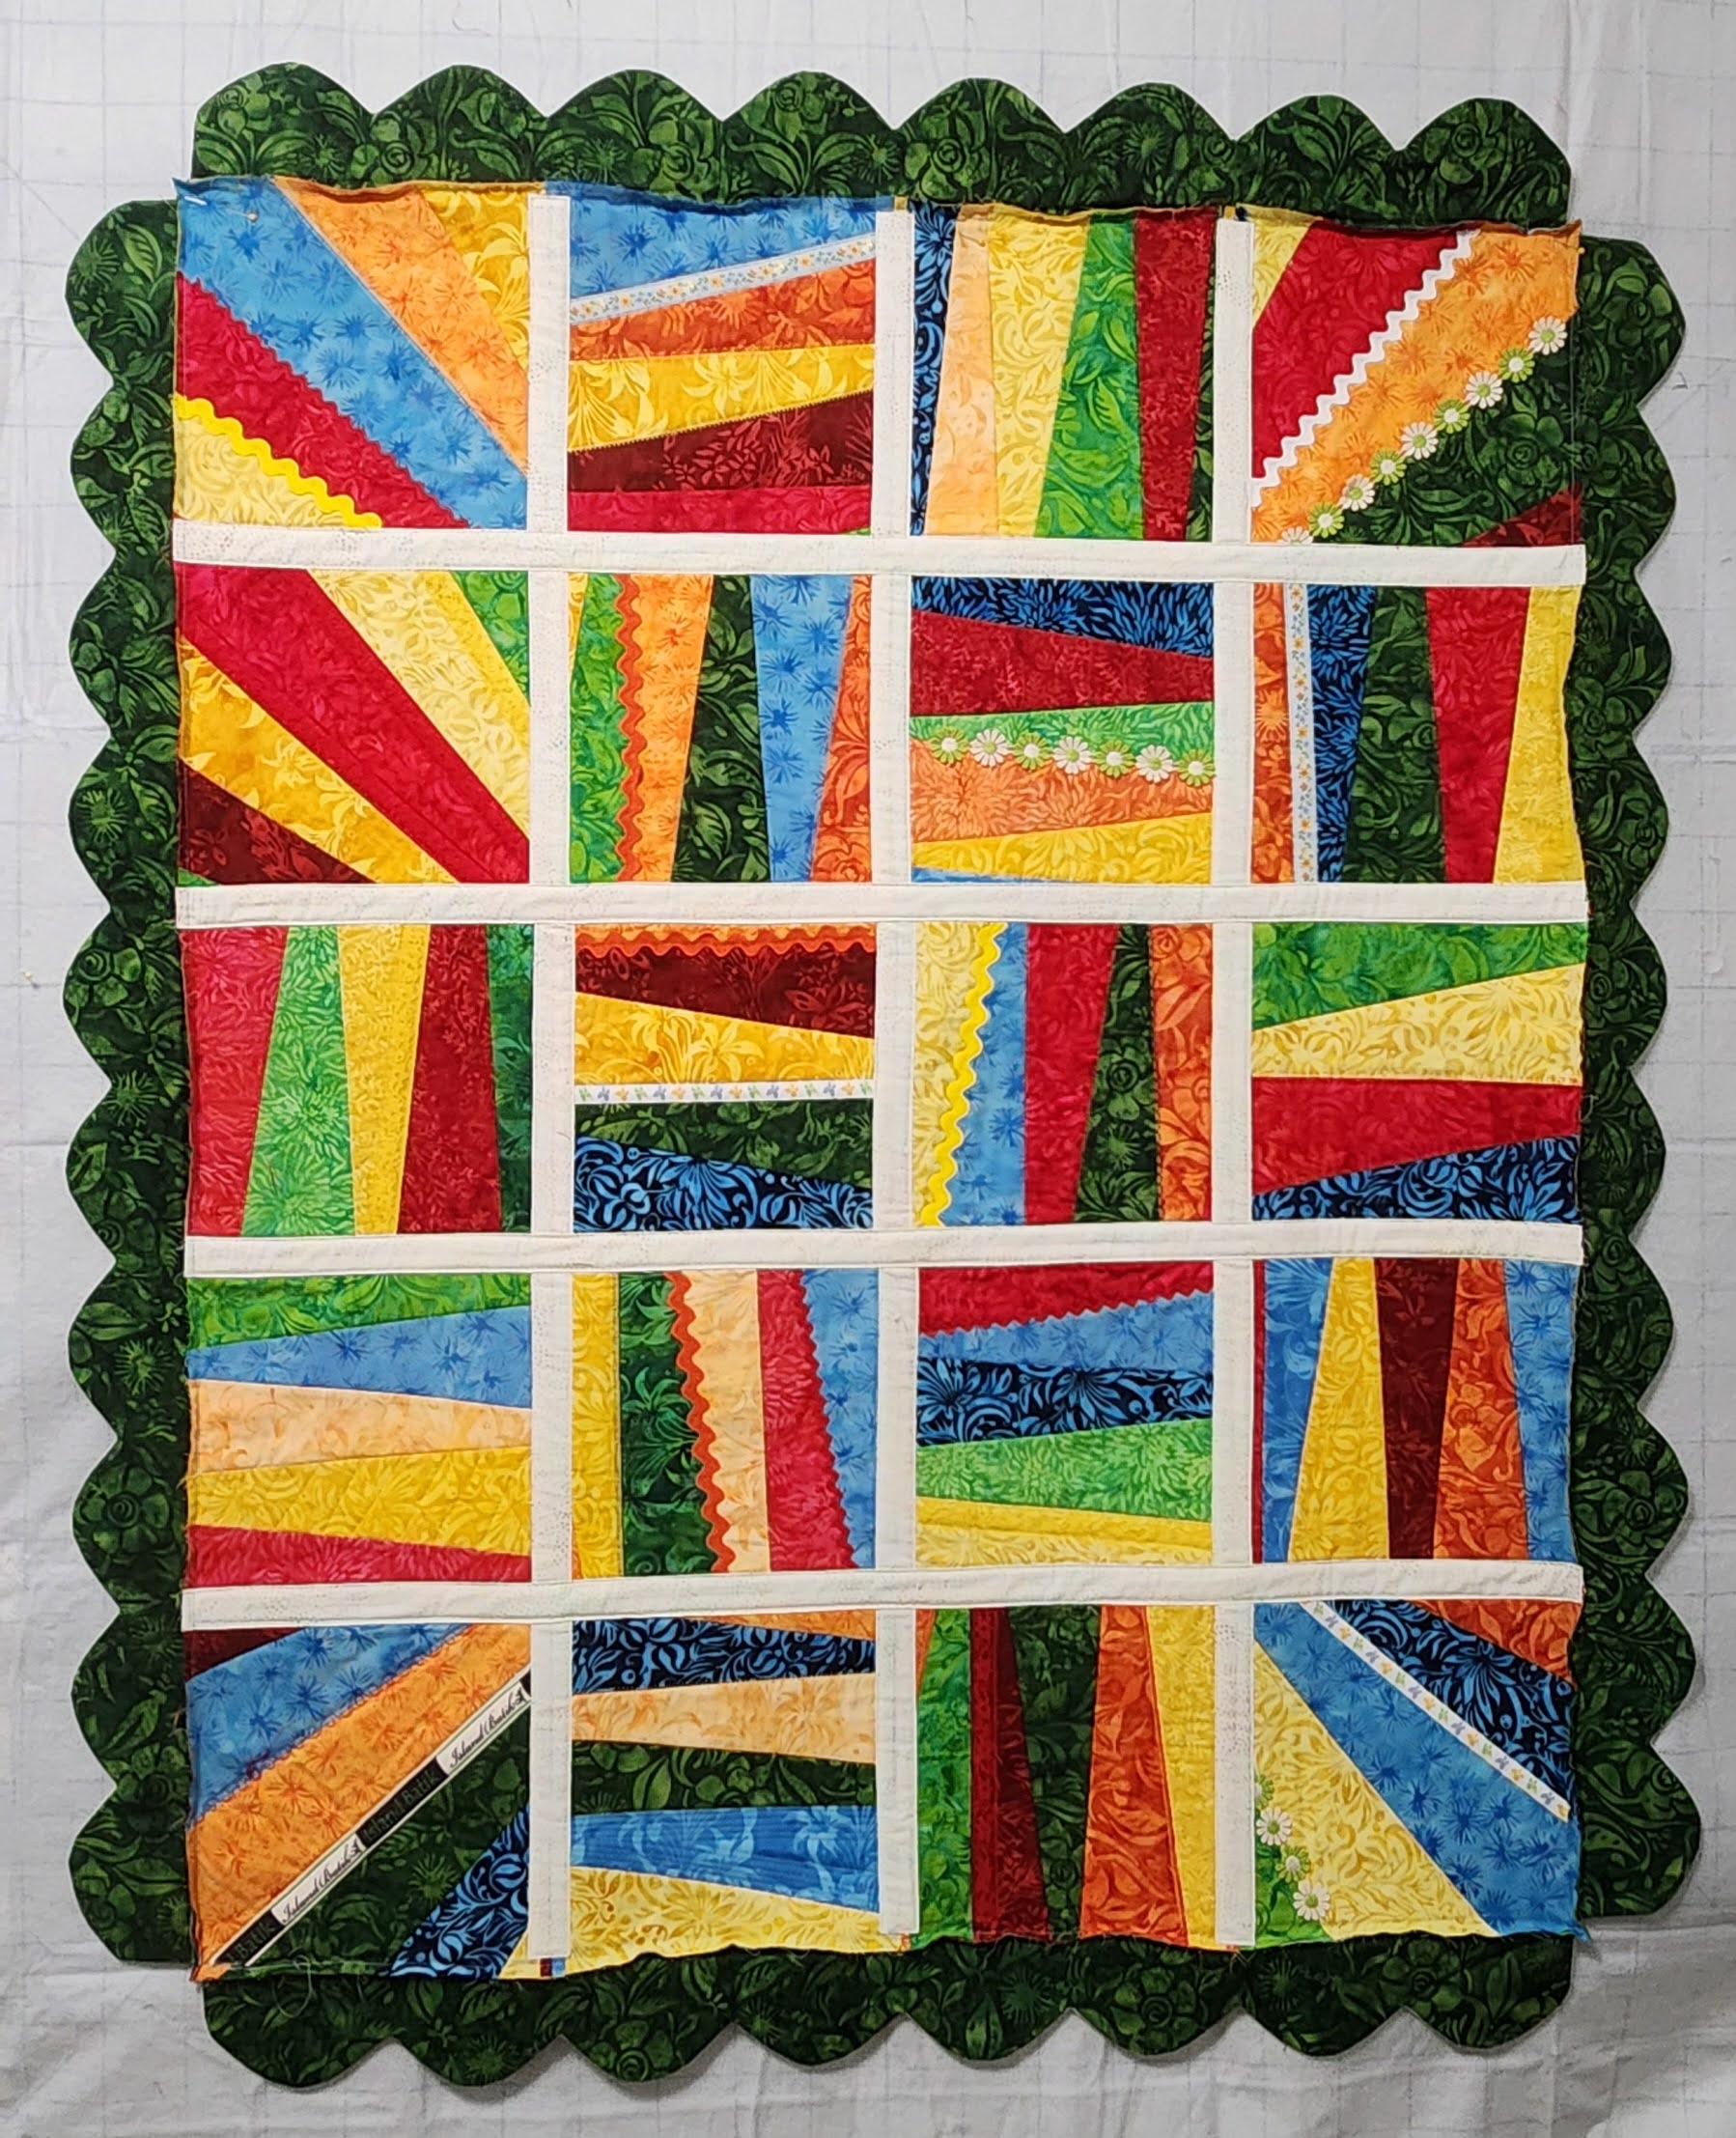
The binding was pulled completely to the front. It was stitched down, giving the quilt a unique look. Even if I’m still perfecting the corners.
Back of Quilt.

Celebrating the Finished Quilt
I visited my mom and brought the quilt along for a fun photo session.
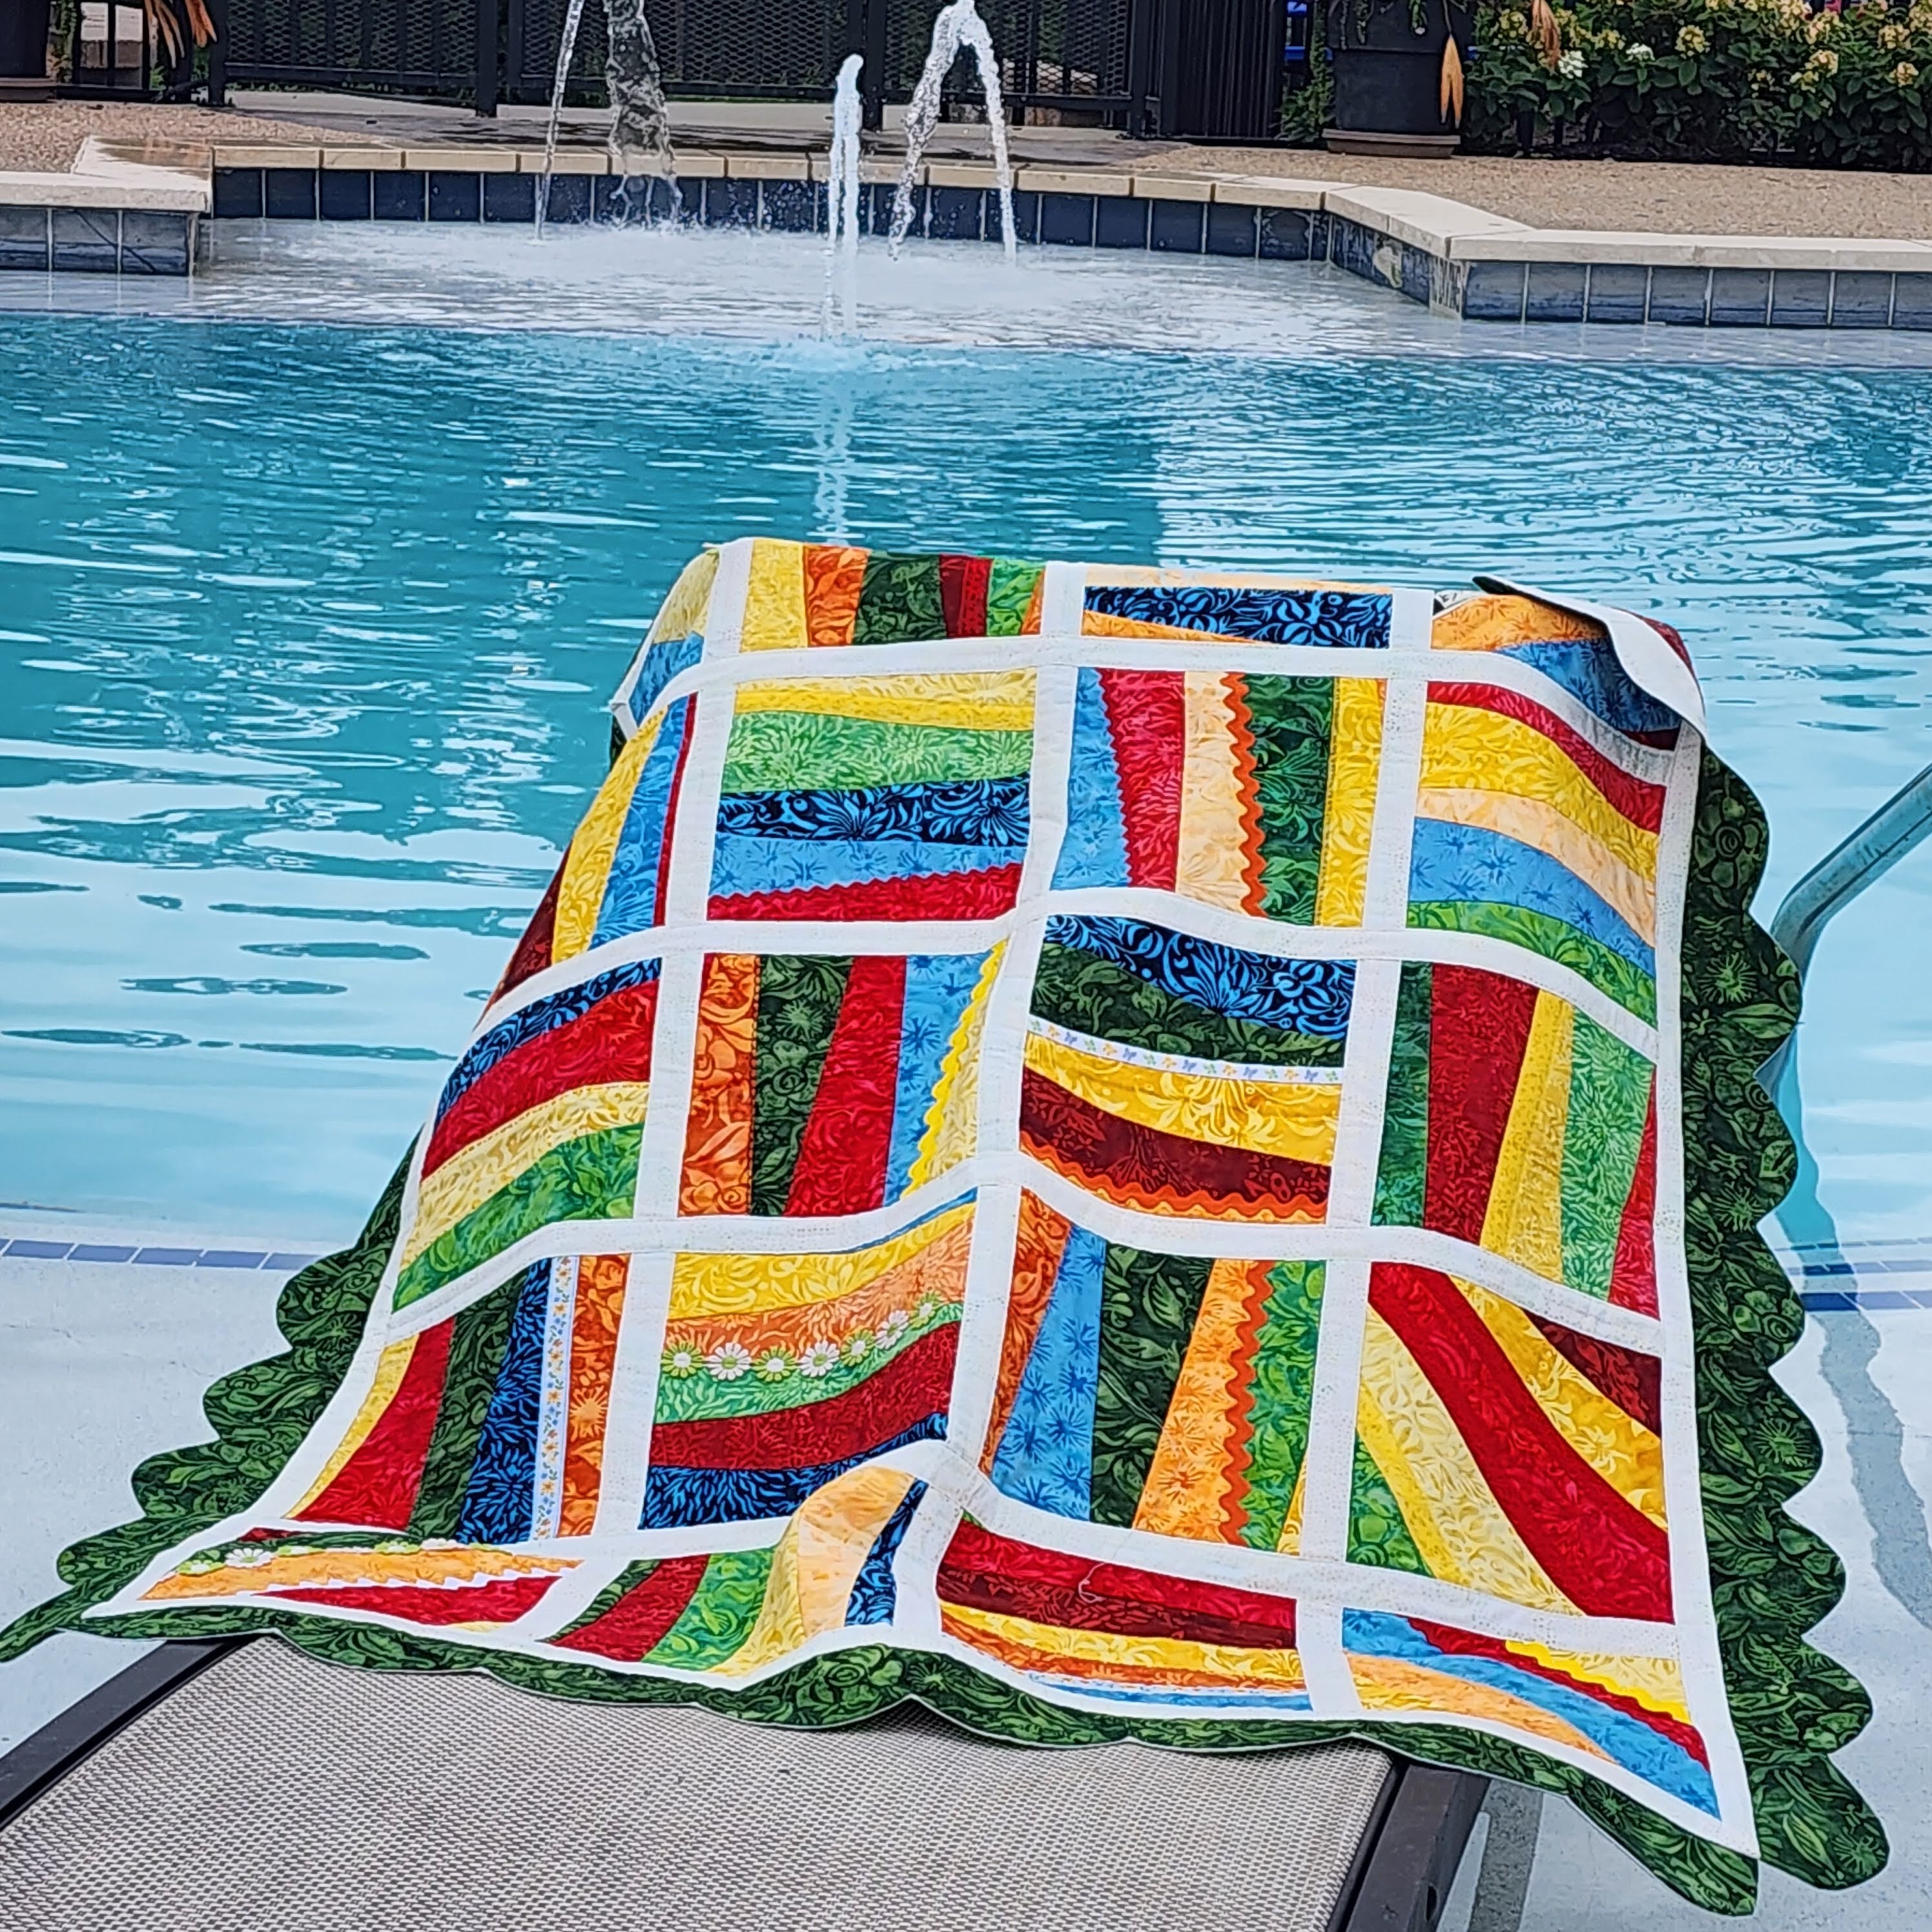


This project was a joyful exploration of new techniques. It was also a celebration of the vibrant Colorburst fabric line from Island Batik.
Have you ever made a crazy quilt? If so, please share a photo—I’d love to see all the creative interpretations! And be sure to check out the other Island Batik Ambassadors’ crazy quilts for more inspiration.
Week 1
Brenda Alburl ~ Songbird Designs – 09/08/2025 – Aurora
Sarah Pitcher ~ Pitcher’s Boutique – 09/09/2025 – Berry Crush
Solomae Stoycoff ~ Cuddle Cat Quiltworks – 09/09/2025 – Berry
Renee Atkinson ~ Pink Tulip Quilting – 09/10/2025 – Colorbust
Lisa Pickering ~ Lisa’s Quilting Passion – 09/10/2025 – Colorbust
Connie Kauffman ~ Kauffman Designs – 09/11/2025 – Earth Essence
Week 2
Jennifer Thomas ~ Curlicue Creations – 09/15/2025 – Everlasting
Preeti Harris ~ Sew Preeti Quilts – 09/15/2025 – Everlasting
Susan Deshensky ~ Lady Blue Quilts Studio – 09/16/2025 – Fossil Finesse
Gail Sheppard ~ Quilting Gail – 09/16/2025 – Fossil Finesse
Denise Looney ~ A Quiltery – 09/17/2025 – Frosted Foliage
Kimberly Flannagan ~ Kimberly’s Quilts – 09/17/2025 – Frosted Foliage
Mania Hatziioannidi ~ Mania for quilts – 09/18/2025 – Garden Glory
Tina Dillard ~ Quilting Affection Designs – 09/18/2025 – Garden Glory
Week 3
Brittany Fisher ~ Bobbin with Brittany – 09/23/2025 – Quiet Charm
Carol Stanek ~ Stitch with Color – 09/22/2025 – Geode Glow
Kim Jamieson-Hirst ~ Chatterbox Quilts – 09/22/2025 – Geode Glow
Suzy Webster ~ Websterquilt – 09/24/2025 – Stone Strata
Leah Malasky ~ Quilted Delights – 09/24/2025 – Stone Strata
Connie Kresin Campbell ~ Freemotion by the River – 09/25/2025 – Sunset
Emily Leachman ~ The Darling Dogwood – 09/25/2025 – Sunset
#islandbatikambassador, #islandbatik, #iloveislandbatik, #luminfabrics, #threadedchaosbloghop, #hobbsbatting, #hobbsinside, #aurifil, #aurifilthread, #schmetzneedles, #juki, #oliso

I love your use of embellishments! This quilt is beautiful!
LikeLike
Lisa, your quilt is very beautiful! The white sashing really makes the blocks pop and all the embellishments . The borders are fantastic. You did an awesome job!
LikeLike
What a fun quilt! I love the trims you used, especially the Island Batik ribbon. It was interesting to learn how you constructed this project. Happy sewing!
LikeLike