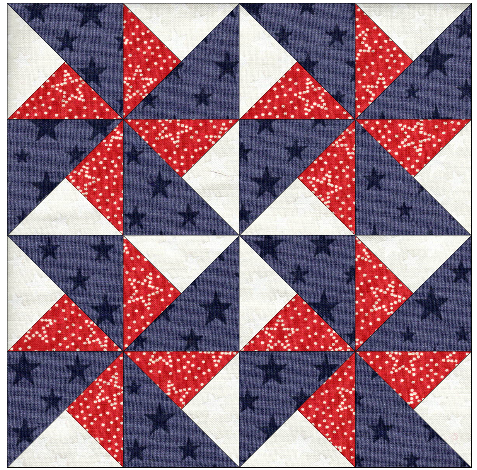
Our alternative block is the “Spinner Pinwheel” for all those fun summers playing in the sun. This is an easy block, learning how to make Quarter Square Triangles (QSTs).

Fabric
Red – 10″ x 10″
Blue – 10″ x 20″
White – 10″ x 10″
Cutting Pieces
Cut 5″ squares (4 3/4″ if you do not trim)
Blue – 8 pieces
White – 4 pieces
Red – 4 pieces
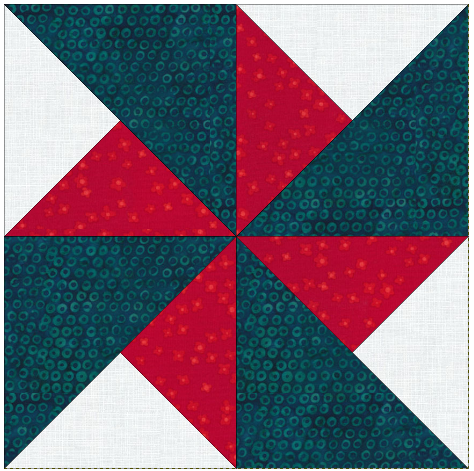
Alternative If you would like to make one set instead of the four sets of pinwheels, cut the squares to 7 1/2″ x 7 1/2″ squares, 2 Blue, 1 White and 1 Red. This will make an unfinished Block of 12 1/2″ x 12 1/2″.
Assembly
Using 2 pieces of Blue, 1 white piece and 1 red piece, you will do theses steps a total of 4 times to make 16 QSTs.

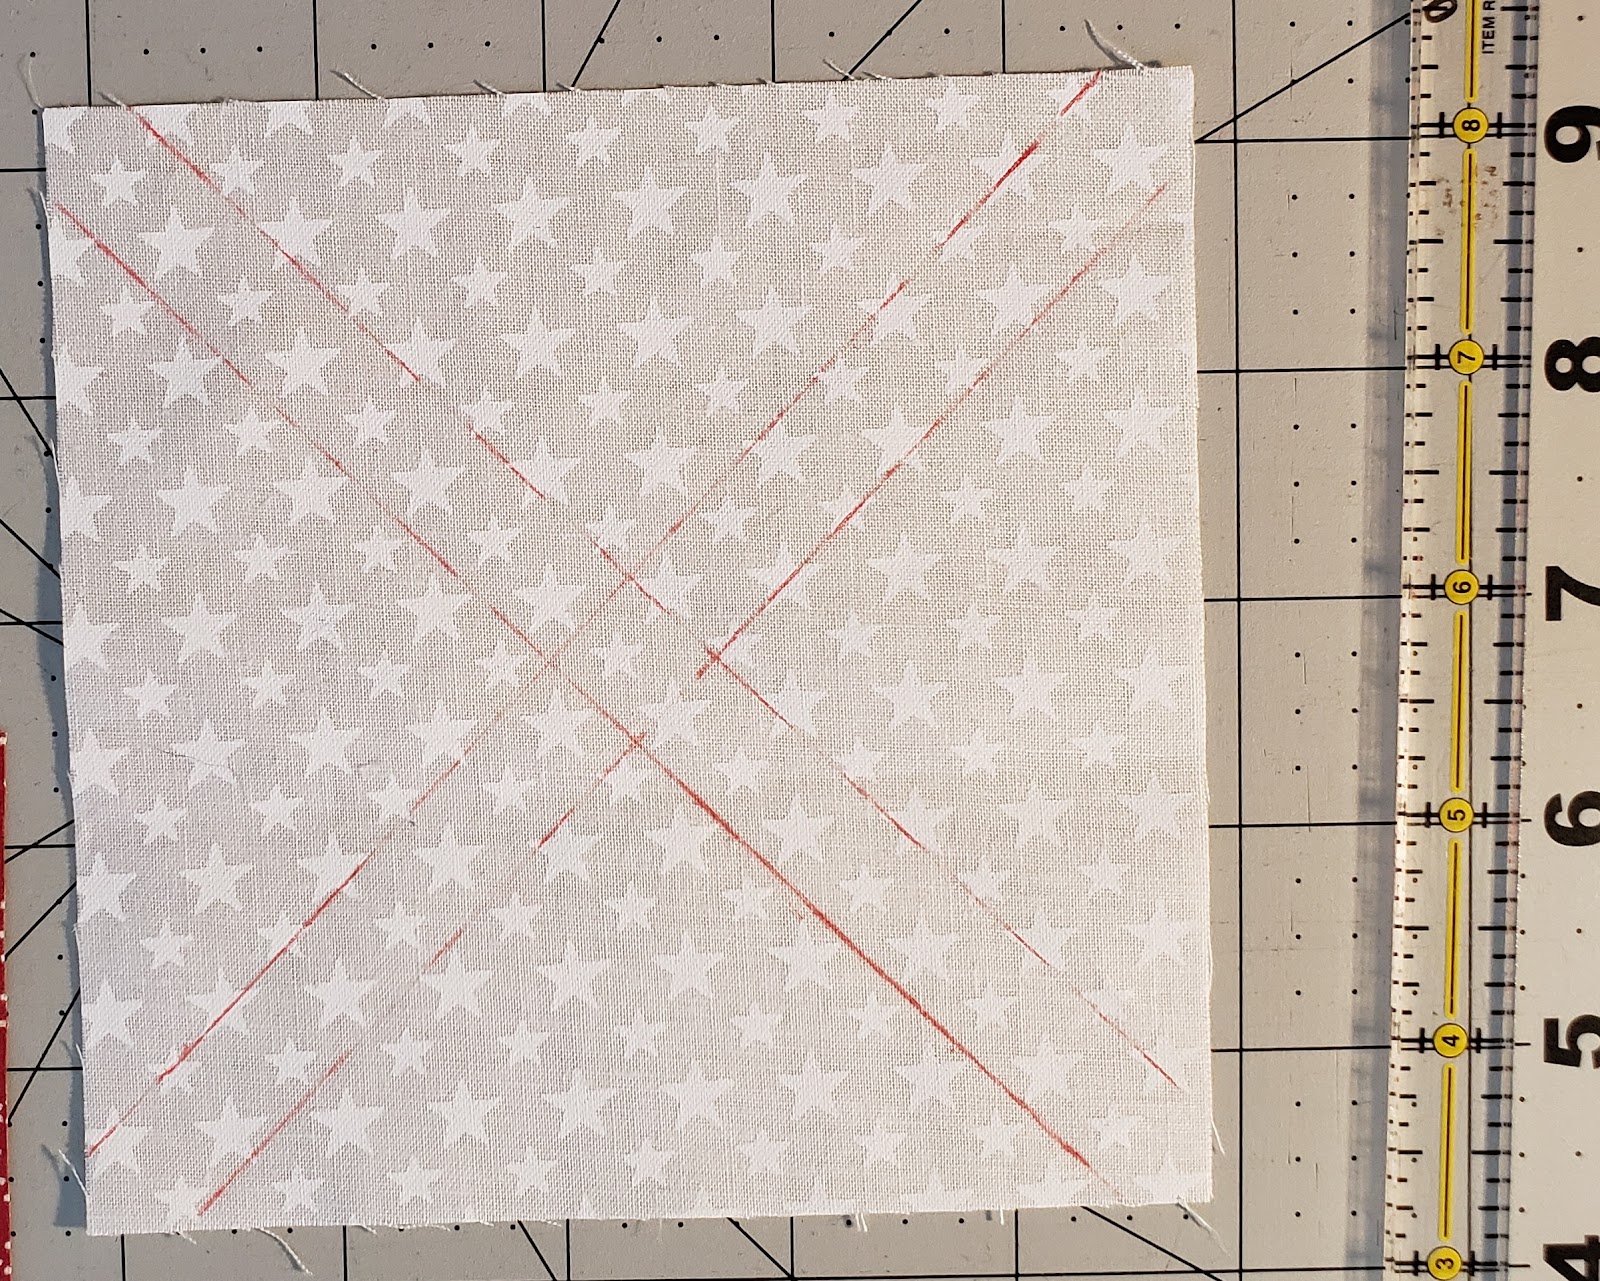
Step 1 – Mark top square (white), place mid-line marks using a quarter inch ruler diagonally from corner to corner both directions. (If you do not have a quarter inch ruler, you can draw a line down the middle from corner to corner, and then draw a line a quarter inch on both sides of the line. It is easier if you draw the lines to stitch on.)
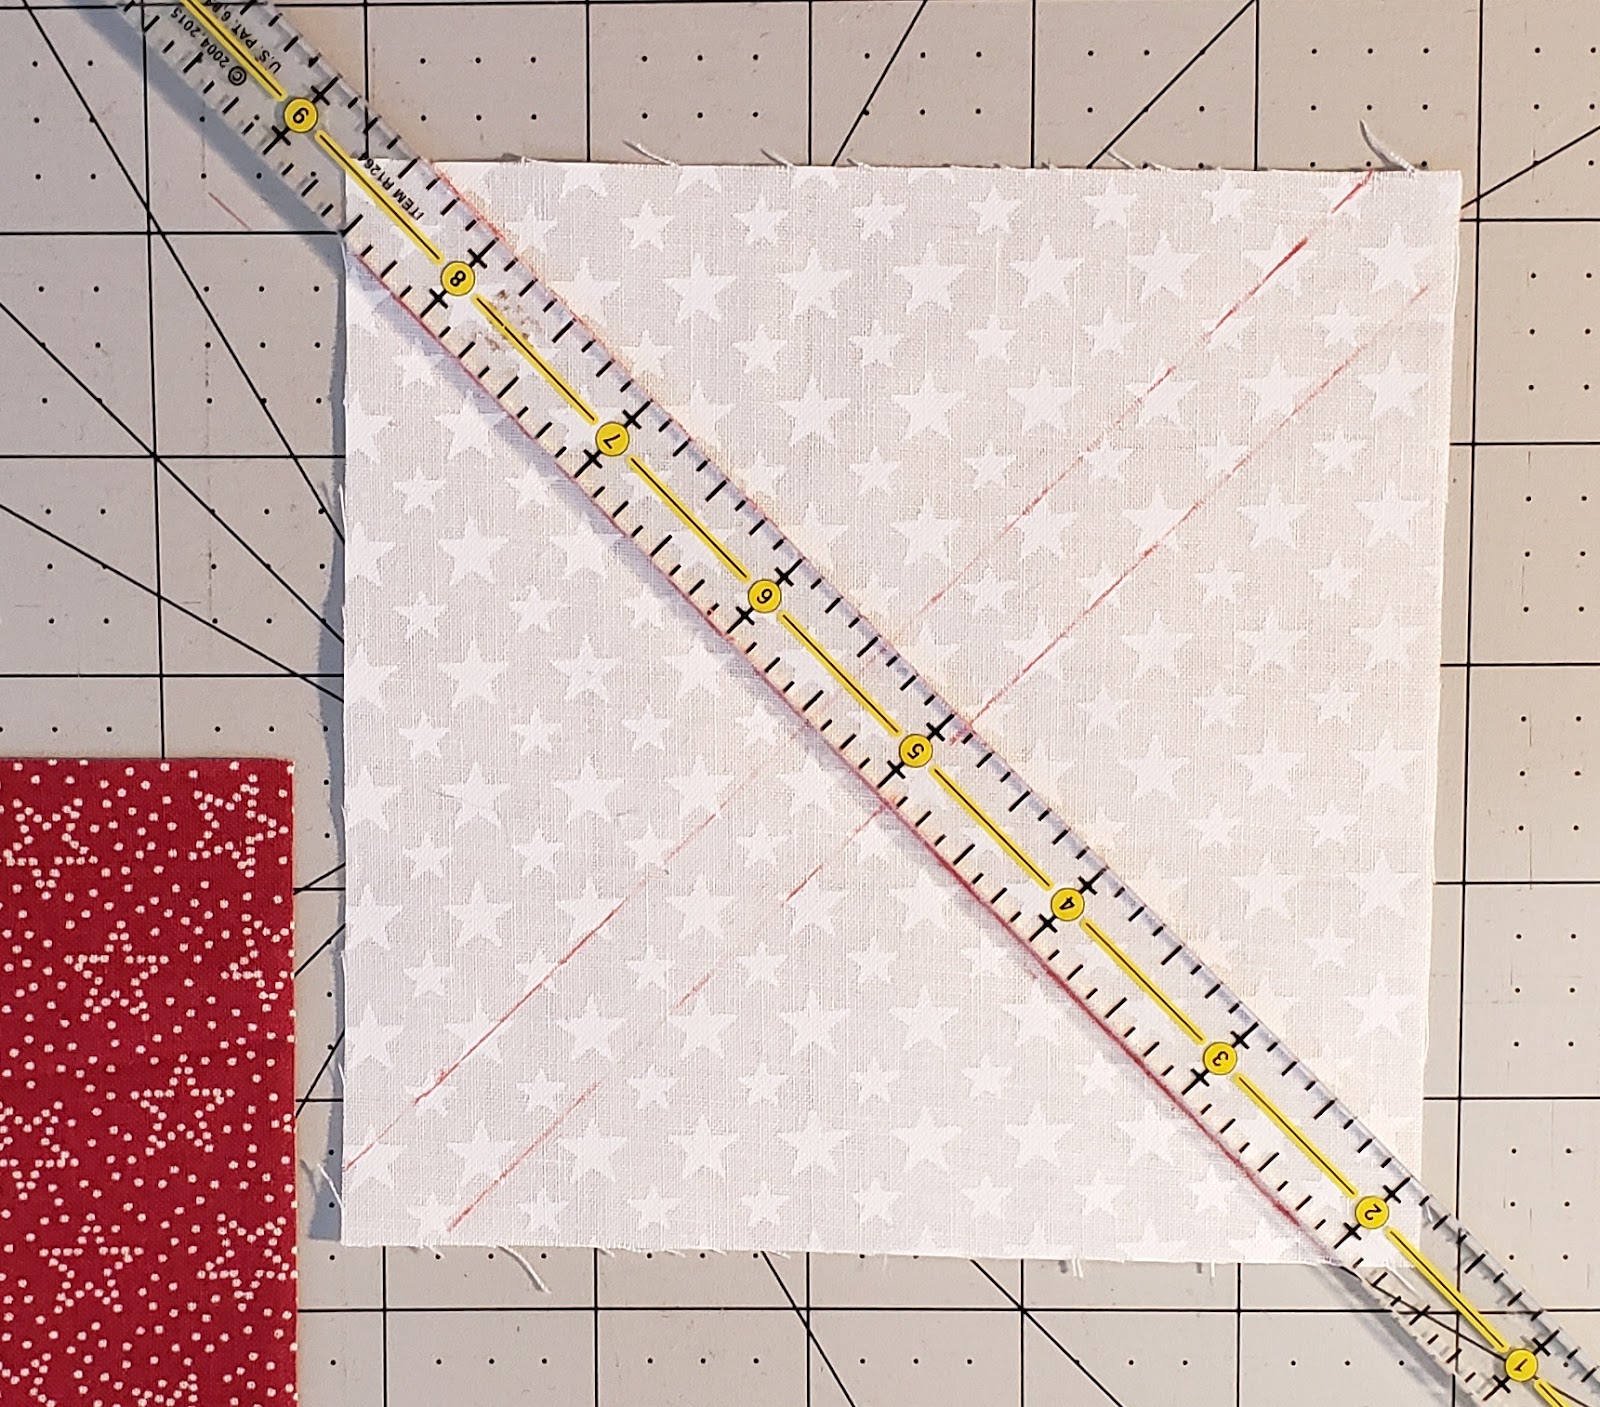
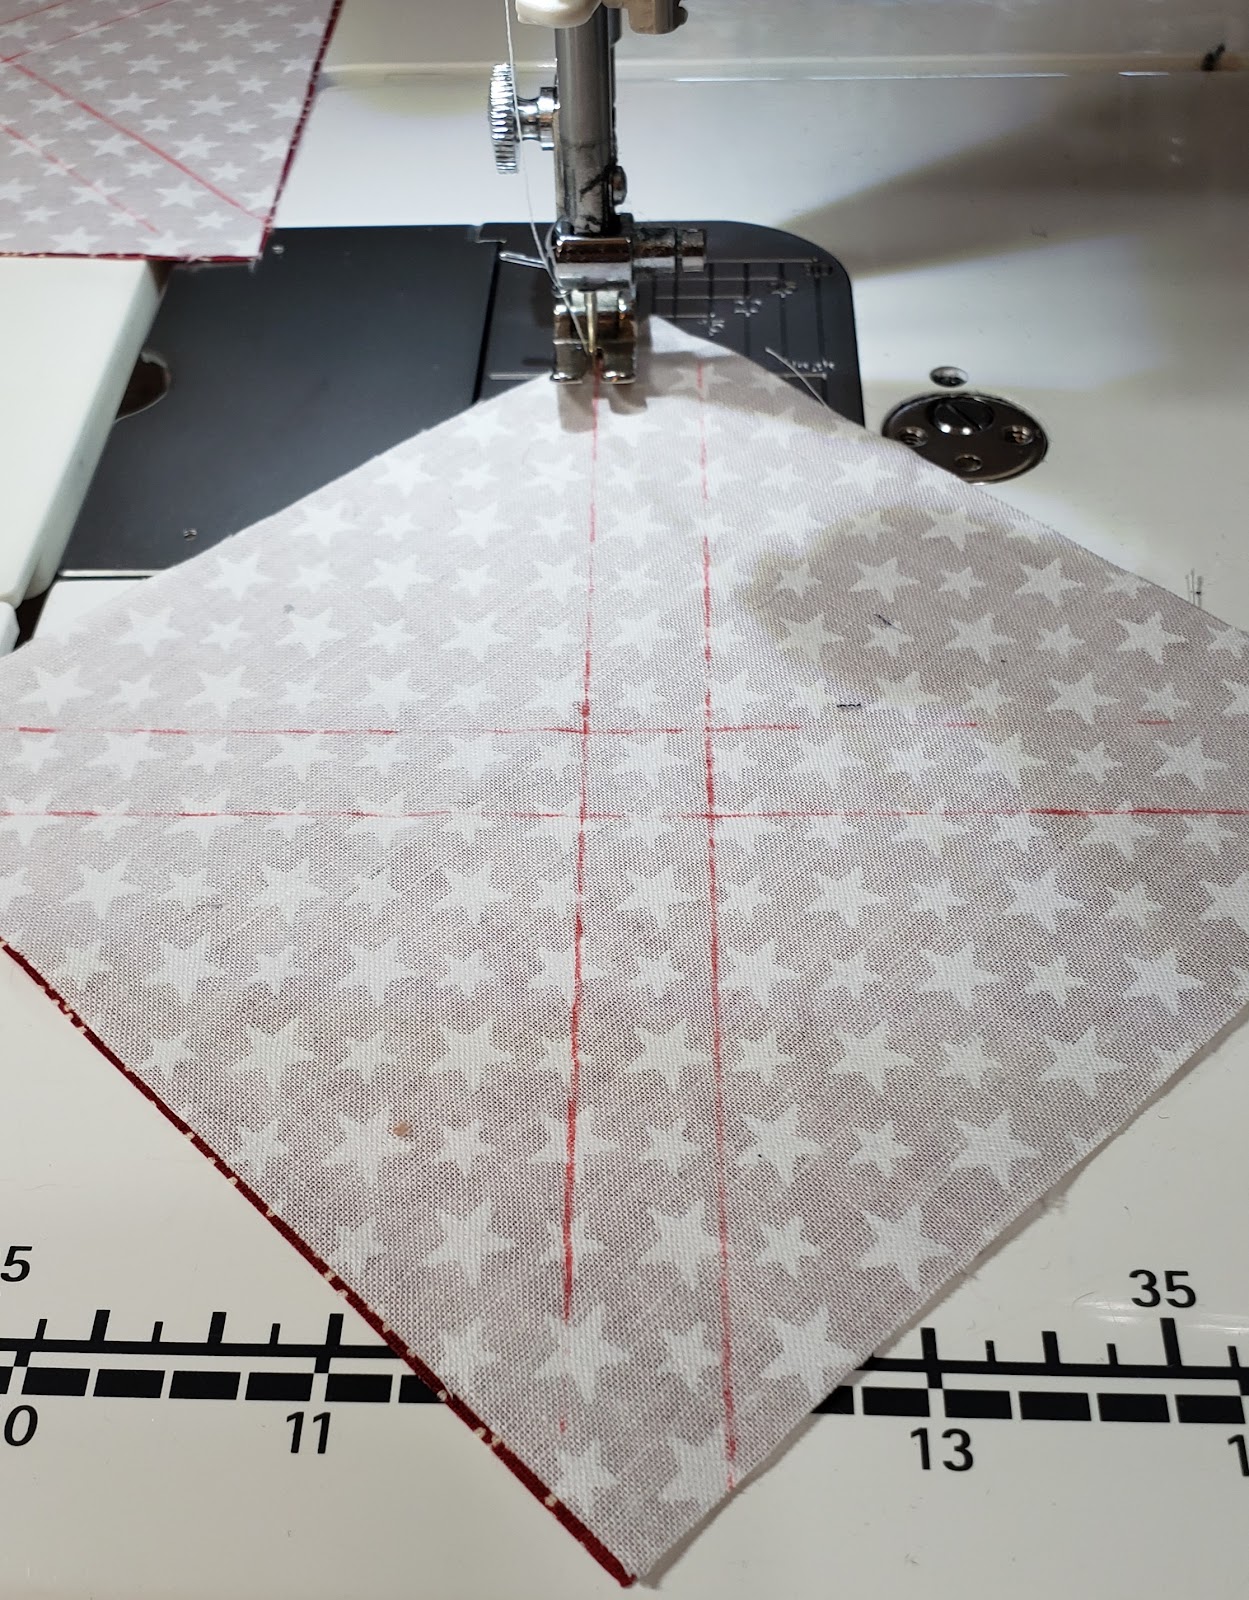
Step 2 – place the white piece on top of the Red piece, with right-sides together.
Step 3 – Orient the squares so that they will go under the needle on point (diagonally) and along the left side marked line.

Stitch along the left marked line until you are half-way past the top intersecting line. Stop stitching. Lift up the presser foot. (see picture shows how to stitch, following blue line A)
Pivot the fabric clockwise by 90 degrees. Lower the presser foot. Stitch the 1/2 inch distance to the next line. Stop stitching. Lift up the presser foot. Pivot the fabric counter-clockwise by 90 degrees. Lower the presser foot. Stitch along the right line to its end and off the fabric.

Note: that the color on the top will be the outside color (white). If you want to draw your lines on the darker color, you can simply stitch the opposite, start on the right side and end on the left side.
Cut thread, and rotate the block 90 degrees, and repeat the step above to make the second stitching line (Black line B). It should intersect with the first stitching line near the middle of the block.

Using a rotary cutter and quilting ruler, cut the squares in half by cutting diagonally from one corner to corner.
Cut the square in half again by cutting it diagonally from the other corner to corner.
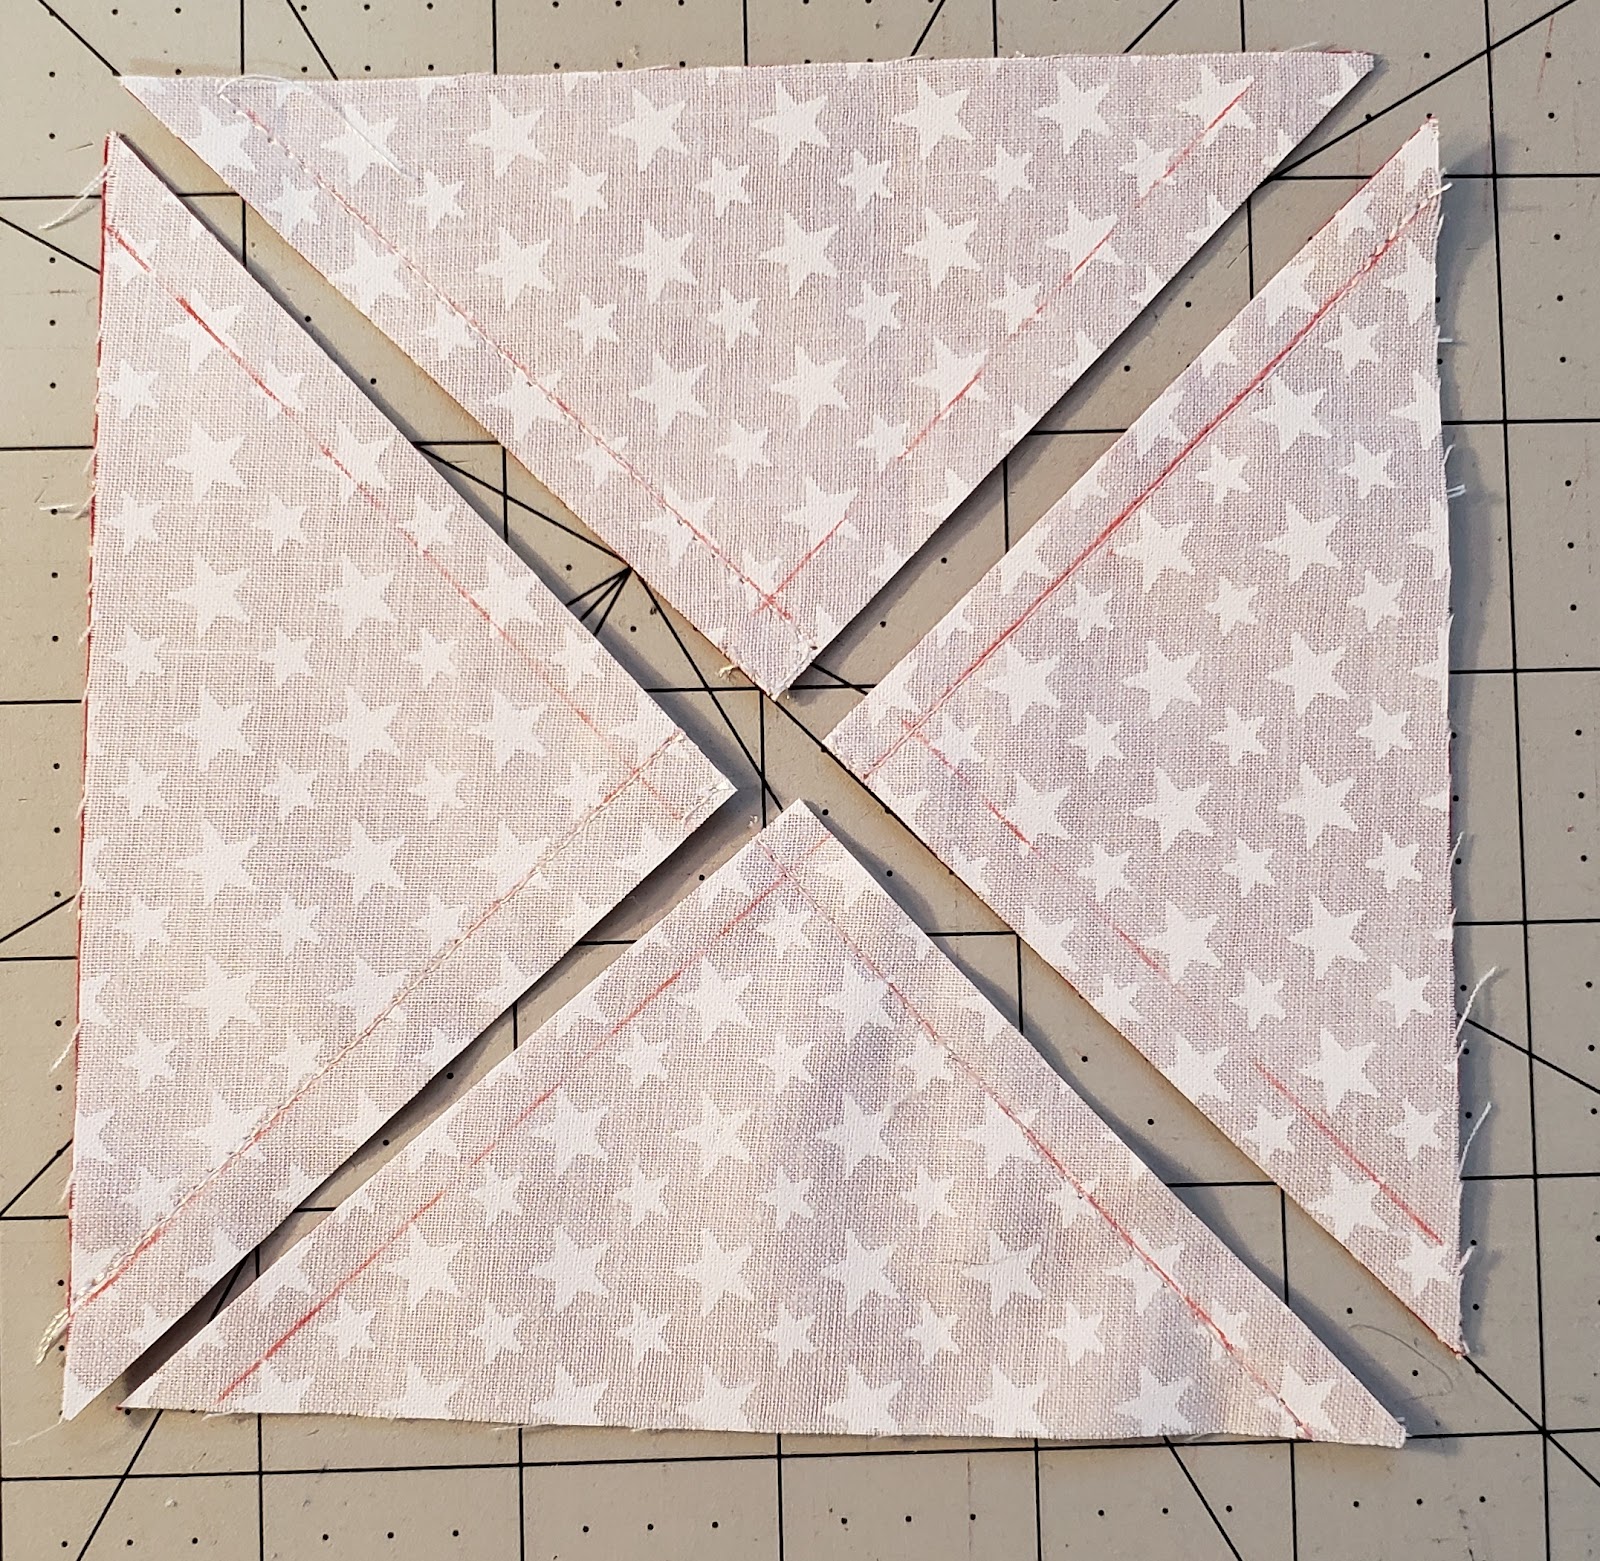

Press open, you now have 4 HQST, the small triangles
Step 4 – Cut the Blue pieces in half from corner to corner
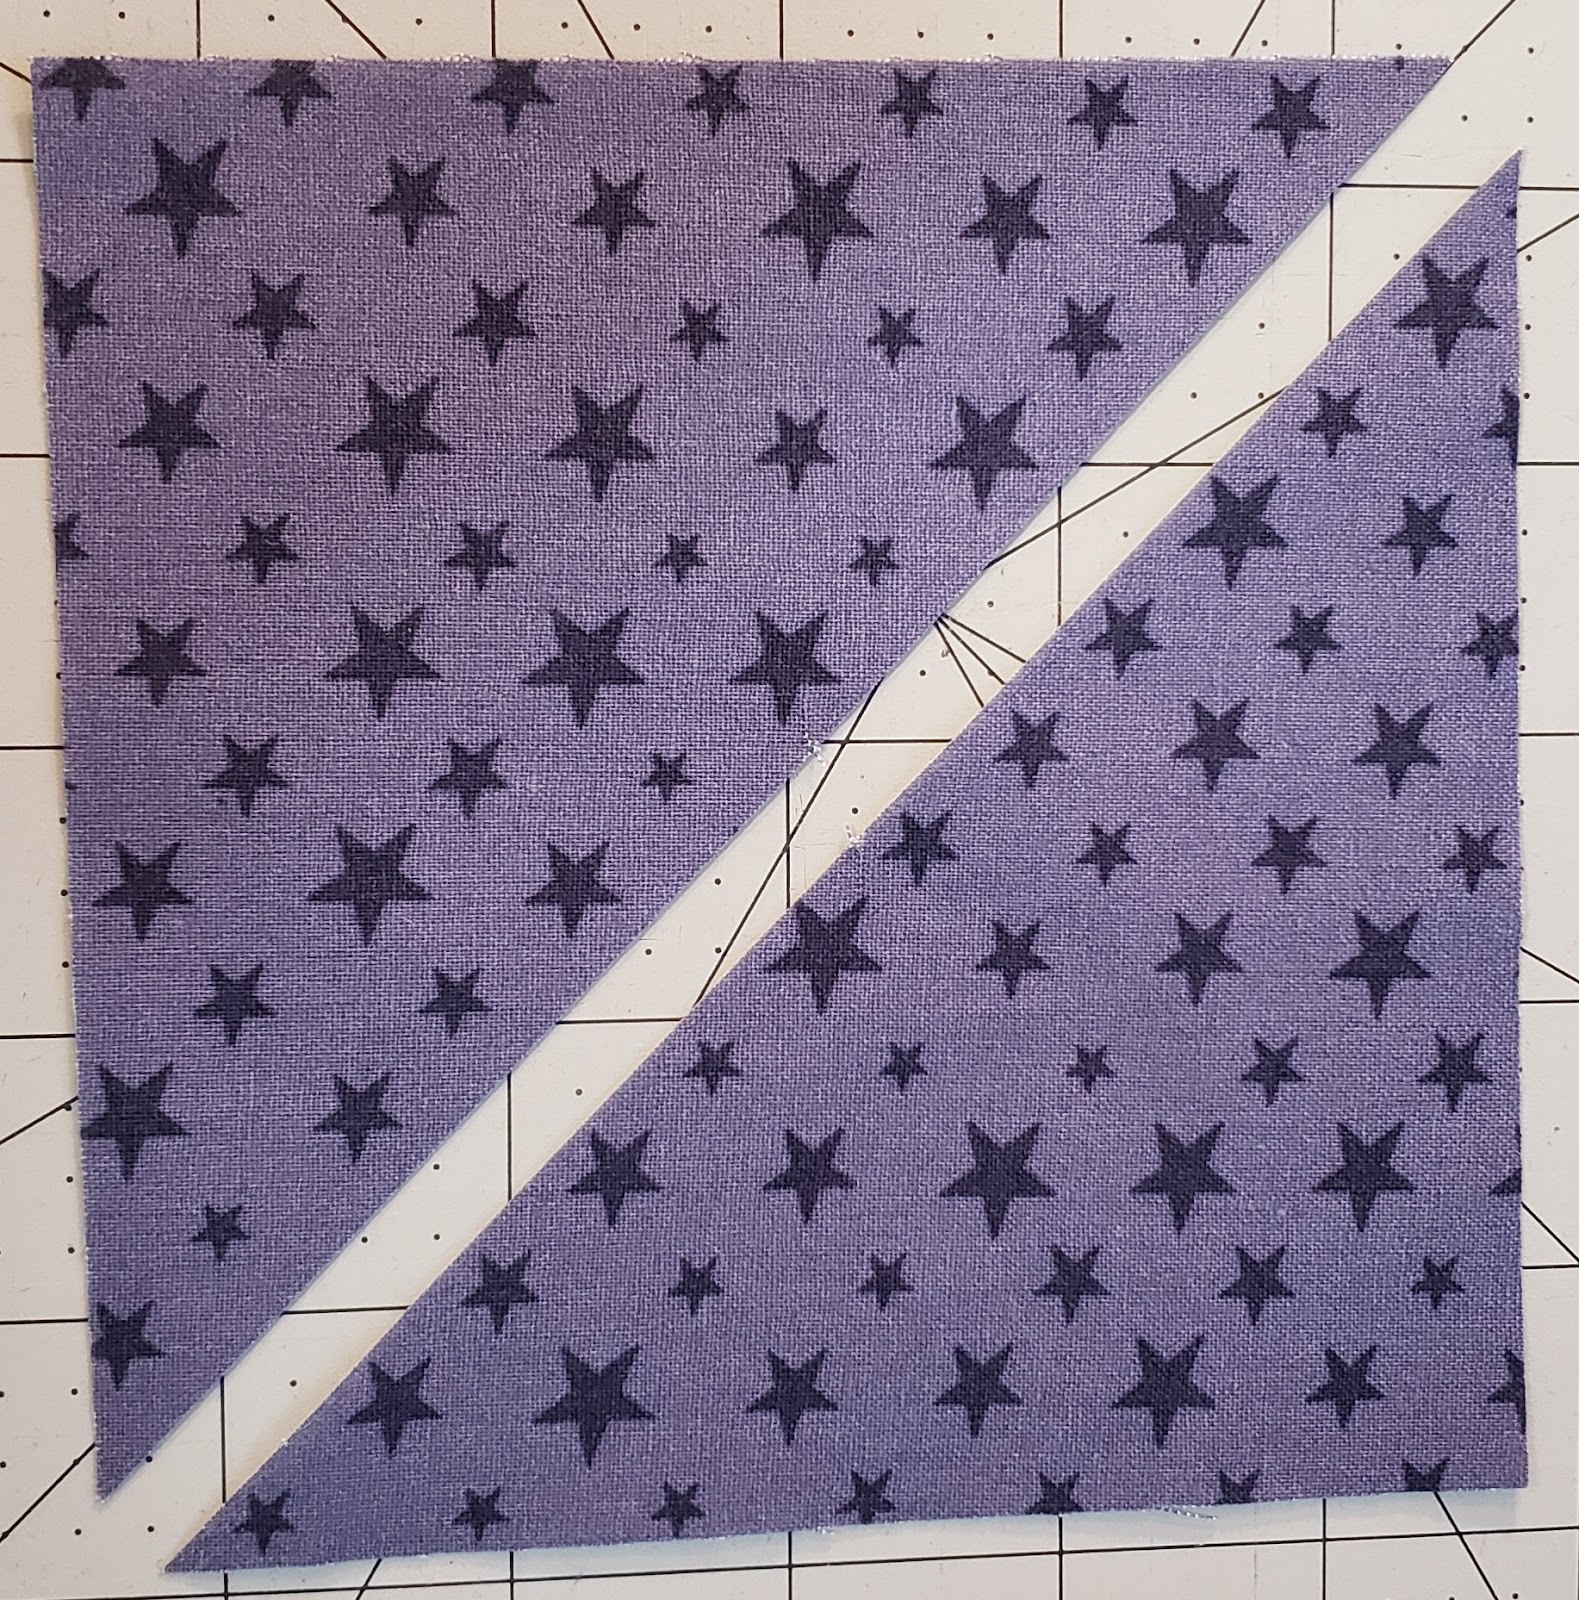

With Right sides together, match the Blue with the Red/White pieces along the long side.
Sew 1/4″ seam . Repeat this for all four pieces.

You will need to do Steps 1-4, three more times for a total of 16 non-mirror QSTs.
Step 5 – Square up QSTs to 3 1/2″ There are two ways that you can square up the blocks.

Option 1 – Use a Triangle Square up Ruler, to square the block before you press open, easiest way. Making sure to line up both the center seam and the bottom seams.
Option 2 – Use a ruler to measure and square up the pressed open square. This option takes a little more time, as you need to make sure that you are not only squaring up the outside edges but also making sure that the Red/white are even.

The half-point of the unit is 1 3/4″, so using the vertical & horizontal lines that correspond to this measurement, and align them with the center of the block where the two triangles meet. Trim.

Rotate the block half way, and align the cut edges to the 3 1/2″ lines both horizontal and vertical, making sure the center is still aligned, and trim with a rotary cutter.

Continue to trim all 16 of your QSTs in the method that works for you.
Step 6 – Layout your squares to match the pattern desired, then sew together.

Pin the rows together, double checking that your layout is still correct. Nest the seams to help with matching points, and sew.
NOTE: For a easy way to keep the pieces in the correct order, check out my blog, Chain Piecing Blocks.
Press seams all in one direction.

Your block is now done and ready to post on the Quilting BOM FaceBook group.
Click here to download a PDF version of this Block.
Thank you for joining us in this Season Block of the Month!
See You next month for the August Block!
