
We are continuing to do more blocks from the “One Hundred and one Patchwork Patterns” book by Ruby Short McKim. The book was published in 1931, and my husband’s maternal Grandmother learned to quilt from this book. These blocks are done in her honor.
The 23rd block for 2020, is Spools.
“IN THE days of our grandmothers, the spool motif played an important part in the making of wooden beds, stool legs and whatnots. It even was inspiration for the making of this quaint quilt pattern.” (McKim)
The original block was used with angled seams. “These blocks are rather difficult to piece, as the ends of the four-side pieces set into an angle when sewed onto the center block.” (McKim) That would make this simple block so hard to make.
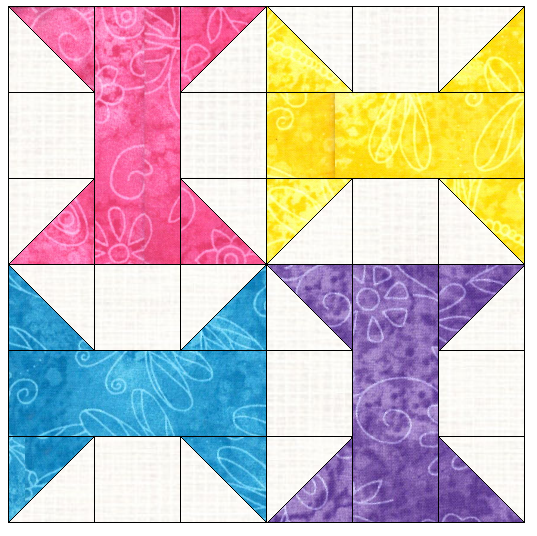
We have made this block simple, by making it with 4 HST, 2 squares and a strip. The original blocks were 6″ finished, and you would assemble multiples together. To continue with the same size blocks, our block will be 12 ½” x 12 ½” unfinished square, or 12″ x 12″ finished square. We do have an alternative to make this with the original size, and use four smaller spools (6 ½” x 6 ½”)
You can make either size, depending on what size pieces you would like to use. Or make both.
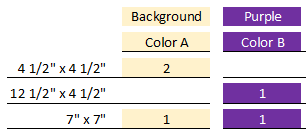
Fabric Requirements
One Large Spool
- Color A – 9″ x 12″
- Color B – 13″ x 13″
4 Smaller Spools
- Color A – (Background) 7 1/2″ x 17″
- For each of the four colors you will need 7″ x 7″ of each
Fabric Cutting
There are two options for this block, you can make a large Spool, or make 4 smaller spools sewn together to make the block. Both options finish at 12 1/2″ x 12 1/2″
One Large Spool
Four Smaller Spools – instructions below

Assembly – Large Spool
Step 1 – Creating Half Square triangles (HST) 4 1/2″ x 4 1/2″

Using the 7″ x 7″ pieces, place front sides together
Stitch 1/4″ along all four sides of square (red line is stitching)
Cut Diagonally from Corner to corner both directions
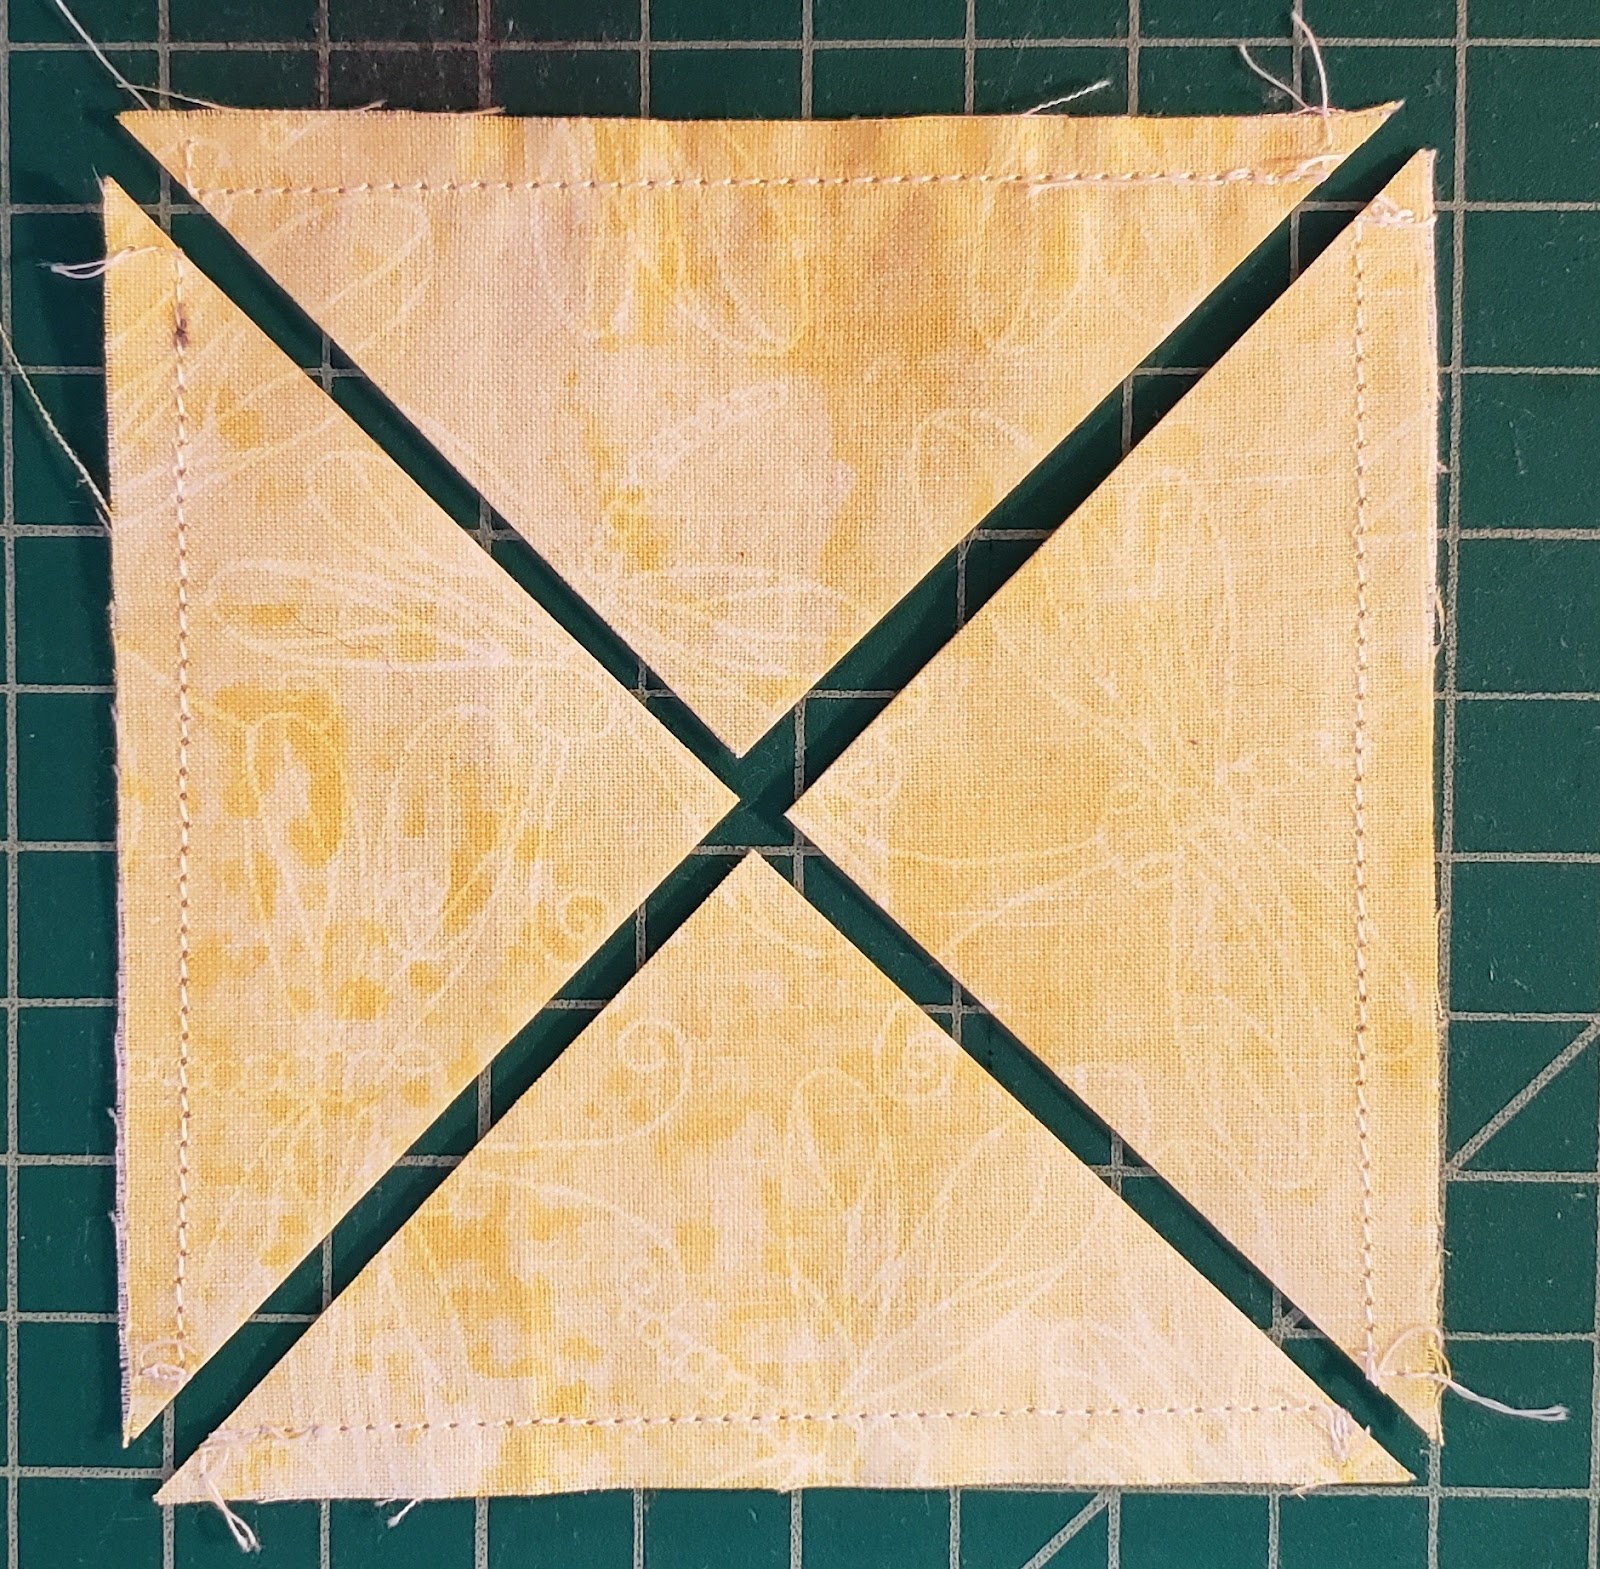
Press open, resulting in 4 HST
Square up the HST using your preferred method to 4 ½” x 4 1/2”
Step 2 – layout the pieces according to the following layout. Make sure that you lay the HST in the correct layout.

You will have 7 pieces, assemble them columns, and then sew the columns together. Make sure as you sew the outside two columns that you do not rotate the HST.
Press the seams, and you have completed the Large Spools Block.
Alternative – Four Small Spools
Step 1 – Creating HST 2 ½” x 2 ½”
Using the same method as you did for the large spool, you will use one of the background 4 ¼” x 4 ¼” pieces and one color 4 ¼” x 4 ¼” pieces.
You will repeat this process for all four colors, for a total of four different sets of 4 HST.
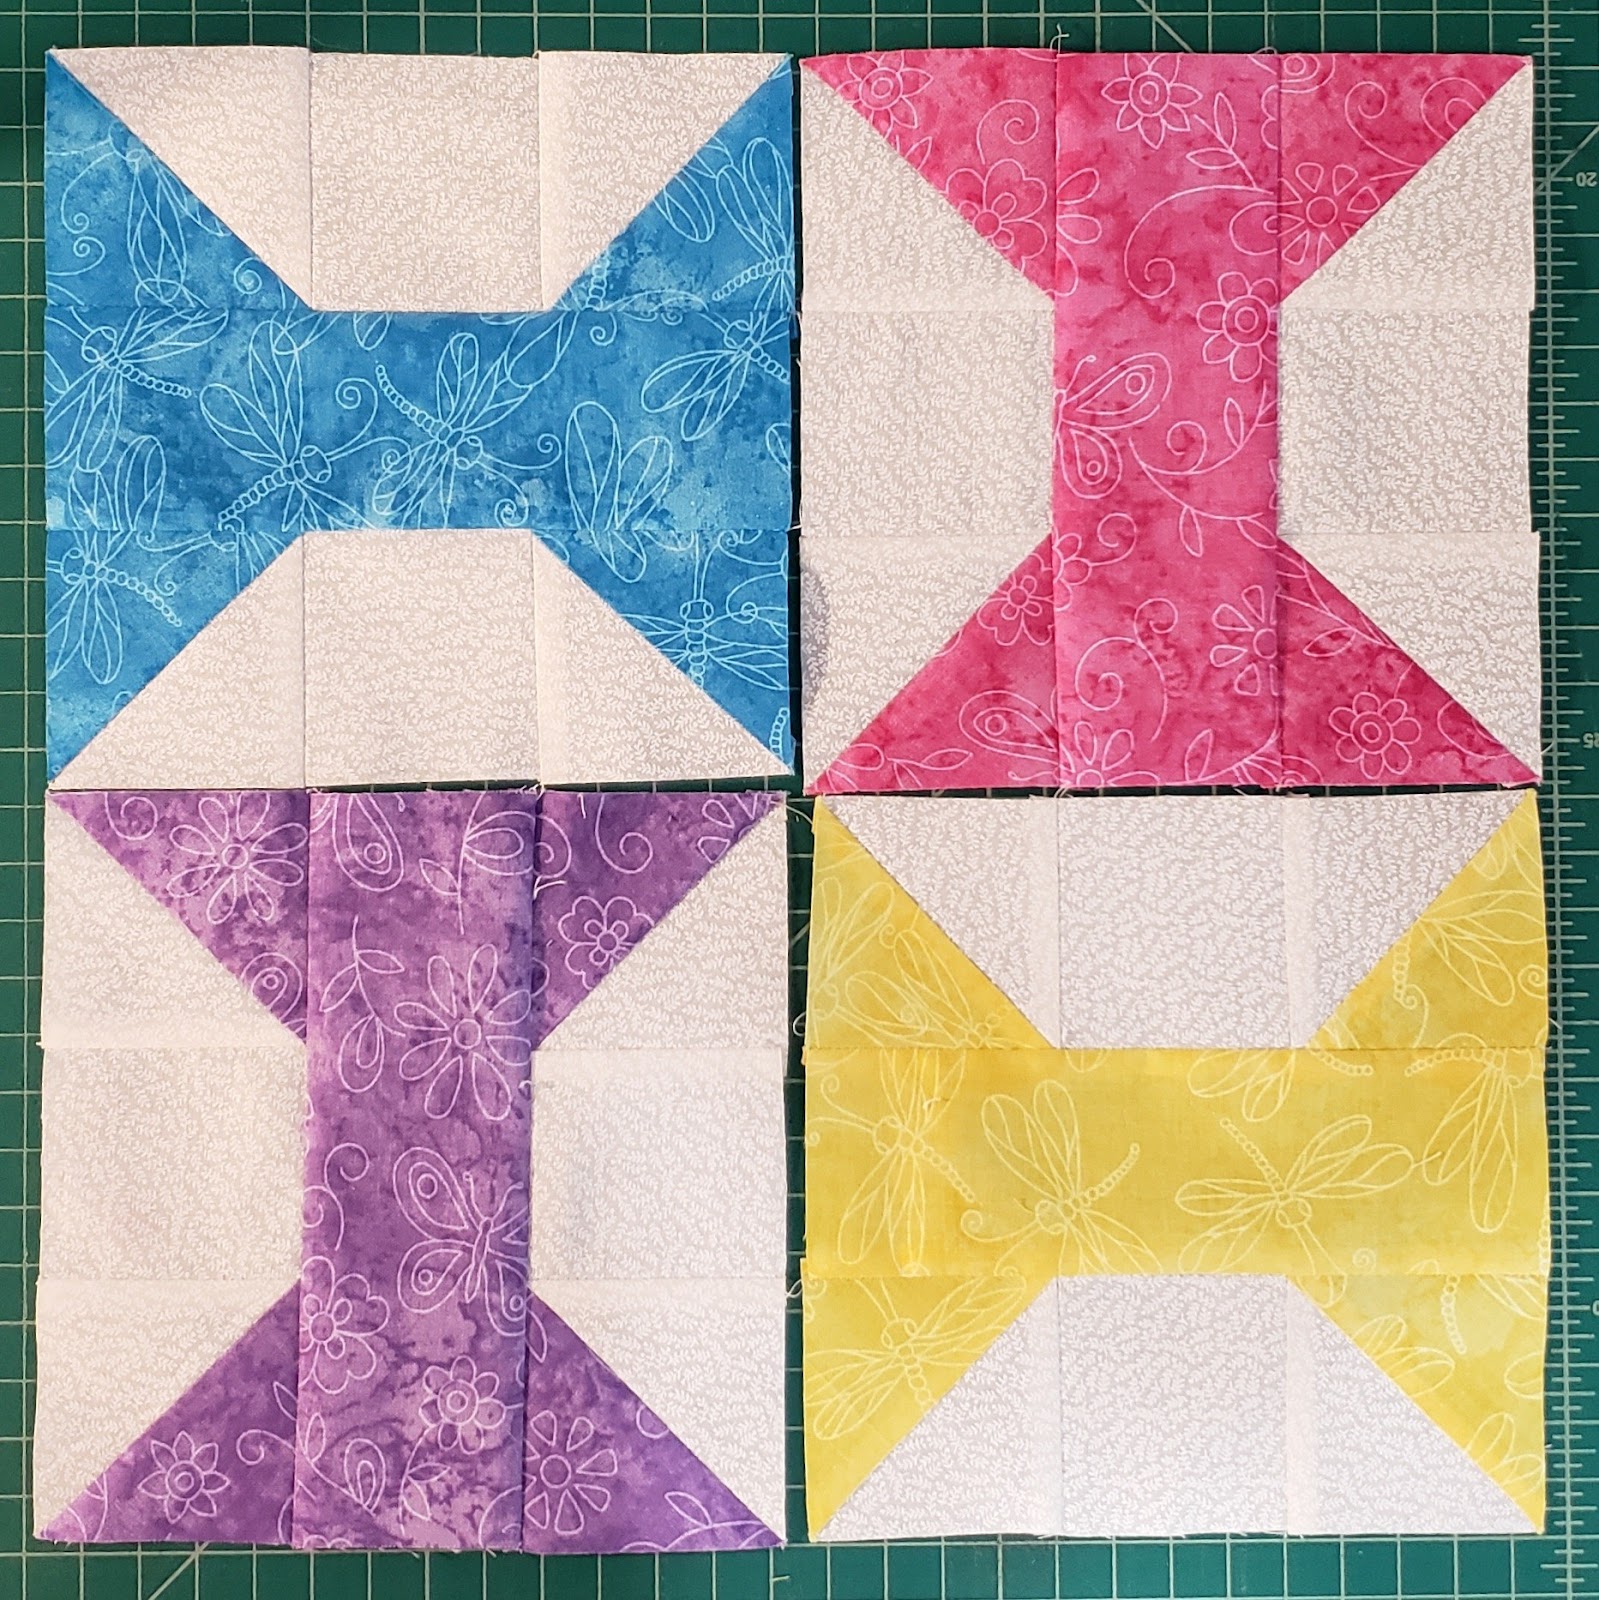
Step 2 – Four small spools
The layout for this block is the same as for the Large spools, except you will create 4 different spools.
You will need to press these blocks, so that they will nest together with the others. I found that I was best to press the sides (HST & square) towards the HST. When sewing the three columns together, press towards the center strip (6 1/2″ x 2 1/2″).

Once you have all 4 spools sewn together, take the time to make sure that each is 6 ½” x 6 ½” square.
Step 3 – Final layout.
You will lay the four small spools out, you can lay them all the same direction, you can rotate two opposite corners to give a different layout. The layout is completely up to you.
Sew the 4-patch together, making sure to press your seams.
You have completed the Small Spools Block.

I look forward to seeing all your wonderful blocks! Make sure to post on the Facebook group! Remember to add the hashtag #BOMSpools.
Thank you for joining us for this additional 2020 block of the month!
Click Here for a downloadable PDF of the instructions.
For the previous blocks, you can check under “Units” in the Facebook group.
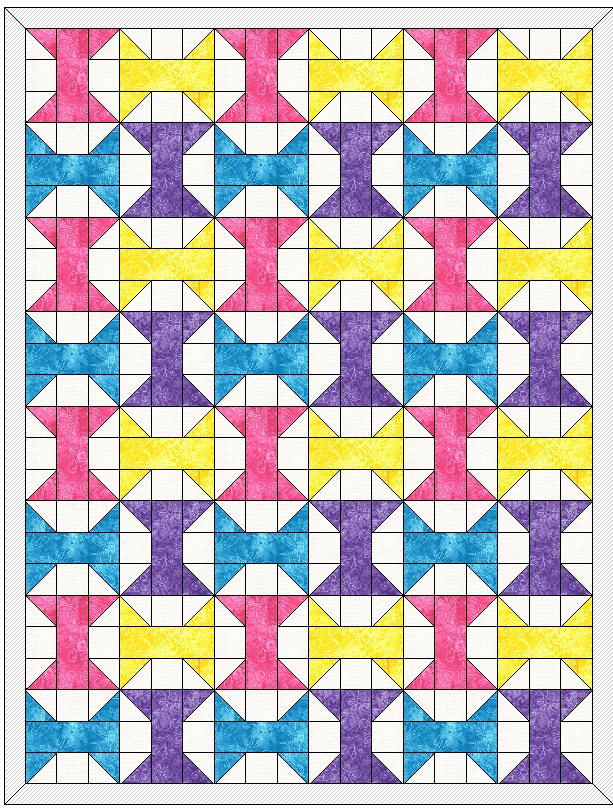
Here are some suggestions of how this block would look in a full quilt.


I have always loved this block! I’m going to make good use of it! Thank you Lisa! It’s so much easier to find your blog!💛
LikeLike
Glad you love the block. Make sure to post in the Facebook group, so we can all enjoy your work. 🙂
LikeLike
Thank you… I just running behind – but I will get caught up😊. Thank you for the blocks!
Sent from my iPhone 🇺🇸🏠
Jeri@JeriAnderson.net
LikeLike
No problem, get caught up as you have time.
LikeLike