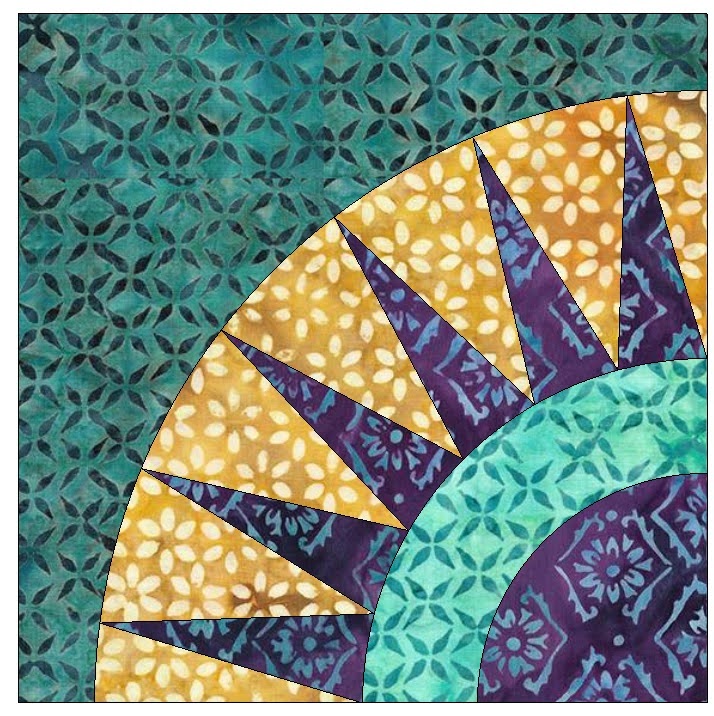
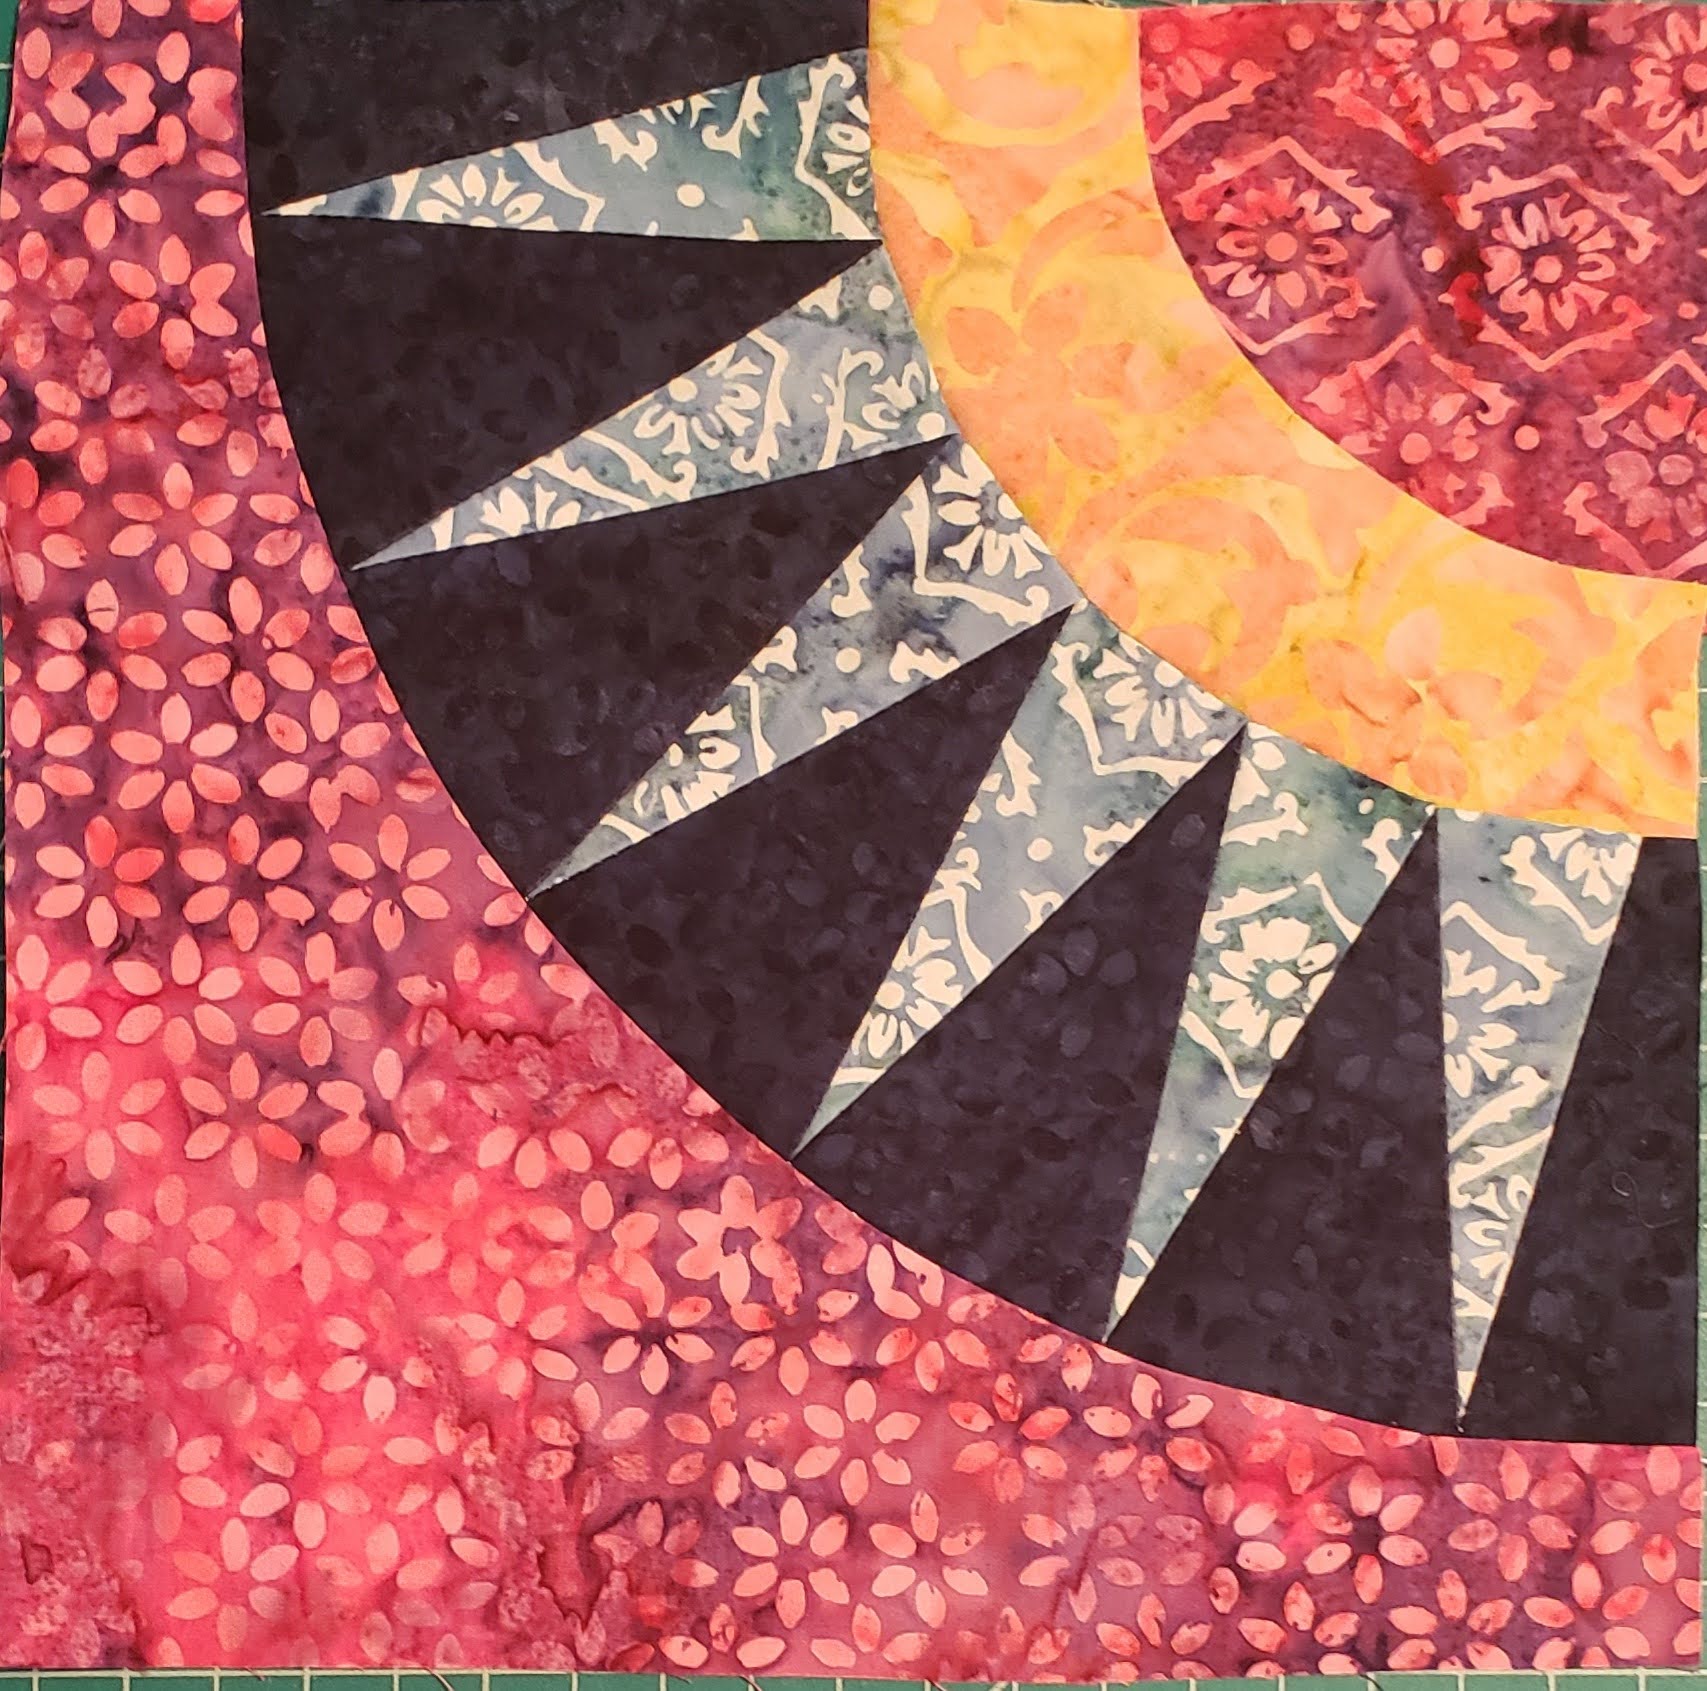
The Island Batik Ambassador’s challenge for June 2022 is the New York Beauty Block. The second easiest of the three New York Beauty blocks is Layout 1, for blocks 1 and block 3.

Each of the blocks gets a little harder each week, this is the middle level of the blocks, Layout 1. You will create four of color set 1 and three for color set 3.
Templates/Paper Piecing
You will need to download and print the Templates and Paper Piecing or Legal Paper Piecing.
At least the Paper Piecing sheet needs to be printed on a piece of Freezer paper. You can purchase this in the grocery store, where you get foil. I cut out a sheet at 8 1/2″ x 14″ (legal size) so I could print without having to piece the paper together. You can download the size you want.
Print on the dull side (not the shiny wax side).
You can do these instructions without the paper piecing, you can cut all the pieces to the exact size of the templates, and then piece together, just watch your seams, making sure 1/4″.
Cutting
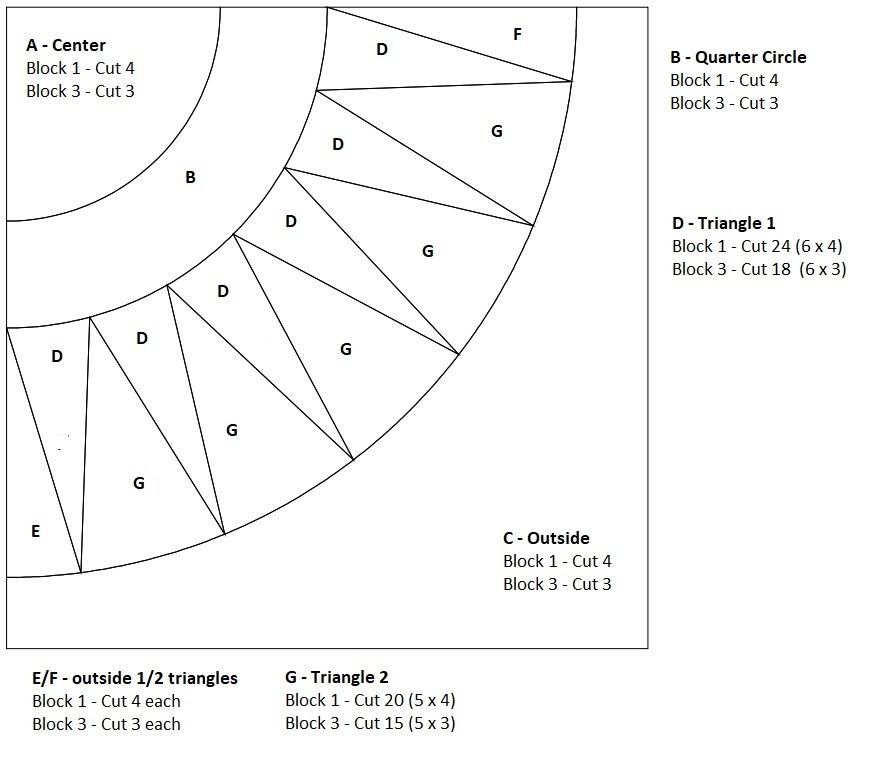
This block is similar in the sewing, except that you will have an extra quarter circle strip of fabric. This block will use 5 difference colors, for the layout.
Using the templates, cut out the pieces needed. Piece B will need to be combined from the two pages, each straight side should measure 9 1/2″ from seam allowance to seam allowance.
Block 1 – Quantity needed 4
Fabric I used in this block from the Savannah collection
○ Center – 1450
○ Circle – 3551
○ Triangles 1 – 1450
○ Triangles 2 – 2035
○ Outside – 3559
This block will go together very similar to Layout 3, however, we added an additional partial circle piece.
Step 1 – Paper Piecing
Trim the Paper piecing piece, it does not need to be exact, we will trim after we sew the pieces together.
Fold along each of the center lines between the shading. We will be sewing along the folds, to reduce having to print multiple copies, or to pull off paper. You will be able to iron the pieces as we go.

You can start at one end, or in the middle, your preference. I decided to start with one end and work across.
NOTE: If you need help, view last weeks blog for pictures for each step. I forgot to take pictures a I was making the blocks.
The first piece, you will iron on to the paper piece, with fabric back against the paper. The rest of the pieces will be right sides together.
After ironing the fabric to the paper, fold back on the fold line, and trim to 1/4″
Flip over, still folded, and place right-sides together the next fabric piece, makings sure to match the direct of the paper. (opposite of the previous piece.)
Then holding together, flip over, and go to sewing machine and stitch right along the fold of the paper (not on it).
Press open.
Fold next paper fold back, and trim the fabric to piece to 1/4″.
Flip over, and attach next triangle piece. Making sure the opposite direction.
Gently flip over, and go to sewing machine and stitch along fold of paper.
Continue going back and forth with the pieces, until you finish the row.
NOTE: The first and last pieces will be different pieces. (Pieces E & F)
Once you have attached all the triangle pieces across. Press seams.

Then trim the strip to the dotted outline, 1/4″ from the points of the triangles.
Carefully remove the paper from the back.
You will create a total of 4 of these pieces for the four blocks.

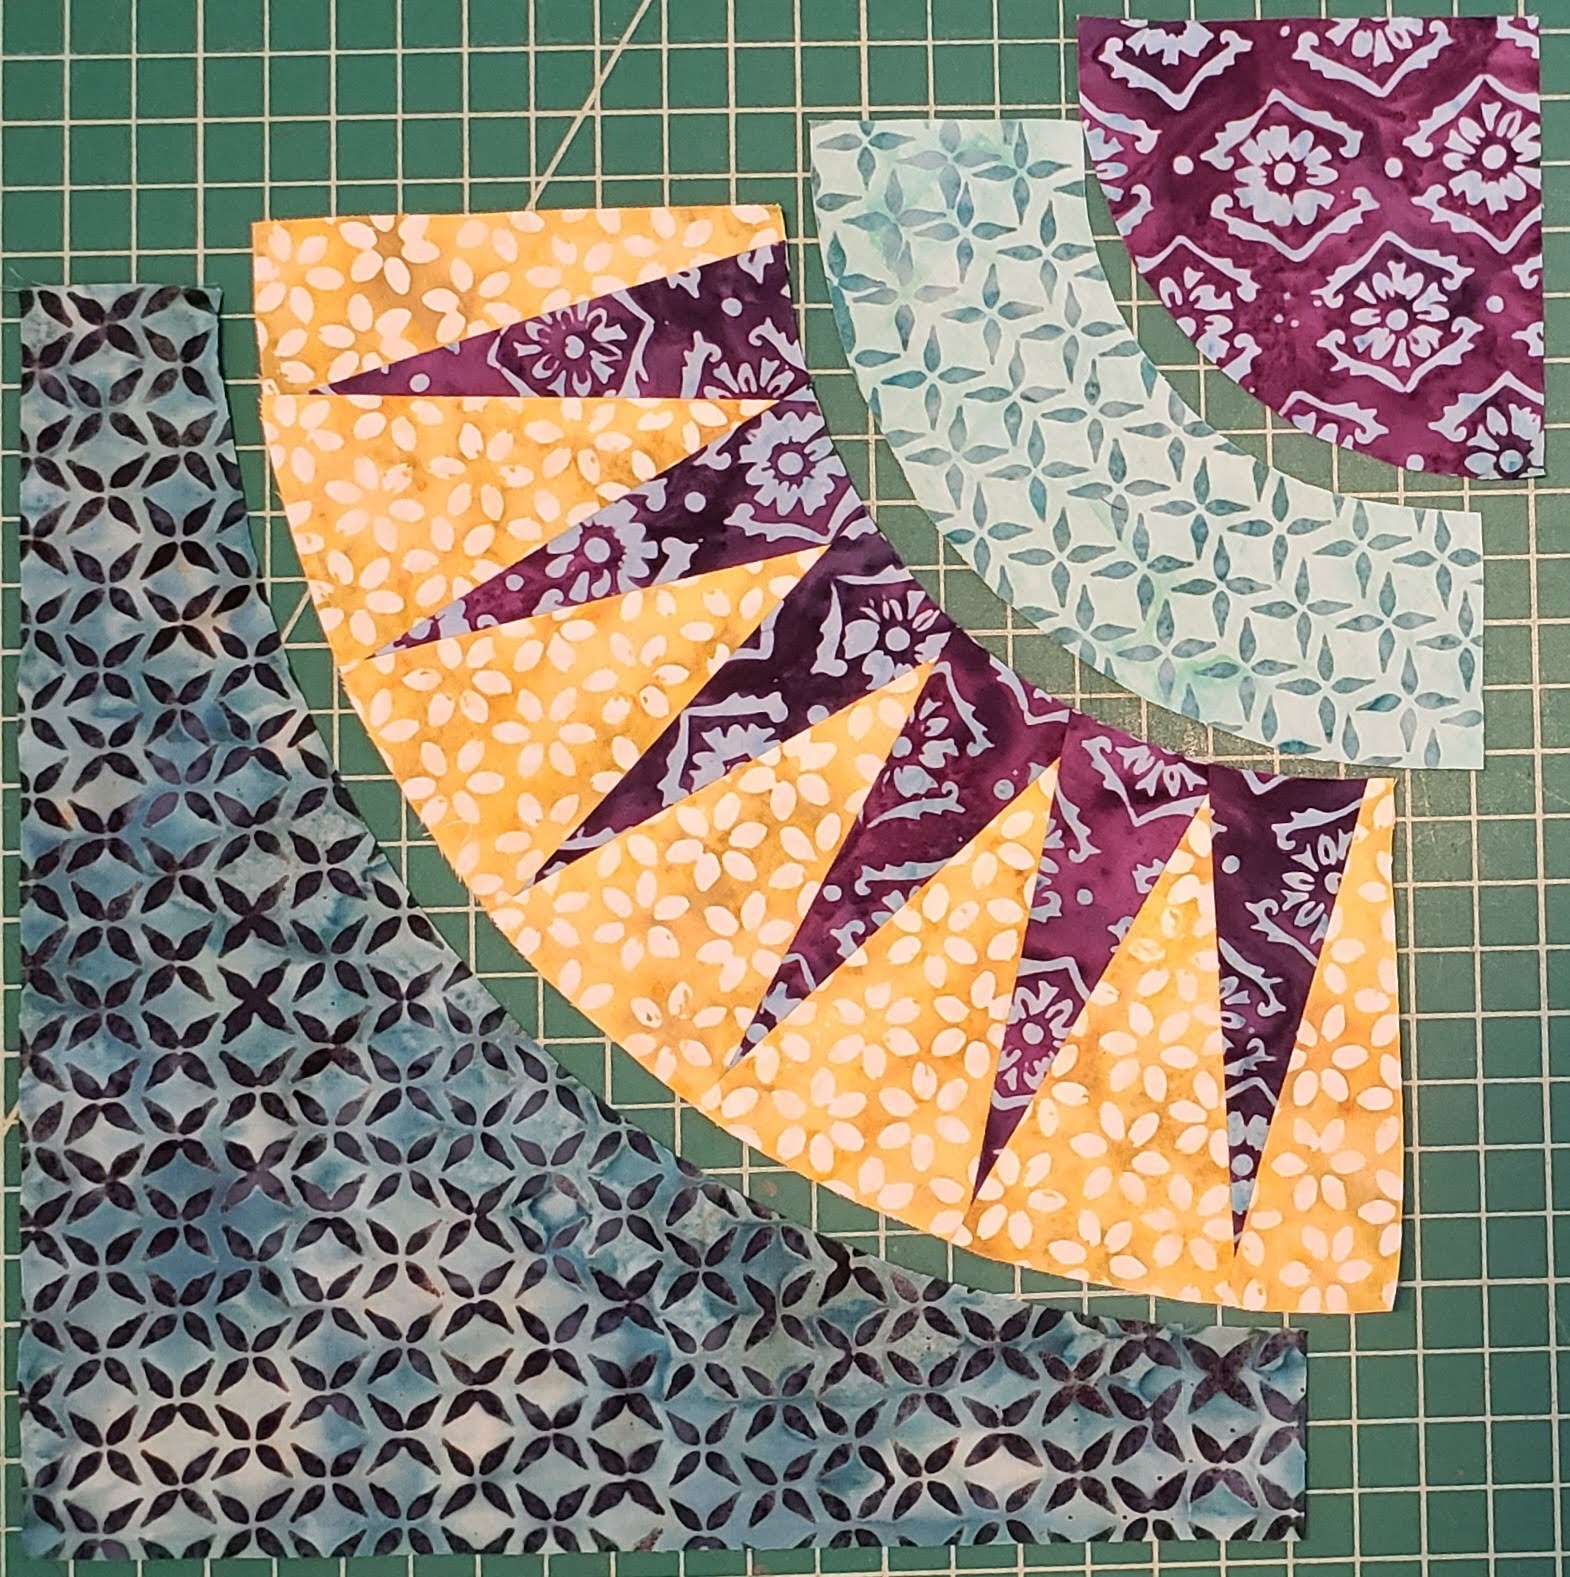
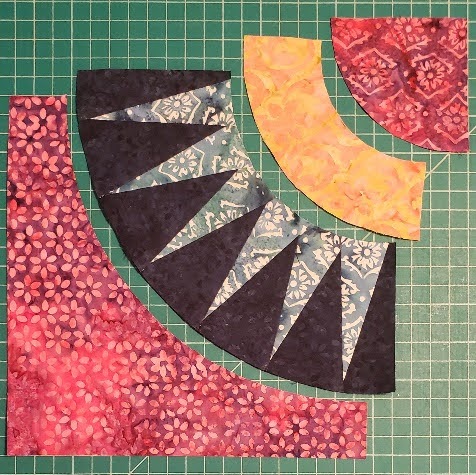
Layout the pieces with Piece A (center), Piece B (quarter circle) and Piece C (outside edge).
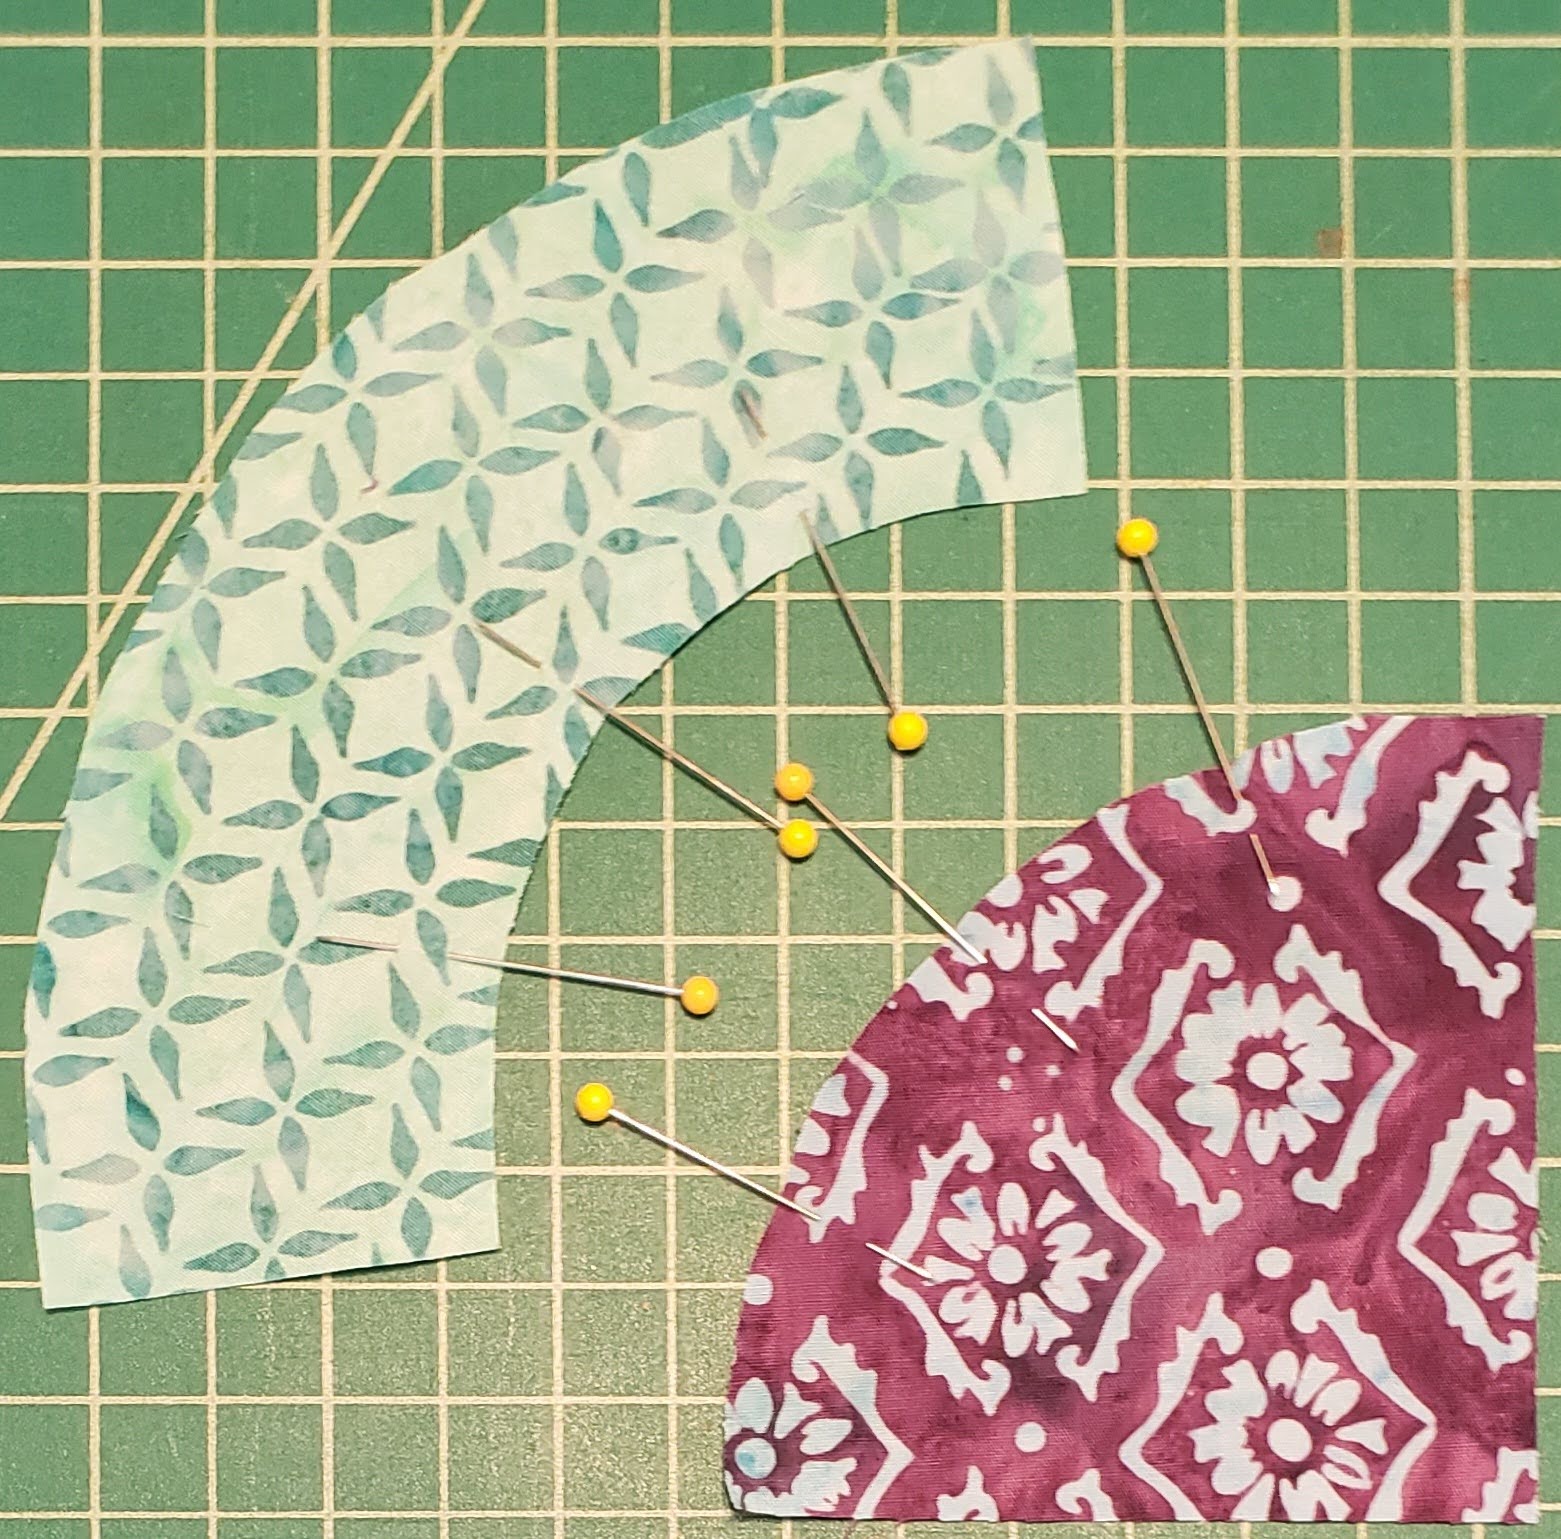
Now match the Piece A (center piece) to Piece B (quarter circle), matching the center and edges. Sew 1/4″ seam allowance.
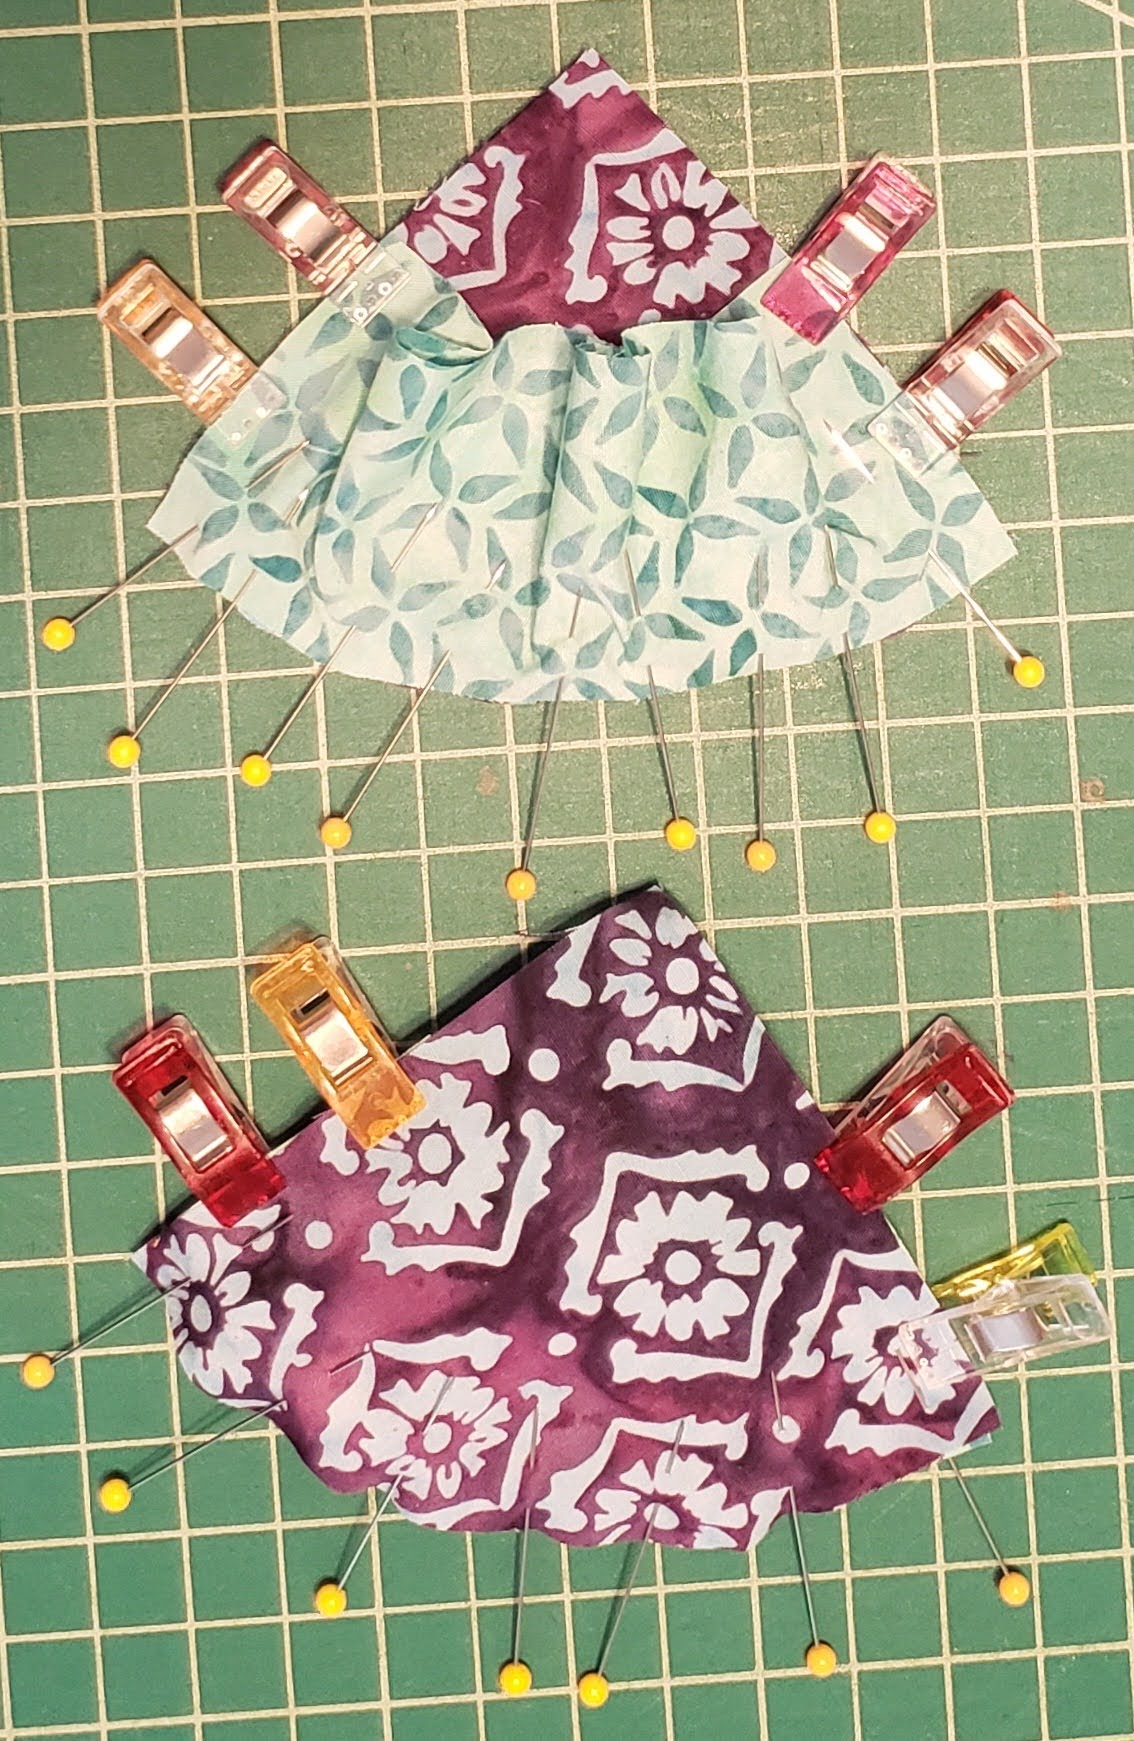
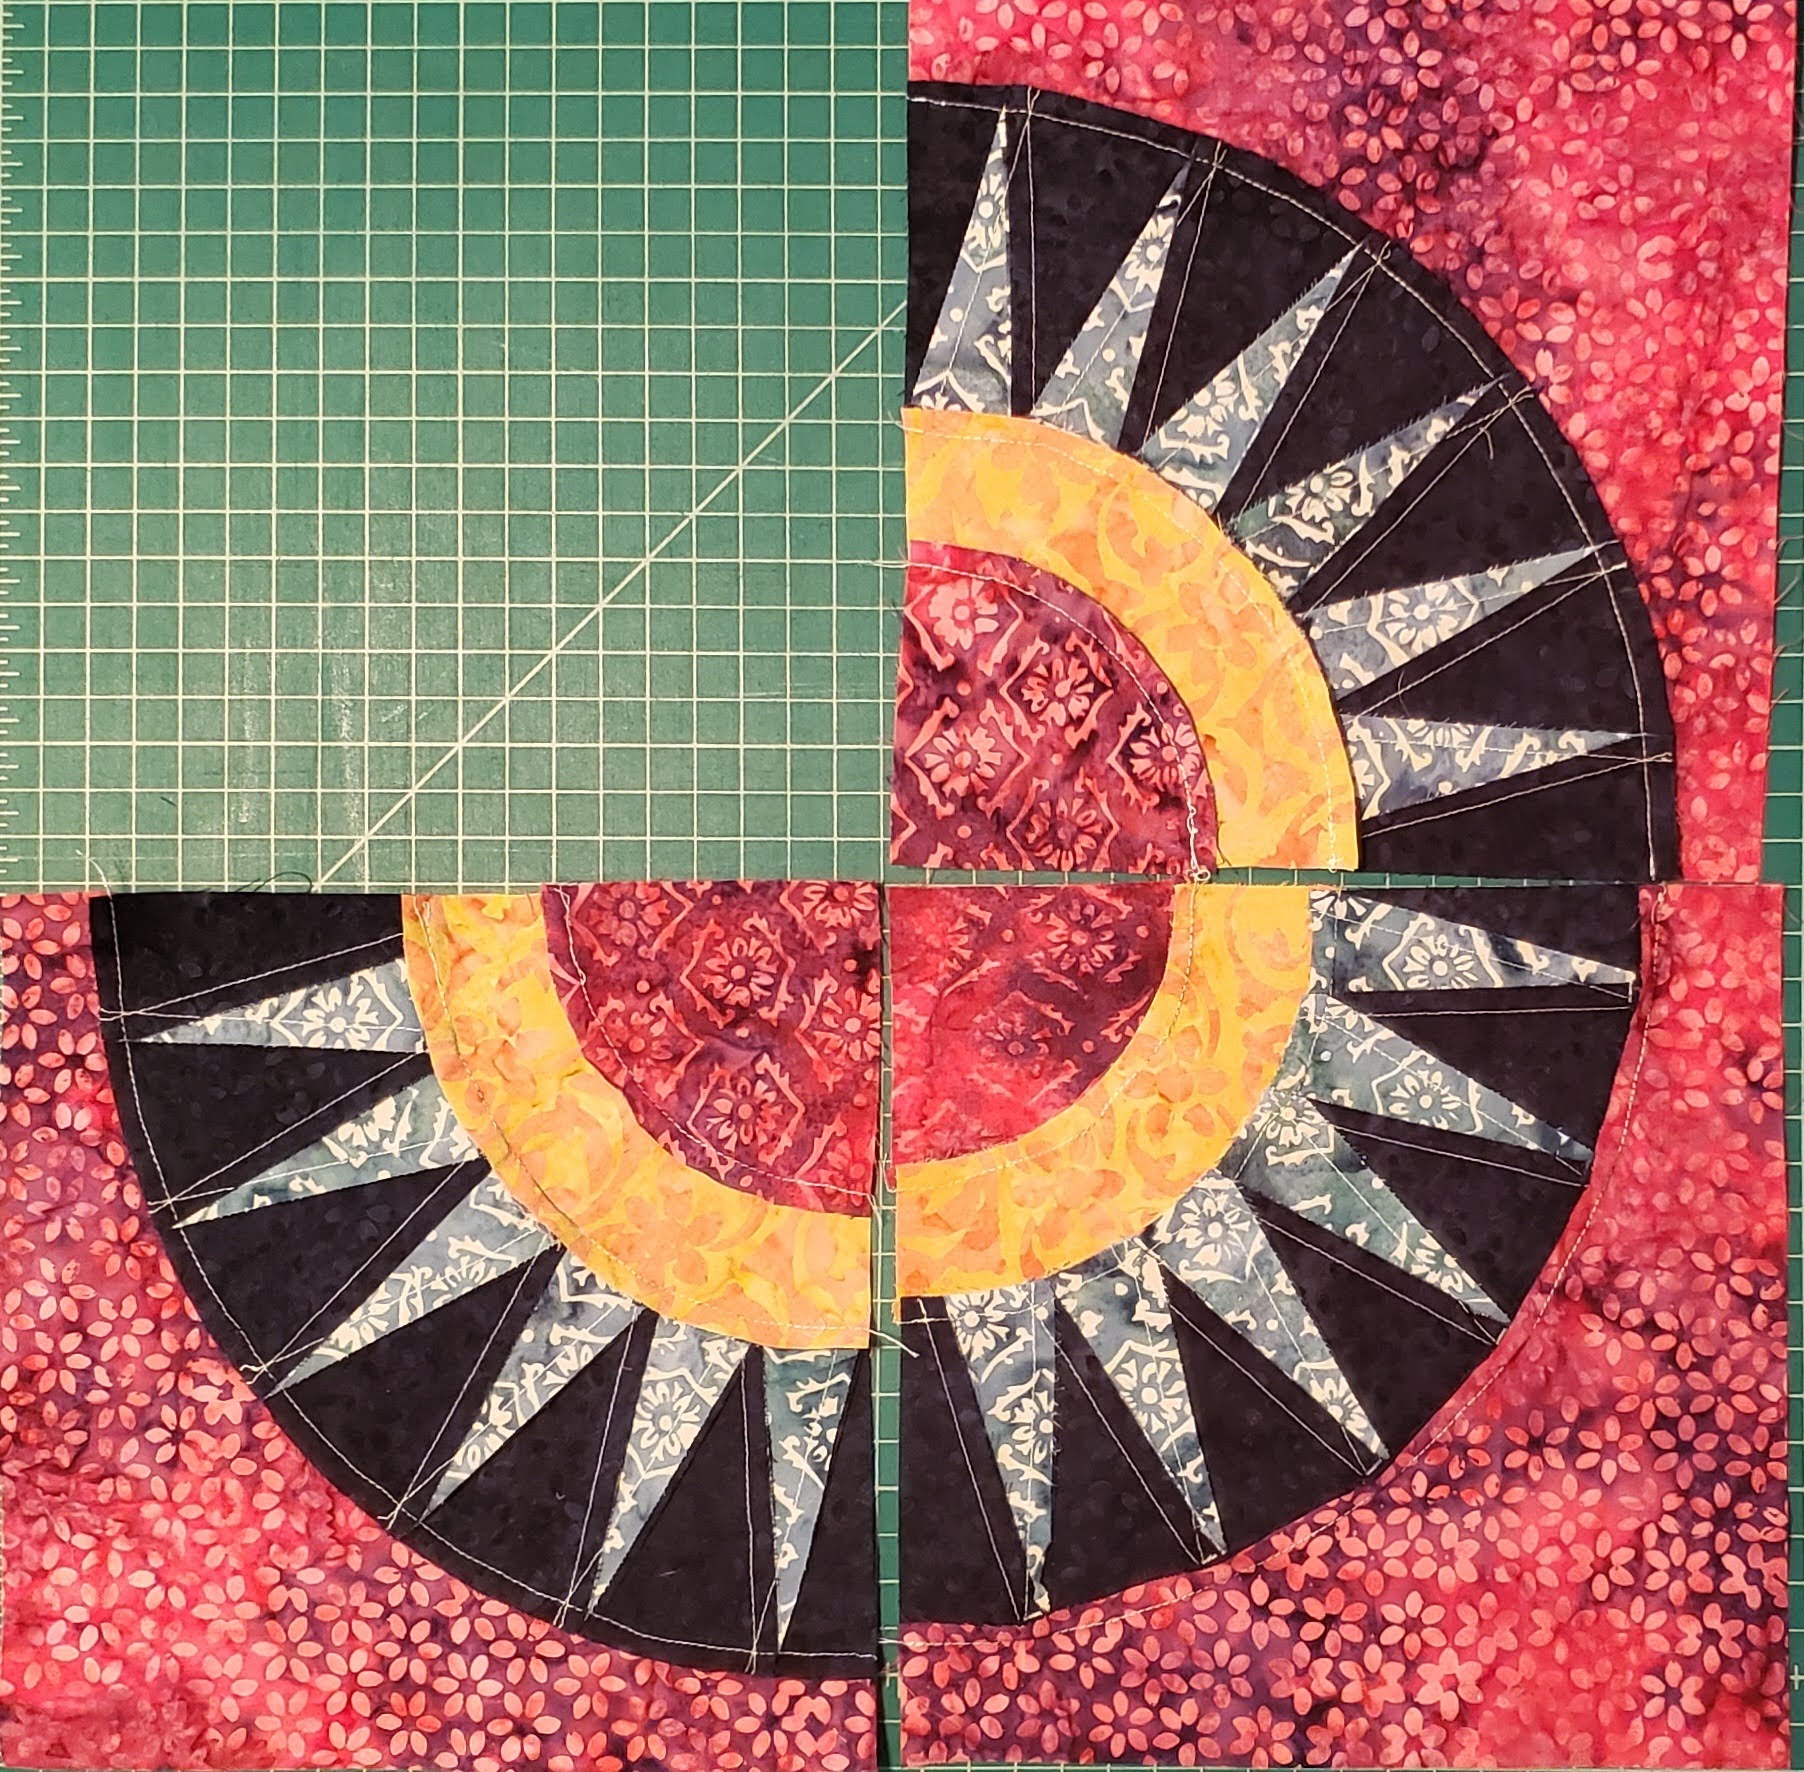
NOTE: With this set you will need to press two one direction, and two the other direction, this way you can nest the four pieces together.
a. Press two squares towards the center piece (piece A)
b. Press two squares towards the outside piece (piece C)

Next sew Piece C (outside piece) to the pieced triangle piece, matching the center and edges. Sew 1/4″ seam allowance.

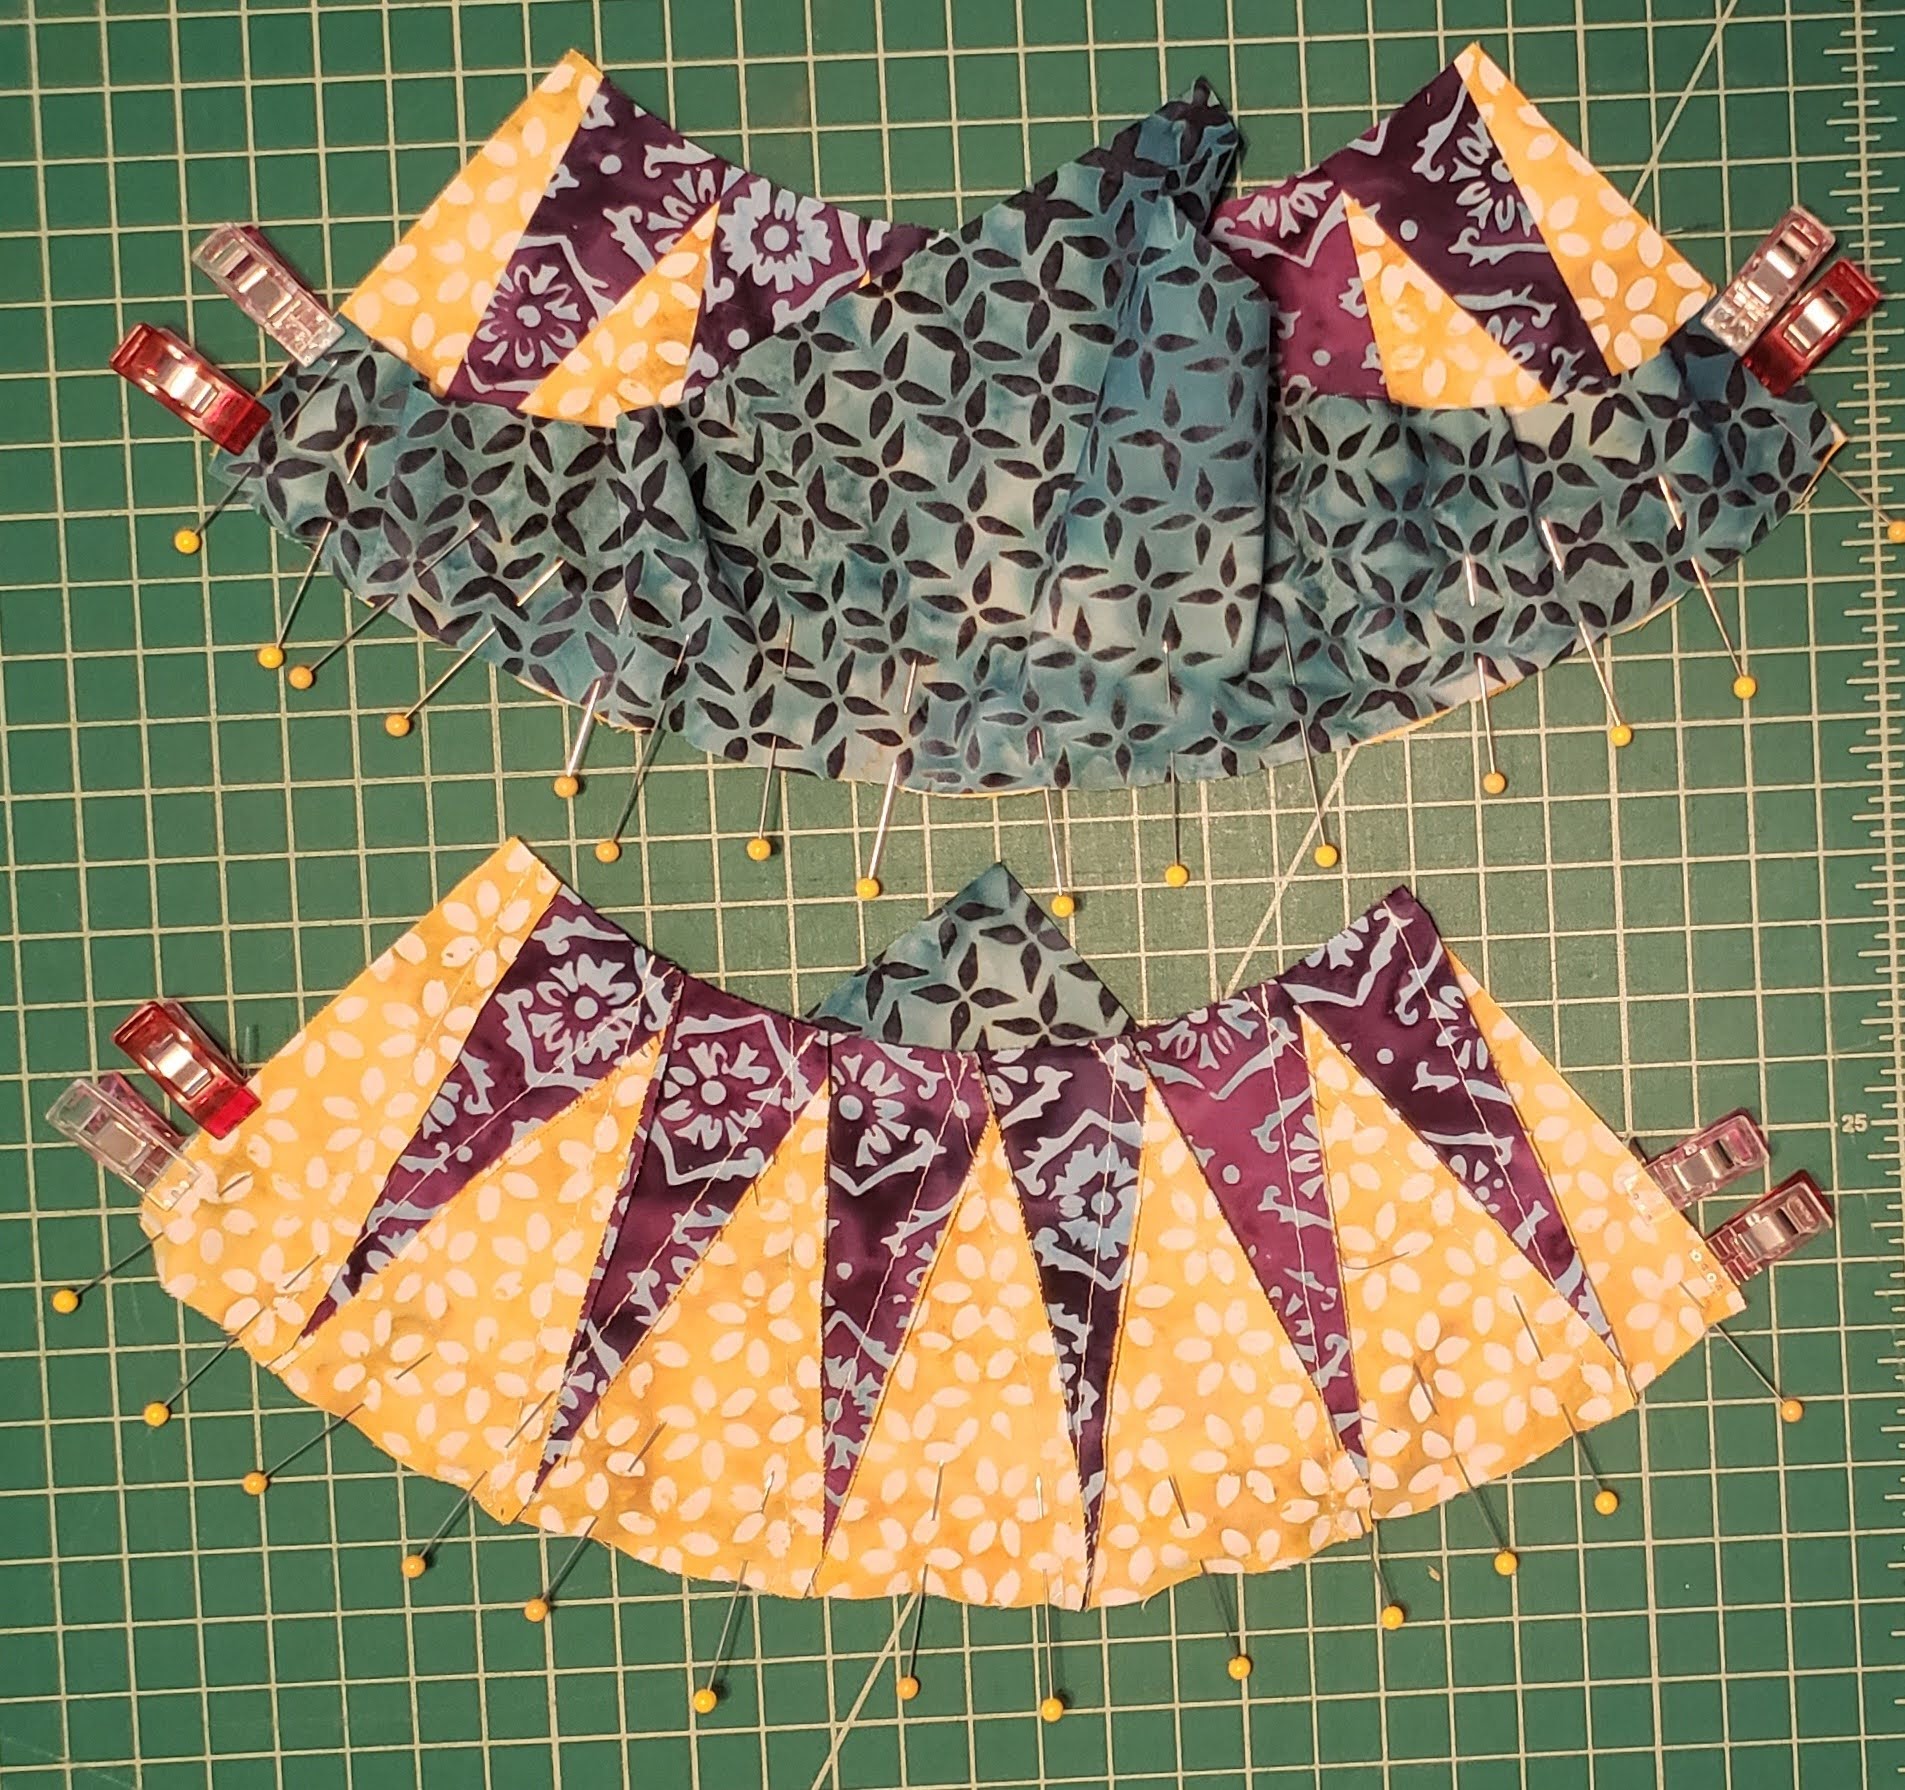
I found that if you stitch on the pieced side, you can watch for the points to make sure that you don’t go over them.
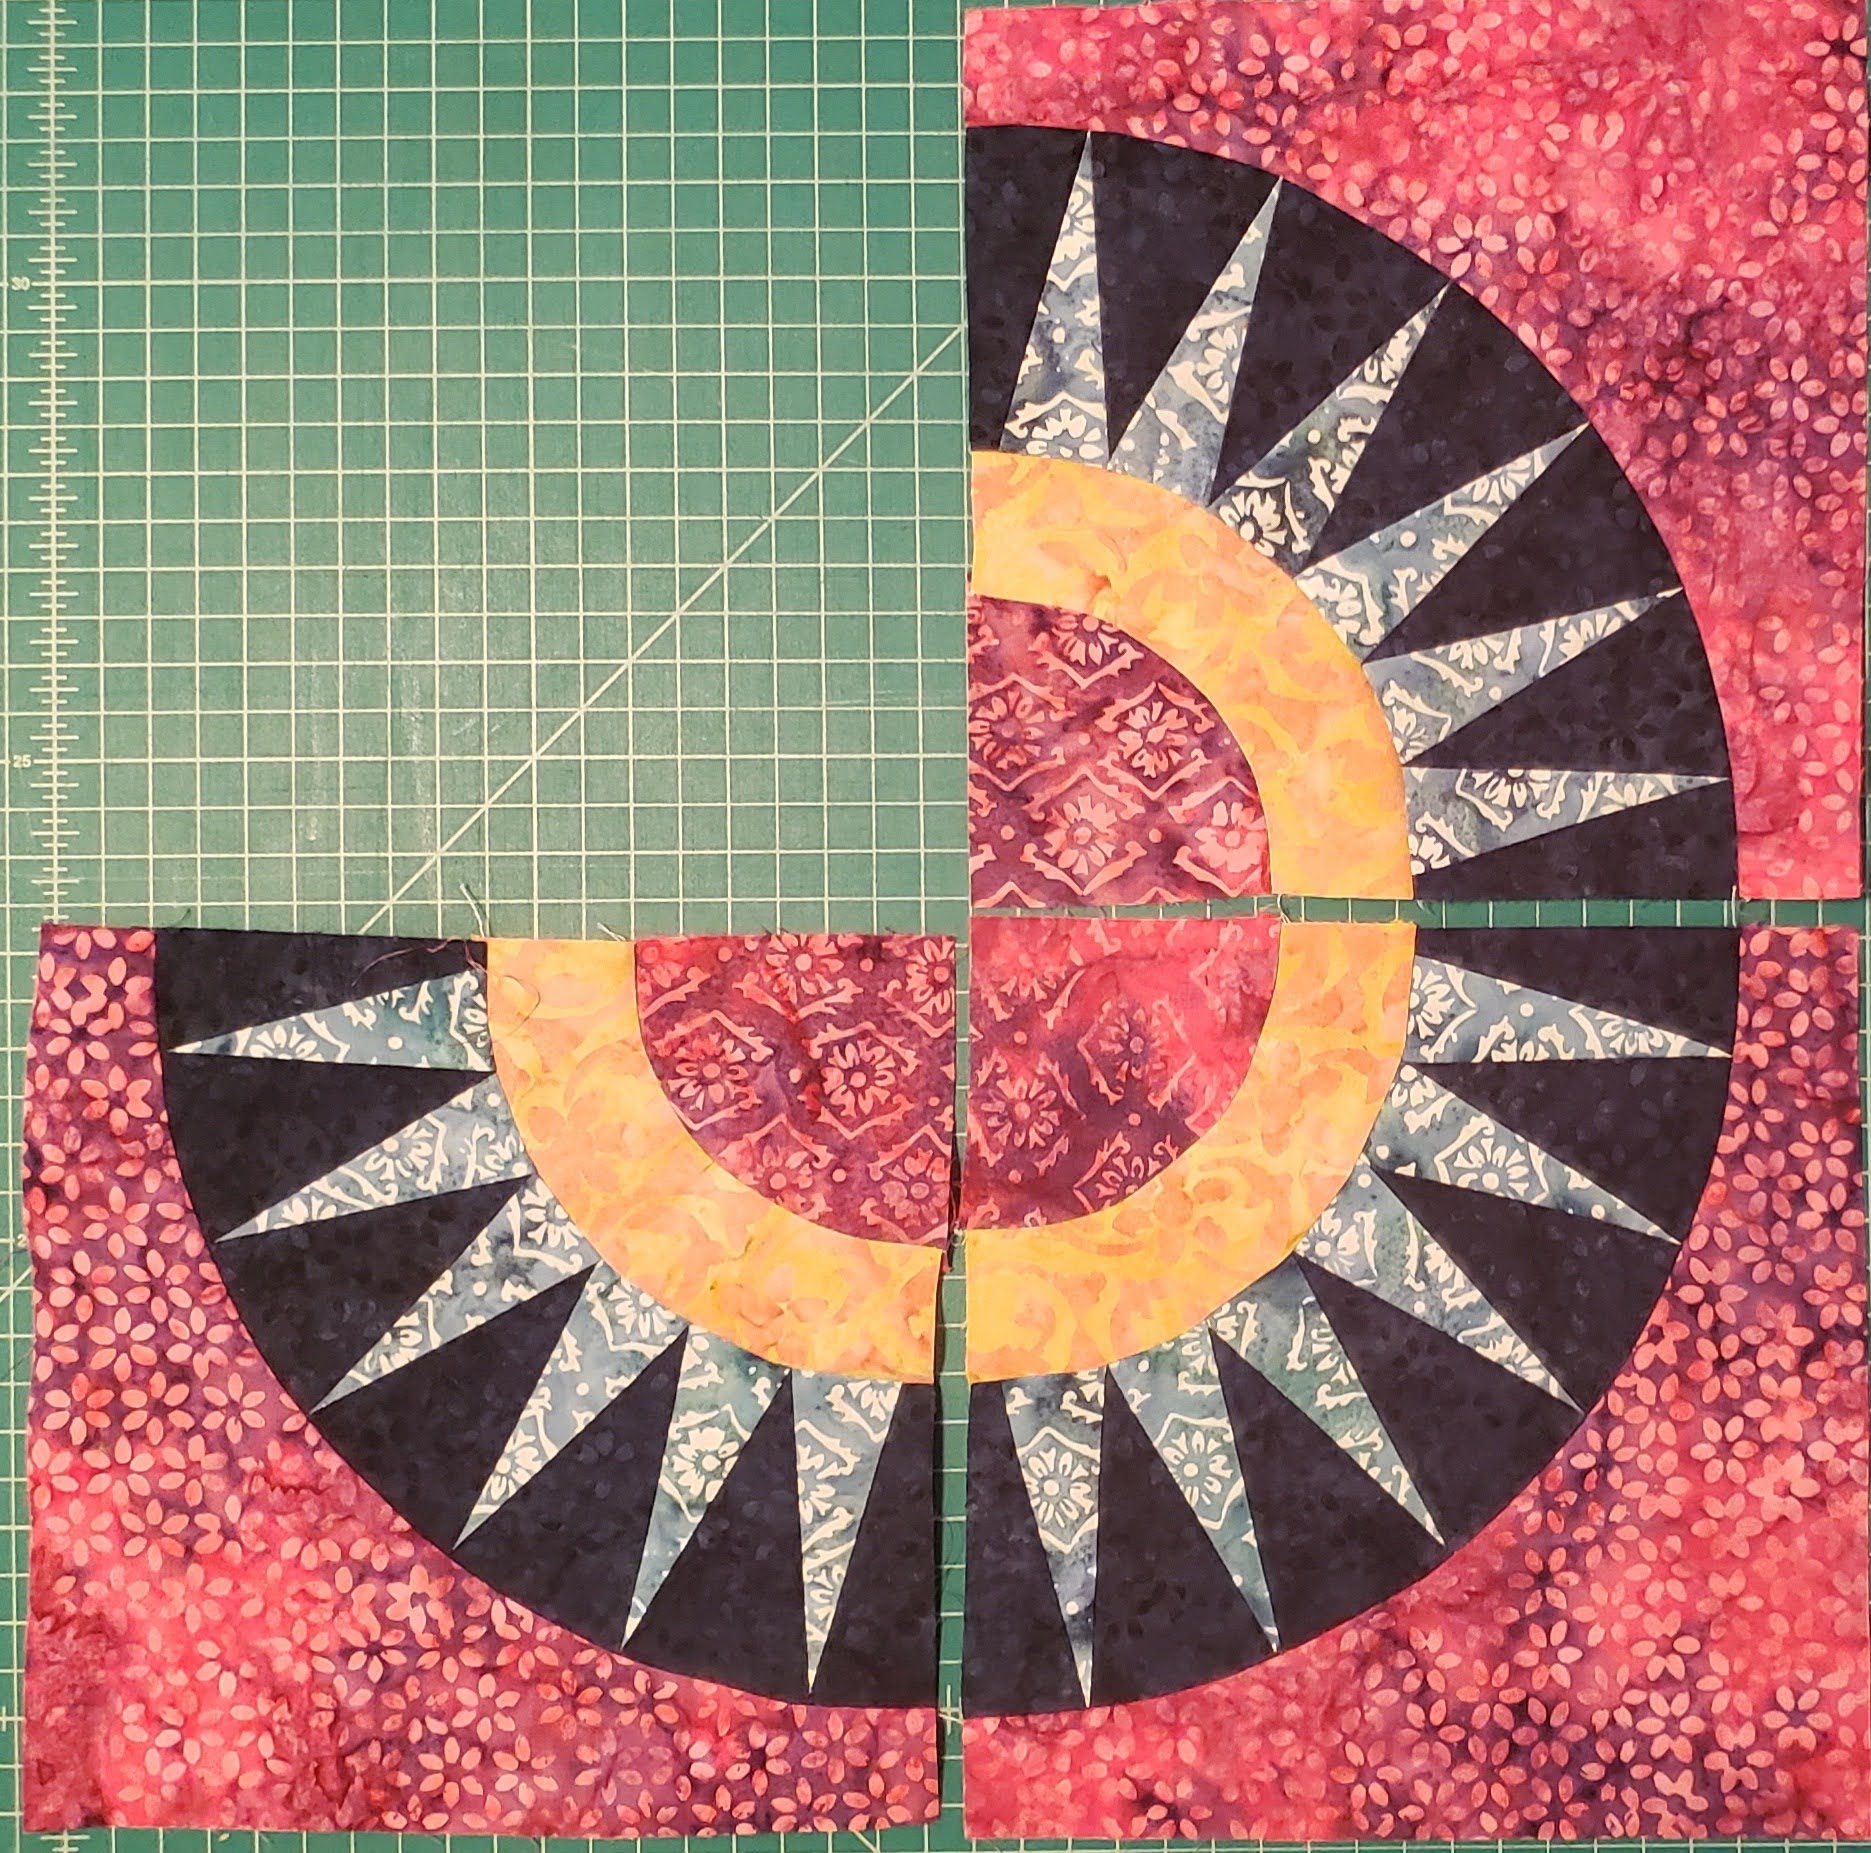
Attach the Piece A/B to Pieced triangles/C, matching the center and outside edges.

Again, if you watch the points of the triangles, you can keep from losing those as you sew together.
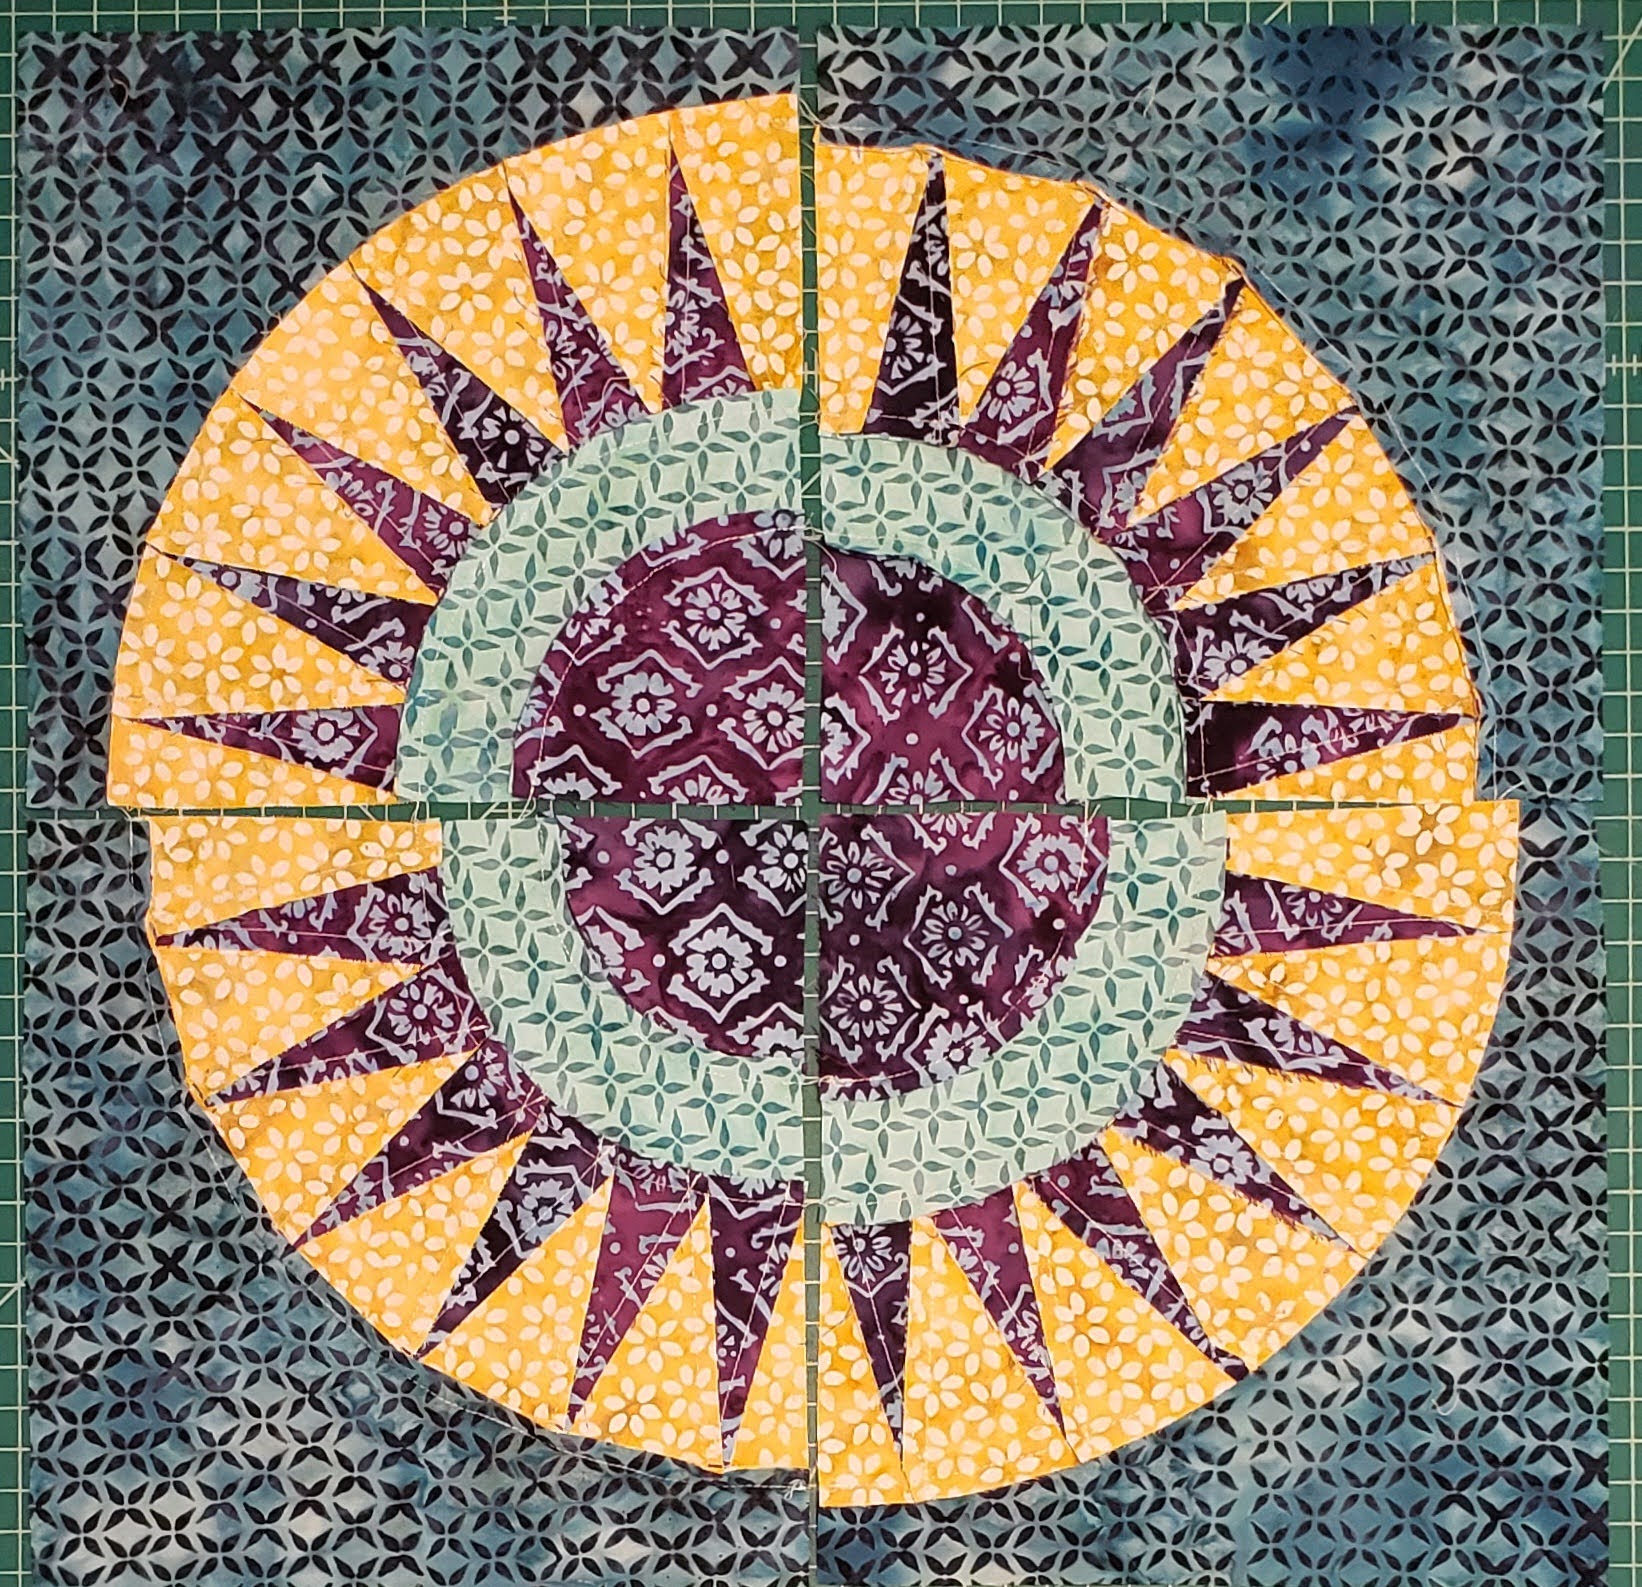
Square the blocks to 9 1/2″ x 9 1/2″
You have finished block 1, you will have four of this color and layout.
Block 3 – Quantity needed 3
    Center - 1885
    Circle - 4230dd
    Triangles 1 - 1566
    Triangles 2 - 2584
    Outside - 2885
Fabric I used in this block from the Savannah collection
○ Center – 1885
○ Circle – 4230
○ Triangles 1 – 1566
○ Triangles 2 – 2584
○ Outside – 2885
Using the same templates, you will create three more of this block using the second set of fabrics.

Layout the pieces, and sew the center and 1/4 circle together, and the Pieced triangles and outside piece together.
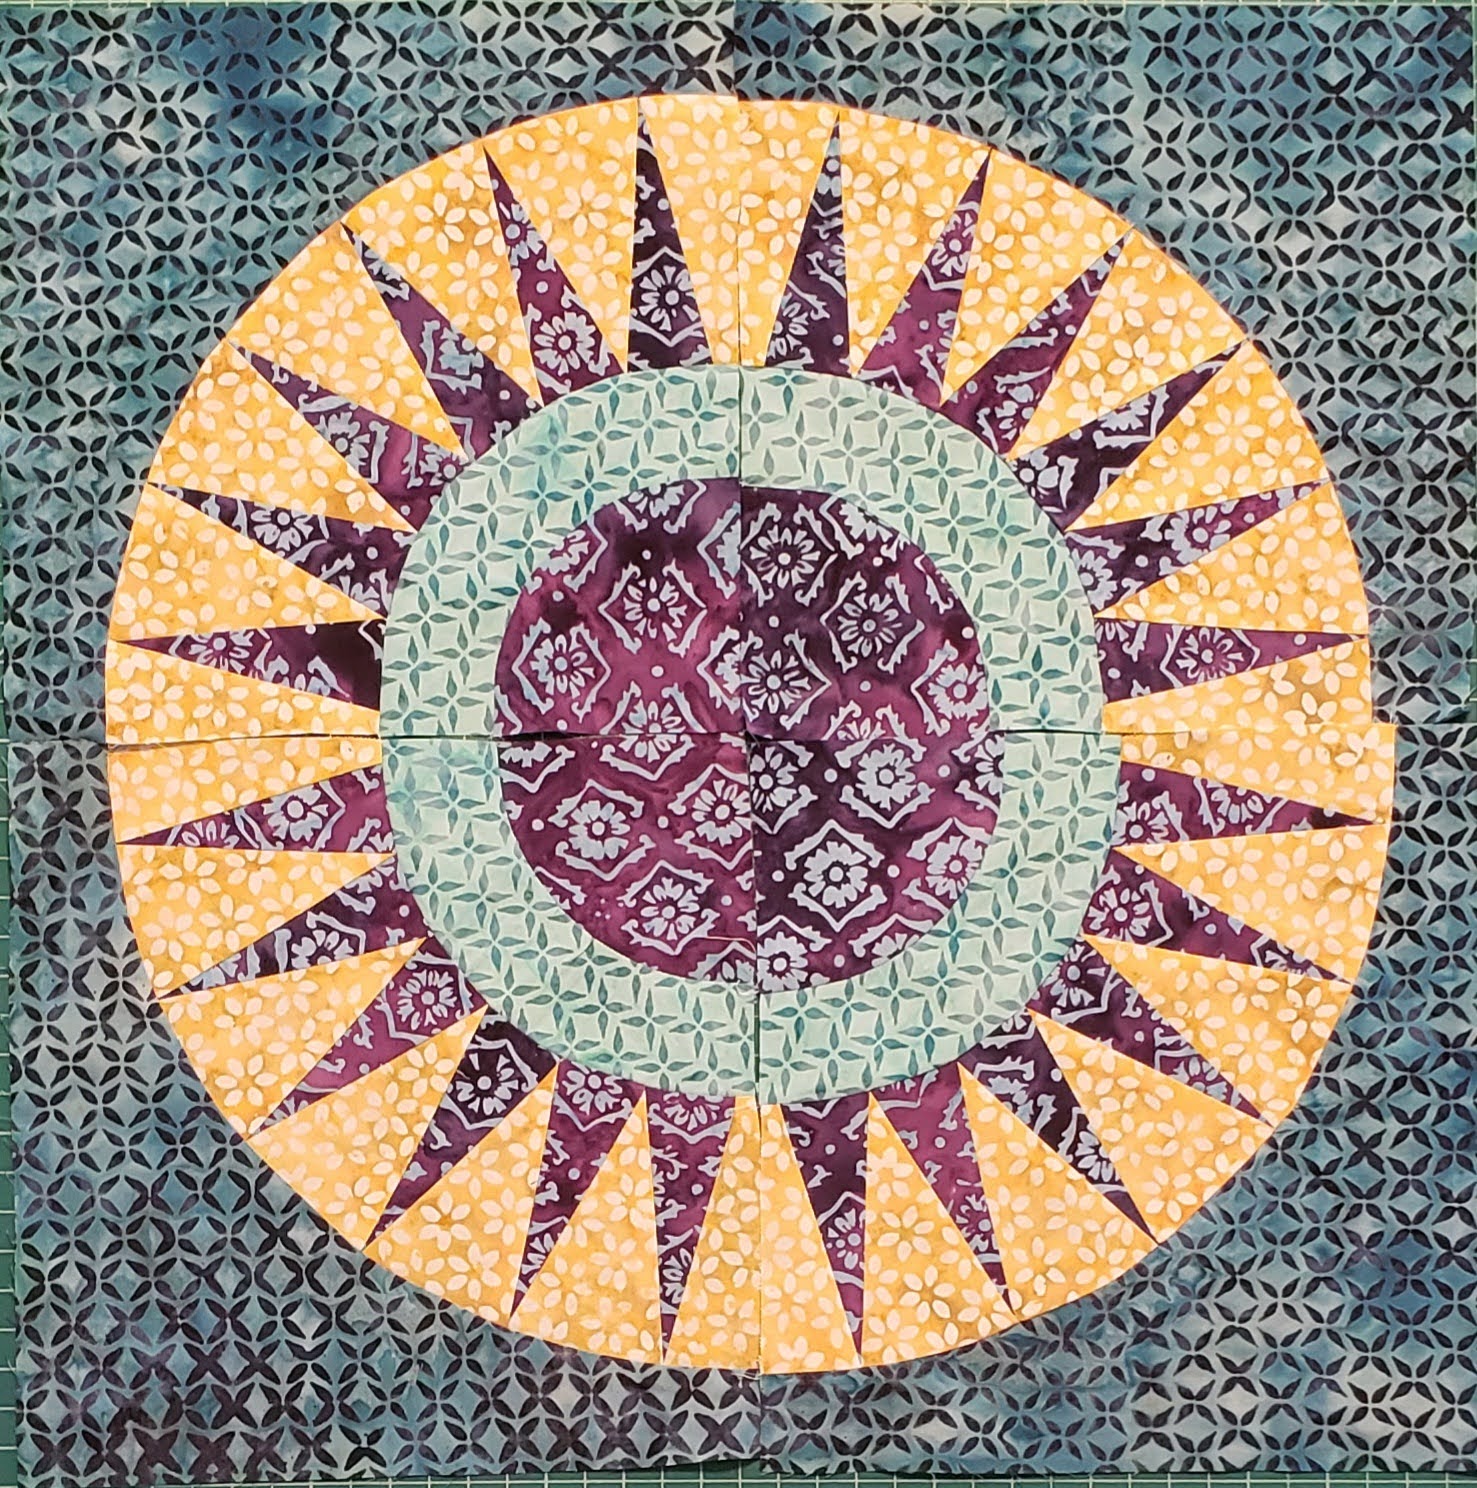
You will create 3 of this block. When you press, you will have two going one direction, and one going the opposite. This way you can nest the three pieces together.
Square the blocks to 9 1/2″ x 9 1/2″.
You will have the three layout 1, blocks 3.
Remember the templates and paper piecing pieces are only available until end of September 2022.
Come back next week to see how to create the final layout 2, block 2.
Thank you to Island Batik, Hobbs Batting Aurifil Thread and Schmetz for providing me with the materials to make this quilt.