
For October the Island Batik Ambassadors received North Carolina Star “BOB” (Block on a board), from Accuquilt, for our “Falling for Accuquilt” challenge. The North Carolina Star block is a beautiful and classic design that has been around for a long time.

At first glance at this block, it looks like lots of “Y” seams, but Accuquilt, has made it so much easier to assemble, by taking out these “y” seams. Using the Accuquilt system to create this block can make the process more efficient and precise, resulting in a more accurate block.

This block “North Carolina Star”, was published in the Chicago Tribune on December 21, 1933, and was designed by Nancy Cabot. She wrote:
“Today’s design is one of the loveliest of all the variations of the star pattern. It is the authentic state star pattern of North Carolina and, of course, quite old. Originally it was executed in blue and white calico, since those colors and that fabric were most common. Today it is usually made in modern materials in a variety of colors.”
As an Ambassador I get to work with wonderful fabrics and other materials that were provided to me free by Island Batik and their industry partners, Accuquilt, Aurifil Thread, and Schmetz Needles, Hobbs Batting, as part of my role as an Island Batik Ambassador.
Electric Quilt is a fantastic tool that makes the decision-making process much easier. I created the block, and colored it with some Island Batik fabric from the Natural Healing fabric line, that I used in my September 2023 blog. This fabric has such pretty fall colors, it brings the beauty of the season indoors.
Choosing the right fabrics for a quilt project can be a delightful but challenging process. It’s wonderful that Electric Quilt can help you experiment with different colors and combinations, making the decision-making easier.
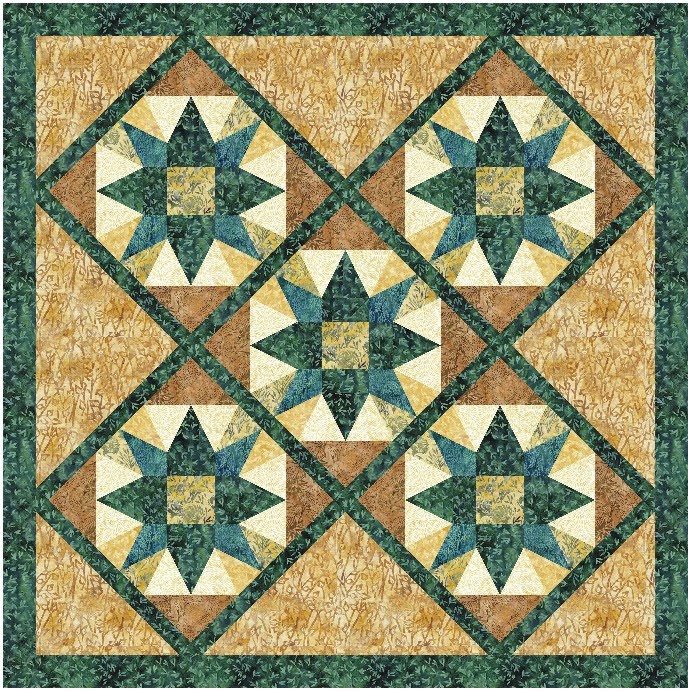
Creating five identical blocks with a 1″ strip to set them apart creates a cohesive and visually appealing design. A fall-themed wall quilt in my quilt studio will not only add warmth and character to the space but also serve as a source of inspiration as I work on other quilting projects.
After deciding what fabrics to use, I starting cutting out pieces of fabric to use on my Accuquilt.

There are 7 different pieces of the die. I cut fabric the size of each section of the die, and cut out all the pieces for the five blocks. I used 6 difference fabric pieces.

For one block you need to cut the following pieces.
Color 1 – Piece A – 4 patches (2 pieces – 5 1/4″ x 5 1/4″)
Color 2 – Piece B – 8 patches (4 pieces 4″ x 5″)
Color 3 – Piece B – 4 patches (2 pieces 4″ x 5″)
- Piece E – 8 patches (2 pieces 3 1/2″ x 3 1/2″)
- Piece G – 4 patches (2 pieces 3 1/4″ x 3 1/4″
Color 4 -Piece C – 8 pieces (2 pieces 4 1/4″ x 4 1/4″)
- Piece E – 4 patches (1 piece 3 1/2″ x 3 1/2″)
- Piece F – 1 piece 2 3/4″ x 2 3/4″
Color 5 – Piece C – 8 pieces (2 pieces 4 1/4″ x 4 1/4″)
Color 6 – Piece D – 4 patches (4 pieces 3 3/4″ x 3″)
- Piece E – 4 patches (1 piece 3 1/2″ x 3 1/2″)
To make this quilt layout, you would multiple the pieces by 5.
By Dividing the block into sections, makes the process more manageable and helps with assembly of the block.
- Four Corner Sections: These should all be identical, which simplifies the process even further. By making them the same, you ensure uniformity in your final block.
- Four Center Side Strips: Just like the corner sections, having identical center side strips helps maintain symmetry in your block. This is especially important for the visual balance of your design.
- Center Square: The center square is the focal point of your block and sets the tone for the entire design. It’s a crucial element that anchors the rest of the block.
As you assemble your block, working with these sections individually will make the sewing process more efficient and less prone to errors. It’s a great way to maintain consistency and accuracy in your quilting project.
Corner Sections

Center Sections

Layout the pieces for the blocks. First put the square in the center, then add the four corners. In the following layout.

Next add the Center side strips, to complete the block.

Sewing the nine pieces together and pressing the seams is the final step in assembling your quilt block. After sewing each seam, it’s essential to press the seams to set them properly and make the block lie flat.

You will create this block 4 more times, to have a total of 5 identical blocks.
Layout
Arrange the Blocks on Point:
- Place one block at the center. This will be the focal point of your design.
- Position two blocks on the top and bottom of the center block. The blocks should be rotated to form the top and bottom arms of the X.
- Finally, position the remaining two blocks on the left and right of the center block, again rotated to form the arms of the X.

By arranging the blocks on point in an X shape, you create a dynamic and eye-catching design that takes full advantage of the quilt blocks you’ve created. The symmetry and balance of the identical blocks will add a harmonious element to the overall composition.
Cut the Sashing Strips: Using your Accuquilt strip die cutter, cut 1 1/2″ strips. These strips will give you 1″ finished sashing when sewn into the quilt.
Sew Sashing Strips to the Blocks: Begin by sewing sashing strips to the sides of each of your quilt blocks. These strips will serve as the horizontal sashing between the blocks in the X shape.
After sewing the sashing to the sides of each block, you should have a row of blocks with sashing strips between them. These strips will separate the blocks and create a visually pleasing arrangement.
Adding triangles to the layout is a fantastic way to enhance the visual interest and design of your quilt. These triangles, often referred to as “setting triangles,” are used to create a square or rectangular quilt layout when you have blocks set on point (diagonally).
Cut two 13 1/2″ x 13 1/2″ squares diagonally in half to create two right triangles from each square.

Cut a 14 1/2″ square diagonally in half both ways to create four smaller triangles.
Place these corner triangles at each of the four corners of your quilt layout. These triangles will add a decorative border to your quilt.

Piecing diagonally in strips is a common and efficient technique for assembling.
Adding a border is an excellent way to frame and finish off your quilt top. Using the same fabric as the block sashing for the border creates a cohesive and harmonious look. Use the 2 1/2″ strip die from Accuquilt to cut border strips from the same fabric as the sashing fabric. These strips should be 2 1/2″ wide.
Adding the border not only gives your quilt a polished look but also serves to stabilize the edges and provides a clean finishing touch. Using your Accuquilt die ensures accuracy and consistency in the width of the border strips.
Finishing the quilt.
Using Hobbs Cotton Batting for your wall quilt is an excellent choice. Hobbs batting is known for its quality and durability, making it a reliable option for quilting projects. The blend of 80% cotton and 20% polyester offers a good balance of softness, breathability, and stability. For a wall-sized quilt, this batting is a suitable choice because it provides warmth and structure without excessive weight. It’s easy to work with and will result in a quilt that hangs nicely.

Using Aurifil Thread for your quilting projects is a smart choice, and it’s known for its quality and versatility. Aurifil Thread is a high-quality thread that is smooth, strong, and lint-free. It is made from 100% long-staple Egyptian cotton that is mercerized for a lustrous finish. Aurifil Thread comes in a variety of colors, weights, and spools to suit different sewing needs. With Aurifil Thread, you can expect high-quality results and a smooth sewing experience. The variety of colors and weights means you can always find the right thread for your specific project, and the light gray shade of Aurifil Thread 2600 is particularly useful for many quilting applications.
Utilizing a design like “Autumn Leaves” from Quilting Pantographs for your quilt adds a beautiful and intricate touch to your project. Pantographs, or E2E (Edge to Edge) designs, are a fantastic choice for both longarm and machine quilters, as they provide a continuous and consistent pattern that can cover the entire quilt.

The leaves fit the “Falling for Accuquilt” theme. The Quilting Pantograph designs are so easy to use, and they have the option of printing the pantographs, and using with your machine, or a file to use on your longarm. I used my Juki Longarm to stitch out the design.

Adding a hanging sleeve to your quilt is a practical and thoughtful touch, especially when you intend to display it on the wall. It’s a common technique used by quilters to make hanging their quilts easier. I used some folded triangles in the four corners, so that I could add a dowel rod to hang the quilt on the wall.
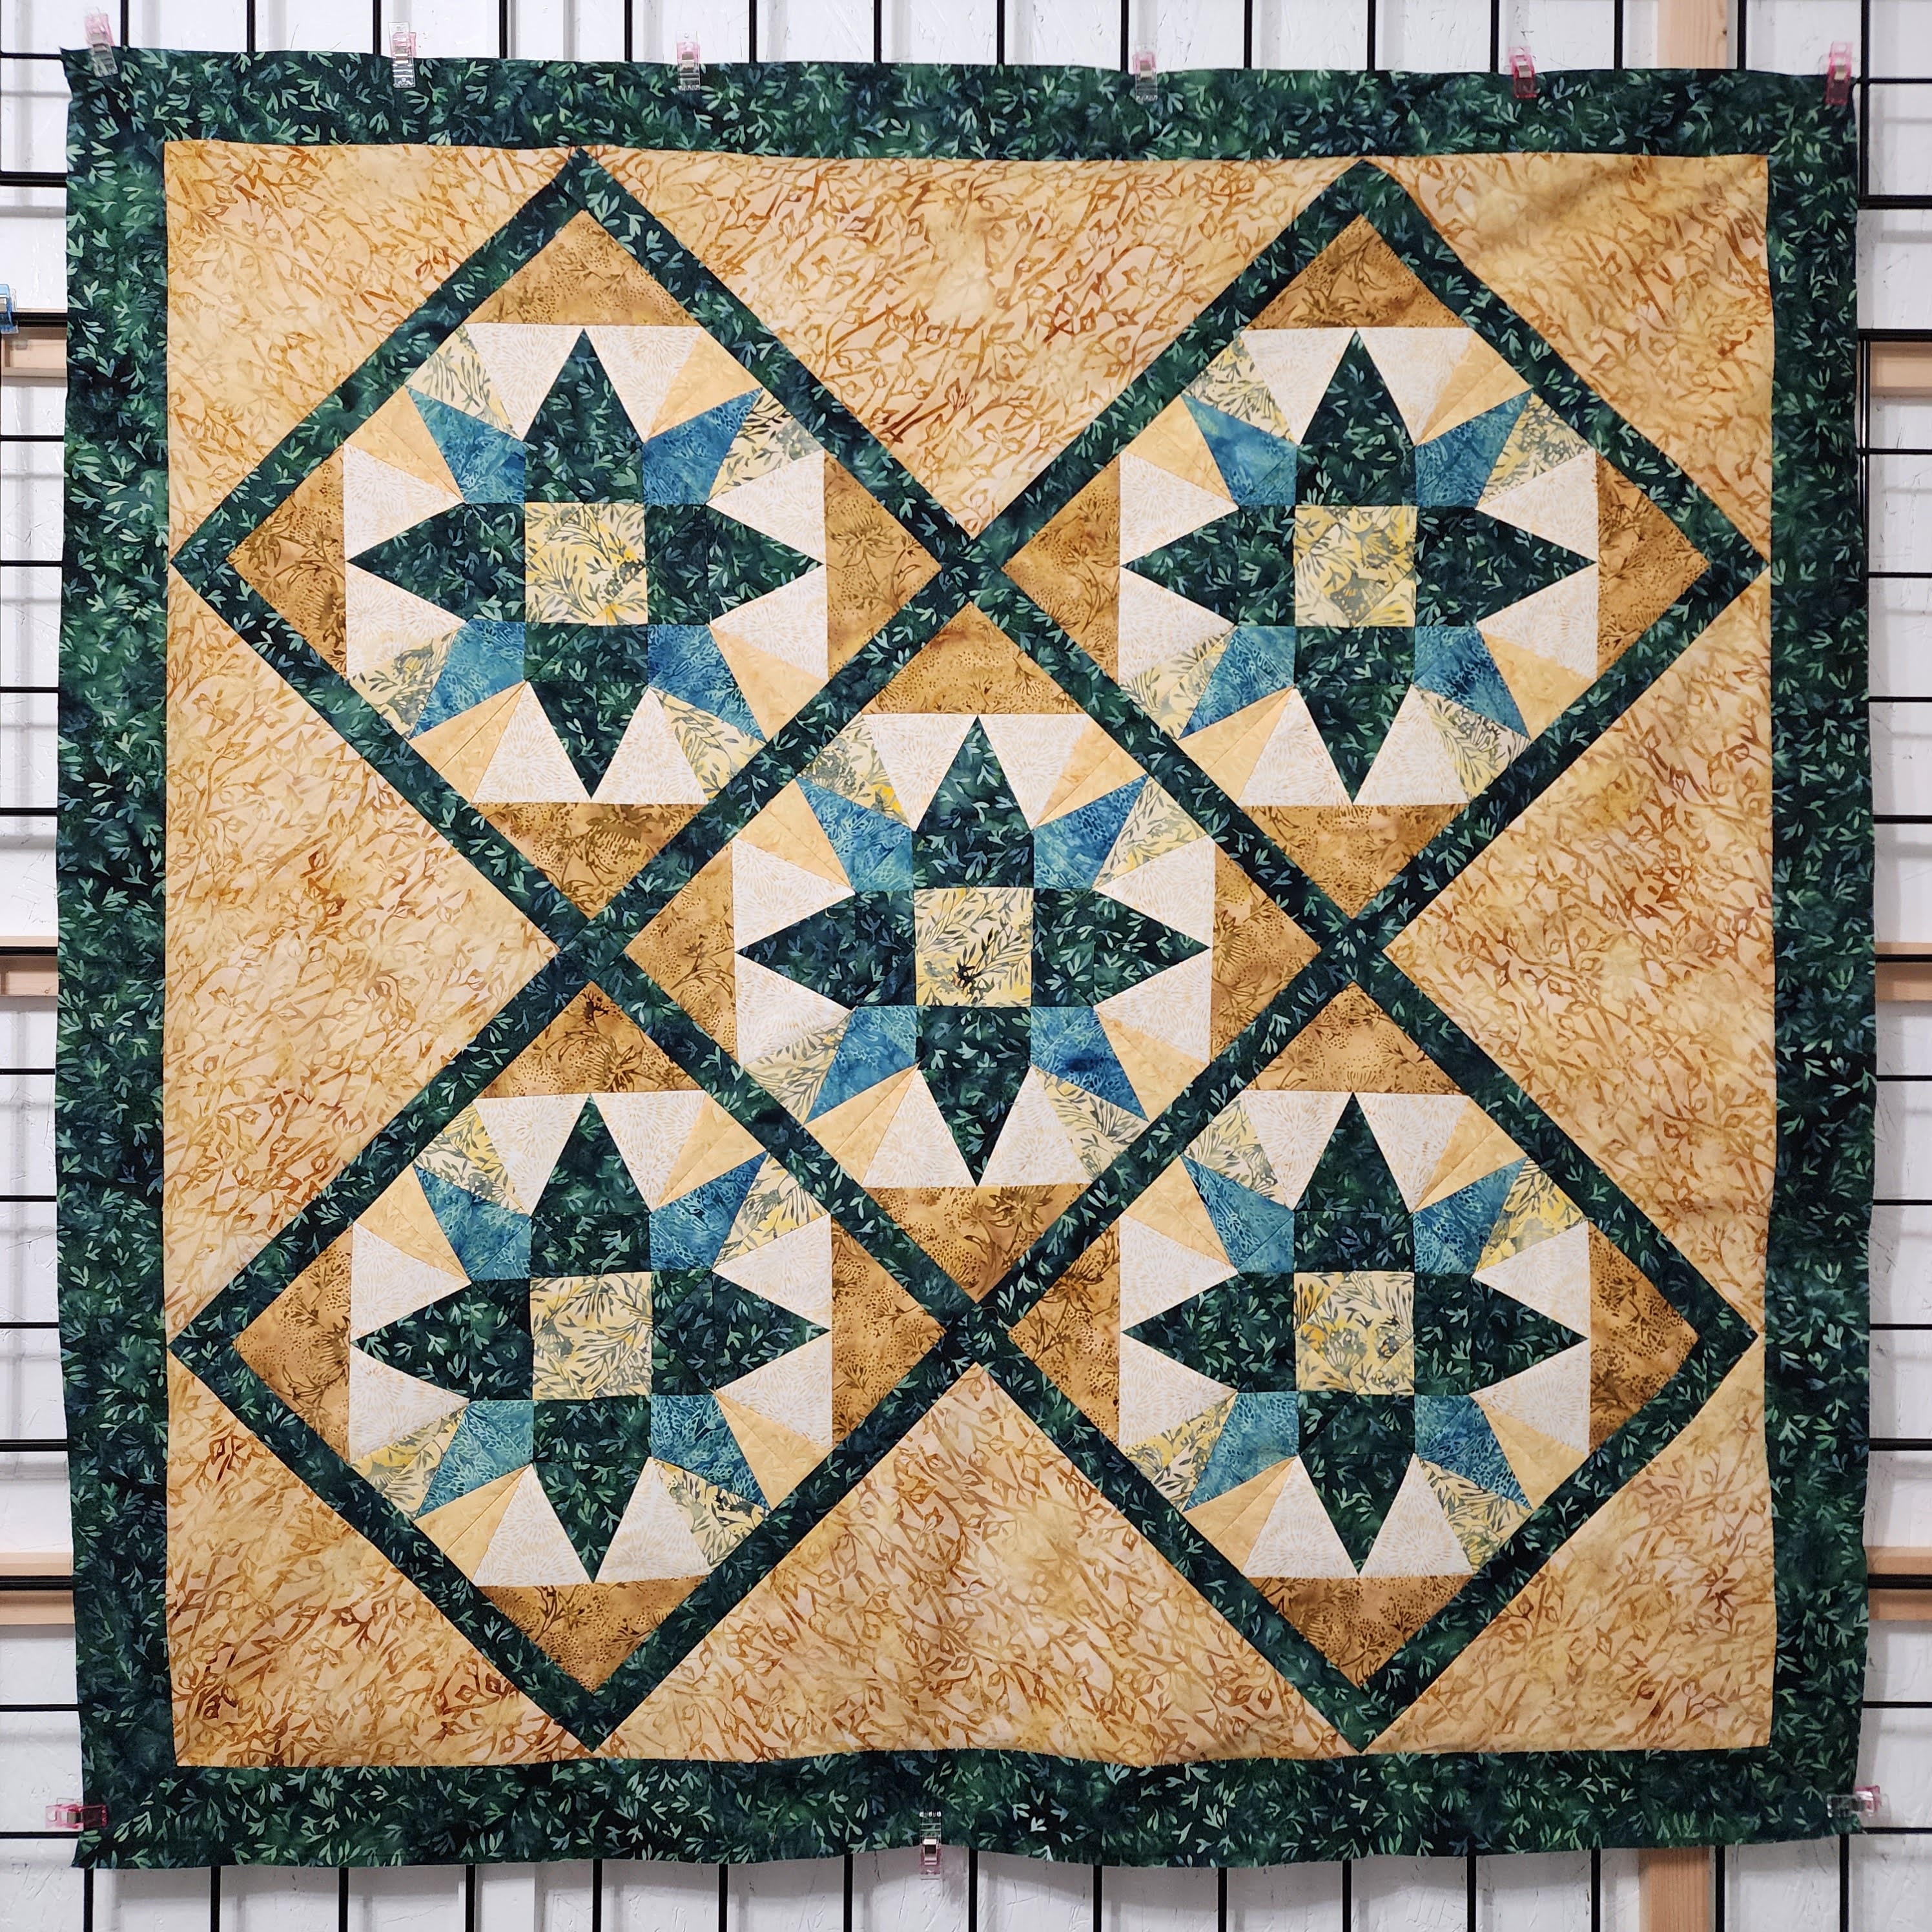
Hanging the fall-themed quilt on the garage for a photo session with my dogs and seasonal decorations seemed to be the perfect idea. It was a way to capture the season, the show the quilt in cozy and festive setting.

The quilt finished at 42″ x 42″.
Quilts make fantastic wall art, adding color, warmth, and a touch of your creative personality to your workspace. Here is the quilt on my Studio wall. Much better than a blank white all.

Quilting is a diverse and creative art form, and it’s always fascinating to see how different quilters bring their unique perspectives and styles to the same pattern or theme. Exploring the interpretations of fellow quilters can be a great source of inspiration for creating your own quilt.
Here are some pictures from my photo shoot. More to follow on Instagram!


If you enjoyed my “North Carolina Star” quilt, check out the other Island Batik’s ambassadors interpretation of this “BOB” by Accuquilt.
Brenda Alburl ~ Songbird Designs
Renee Atkinson ~ Pink Tulip Quilting
Pamela Boatright ~ PamelaQuilts
Susan Deshensky ~ Lady Blue Quilts
Brittany Fisher ~ Bobbin with Brittany
Preeti Harris ~ Sew Preeti Quilts
Mania Hatziioannidi ~ Mania for quilts
Reed Johnson ~ Blue Bear Quilts
Victoria Johnson ~ Forever Quilting for You
Randi Jones ~ Randi’s Roost
Connie Kauffman ~ Kauffman Designs
Emily Leachman ~ The Darling Dogwood
Denise Looney ~ Quiltery – For The Love Of Geese
Leah Malasky ~ Quilted Delights
Maryellen McAuliffe ~ Mary Mack Made Mine
Anorina Morris ~ sameliasmum.com
Lisa Pickering ~ Lisa’s Quilting Passion
Sarah Pitcher ~ Pitcher’s Boutique
Claudia Porter ~ Create with Claudia
Lana Russel ~ Lana Quilts
Elita Sharpe ~ Busy Needle
Gail Sheppard ~ Quilting Gail
Sandra Starley ~ Textile Time Travels
Jennifer Thomas ~ Curlicue Creations
Suzy Webster ~ Websterquilt
#hobbsbatting, #aurifil, #aurifilthread, #schmetzneedles, #janome, #juki, #accuquilt, #islandbatikAmbassador, #iloveislandbatik, #islandbatik, #hobbsbatting,


Your quilt turned out beautifully, Lisa! Love the sweet pups in the pics too!
LikeLike
Hello Lisa. I love the way your quilt turned out. I also didn’t realize you had that many dogs. They are adorable! I used to have a beagle named Sadie. She was the most loyal dog. What a sweetie. Amazing that you got a photo with each one of them with the quilt. Have a fabulous day!
LikeLike